A recent Windows 10 Security update is causing printers shared over the network to throw the 0x0000011B error code. The good news is that the problem is easily fixable, and we will show you how.
From uninstalling the problematic update to manually installing the printer using a local port, we will review every method to get your network printer working again. Here are all the ways to fix the 0x0000011B error in Windows.
Fix 1: Update Windows
While it was a Windows Update that initially caused the issue, another update will likely fix it.
Windows Updates are notorious for creating weird bugs and conflicts, but Microsoft is also quick to roll out a hotfix for any such problems. Simply installing the latest update will usually fix the 0x0000011B error.
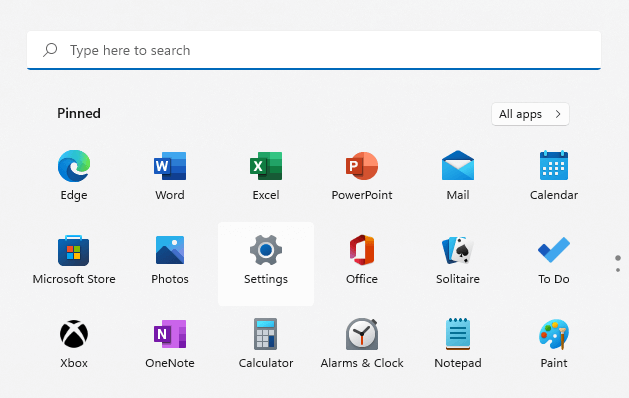
- To check for updates, head to the Start Menu and open Settings .
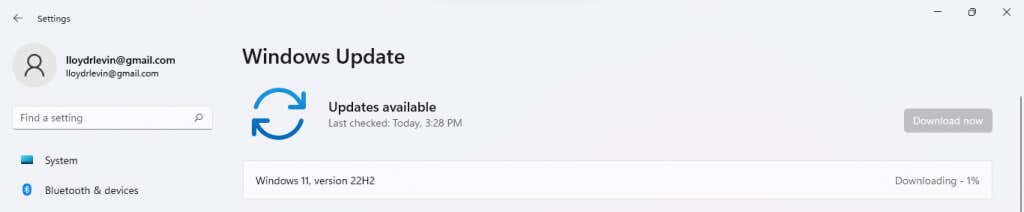
- Switch to the Windows Update tab and click the Check for updates button.
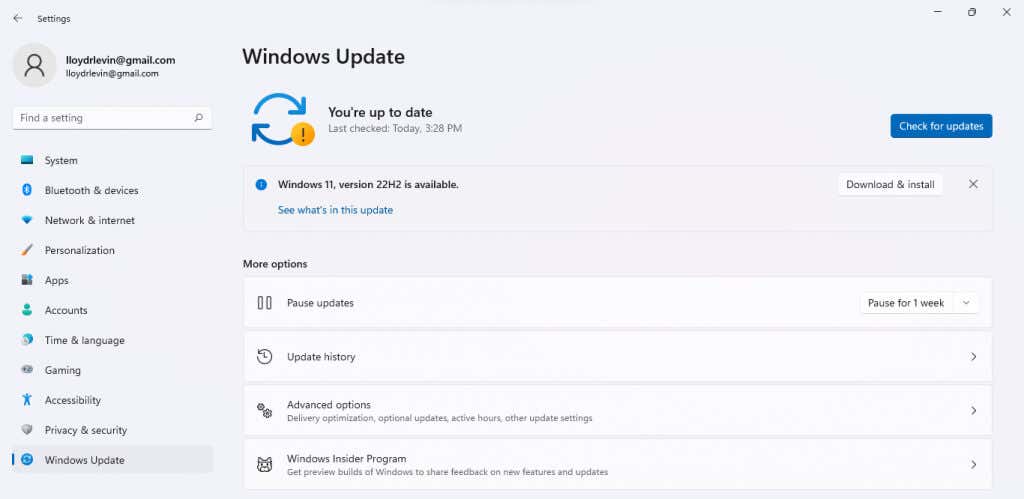
- Any available packages are displayed as Updates available . Use the download now button to download and install the update.
Restart your computer after the update is installed to apply the new changes. If you still get an “Operation Failed With Error 0x0000011B” message, move on to the next fix.
Fix 2: Uninstall the Problematic Update
In Windows 10 (and Windows 11), you can uninstall recent updates . This lets you roll back malfunctioning updates to get your computer working correctly.
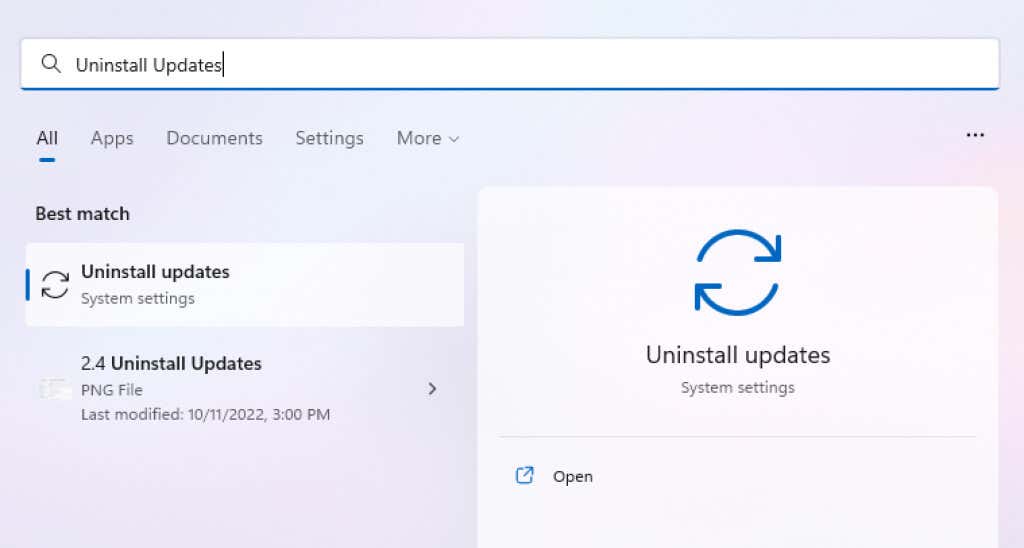
On Windows 11, you can find the option to remove updates by searching Uninstall Updates in the Start Menu.
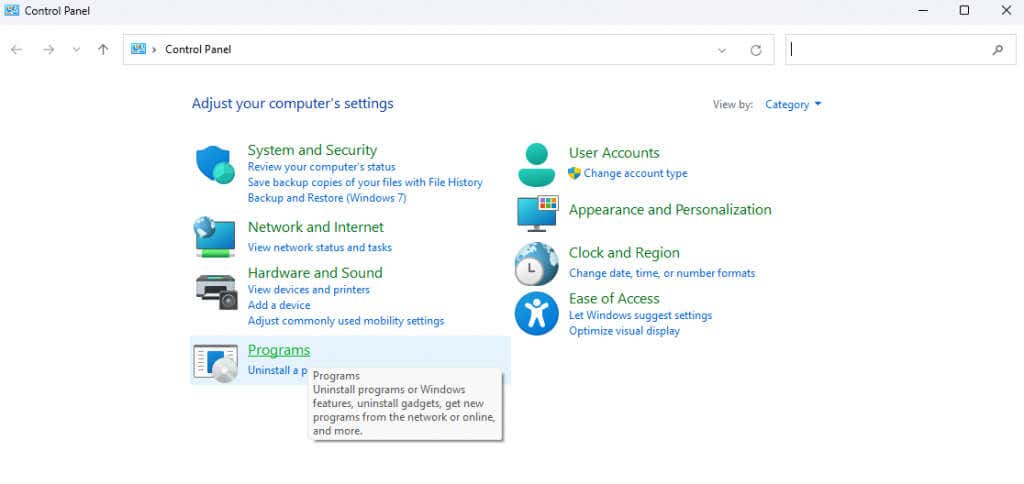
In all versions, you can also locate this setting through the Control Panel.
- Open Control Panel by searching for it in the Start menu.

- Select Programs .
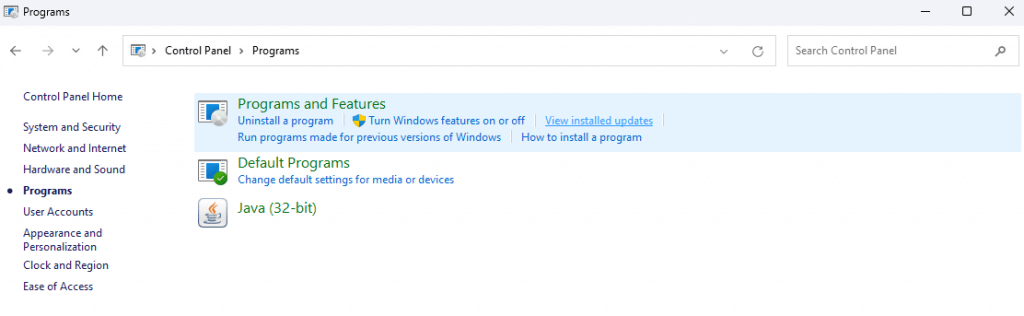
- This opens Programs and Features with the option to View installed updates . Click on it.
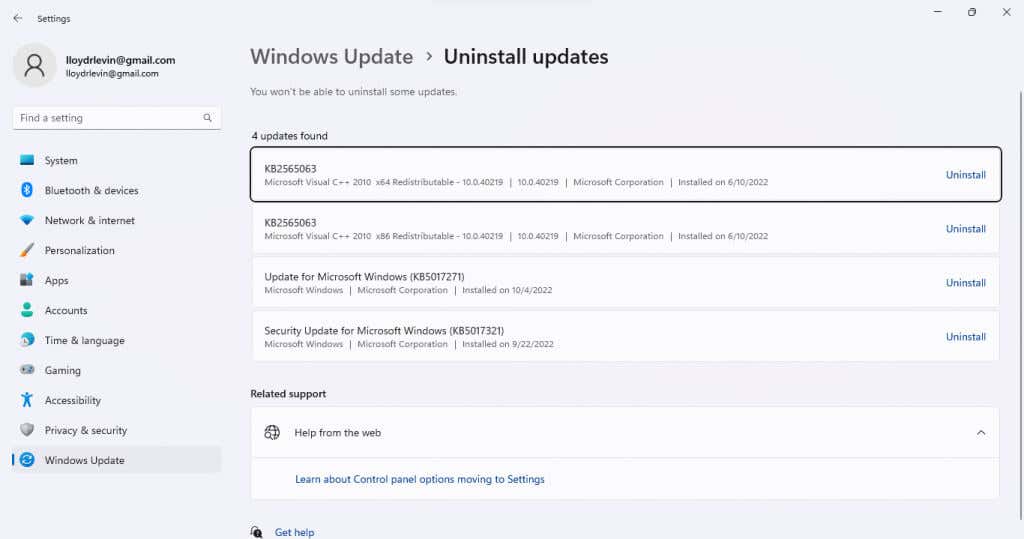
- A new settings window displays all recently installed Windows updates with the option to uninstall them. Check the dates of these updates and uninstall the one that started your problem.
Removing the update will fix the issue, though it is a temporary solution. Wait until the next update, as that usually implements bug fixes.
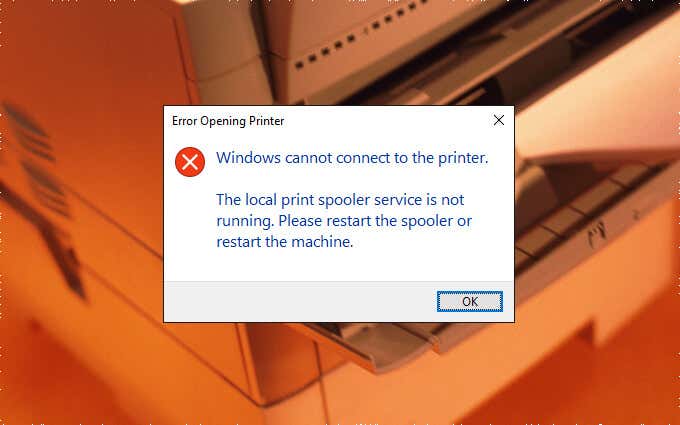
Fix 3: Restart the Print Spooler Service
The print spooler service is responsible for managing all print jobs created on the computer and is often the root of any printer-related bugs. Simply restarting the print spooler service can usually fix the 0x0000011B error.
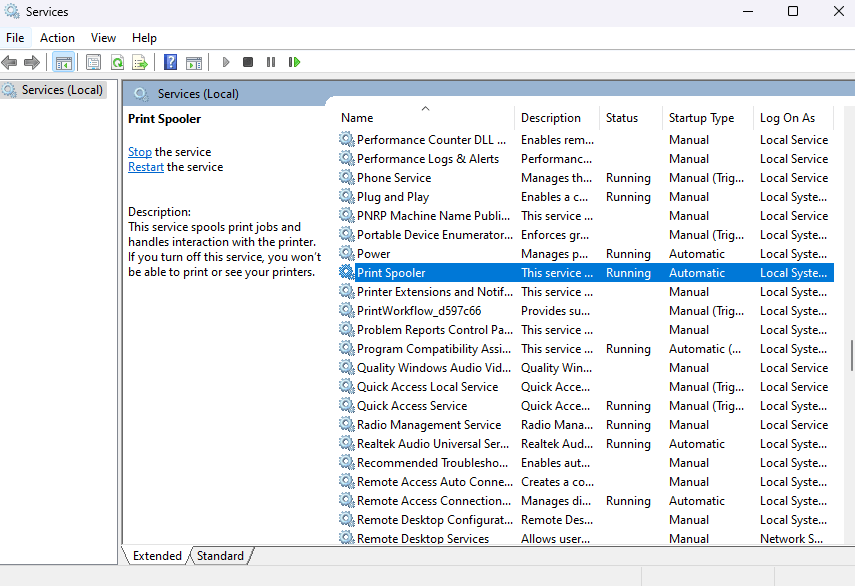
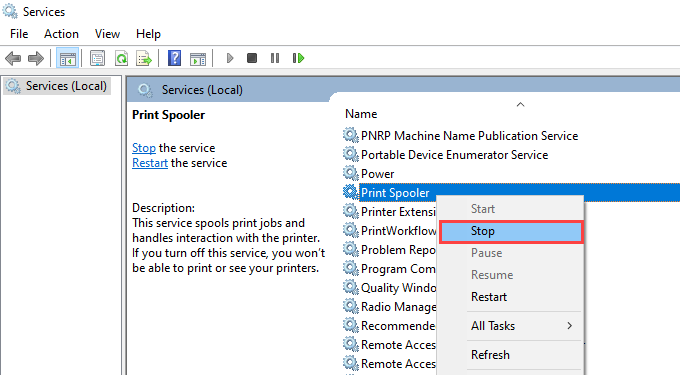
- Search for Services in the Start menu and open it.
- The app lists all services—running or not—on your computer. As the listing is alphabetical, scroll down to find the Print Spooler service.
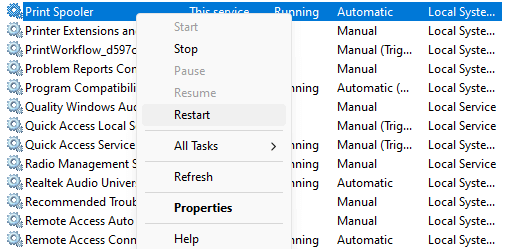
- Right-click on the service and select Restart.
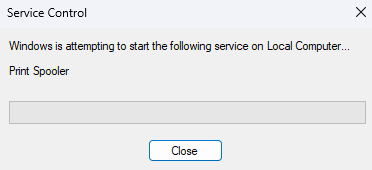
- Windows immediately restarts the service.
If the problem was caused by a temporary glitch, this should fix it. Otherwise, try another method.
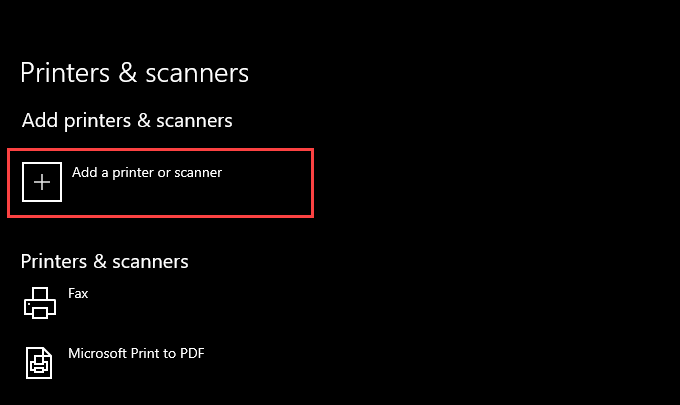
Fix 4: Manually Install the Printer
A workaround for getting a network printer functioning again is to install it manually . This often allows the system to use the device without a 0x0000011B error message.
Note that in earlier versions of Windows, you’d find this option in the Control Panel, while Windows 10 and Windows 11 have relocated it to the Printers & Scanners section of Settings . The steps are still mostly the same, just with an updated UI.
- Open Settings by clicking the gear icon on the Start menu. (In older versions of Windows, open the Control Panel instead.)

- Switch to the Bluetooth & Devices tab in Settings, then select the Printers & Scanners option. (Or, in the Control Panel, select the View devices and printers option under Hardware and Sound .)
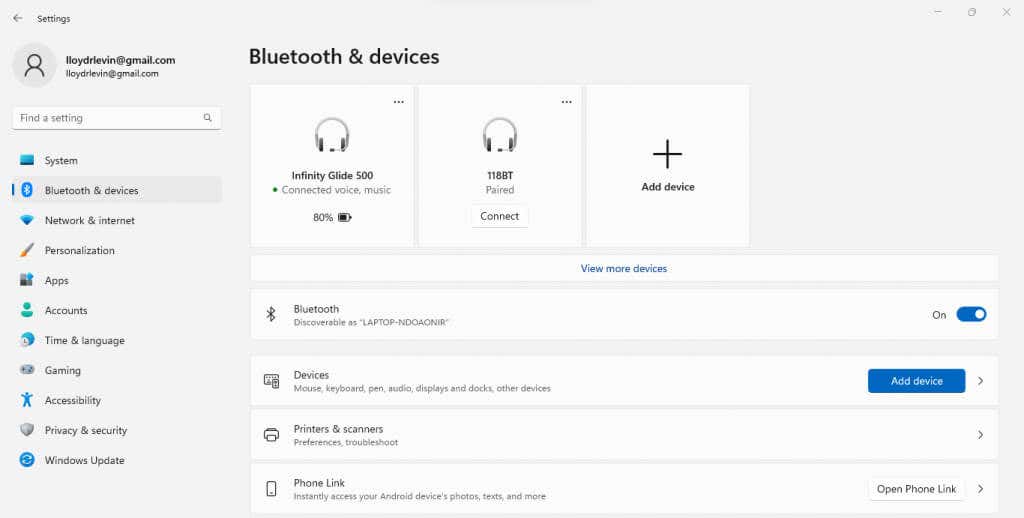
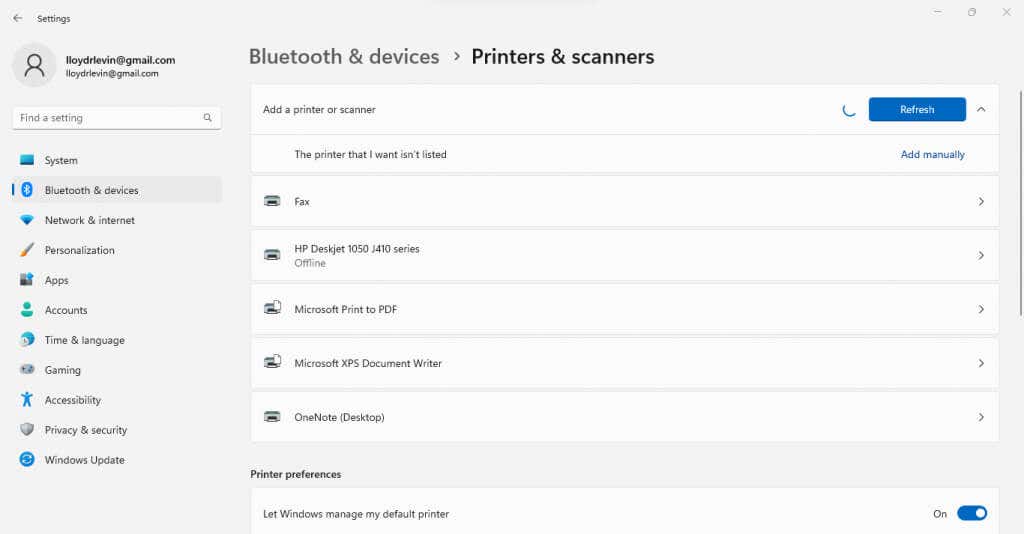
- Click Add device to try to detect the printer automatically.
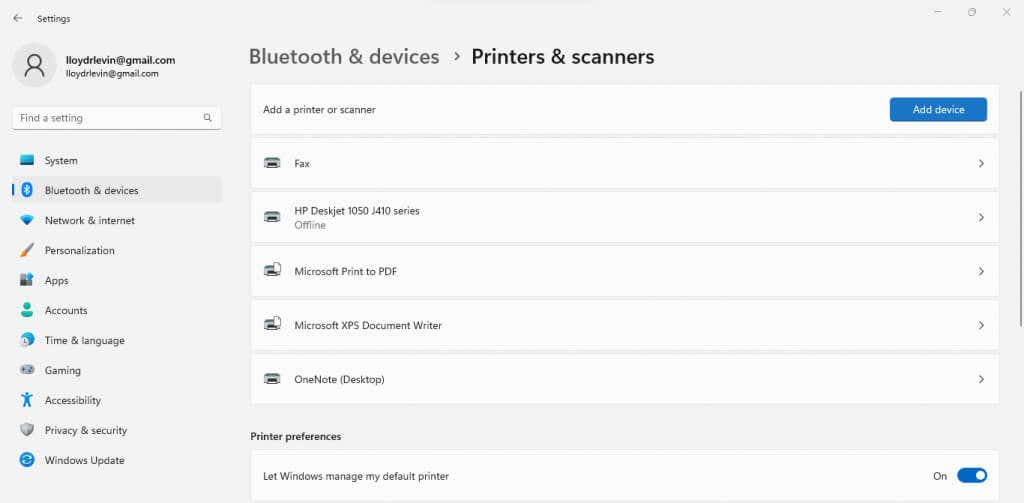
- After a few seconds of scanning, you will be presented with the option to Add manually . (The corresponding Control Panel option reads The printer that I want isn’t listed .)
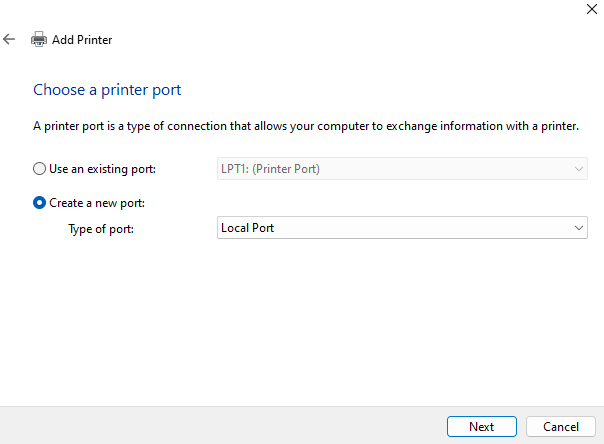
- Now you have two ways to go about this. You can add the printer using its IP address or create a local port and manually install the right drivers.
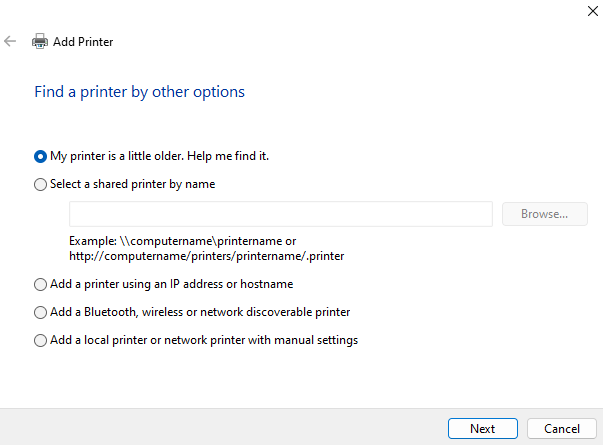
- If you choose the Add a local printer or network printer with manual settings option, you can create a new local port. Give it a name and manually install the printer drivers, allowing you to use the network printer through that connection.
- The easier option is to Add a printer using an IP address or hostname. You just need to specify the type of printer and enter its IP address.

Manual printer installation is a complicated process, with a lot of room for small errors that ruin the whole anyway. If you manage it, however, it is almost guaranteed to work without any 0x0000011B errors.
Fix 5: Disable CVE-2021-1678 Mitigation
The whole issue has been caused by a recent Windows Update addressing a security vulnerability posed by network printers. If nothing else works, you can perform a registry edit to shut this new feature down.
While the edit is simple enough, registry editing always comes with some risk of messing things up, so the usual warnings apply. Do not fiddle with registry values beyond what is outlined in the following steps, and create a registry backup before you proceed.
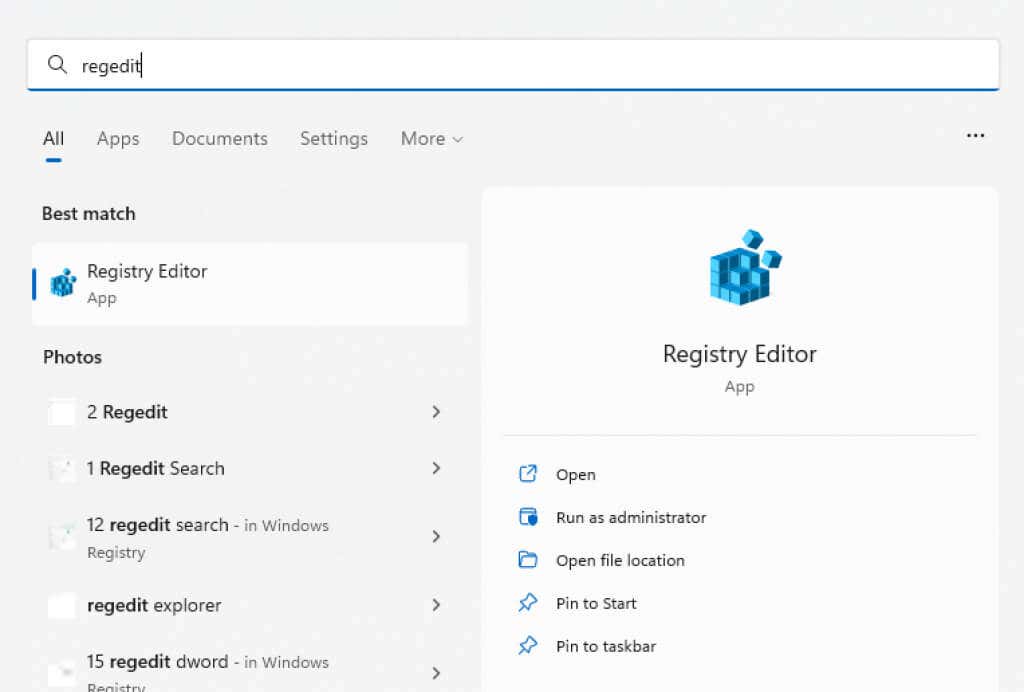
- First, open the Registry editor by searching for it in the Start menu.
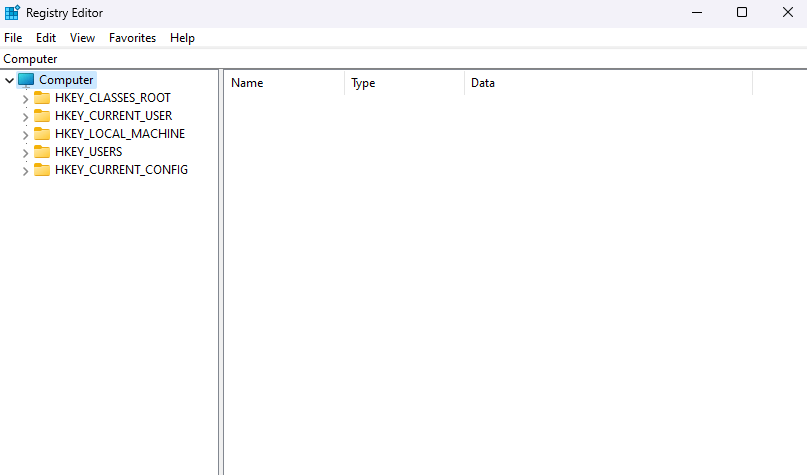
- Despite its scary reputation, the registry editor is actually quite easy to use. On the left side is the folder structure containing all registry entries sorted by their respective categories, and on the right, you will see the keys themselves.
- Navigate to HKEY_LOCAL_MACHINESystemCurrentControlSetControlPrint by clicking through the folders or just copy-pasting the path in the address bar.
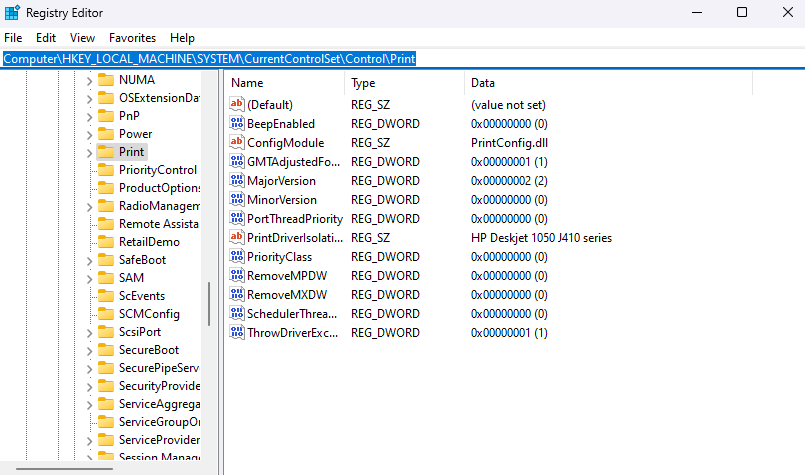
- Right-click in the empty space in the right panel and select New > DWORD (32-bit) value .
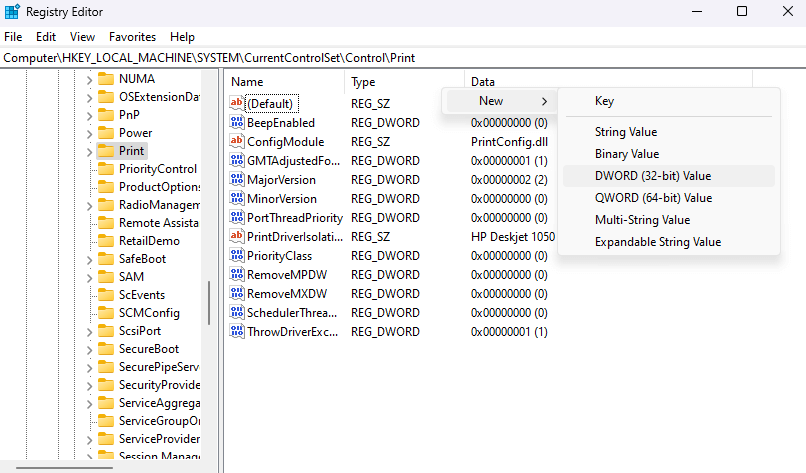
- Name it as RpcAuthnLevelPrivacyEnabled . Note that this is case-sensitive, so copy-paste the name instead of typing it out yourself.
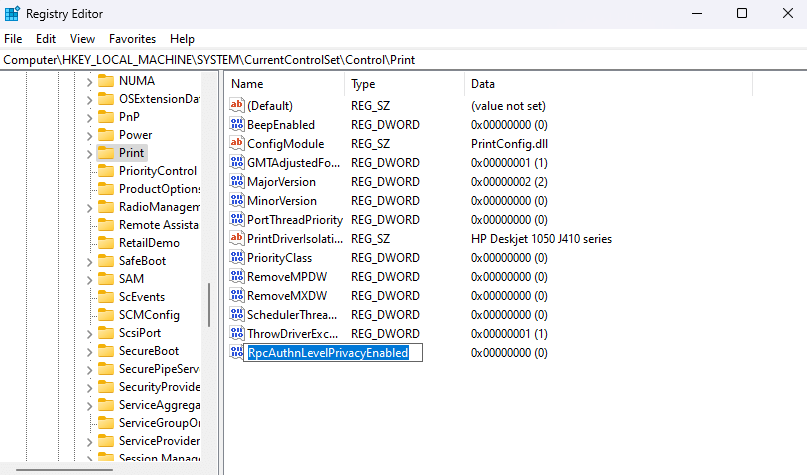
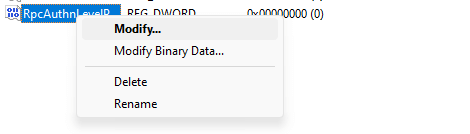
- Registry keys usually start with a default value of zero, but it is a good idea to check anyway. Right-click on the new DWORD you created and select Modify .
- Make sure that the Base is set to Hexadecimal and the Value is 0 .
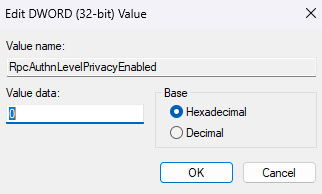
- Restart your computer to apply the changes. Your network printer should now work without any issues.
What Is the Best Way to Fix the 0x0000011B Printer Error in Windows?
The only permanent solution to the 0x0000011B error is to install the latest Windows Update which fixes the issue. For now, you can try uninstalling the update or disabling the problematic security feature from the Registry .
Other workarounds include installing the printer manually. You can do this by configuring a new local port with the printer drivers, or using the IP address of the network printer to help the PC establish a connection.
Before you try all these methods, however, make sure you are suffering from a 0x0000011B error. If you cannot see the network printer in File Explorer, you might be using the wrong workgroup or just not connected properly.
- Preparing for Windows 10 End of Support: Upgrading to Windows 11
- How to Fix a “This file does not have an app associated with it” Error on Windows
- How to Fix an Update Error 0x800705b4 on Windows
- How to Resolve “A JavaScript error occured in the main process” Error on Windows
- How to Fix the Network Discovery Is Turned Off Error on Windows
Levin Roy is a software engineer who loves writing about technology. Whether it is Windows tips-and-tricks or in-depth guides about application development, Levin uses his practical experience and technical skills to create articles that can help solve tricky problems. Read Levin’s Full Bio
The Print Spooler is a service that handles printers and print jobs in Windows 10. But multiple things—such as corrupt files, obsolete drivers, and insufficient permissions—can stop it from functioning correctly.
So if the Print Spooler crashes, fails to start, or keeps stopping as you perform a printer-related action on your PC, the fixes and suggestions below should let you get it working again.
Run Printer Troubleshooter
Windows 10 comes with a built-in troubleshooter that can automatically sort printer issues on your computer. So it’s best to kick things off by running it.
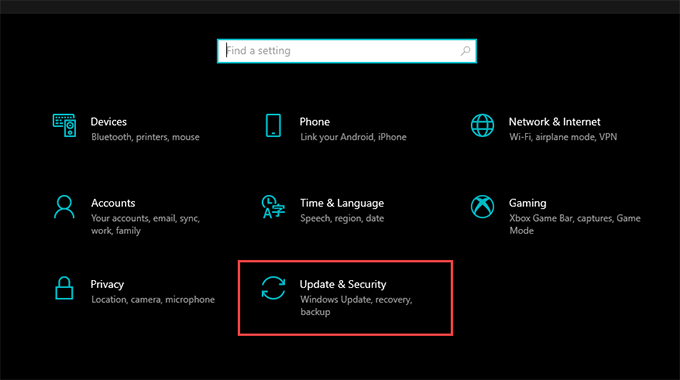
Open the Start menu and select Settings .
Select Update & Security .
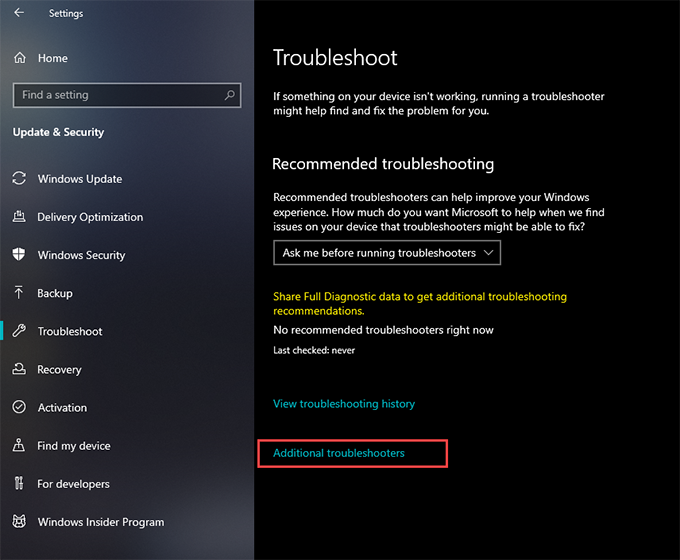
- Switch to the Troubleshoot tab and select the option labeled Additional troubleshooters .
- Select Printer > Run the troubleshooter .
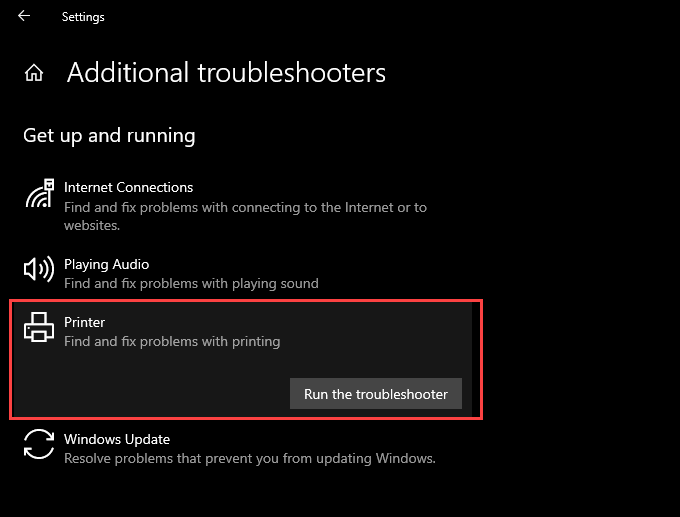
- Follow all prompts on the Printer troubleshooter to find and fix problems with printing.
Check Print Spooler Configuration
If running the Printer troubleshooter didn’t help, follow up by double-checking the configuration of the Print Spooler. Then, make any changes to match the steps that follow.
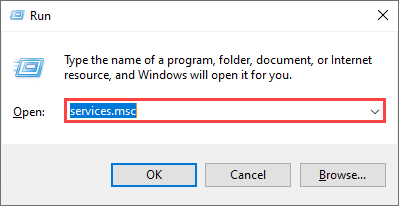
Press Windows + R to open the Run box.
Type services.msc and select OK . The Services app should load momentarily.
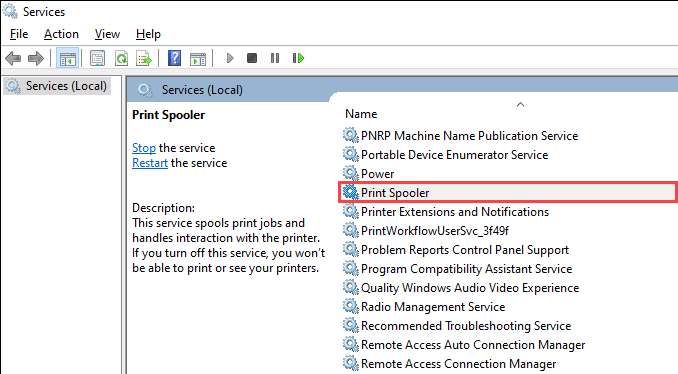
- Double-click the service labeled Print Spooler .
Set Startup type to Automatic .
Select Start to set Service status to Running .
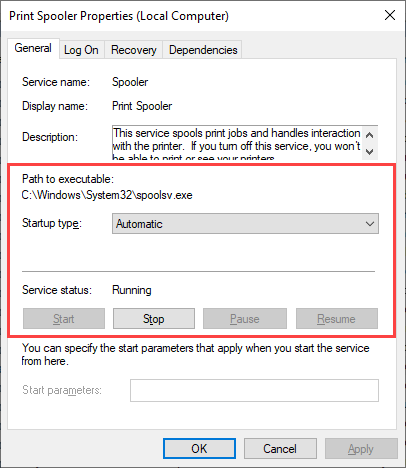
- Select Apply , then OK .
Check the Print Spooler Recovery Response
Should the issue recur, you must follow by tweaking the Print Spooler’s recovery response in a way that restarts the service even after it fails.
Re-open the Services app.
Double-click the Print Spooler service.
Switch to the Recovery tab.
Select Restart the Service on the drop-down menus next to First failure , Second failure , and Subsequent failures .
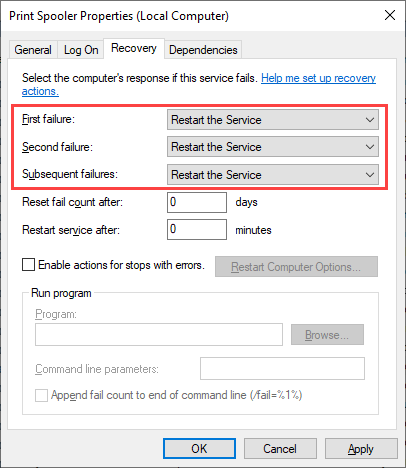
- Select Apply , then OK .
Delete the Print Spooler Cache
An obsolete or corrupt Print Spooler cache can cause it to crash repeatedly. Try deleting them to check if that helps. However, before you do that, you must manually stop the service from running.
Open the Services app.
Right-click Print Spooler and select Stop .
Open File Explorer and go to Local Disk (C:) > Windows > System32 > spool > PRINTERS .
Delete all files inside the directory. However, leave folders (if you see any) intact.
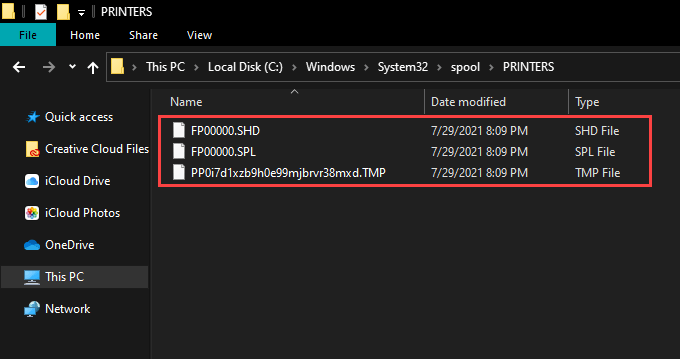
- Restart your computer.
Delete Temporary Files in Windows 10
Temporary files that belong to applications and the operating system can also create conflicts and prevent the Print Spooler from working correctly. Try deleting them.
Press Windows + R to open the Run box.
Type %temp% and select OK .
Delete all files within the folder.
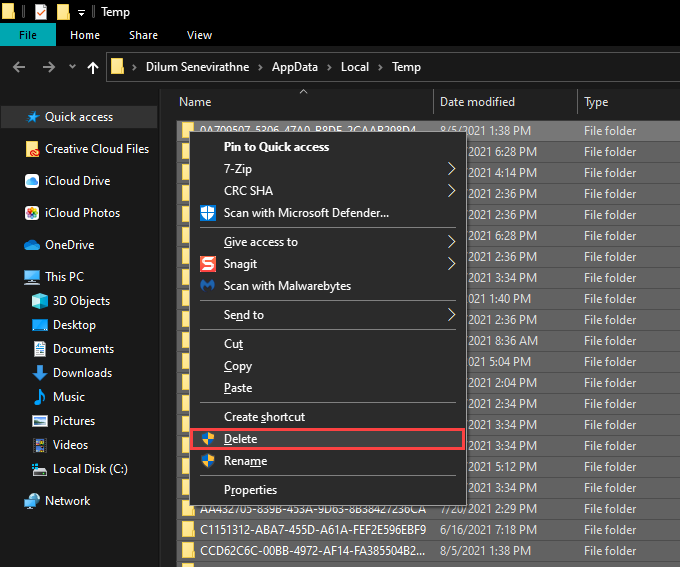
Open another Run box, type temp , and select OK .
Delete all files within that folder as well.
Restart your computer.
For additional instructions, check out this guide to deleting temporary files in Windows 10 .
Reinstall Printer Drivers
Corrupt or broken printer drivers can also cause the print spooler to keep stopping. If the service stops working while interacting with a specific printer, try reinstalling it.
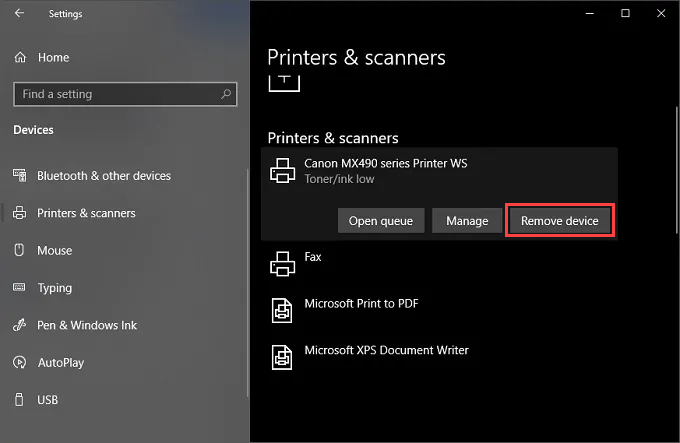
Open the Start menu and go to Settings > Devices > Printers & scanners .
Select a printer under the Printers & scanners section.
Select Remove device .
Select Home and go to Apps > Apps & features .
Select and remove any printer-related support software.
Restart your computer.
Re-open the Settings app and go to Devices > Printers & scanners . Then, choose the Add a printer or scanner option and select Add device .
Select the printer and follow all on-screen prompts to reinstall it.
Reinstall any support software for the printer.
If you run into issues while following the steps above, you may want to learn about additional ways to remove printer drivers in Windows 10 .
Update Printer Drivers
Newer printer drivers contain fixes that resolve bugs and compatibility issues with the operating system. So it’s always a good idea to download and install the latest drivers or support software from your printer manufacturer’s website. Also, consider using a driver updater tool if you have any trouble procuring drivers manually.
Update Windows 10
Updating Windows 10 helps fix any persistent bugs and glitches preventing the Print Spooler from working correctly. Check for any pending updates and apply them now.
Open the Start menu and go to Settings > Update & Security .
Select Check for updates .
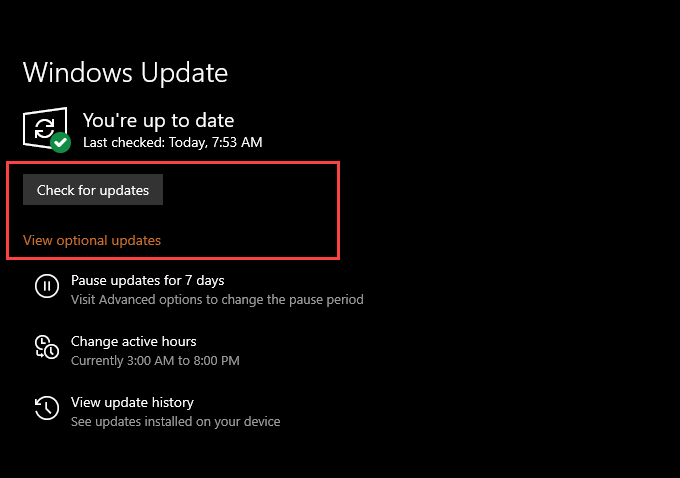
- Select Download and install to apply all pending updates.
If you see the View optional updates option within the Windows Update screen, select it and apply any Microsoft-verified driver updates for your printer.
Fix Broken Registry Keys
Broken registry keys in Windows 10 can also result in Print Spooler-related issues. A free registry cleaning application such as Wise Registry Cleaner should help you both scan and fix errors automatically.
Scan for Malware
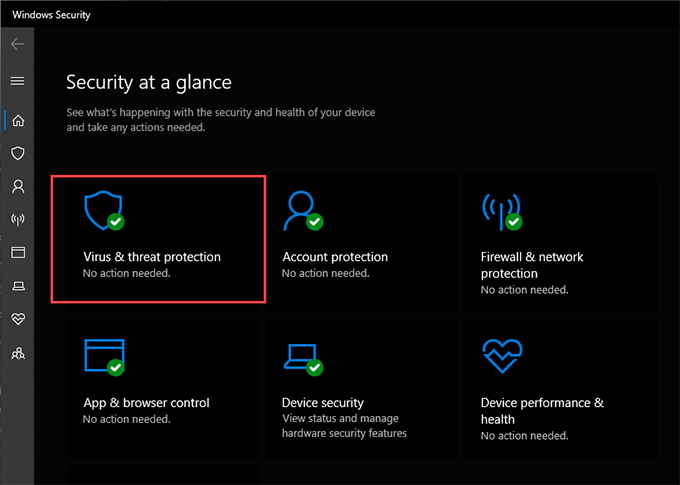
Computer viruses and malicious programs often cause essential functions in Windows 10 to stop working. However, you can use Windows Security to rule that out by performing a comprehensive scan for malware.
Select the Windows Security icon on the system tray.
Select Virus & threat protection .
Select Scan options .
Select the radio button next to Full scan .
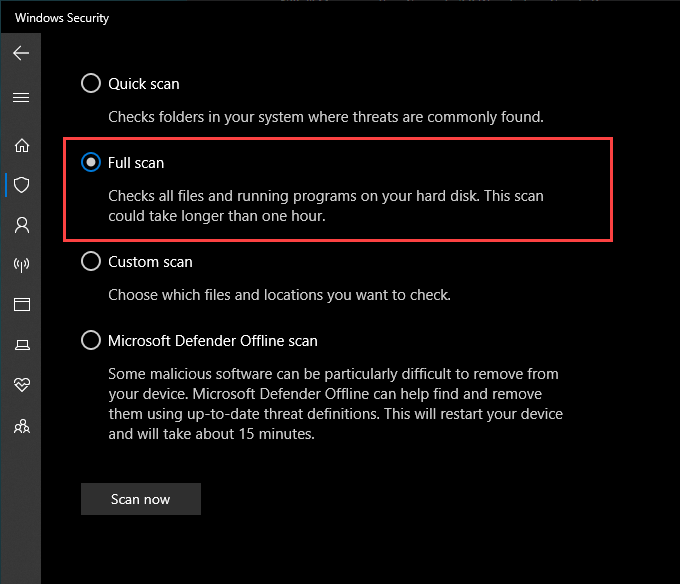
- Select Scan now .
Run the System File Checker
The System File Checker is a command-line tool that can help you fix file corruption and stability issues in Windows 10. You can run it via an elevated Windows PowerShell console.
- Right-click the Start button and select Windows PowerShell (Admin) .
- Type the following command:
sfc/ scannow
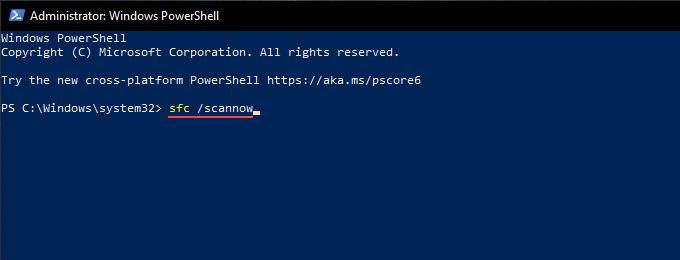
- Press Enter .
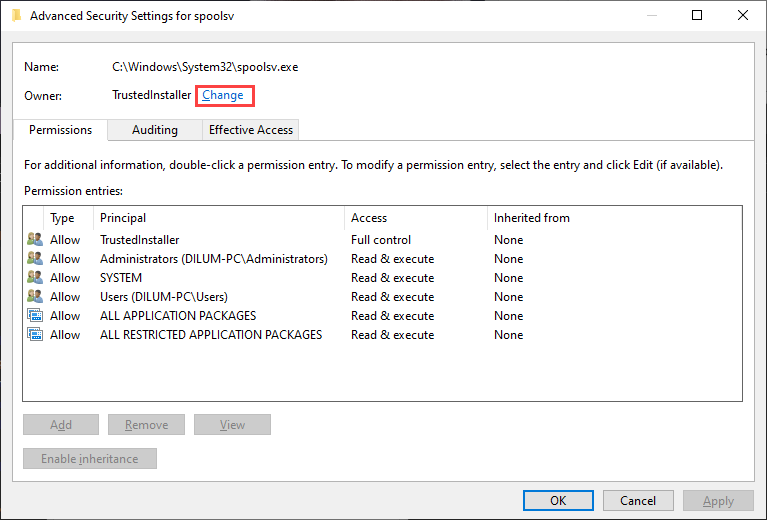
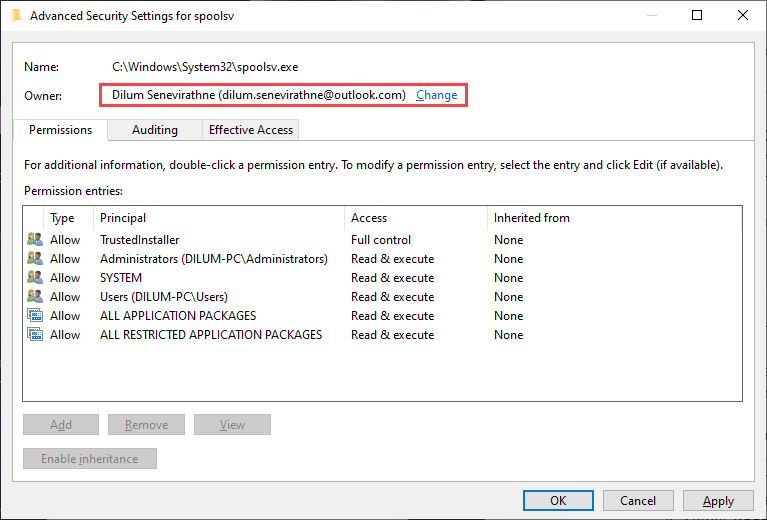
Take Ownership of Spoolsv
Taking ownership of the executable file that runs the Print Spooler can also help stop crashes and other issues with the service.
Open File Explorer and go to Local Disk (C:) > Windows > System32 .
Right-click the file labeled spoolsv and select Properties .
Switch to the Security tab and select Advanced .

- Select Change .
- Type in your Windows username and select Check Names . If you typed it correctly, you should see the path to your user account listed automatically.
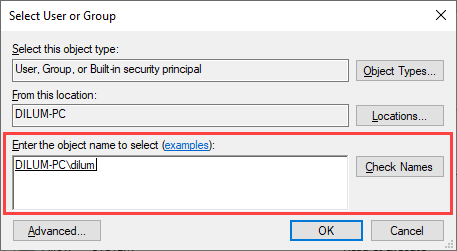
Select OK .
Confirm that you see your username next to Owner . Then, select Apply , then OK .
- Restart your computer.
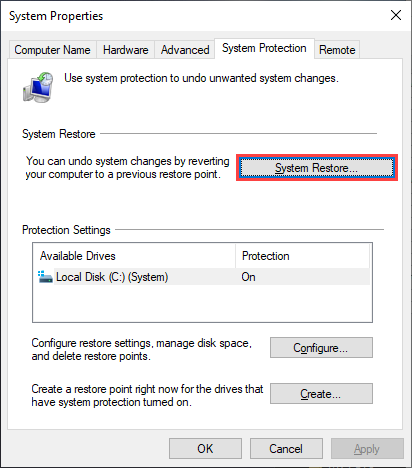
Perform a System Restore
If your print spooler still keeps stopping, you can choose to revert your computer to an earlier state when the Print Spooler worked without problems. However, you can only do that if you took the time to activate the System Restore functionality in Windows 10 previously.
Open the Run box.
Type sysdm.cpl and select OK .
Switch to the System Protection tab.
Select System Restore .
- Select Recommended restore or Choose a different restore point and select Next .
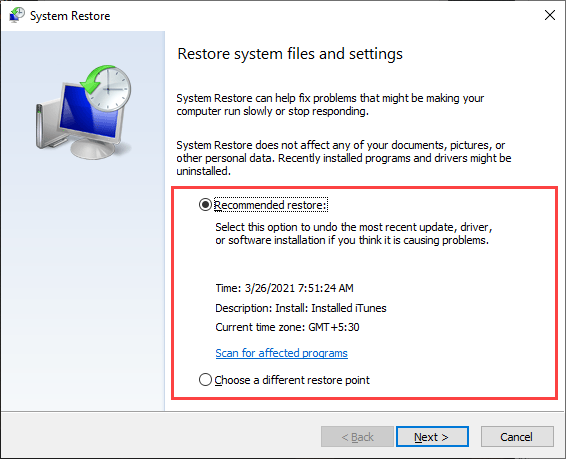
- Follow all on-screen instructions to reset your computer.
Print Spooler Working Non-Stop
Any of the fixes above should’ve helped get the Print Spooler up and running correctly. But if none of them worked and you keep receiving errors frequently, you must consider restoring Windows 10 to factory settings . You might be dealing with a severe underlying issue that only setting up the operating system from scratch can fix.
- Preparing for Windows 10 End of Support: Upgrading to Windows 11
- How to Fix a “This file does not have an app associated with it” Error on Windows
- How to Fix an Update Error 0x800705b4 on Windows
- How to Resolve “A JavaScript error occured in the main process” Error on Windows
- How to Fix the Network Discovery Is Turned Off Error on Windows
Dilum Senevirathne is a freelance tech writer and blogger with three years of experience writing for online technology publications. He specializes in topics related to iOS, iPadOS, macOS, and Google web apps. When he isn’t hammering away at his Magic Keyboard, you can catch him binge-watching productivity hacks on YouTube. Read Dilum’s Full Bio
Times change and so does Windows. If you’ve recently moved from a Windows Server 2012 and Windows 7 or 8 environments into Windows Server 2019 and Windows 10 , things are a little different.
The old ways to connect to a network printer are still there. They may look a little different, too. So we’ll show you how to connect to a network printer in Windows 10 or Server 2019. Our favorite way is the last method.
Use Add Printers & Scanners
The new Windows Settings world works the same as in the Control Panel , but it looks different enough to cause confusion for some. Note that if this is at work and you’re not an administrator, the printer must be on the network and the driver already installed. If it’s not installed, you’ll get a prompt to enter the administrator account name and password.
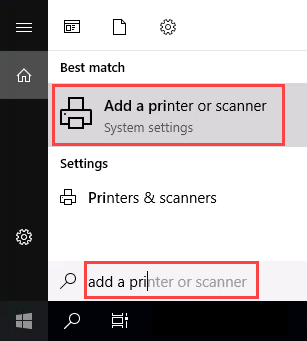
- In the Start menu, type add printers . When the result Add a printer or scanner shows, select it.
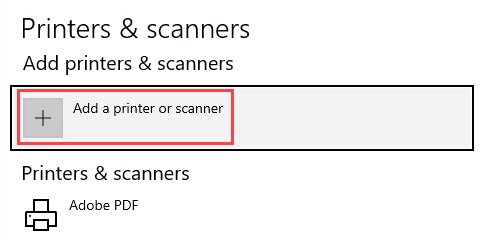
- When the Printers & scanners window opens, select Add a printer or scanner . It will start searching for available printers.
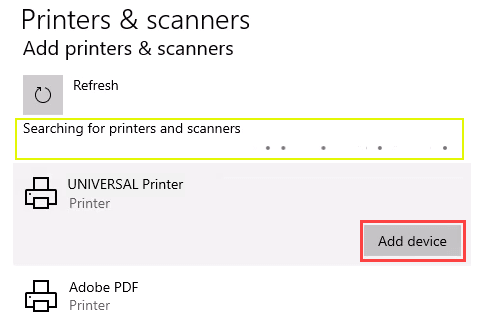
- It may look like it’s still searching, even though all the printers available are showing. Find the printer needed, select it, and then the Add device button will show. Select it.
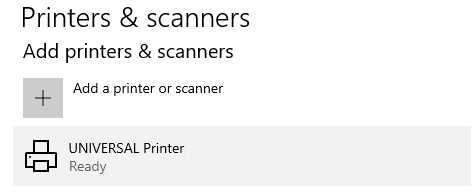
- The printer will install. There’ll be a progress bar and when it’s done, it’ll say Ready .
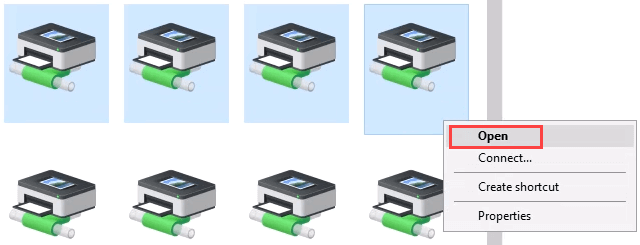
Connect to a Network Printer Through a Network Share
Here’s a way to install a printer that’s different from what you may be used to. It requires that the printer is shared and on the network. Unless you’re the administrator, the driver needs to be installed on your local machine or server. You need to know the path to the share as well. It will look something like Print-Server-Name , where Print-Server-name is the name of the server.
- Open File Explorer . In the location bar, enter the printer share path and then press the enter key. File Explorer will find the share.
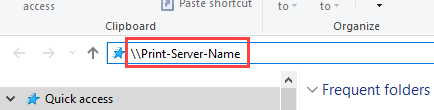
All the shared printers will show.
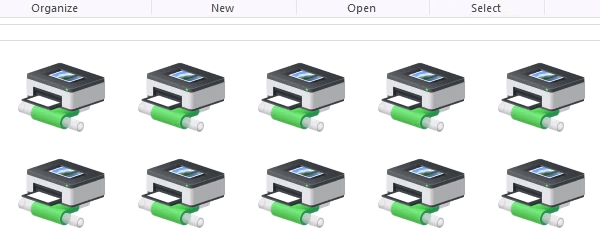
- There are two options: Install a single printer Install several printers at one time
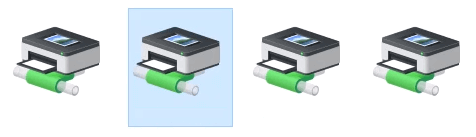
To install a single printer, double-click on it.
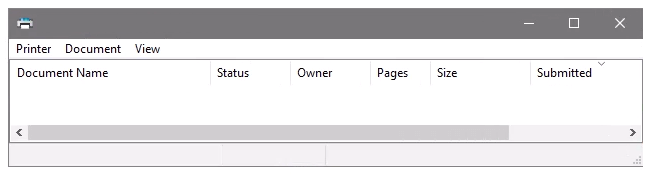
When the installation finishes, you’ll see the newly installed printer’s print queue window.
- To install several printers at once, select printers by clicking and dragging a rectangle around them, or hold down the Ctrl key while selecting printers individually. Either right-click and select Open or simply press the Enter key.
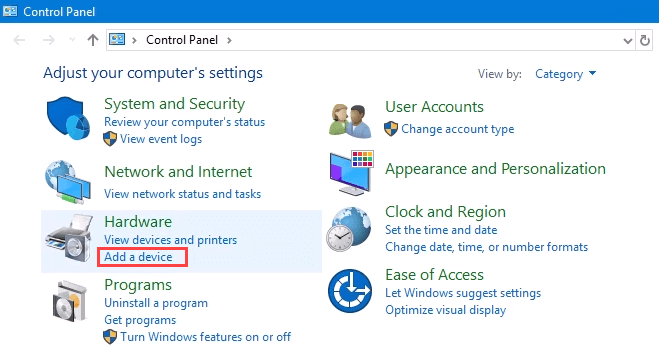
Connect to Network Printer via Control Panel
The good old control panel is still there. If you’ve used it before, you know what to do. If not, it’s almost the same as adding a printer through Settings.
- Open the Start menu and select Control Panel . If it’s not there, start typing control and it will show.
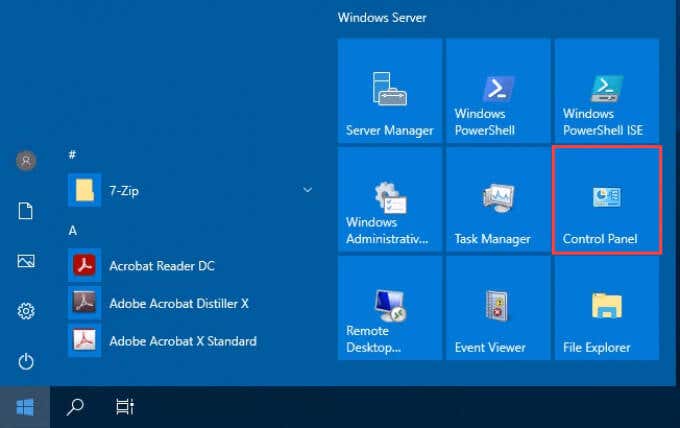
- Select Add a device in the Hardware category.
- Select Add a printer .
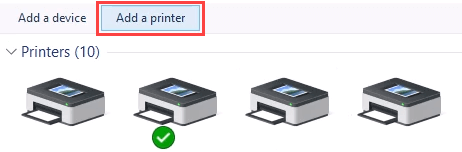
- It will show a selection of printers. Select the one needed and then select Next .
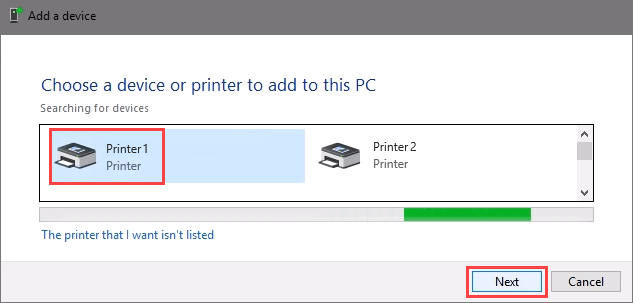
The printer will start installing. It may take a few seconds or minutes.

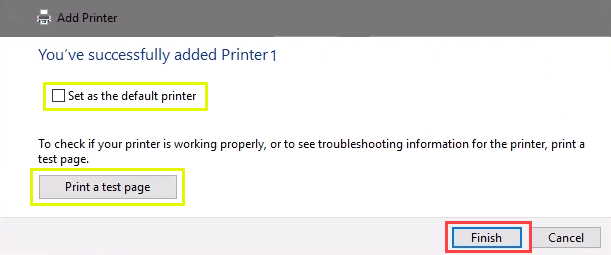
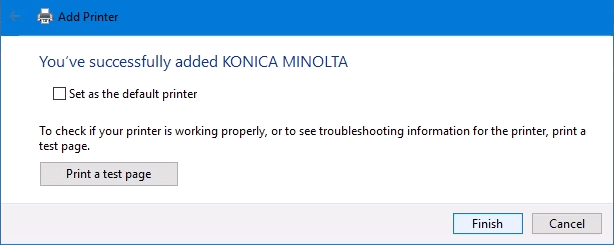
- Once the success window opens, there are options to Set as the default printer and Print a test page . Set the printer as default if needed. It’s always a good idea to print a test page. To exit, select Finish .
Connect to Network Printer via IP Address
The printer you want to install might not be easily visible, but if you have the IP address for it you can use that to connect with the printer. Administrator rights may be required. The first part is the same as adding a printer through the Control Panel until you get to the step to choose the printer. Let’s pick it up from there.
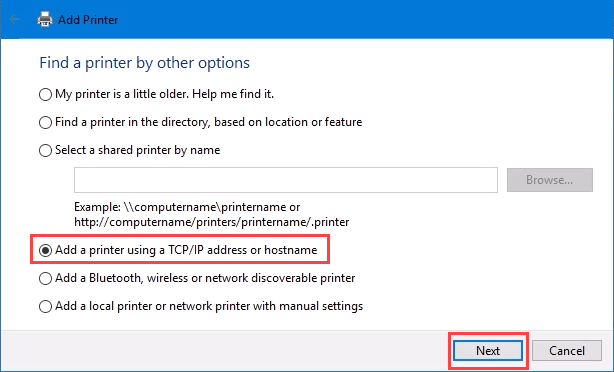
- At the Add a device window, select The printer that I want isn’t listed .
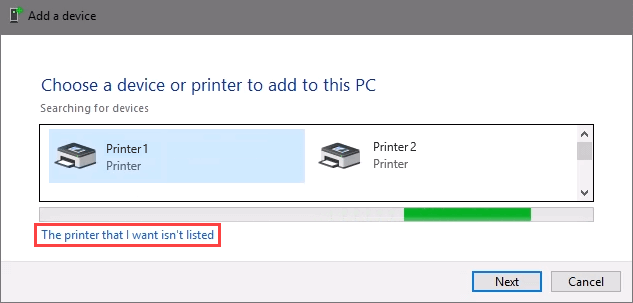
- If administrator rights are required, select Add a local or network printer as an administrator .
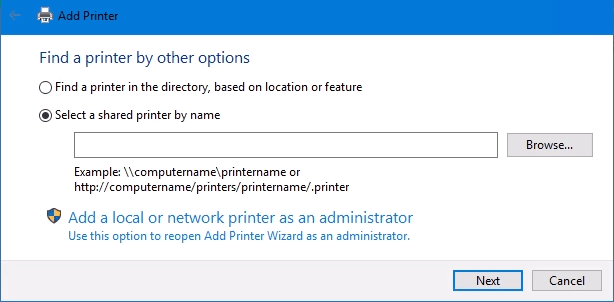
Otherwise, the window below will show. Select Add a printer using TCP/IP address or hostname then select Next .
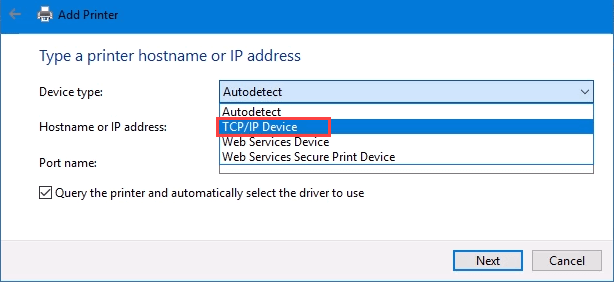
- For Device type: there are several choices. Web Services Device and Web Services Secure Print Device are used for special cases. If you don’t know what those mean, you probably don’t need them. Autodetect may make the wrong choice as well. Select TCP/IP Device .
Enter the IP address in the Hostname or IP address: field. Notice how the Port name: field auto-populates with whatever is entered. The port name can be left as is or changed. In most cases, Query the printer and automatically select the driver to use remains checked.
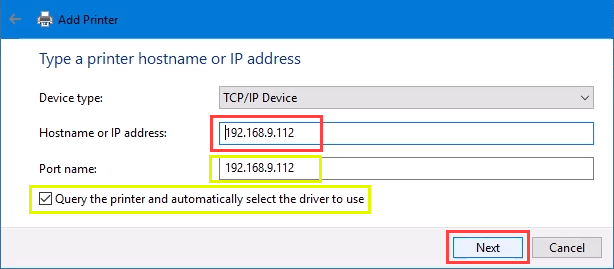
Sometimes an organization will use a universal printer driver to keep things simpler and use less storage. It also keeps the registry small and login times faster. The HP Universal Print Driver works well for HP and many other printers. Select Next .
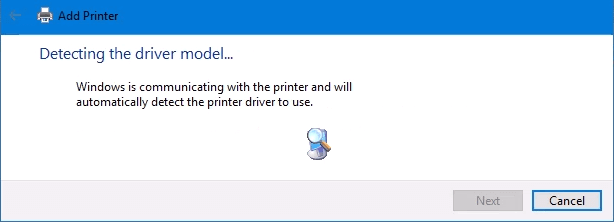
It detects the TCP/IP port to see if it exists.
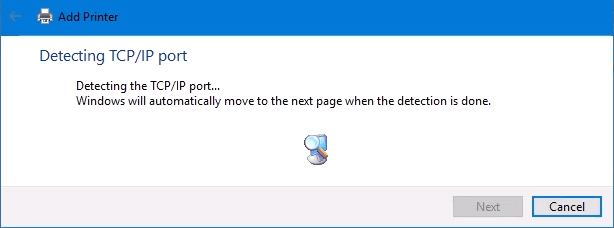
Then it detects the driver model needed.
- Normally, Windows will find a driver already installed, offer the option to replace the driver, or ask to install a driver. If it’s on the network already, it probably installed the driver already. Select Use the driver that is currently installed and select Next .

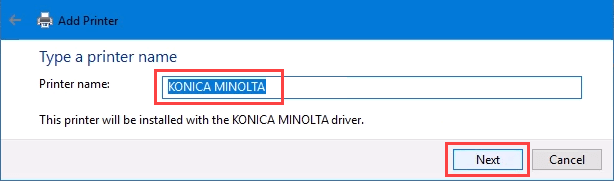
- It will auto-select a name for the printer. That can change as needed. Select Next .
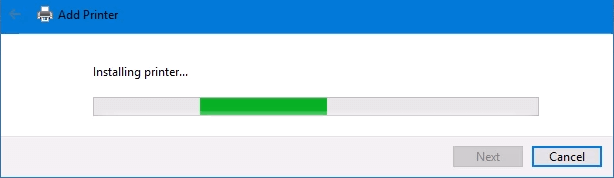
The real installation begins.
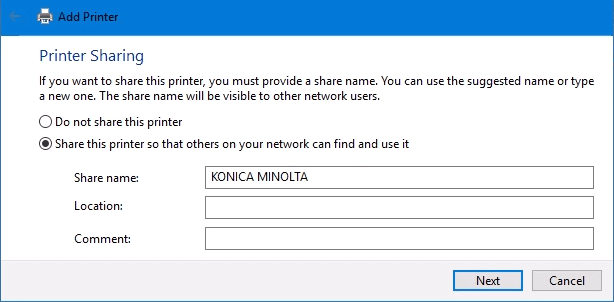
- If sharing the printer, add a location so others can see where the printer is located.
It successfully installed the printer. Set it as the default or not as needed. As always, it’s a good idea to Print a test page . Select Finish closes out the window.
Connect to a Network Printer via PowerShell
Finally, the last, and possibly best, way to connect network printers is with PowerShell . Why is this best? If you’re a System Administrator and have dozens of printers to connect, or if you need to make sure the printer is connected every time the server starts or someone logs in, a PowerShell script is best. It’s fast, done once, and easy to call many times.
You will need to know:
- Printer IP address
- Printer driver name
- What to name the printer
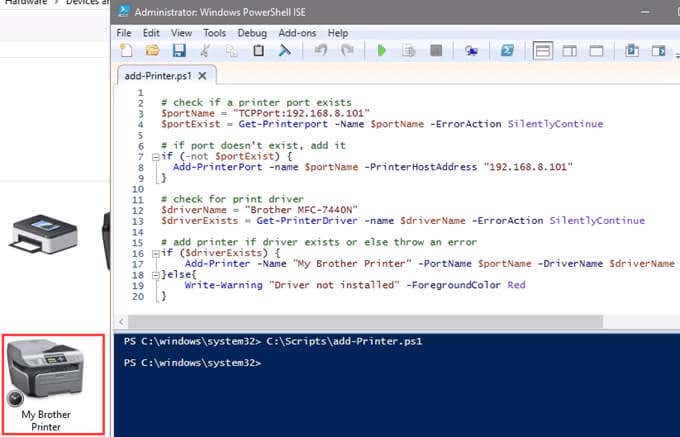
Following is a sample script. Make it into a looping script to install several printers at a time, or make it a function to call from other processes.
check if a printer port exists
$portName = “TCPPort:192.168.8.101”
$portExist = Get-Printerport -Name $portName -ErrorAction SilentlyContinue
if port doesn’t exist, add it
if (-not $portExists) { Add-PrinterPort -name $portName -PrinterHostAddress “192.168.8.101” }
check for print driver
$driverName = “Brother MFC-7440N”
$driverExists = Get-PrinterDriver -name $driverName -ErrorAction SilentlyContinue
add printer if driver exists or else throw an error
if ($driverExists) { Add-Printer -Name “My Brother Printer” -PortName $portName -DriverName $driverName } else { Write-Warning “Driver not installed” -ForegroundColor Red }
When the script is run, it takes maybe 3 seconds. Then you’ll see the printer installed.
Any Other Ways to Connect to a Network Printer?
We’ve given you several ways to connect to a network printer or several printers. One of them will be the best way for you. There is at least one other way, and that’s by the Command Prompt.
- Preparing for Windows 10 End of Support: Upgrading to Windows 11
- How to Fix a “This file does not have an app associated with it” Error on Windows
- How to Fix an Update Error 0x800705b4 on Windows
- How to Resolve “A JavaScript error occured in the main process” Error on Windows
- How to Fix the Network Discovery Is Turned Off Error on Windows
Guy has been published online and in print newspapers, nominated for writing awards, and cited in scholarly papers due to his ability to speak tech to anyone, but still prefers analog watches. Read Guy’s Full Bio
