Printing when you’re on the road is never a simple matter. Where you choose to print depends on when you need your printed document.
If you only need to pick up your printout when you get home, printing over the Internet to your home computer is the way to go. This is possible from either your laptop or your cellphone.
However, if you need a printout immediately, there are lots of kiosks and printing centers around the country where you can send your printout and pick it up immediately.
In this article, you’ll learn about all the options available to print documents whenever you’re out of the house.
1. Using Google Cloud Print
One of the best services ever offered by Google is Google Cloud Print . This service lets you safely and securely connect your wireless printer to the Internet. Once connected to the Google Cloud Print service, you can use your Google account to print anything from your laptop or your smartphone.
Setting up this service is very easy if you have a printer supported by the service. Just visit the Google Cloud Print page to get started. You’ll need to log into your Google account if you haven’t already.
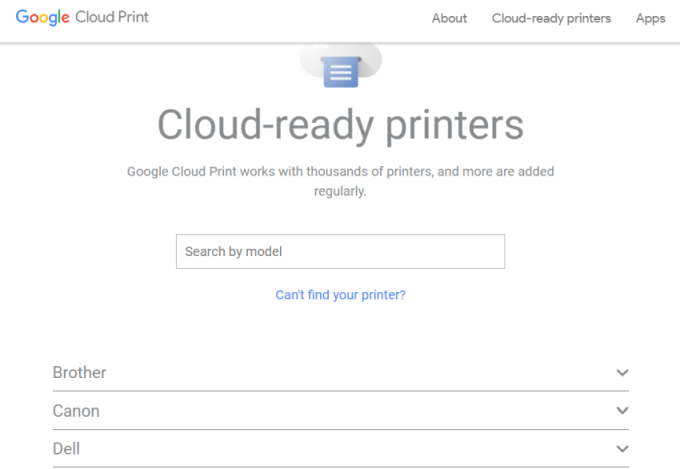
If this is your first time setting up one of your printers with Cloud Print, click Add a Cloud-Ready Printer to see if your model of printer is compatible.
If your printer isn’t a Cloud-Ready model, then click Add a Classic Printer to see the setup instructions for adding a regular printer to Google Cloud Print (see simple instructions below).
Connecting Your Computer to Google Cloud Print
To set up your Google Cloud ready printer:
- Make sure your computer is turned on
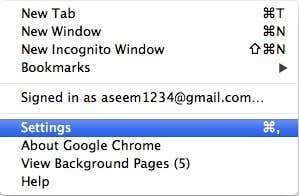
- Open your Chrome browser, click the three dots in the upper-right, and select Settings .
- Scroll down and select Advanced .
- Scroll down further to Printing and expand Google Cloud Print .
- Select Manage Cloud Print Devices .
You may be prompted to sign into your Google account. If you see the cloud-ready printer that your computer is already connected to, click the Register button. Otherwise, under the Classic Printers section, click the Add printers button.
If you register a cloud-ready printer, you’ll need to confirm the registration on the printer itself. Adding a classic printer will detect printers connected to your computer and walk you through a wizard to add them to Google Cloud Print.
Printing to Google Cloud Print
Once you’ve set up your printers on Google Cloud Print, using the service is very easy.
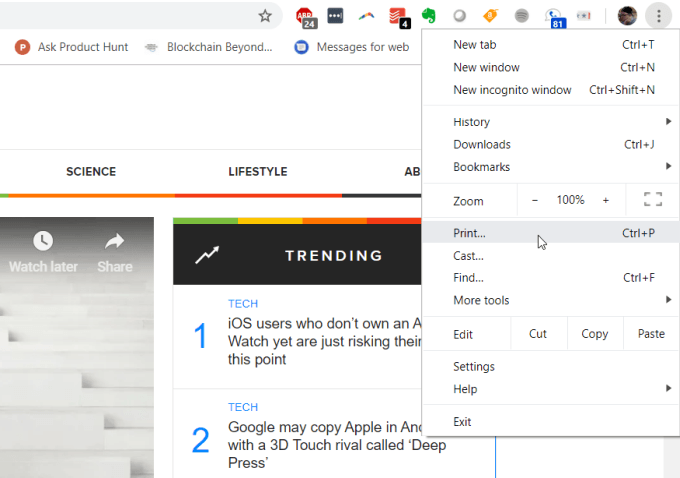
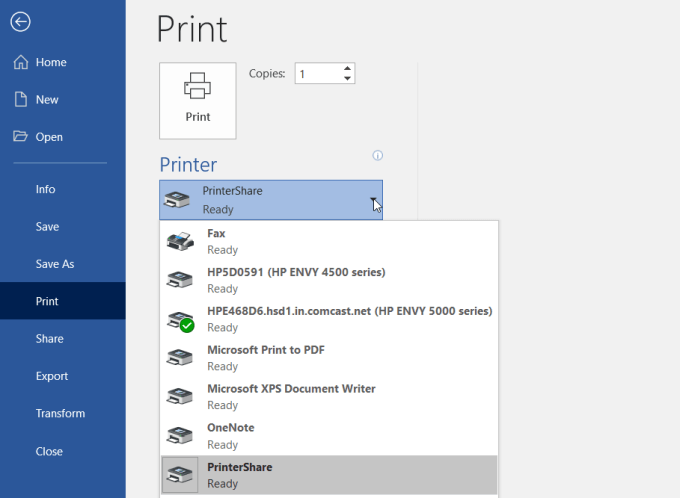
In the Google Chrome browser, you can print as you normally do by clicking the three dots in the upper right and selecting Print .
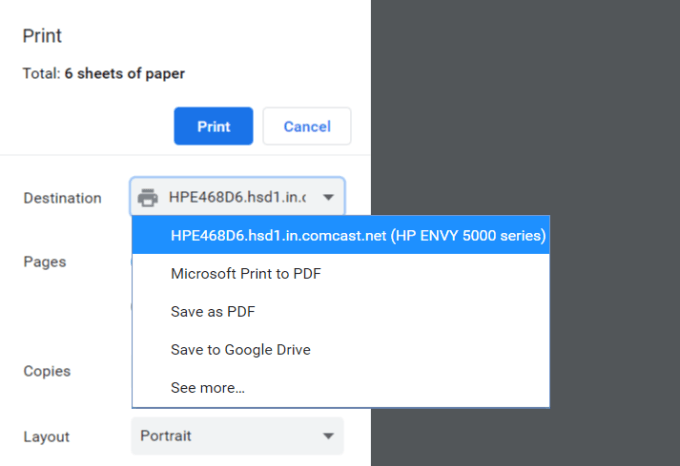
You’ll see the Google Cloud printer available to print to along with its internet address.
Select this printer and click the Print button to print.
Having a Google Cloud Print connected computer, you’ll see the same printer available on different Google services like Google Docs, Google Sheets, and Gmail. It’ll also let you print from your Chromebook if you own one.
On your mobile phone, printing is typically available under the Share feature in different apps.
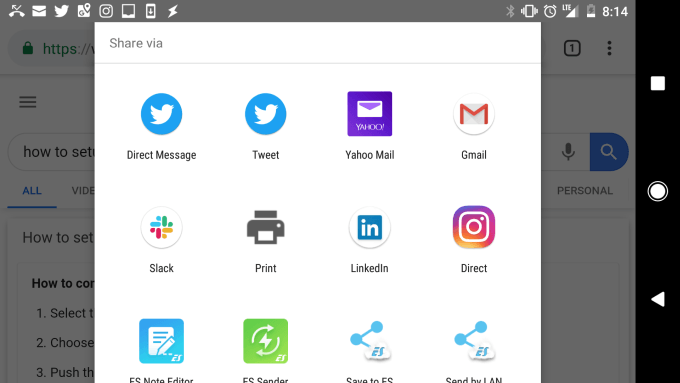
When you choose the Print option, you’ll see your new cloud printer available.
Send your printout to that printer, and it’ll show up on your home printer, no matter where in the world you are.
2. Set Up a Home VPN
Another, slightly more complicated solution to print to your home printer from anywhere is setting up a VPN network you can connect to from the internet.
You can do this using a hidden VPN service included with your Windows 10 computer. You’ll need to follow this procedure from your computer that has access to print to your home printer.
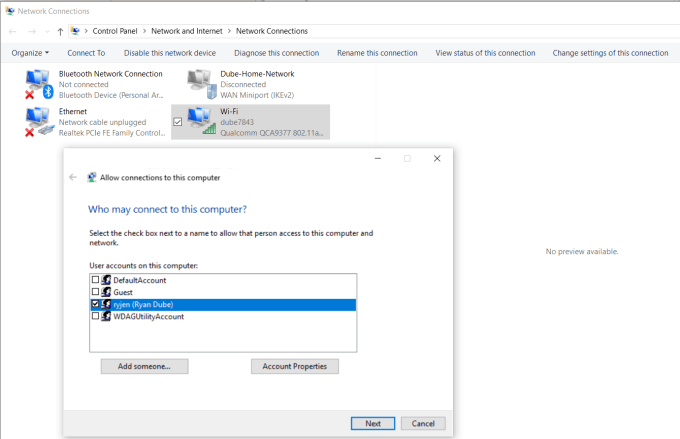
First, you’ll need to allow users to connect to your computer through the internet.
Open the Control Panel and select Network and Sharing Center . Select Change Adapter Settings and press Alt-F on the keyboard. Select New Incoming Connections .
Enable the user accounts you want to give access to, or create a new ID and Password you want to use to allow incoming connections.
Click Next and enable Through the internet .
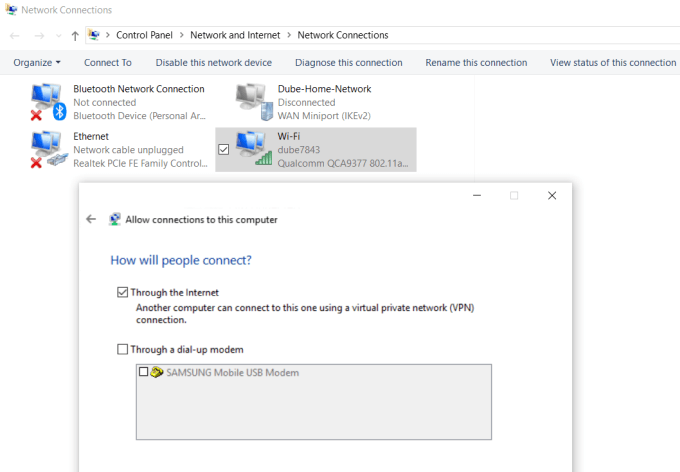
Click Next to finish off the Wizard. You’ve now provided access to your computer through the network via VPN.

Next, you’ll need to log into your home network router and add port forwarding for VPN connections. If this sounds hard, read our post on understanding what port forwarding is and how to setup port forwarding. Make sure to use port 1723 if using PPTP. LT2P uses port 1701.
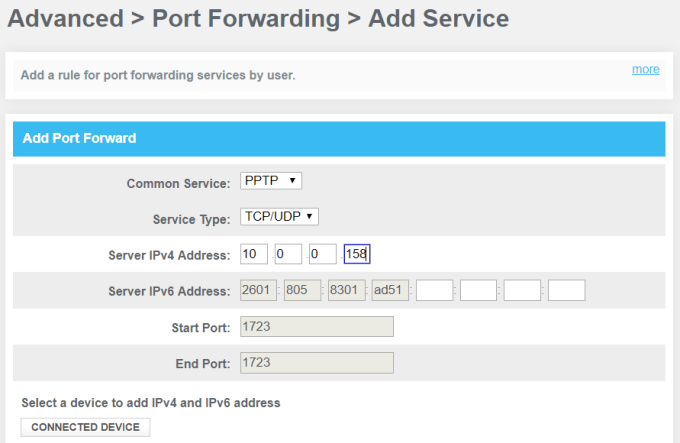
The Windows VPN uses PPTP so select that as the service. Type the internal IP of your computer that’s connected to the printer for the Server IPv4 Address, and leave all other fields as is.
Now, when you want to connect to your computer for printing, you can connect to it via VPN. First, click the Start menu and type VPN . Click on VPN Settings .
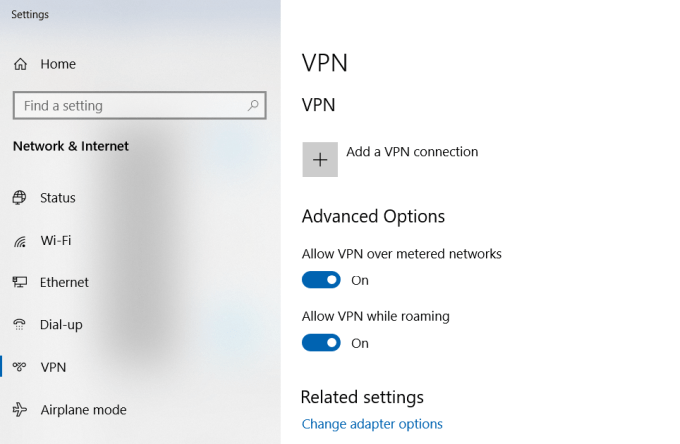
Click on the plus icon to add a new VPN connection.
Before you can fill out the fields, you’ll need your computer’s public IP address . You can see this by visiting a site like WhatIsMyIP.com .
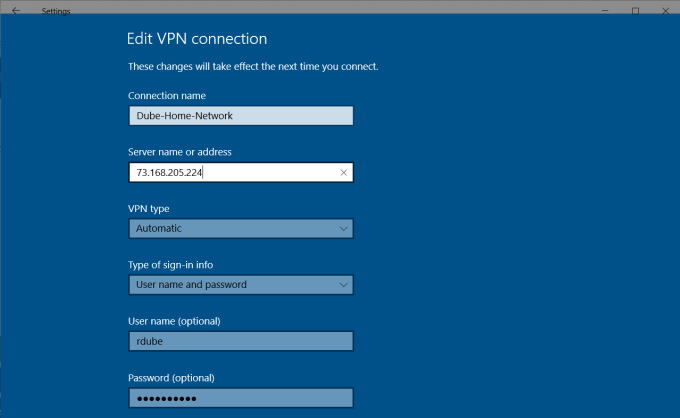
Fill out the VPN form as follows:
- Provider : Windows (built-in)
- Connection Name : Name the connection anything you like
- Server name or address : Give this your computer’s public IP address.
- User name and password : Provide the ID and Password you created when you enabled Internet access to your computer.
Once you’re done setting this up, you’ll see the VPN connection listed in the VPN settings window. Just click connect while you’re connected to the internet away from home to connect to your home computer. Once connected, you’ll have access to all the network devices, like your home printer.
There are several issues that may cause a VPN setup like this to not work. Your virus software, firewall settings, or other computer security settings could block the connection.
3. User Free PrinterShare Software
Another solution that’s a whole lot simpler than trying to figure out what security settings is blocking your VPN connection is just installing free software that will share out your connected printer to the Internet.
Install the PrinterShare software on a computer on your home network. To use the web printing option, you’ll need to create a free PrinterShare account and password.
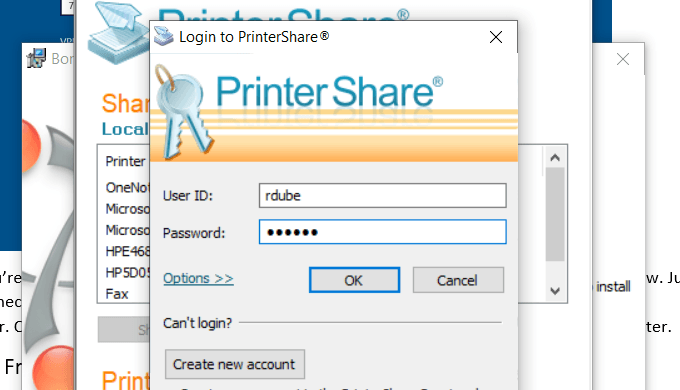
The software will randomly generate a user account number that will display in the software. Remember this ID, and the password you configured for it.
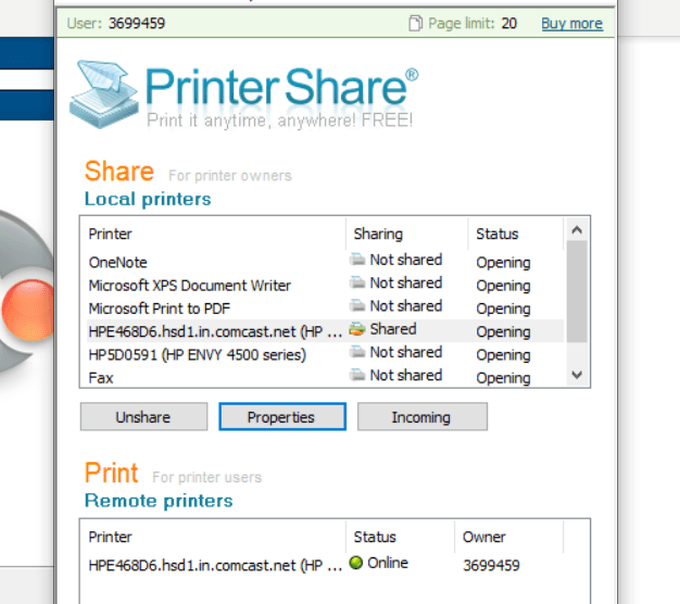
Launch the software on the computer and share the printer that you want to allow internet printing to.
Install the PrinterShare application on the second computer that you’re using outside of your home. Next time you run the software while you’re sitting in an internet café somewhere, you’ll see the printer you shared under the Remote Printers list.
Now, when you try to print a document or anything else on your computer, you’ll see the PrinterShare printer available under your list of printers.
Printing to this printer will send the print over the internet to the printer connected to your other computer on your home network.
As you can see, you don’t have to configure the router or change any security settings. The print is transmitted directly over the internet via the internet connection on your home computer.
4. Online Printing Services
If you don’t mind spending some money and you won’t need the printout for a few days, you can order printouts online.
There are several services where you can upload documents and have the service print them and mail them to you.
A few of these services include:
- PrintDog : Order anything from brochures and greeting cards to posters or color and black and white document copies. Prices are very reasonable at just a few cents per page for regular documents.
- UPrin t ing : You can use this service to print regular documents. But you can also order flyers, posters, brochures and more. You can even order a design printed on t-shirts or mugs.
- Best Value Copy : If you just want fast and cheap copies, this is probably the best service for it. Prices are just a few cents a page at a flat rate. There’s also no minimum order, so if you want to just print a few pages, you can.
5. Shipping Print Kiosks
If you want your document printouts immediately, using a local shipping service is the best option.
These companies offer either web-based file transfers, or you can transfer documents from your computer using a memory stick to a computer in the shop. There, you can use their printer to print out your document.
A few of the most popular print kiosks you’ll find all around the country (and in some cases the world) are the following:
- UPS : You either print online or at your local UPS shipping center.
- FedEx : Print using their website and pick it up at a local FedEx center.
6. Local Print Shops
Beside large shipping services, there are also lots of print shops around the world where you can bring in a memory stick with your documents on it and print those documents for very cheap per-page prices.
A few of these include:
- Staples : Use the website to find a Staples print center near you.
- Office Depot : Do in-store document printing quick and easy.
- CVS : Visit the CVS photo center where you can also print documents.
- Costco : If you have a Costco membership, visit a location for your document printing needs.
7. Your Local Library

One of the most overlooked resources is the local library. Almost every town in the country has a library. Even the smallest libraries offer printing services for their patrons.
Usually, you can buy a card that works on the printer and you load the card with a set amount of money that you can use to make copies. Modern printers at libraries have a memory card slot so you don’t even need a computer to print to the library printer. Or, you connect to the library network and print to the printer that way.
Usually, library printing services are dramatically discounted from the prices you’ll find at commercial printing centers.
- How to Fix Slow Wi-Fi on Your Smartphone
- 7 Best Machine Translation Software (or AI) to Try in 2025
- What Does the Green Dot Mean on Facebook?
- How to Turn off Hardware Acceleration in Chrome
- How to Check VRAM in Windows 10, 11, and macOS?
If you haven’t heard of Google Cloud Print, that’s not totally surprising. Even though it’s been around since 2011, it hasn’t become widely used. However, that is something that might change over the next year or so. Unlike some Google services that get canned during Spring cleaning, Google Cloud Print has been getting more and more features added to it.
So first of all, what is Google Cloud Print? It’s basically a way for users to connect their printers (wired or wireless) to the Internet and have the ability to print from any device (web, desktop, mobile) from anywhere in the world. What’s nice about Google Cloud Print is that you can print from a device without needing to install any printer drivers on the system. This can save an enormous amount of time and energy.

For example, if you bought a new Windows PC and connected it to your network, you normally would have to find the drivers for your current printers, load the software and go through all the steps to get it installed on that PC. Now only does that take time and a lot of troubleshooting usually, it also slows down your system with a lot of extra printer software/tools you don’t need. From here on out, I will refer to it as GCP.
With GCP, you just install the Google Cloud Printer Driver on your Windows machine and you can now print from any program directly to any printer you have added in GCP. So is GCP is the greatest thing in the world? Well, there are a few caveats and limitations that I will explain below.
Where Can I Print From?
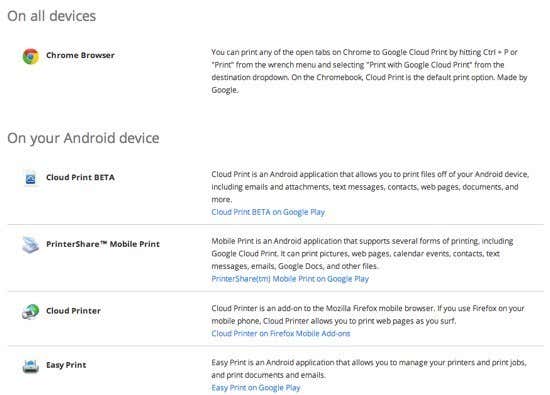
GCP sounds great, but you might be asking from where can I actually print from? Well, that’s where GCP has been making big leaps in the last year. At first, you could only print from Chrome OS, Google Chrome on any platform and Gmail and Google Docs on your mobile. The first increase to this list was the Cloud Print app in the Google Play Store for Android devices.

On July 23rd, 2013, Google really made GCP a lot more useful by introducing the Google Cloud Print Driver. You can install this on any Windows machine and it will allow you to choose Google Cloud Printer when printing from any Windows application.
They also released Google Cloud Print Service in addition to Print Driver. Cloud Print Service will run as a Windows service and can be used to connect older legacy printers to GCP. The Print Service is more geared towards businesses and schools.
Lastly, there is a short list of apps that work with GCP and allow you to print from them. For example, on iOS, you can download PrintCentral Pro , which will let you print emails, contacts, text messages, etc from an iOS device to GCP. At this time, Google hasn’t released a Print Driver for Mac, but you can download an app called Cloud Printer which does pretty much the same thing.
Now that you understand where you can currently print from, let’s take a look at connecting printers to GCP.
Cloud Print Ready vs Classic Printers
The main thing to understand about GCP is how you connect the printers to the actual service. There are two types of printers in the GCP world: Cloud Ready and Classic Printers. Cloud Ready printers are those that already come with the GCP service installed and configured. This is by far the best way to use GCP because the printer will actually register itself with the GCP service over your network and will always be available for printing.
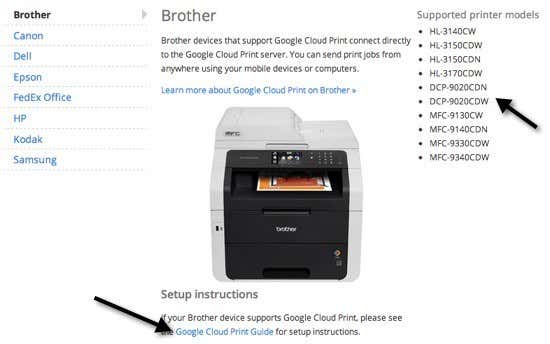
The other great thing about Cloud Ready printers is that they will automatically update their firmware and drivers over the Internet, so you don’t even have to worry about it. Unfortunately, there aren’t a lot of printers out there yet that support GCP. You can see the entire list of Cloud Ready Printers here:
https://www.google.com/cloudprint/learn/printers.html
If you do have one of the printers listed there, you can click on the link provided for setting it up with GCP. You basically just have to register your Google email address with GCP on the printer.
Next up are Classic Printers. Classic Printers are what most people will be using when setting up GCP. Classic Printers are either printers that are directly connected to your computer via a cable or wireless printers installed on your machine. Any printer that you can print to from your computer can be added to GCP regardless of how it is connected.
Now the major difference between a Cloud Ready and a Classic printer is that in order to print to any Classic printers, the computer that has the printers installed has to be on and you have to be logged into Google Chrome. If you turn off the computer or log out of Chrome and try to print to GCP, the print job will simply be added to the print queue. When the computer turns back on and you log into Chrome, the print job will then be printed.
Adding a Classic Printer
Adding a Classic Printer to GCP is pretty straight-forward. First, go to the computer that has the printers already installed and open Chrome. Then click on the Chrome menu button (three horizontal lines) and choose Settings .
Scroll down and then click on Show advanced settings . Scroll down some more until you see Google Cloud Print .

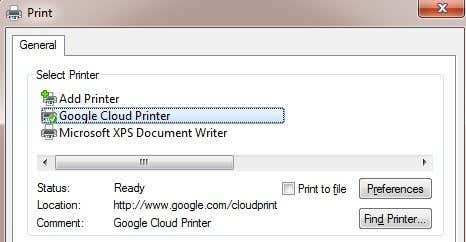
Go ahead and click on the Add printers button and a popup box will appear with a list of the currently installed printers.
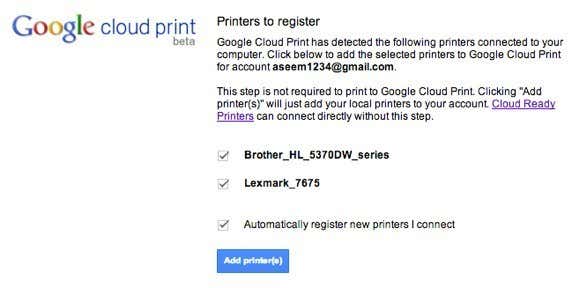
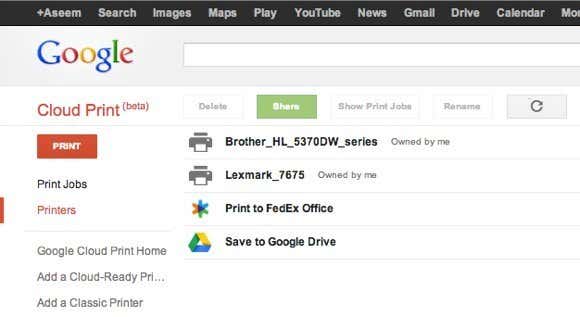
You can also choose to automatically register new printers when you connect them to your computer. That’s all there is to adding printers to GCP. Now it will take you to the GCP management console where you should see your printers listed.
Uploading Files to Print
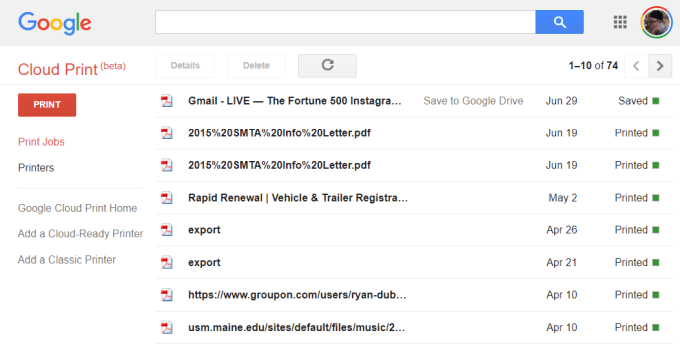
In addition to the various ways you can print mentioned above, you also have the option to upload a file directly to GCP and print it. So, for example, if you’re on a Mac and want to print a PDF file or an image or a Word doc or whatever, you can just upload it. Log into the GCP console, click on PRINT and then click on Upload file to print .
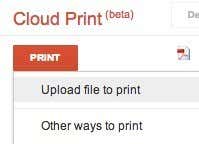
I uploaded an Excel file and it printed just fine. From what I can tell, it seems like you can print any kind of file. I was able to even print an Adobe Photoshop file. So far, I haven’t been able to NOT print something, so that’s pretty great.
Sharing Printers
One neat feature of GCP is the ability to share a printer with someone else that has a Google account. It’s got to be one of the best features of GCP. Last week my parents came into town and they needed to print a boarding pass for the return flight. Normally, they just use my computer and print it from there, but this time I decided to give GCP a bit of a test.
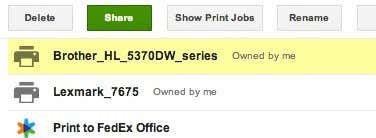
I went to the GCP console, selected a printer and clicked on Share .
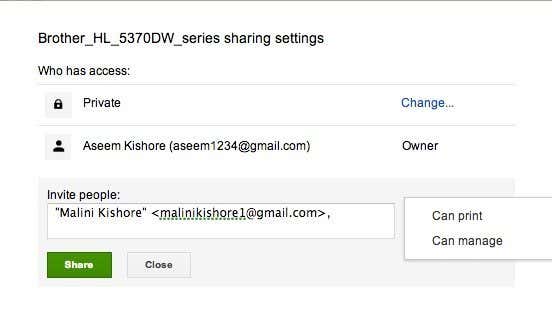
Then I just typed in the email address and chose the Can Print permission.
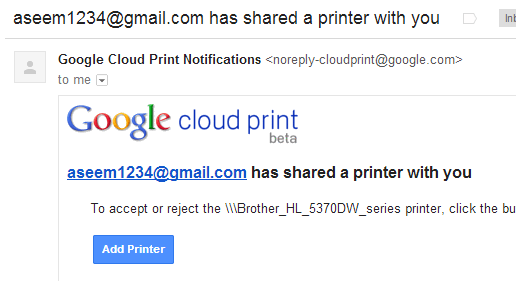
In her Google account, she received an email with a link to add the printer.
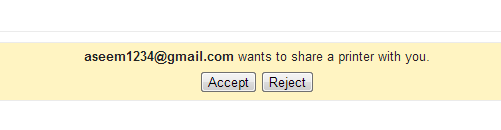
She clicked on the link and then had to click Accept to add my printer to her Google Cloud Print account.
And that was literally it! Then she just printed the boarding pass from Chrome and chose my printer. It printed in two seconds and we were done. No need to use my computer, no need to download printer drivers on her computer. Just send a link, click on it and print! Next time someone visits you and needs to print and you don’t want them on your computer, use GCP if they have a Google account! It’s the first time in a long time I have been impressed by something working so well and efficiently.
Conclusion
By using Google Cloud Print, you can also consolidate all of your printers into one place. For example, if you have wireless printer installed on one machine, but have a second printer connected by cable to a second machine, you can add both printers to Google Cloud Print and print to either print from any computer or any mobile device.
In addition, you can print any file to Google Drive or directly to a FedEx Office. The ability to save to Google Drive kind of makes GCP like Evernote. You can print a webpage for later viewing straight to Google Drive.
Overall, Google Cloud Print has become a lot more useful over the year. Google will continue adding more features to GCP, which will make it a great way for consumers to print easily from anywhere and any device. Enjoy!
- How to Fix “Could Not Communicate With Your Chromecast” Error
- How to Fix “Unable to connect to chat” on Google Chat
- Google Chromecast Remote Not Working? 7 Fixes to Try
- How to Pause or Cancel Google Play Subscriptions
- How to Use the Google TV Remote App on iPhone and Android Devices
