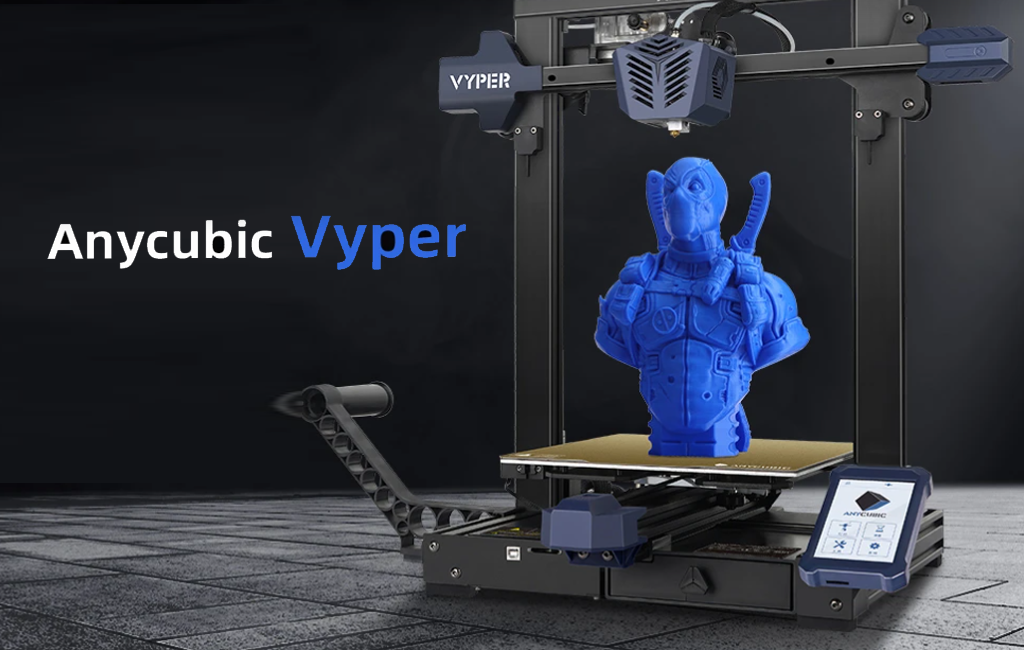
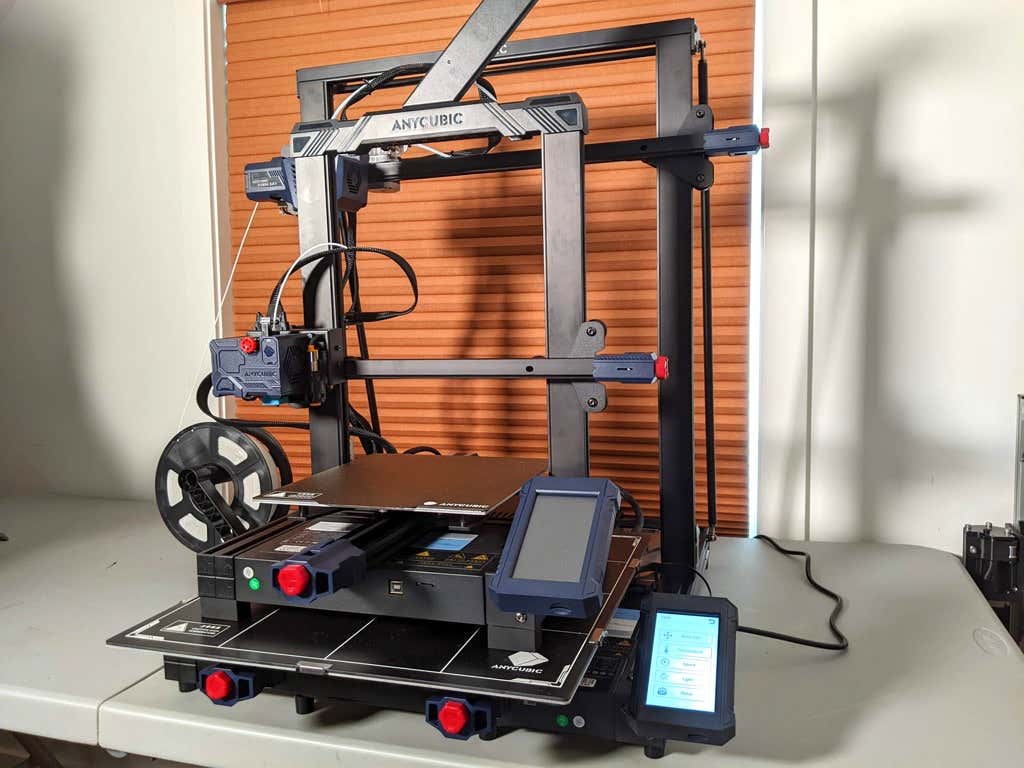
We’re back with another review of a 3D printer from AnyCubic. Last time we reviewed the Mono X, one of AnyCubic’s MSLA printers . This time we tried the AnyCubic Vyper , a mid-range FDM 3D printer that will set you back between $359 and $431 depending on which variant you order.
All in all, the Vyper is a great entry-level filament printer that will have you printing objects right away, without a lot of setup time or trial and error.
Features of the AnyCubic Vyper 3D Printer
AnyCubic’s Vyper 3D printer comes with a rich feature set. The Vyper is comparable to other 3D filament printers in its class and doesn’t cost as much as many of its competitors.
- Large build volume – 9.6 x 9.6 x 10.2 inches (245mm x 245mm x 260mm)
- Automatic bed-leveling via strain gauge sensor
- Dual parts cooling fan, plus hotend fan
- TMC2209 silent stepper driver for ultra quiet and accurate printing
- Built-in belt tensioners for ease of maintenance
- 4.3” color touchscreen
- 32-bit processor
- Dual gear extruder driver
- Dual screw Z axis
- Spring steel bed for easy part removal
- LED light next to the nozzle

We could go on at length about each feature, but suffice it to say, it’s got a lot of nice features, most notably the spring steel sheet and automatic bed-leveling.
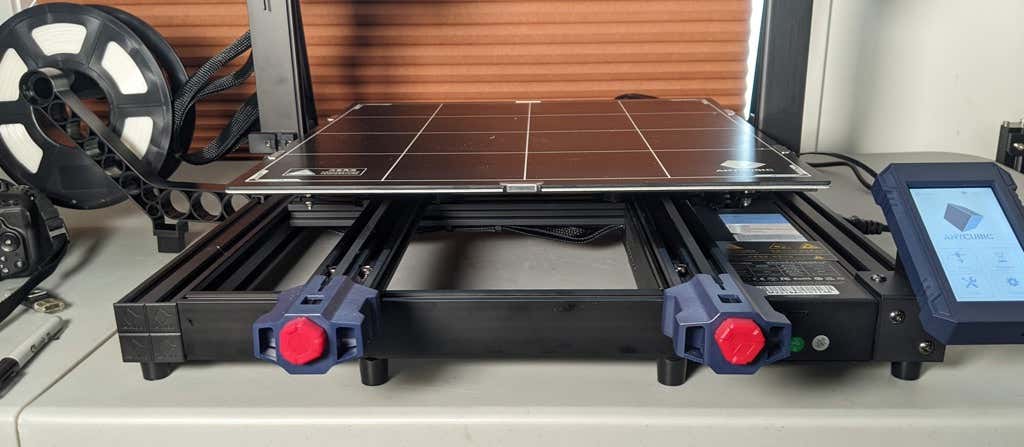
Assembling the Vyper 3D Printer
It took less than 30 minutes to unpack and build the machine before our first part started printing. And five minutes of that was spent looking for tools we thought were missing but were actually included in a really nice built-in storage drawer we completely missed at first glance.

The Z-axis and the XY axis were completely assembled, requiring only that we connect them to each other using the included bolts. Next, we mounted the touchscreen with a few bolts and connected all the clearly-marked electrical cables. It was almost impossible to do it wrong.
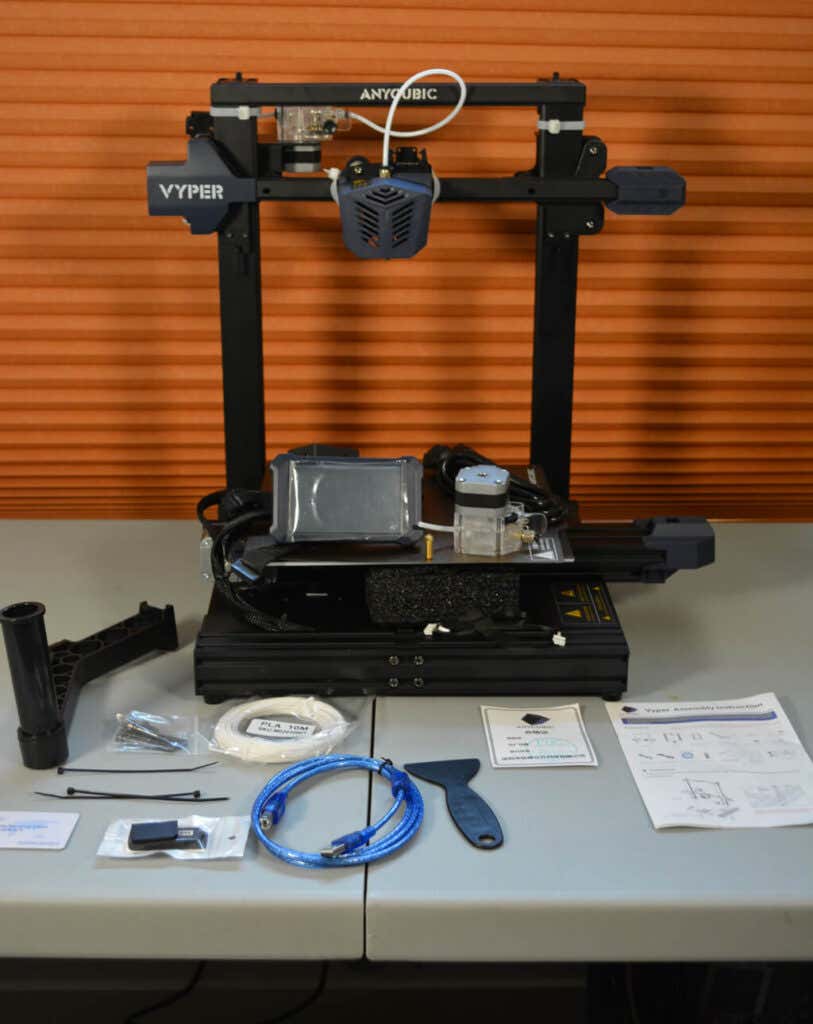
Finally, there were several zip ties used to hold the parts down during transportation. We cut those off, per the instructions. That was it.
Build Quality of the Vyper
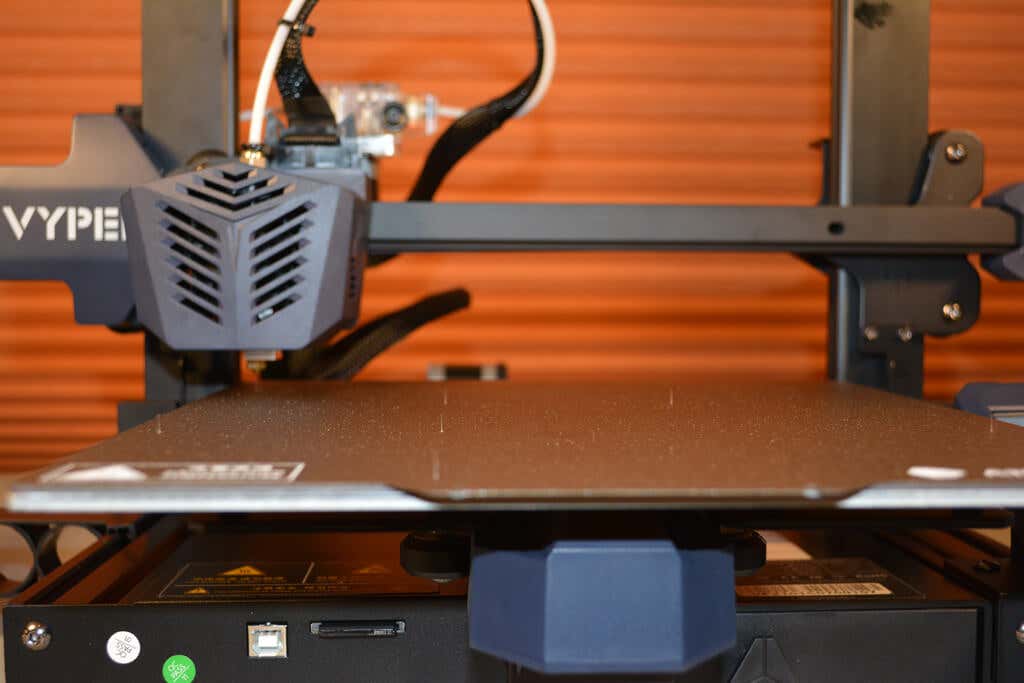
The Vyper uses 20/20 extrusions and molded plastic covers. All the parts looked professional and well-made, not janky like MK3 parts can be. The cable connectors for the wires are user-friendly and well-placed. The touchscreen is second-to-none, and the part drawer is a really nice touch.

Out of the box, the Y-axis needed a tiny adjustment (the instructions mention this possibility). We were impressed by the hotend and the more than adequate part-cooling. The Vyper uses a dual fan, which means you can run your printer faster and still cool your layers. The attention to detail really makes it feel like a printer that costs a lot more than it does.
Calibration
The first step is to level the print bed. AnyCubic advertises the Vyper as “auto-leveling,” and it definitely is. The Vyper uses a method called strain gauge leveling that measures the force applied to the nozzle to determine when it’s made contact with the bed. This has a couple of advantages over other automatic bed-leveling methods.
First, there’s no need to adjust the height of your leveling probe or apply an offset. Second, having the leveling sensor built directly into the nozzle means your probe can reach every bit of the build plate.
Bed leveling was easy to find in the touchscreen control menu, and the touchscreen itself felt extremely responsive. It’s probably the best touchscreen we’ve used on a 3D printer. Leveling the bed was fairly a fairly quick endeavor except for the time it took the Z-axis to drop all the way down. That seemed very slow, but all in all, the process was a quick one. The slowness of the Z-axis is probably a trade-off for better accuracy. And, since you don’t need to level the bed before every print, it’s not a big deal.
The Vyper uses a 4×4 grid system to perform bed leveling and stores it into EEPROM for all subsequent prints or until you re-level it.
First Print
Other than a little bit of oozing on the top of the model, owl.gcode, the test print looked very good. We suspect that particular print could be improved quite a bit by adjusting the Cura settings and reslicing it, but it looked better than anticipated, especially for a first print.
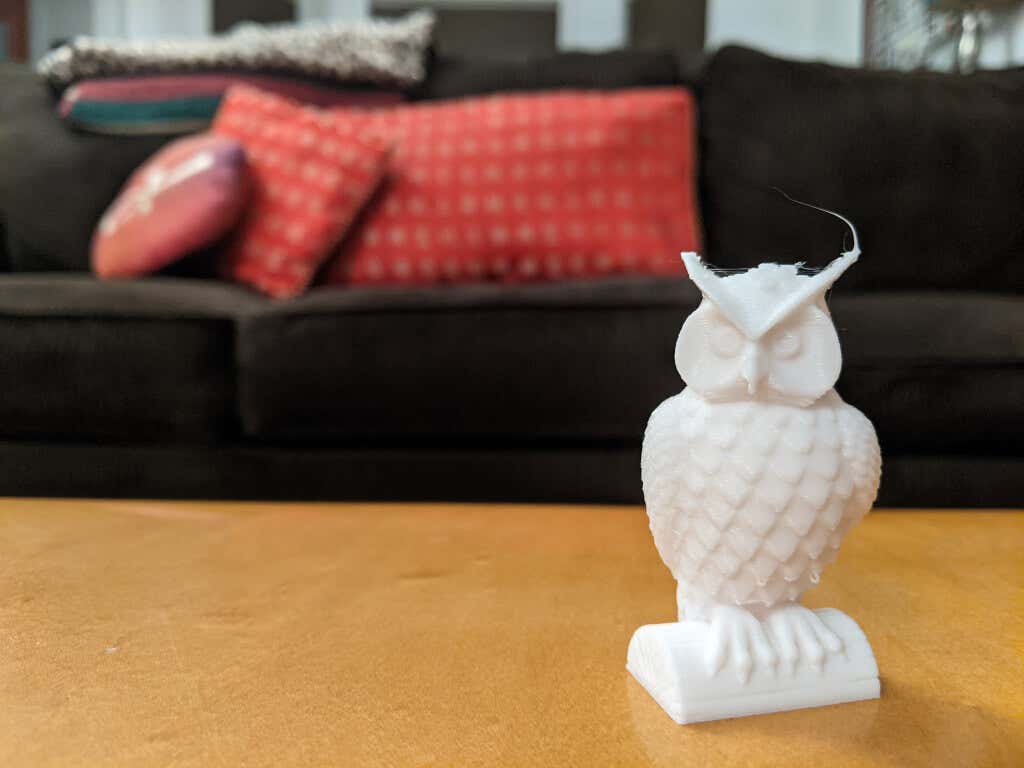
After letting the print bed cool and removing the steel sheet, the print dropped off with almost no effort. The magnetic spring steel bed is a must-have feature if you’re shopping for a 3d printer. The textured surface left a nice finish on the bottom of the test print. The test print completed just under 90 minutes–impressively fast.
Other than the fan, the Vyper is almost silent. Having lived in a house with many 3D printers, we can attest that this is the quietest one we’ve ever used.
Cut to the Chase
For the money, this printer is a steal. It’s easy to set up, easy enough for a beginner to start printing in half an hour. It’s reliable enough to print batches. In fact, we didn’t have any failures at all.
If we were going to buy a printer for someone who had never used a 3D printer before, the AnyCubic Vyper would be a strong contender. It’s much easier to use than an Ender 3 because of the automatic bed leveling and the high-quality parts.
The Vyper requires very few adjustments, which means that the end-user can start printing right away. The Vyper also works great with OctoPrint, so you can get access to all those great OctoPrint plug-ins .
The Vyper might be a great candidate for a print farm or school 3D printing lab since they’re so inexpensive and easy to set up and because of the low failure rate.
All in all, the Vyper is a great 3D printer, well worth the money.
- WhatGeek x 3inuS Kebohub EE01 Mechanical Keyboard Review
- Mobile Pixels Duex Max Portable Monitor Review
- Trifo Lucy: The AI Robot Vacuum and Mop
- Review of Anycubic Kobra Max 3D Printer
- The OBSBOT Tiny 4K: an Impressive Webcam for PC & Mac
Maggie Marystone is a freelance technology writer, human rights worker, and storyteller based in Chicago. Read Maggie’s Full Bio
Modern 3D printers are much easier to use than they’ve ever been. They are also much more capable and reliable than early hobbyists and even commercial models. Perhaps most importantly, they are now priced in such a way that anyone who wants one can afford it.
We’ve pulled together a selection of 10 of the best 3D printers under $500. Each one is highly rated by a decent number of real-world customers and has one or two features that set them apart from the hundreds of other 3D printers on the market.
Best For Big Prints:Creality CR-10 V2
The “biggest” problem with affordable 3D printers is that they tend to be too small. Which means if you want to print projects that are larger than an action figure you have to fork out a sizable stack of money for the privilege.
The Creality CR-10 V2 comes in at the upper limit of our budget for this list and offers a very spacious 300x300x400mm build volume. This V2 model boasts a number of upgrades over the original CR-10, not least of which includes better build materials, quieter operation and a print resume function if the build has to stop for some reason.
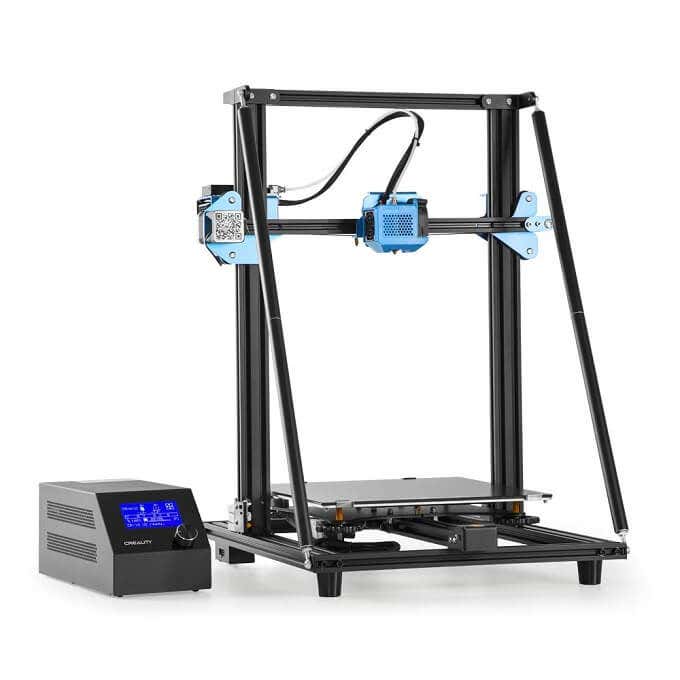
If you want large, quiet and reliable printing at the $500 price point there doesn’t seem to be all that much competition for this newly-refined big-boy printer from Creality.
Budget Dual Material Printing:QIDI TECH X-Pro
Most 3D printers have a single material extruder, which means you can only print your project using one type of filament in a single color. The X-Pro offers a dual-extruder printer at the $500 price point that can print in a variety of materials as well as in two colors at once.
A dual-extruder system like this allows for some truly complex 3D prints. For example, you can print a model that has both hard and flexible materials.This is obviously more complex than single material prints, but having a printer that can print using two independent materials at this price is a big deal.
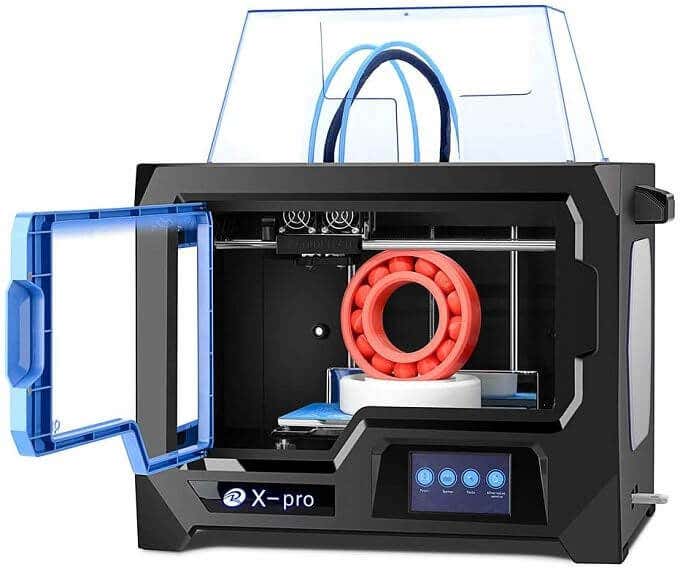
The X-Pro has some smart features. Such as the magnetically attached bed and side panels. It also has a decent build volume and, since it’s enclosed, you should have good temperature stability during your print. If you want to get into multi-material printing, this is the cheapest option we’re aware of.
Fast, Space-efficient Vertical Printer:FLSUN Mini Delta 3D Printer
Most 3D printers on the market, especially in the budget segment, are “cartesian” printers. That is, they use a three-axis print head using XYZ coordinates within the build volume. Delta robot printers such as the FLSUN Mini Delta use a different method of getting the print head to its desired location inside the build volume.
The print head is attached to three arms that run up and down independent vertical rails. By varying the height of each arm, the head can swing freely within the build space.
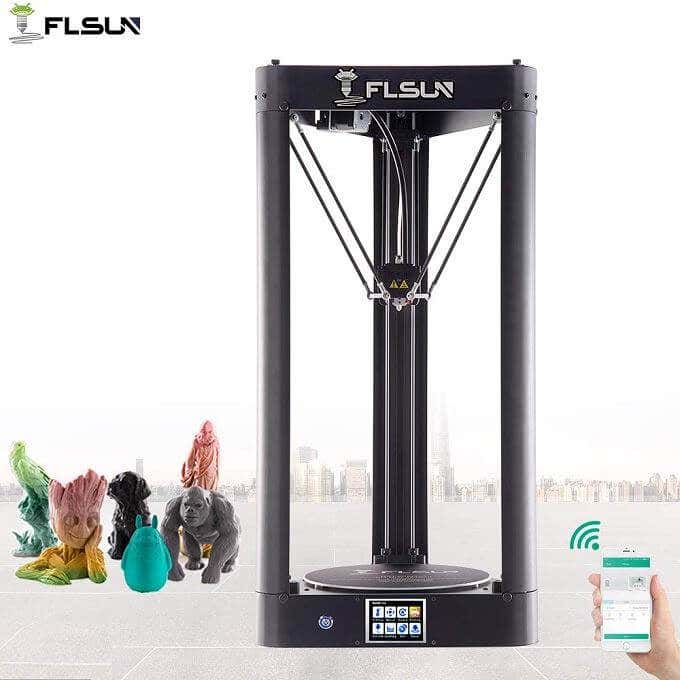
Delta robot printers like this are faster than cartesian printers, can print tall models that would need slicing in cartesian printers and can do a better job of printing curved surfaces. The downside is that they can’t quite reach the same level of resolution and precision as a cartesian equivalent.
The Mini Delta comes in at a fantastic price, has a small footprint compared to its total build volume and offers a stylish all-metal design. If you need the specific advantages of the delta robot design, this is a good budget entry.
Best Budget High-resolution Resin Printer:LONGER Orange 30
It wasn’t too long ago that resin printing was reserved for multi-million dollar engineering facilities. Now resin printers have firmly entered the consumer space and this Orange 30 is one of the best affordable models we’ve seen.
The precision and finely detailed prints that are possible with the Orange 30 are incredible. It uses a 2560×1440 LCD screen to mask each of the print layers, allowing for complex structures and stunning prints. It also uses a matrix of UV LEDs for curing, ensuring uniform levels of UV light across the LCD screen.
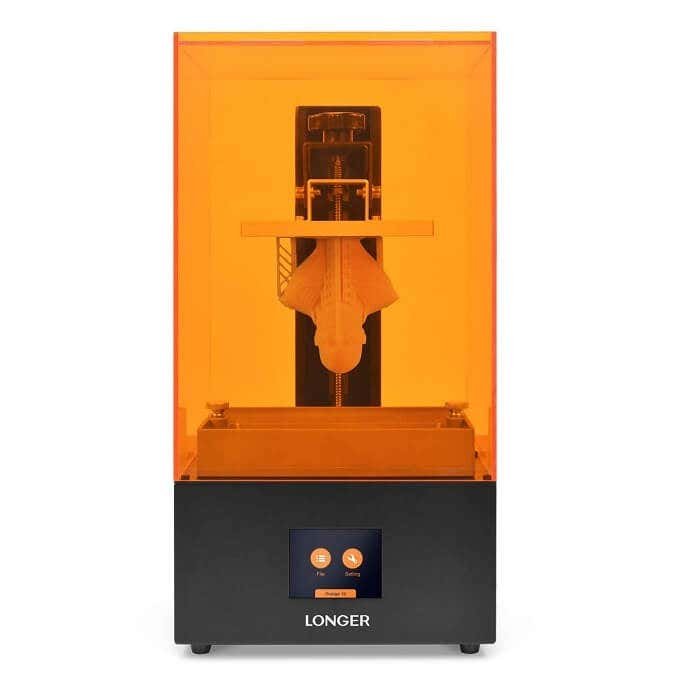
This LCD-based SLA (stereolithography) is a new approach to the traditional industrial rapid prototyping method that’s been in use for decades. It’s a smart way to use existing consumer technology to achieve something new. If you don’t want to build structural models and care mainly about aesthetics, this has got to be near the top of your list.
The Best Beginner’s Printer:FlashForge Finder
The first 3D printers that you could buy for home use were not meant for the casual user. They needed significant assembly, setup and maintenance. We’ve had to build our fair share of 3D printers over the years and this is a key reason they’ve not been mainstream for such a long time.
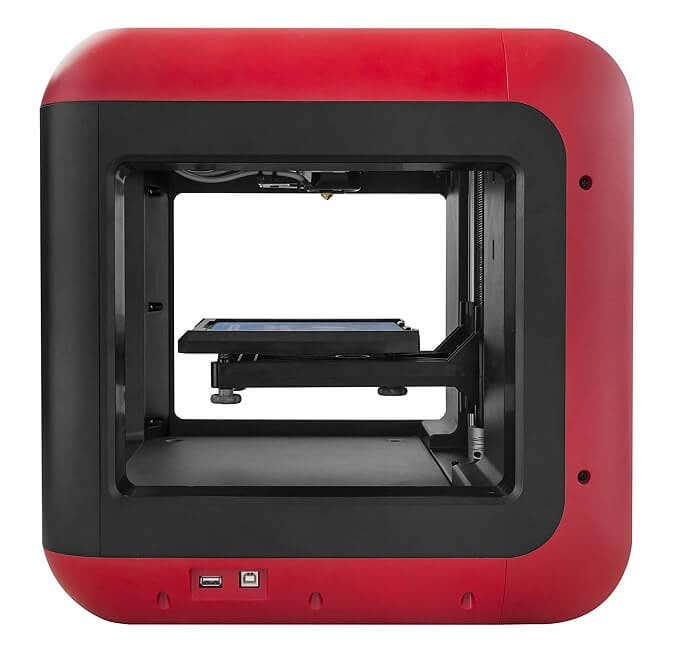
The FlashForge Finder offers a simple, user-friendly printer experience. It’s also designed to be safe to use, with rounded corners and liberal use of plastic where needed. Operation of the printer happens through a color touch screen with a friendly graphical interface. It’s quiet, has assisted leveling and works with WiFi, so you can put it anywhere. It’s pretty much the perfect entry-level 3D printer.
A Fast Budget Resin Printer:PHROZEN Sonic Mini
The Phrozen Sonic Mini uses the same LCD curing system as the Longer Orange 30, but comes in at a significantly lower price. The biggest trade off is a reduction in print resolution, but the Sonic Mini can still achieve fine detail better than any extrusion printer at this price range.
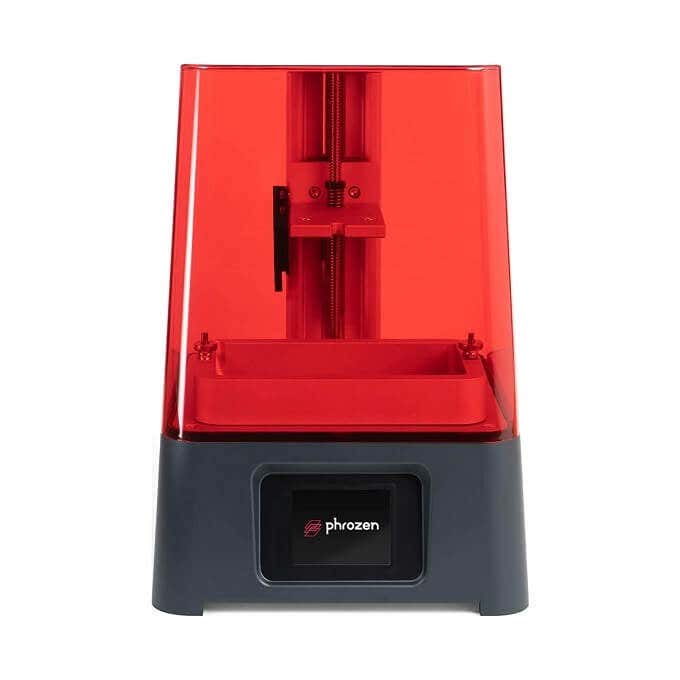
One very cool feature of the Sonic Mini is its wide resin compatibility. You don’t have to stick to first party resin or even LCD resin. This printer will even work with DLP projector printer resins! PHROZEN rates the lifespan of their LCD at 2000 hours, so you’re also likely to get years of service from this entry-level machine unless you decide to upgrade for other reasons.
The Best All-rounder For Everyone:Comgrow Creality Ender 3 Pro
The Creality Ender 3 is the very definition of “good enough” when it comes to 3D printers. It’s an open design machine that has all the most important features an extrusion-type Cartesian printer should have.
It’s an Open Source machine, which means those who like to tinker and customize can really get into the software guts of the machine, or benefit from community mods. While it is semi-assembled to cut down costs, it seems assembly is so easy that they recommend it as a project for children.
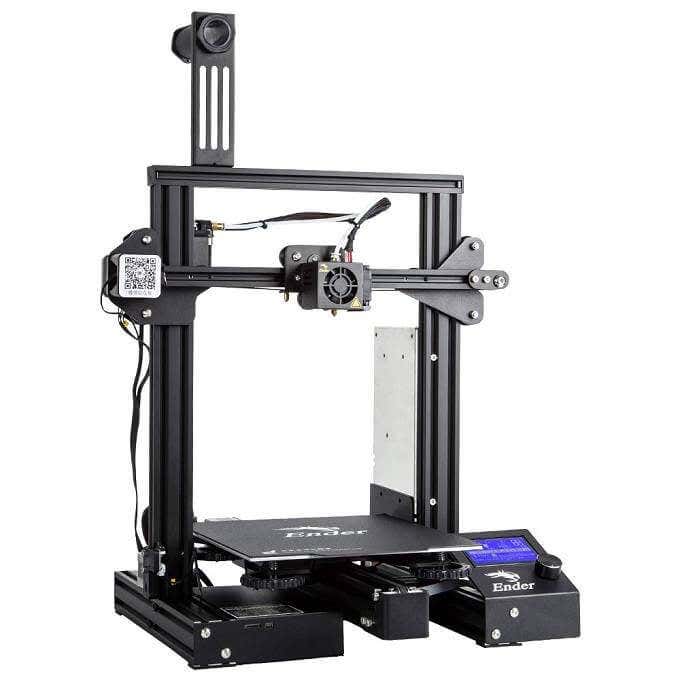
The build volume is more than decent and you get traditionally premium features such as print resuming at a great price. If you’re curious about 3D printing and want a good first experience with a fundamentally solid machine, the Ender 3 looks like the one for the job.
Best For Hobbyists With Small Budgets:JGMAKER Magic
This sub-$200 3D printer from JG Maker straddles the line between a basic hobby-grade dabbling printer and more serious machinery. It’s got an open bed design and a decent build volume, so you should be in a position to print most useful items and not just small curiosities. Most importantly it has a filament runout sensor and allows you to resume printing. Fantastic features at the price!
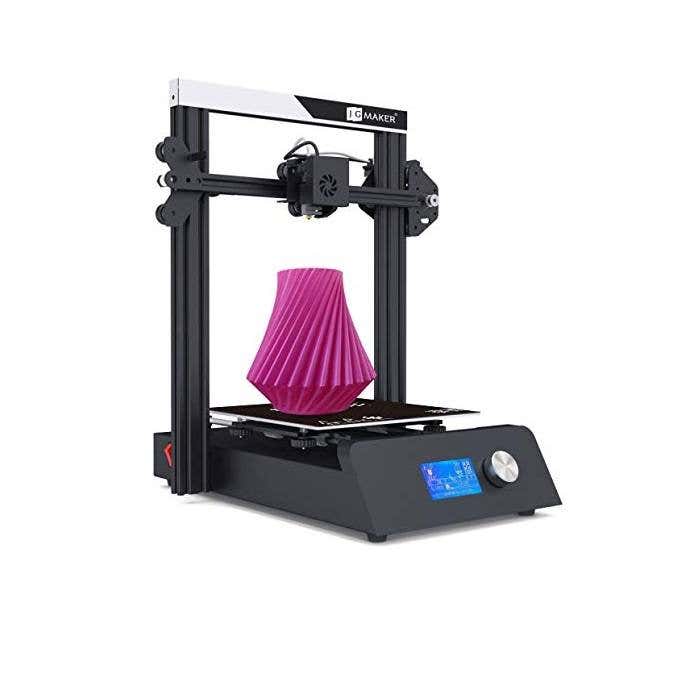
You can print models from an SD card as well, which means your printer and your computer don’t have to be anywhere near each other. WiFi would have been a nice feature, but having a sneakernet solution is better than being forced to tether the machine to a PC.
Adding $100 to your budget will see good gains in performance, build volume, noise level and the overall experience. If that’s just too rich for your blood then the Magic is an excellent choice.
Best Educational Printer:Creality Cr-100 Mini 3D Printer
Available in a kid-friendly red or yellow truck design, the CR-100 Mini is priced for the classroom or the bedroom of any precocious young engineer. This printer doesn’t require any assembly, it has automatic bed-leveling and sports a rather tiny build volume. Not a printer you could really make practical items with, but perfect for making toy models and teaching the little ones about the technology they’ll almost certainly have to use as adults.
It’s small enough to lock away from unsupervised hands and cheap enough to enable bulk purchases by schools.
Most Affordable LCD Resin Printer:QIDI TECH Shadow 5.5 S
The Shadow doesn’t need much explanation. It’s a high-resolution machine with a small build volume. It’s perfect for anyone who wants to make detailed figures and other models or prototypes that aren’t meant to be load-bearing or durable.
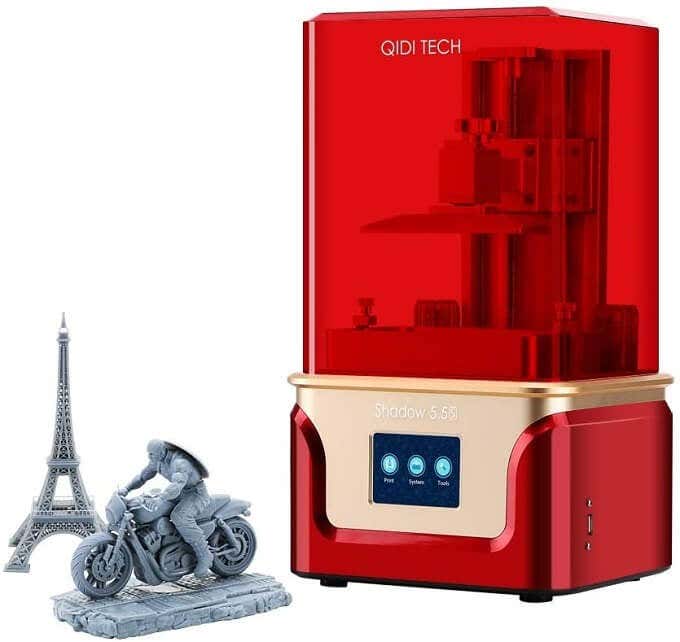
For this price it’s in impulse-buy territory but it will outperform most extruder-type printers at many times the price. If you’re looking to take your Dungeons & Dragons hobby to the next level, this is absolutely the best deal you’re going to get!
Real-world Replicators?
While we’re not quite there yet when it comes to real-world replicators like the ones you’ve seen in Star Trek, it’s still mind-boggling that you can buy what amounts to a desktop production facility from these best 3D printers for well under $500.
Whether you just want to play with the technology or have practical applications for your new 3D printer, there’s no doubt that this is one of the coolest gadgets to own today.
- The Best Free AI Courses to Boost Your Skills
- 6 Best Procreate Alternatives for Windows PC
- 5 Best Podcast Apps for Windows
- Best 10 Free PDF Editors for Windows
- 5 Best Audiobook Players for Windows
Sydney Butler is a social scientist and technology fanatic who tries to understand how people and technology coexist. He has two decades of experience as a freelance computer technician and more than a decade as a technologies researcher and instructor. Sydney has been a professional technology writer for more than five years and covers topics such as VR, Gaming, Cyber security and Transhumanism. Read Sydney’s Full Bio
Back in 2012, German software developer, maker, and excellent tour guide, Gina Häußge, got her first 3D printer . She subsequently wrote and released a free, open source 3D printer host controller application called OctoPrint which allows users to remotely control and monitor prints from a web browser.
“That’s nice,” you might say, “but what makes OctoPrint any different from all the other 3D printer host apps out there?” The thing that sets OctoPrint apart is its extremely versatile, pluggable framework.

The framework Häußge designed has attracted a community of developers who, in turn, continually extend OctoPrint’s features and functionality through plugins. There are currently 277 plugins in OctoPrint’s repository. Häußge says, “All in all 194 plugin authors have spent time and effort to bring you these plugins.”
Below, we’ll take a look at some of the best tools and toys for OctoPrint—plugins that will help you create better prints as well as a few that are just for fun. All these plugins can be installed for free via the OctoPrint interface.
Tools: Best Octoprint Plugins for Better Prints
Predictably, most plugins for OctoPrint are tools to help you make better prints . Installing and using the plugins below will help you improve your 3D printing game.
1.Bed Level Visualizer
To get good prints on your 3D printer, the first thing you need to do is make sure your printer’s bed is level. It’s a difficult, time-consuming process that uses up a lot of filament and can be very frustrating.
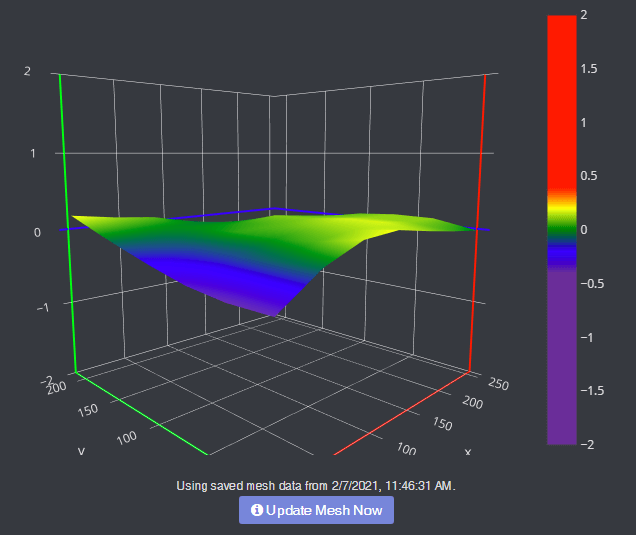
Bed Level Visualizer takes the guesswork out of that process by showing you a topographical map of your bed so you know which areas are high and which are low. If you want your bed to be perfectly level (hint: you do), this is the first OctoPrint plugin you should install. It requires that you have an auto-bed-leveling tool like BLTouch .
2.Enclosure
Putting your 3D printer inside an enclosure helps you control the printer’s environment, which leads to better quality prints. If you have an enclosure, install this plugin, and you’ll be able to control lights, switches, power, or any other sensor you can plug into your Raspberry Pi .
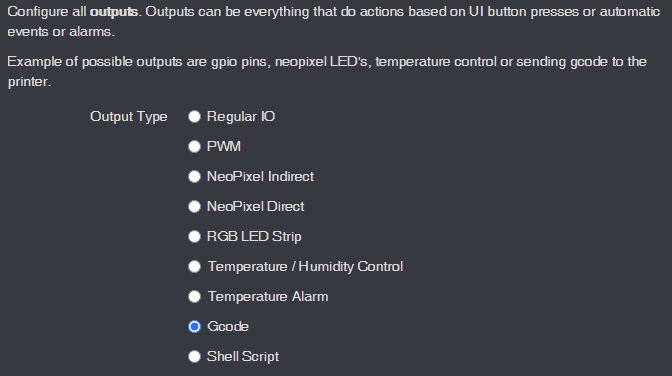
You can view temp sensors, filament run-out sensors, turn your LED lights on and off, or even change the color of your LED lights. This plugin is super-flexible and can control almost any aspect of your enclosure environment that you can imagine.
3. The Spaghetti Detective
When a print goes wrong, the result can look like a plateful of spaghetti. Moreover, if you’ve left your printer unattended, you won’t even know your print has failed until you check.
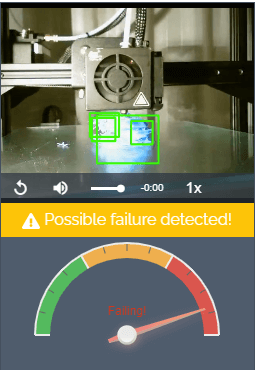
Enter The Spaghetti Detective, an OctoPrint plugin that puts AI deep learning to use by analyzing the images from your webcam for any indication that your print is failing. In other words, The Spaghetti Detective will detect failed prints and send you a message so you can react accordingly.
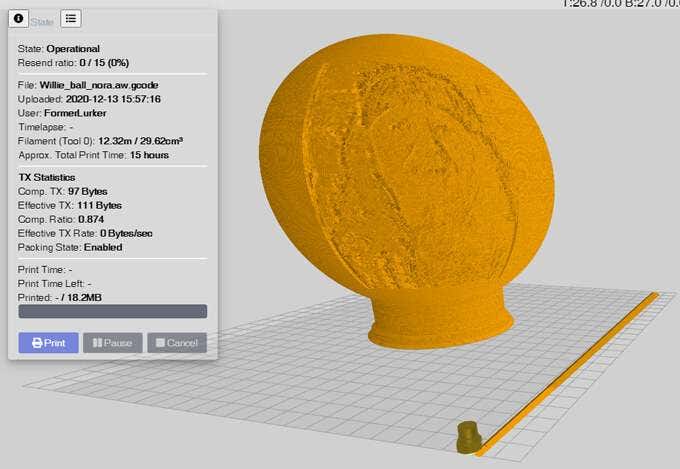
4.Pretty GCode
The Pretty GCode plugin is an excellent 3D model viewer. Click on your GCode file and watch it render before your eyes. Rotate, zoom in on, and detect problems with your GCode files before you print. Pretty GCode even renders arc commands.
5.Firmware Updater
All software should be updated regularly. Updating your printer’s firmware can be a pain, requiring you to download the update to an SD card and then installing it locally on your printer.
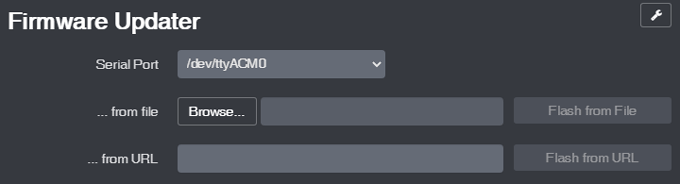
The Firmware Updater plugin allows you to flash your printer’s firmware from within OctoPrint. Just drop in the update file or URL, click a button, and soon your printer will be running the latest firmware.
6.Arc Welder*
Faulty power supplies, bad USB cables, slow serial connections, and slicer problems can all conspire to overwhelm your printer with GCode. If too many commands are sent or if your connection is slowed down, that can cause your printer to stall, and you’ll probably see evidence of every stall on your printed part. Entire forums are dedicated to solving this problem, and a lot of the advice involves recompiling firmware or other difficult operations that may or may not solve the problem.
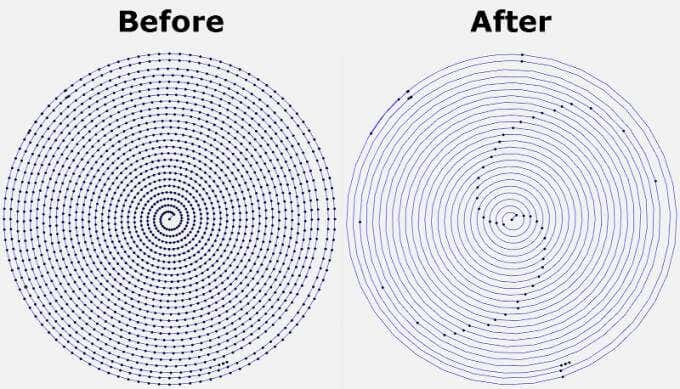
The Arc Welder plugin is perhaps the simplest fix. It reduces the number of GCodes sent to your printer— sometimes dramatically—by compressing some GCodes into arc commands. In many cases, installing Arc Welder will completely eliminate stuttering and stalling and improve your print times and quality. Not all firmware supports arc commands, but if yours does, this should be on your must-install list.
Toys: Best Octoprint Plugins for Fun
The plugins above will help you improve the quality of your 3D prints. The plugins listed below will help improve how you interact with OctoPrint and increase how much fun you have.
7.Octolapse*
Have you seen the videos ? A beautiful 3D print arises from the printer bed like magic. It’s not magic, though. It’s Octolapse. This OctoPrint plugin creates stabilized timelapse videos of your 3D prints. It does this by moving your printer’s extruder out of the way and your printer bed into optimal position before it takes each snapshot so you end up with a really smooth timelapse.
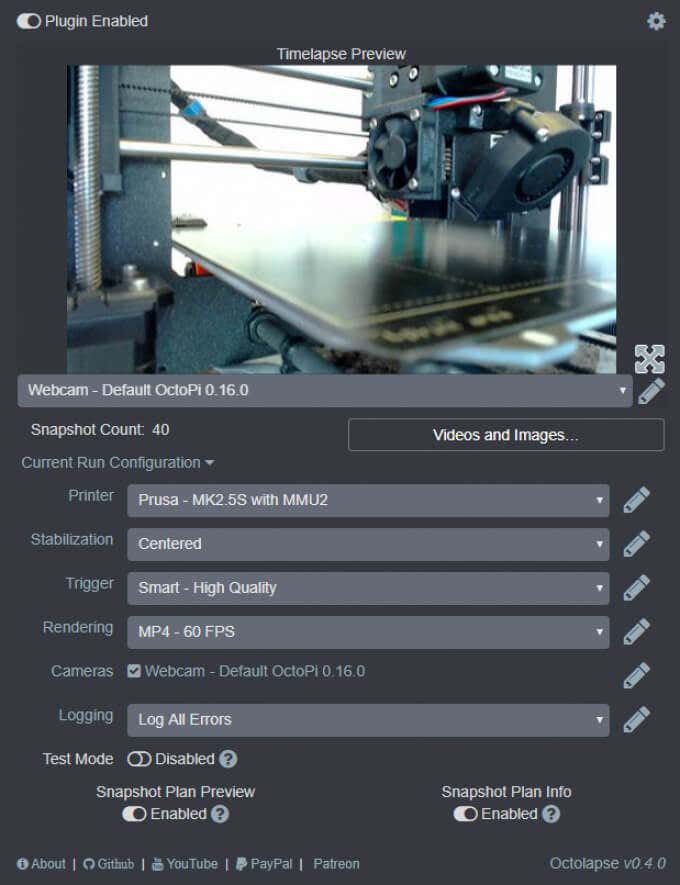
Put another way, you won’t see your printhead moving around in the timelapse, just your print growing from the printer bed. You can set specific triggers for snapshots such as at each layer change, at preset time or height increments, or when particular GCodes are sent to your printer.
8.Themeify
Given the option, many people will choose a dark theme for the apps and web pages they use most. The Themeify plugin allows you to apply themes to OctoPrint. Choose dark mode or from a variety of other pre-set themes. If you know CSS, you can customize virtually any element of the OctoPrint interface.

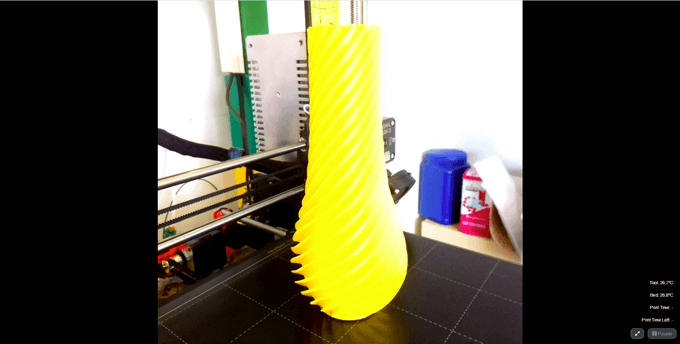
9.Fullscreen Webcam
Are you tired of watching your webcam in OctoPrint’s tiny control window? Maximize it with the Fullscreen Webcam plugin. It does exactly what you think it will do.
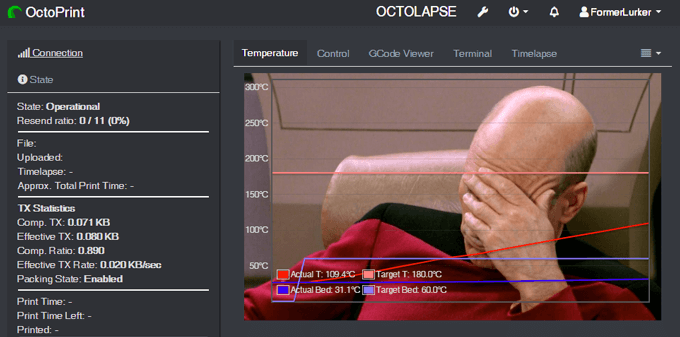
10.CustomBackground
Lastly, who doesn’t want a picture of Captain Picard on the background of their temperature output tab? Drop in any pic, and it’ll show up in the background. Fun!
*Full disclosure: The Arc Welder and OctoLapse plugins were created in the attic by my husband, FormerLurker .
- The Best Free AI Courses to Boost Your Skills
- 6 Best Procreate Alternatives for Windows PC
- 5 Best Podcast Apps for Windows
- Best 10 Free PDF Editors for Windows
- 5 Best Audiobook Players for Windows
Maggie Marystone is a freelance technology writer, human rights worker, and storyteller based in Chicago. Read Maggie’s Full Bio
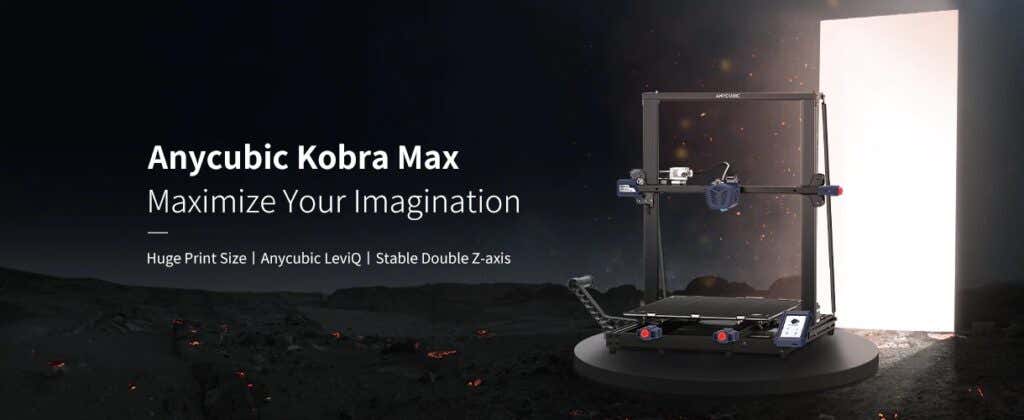
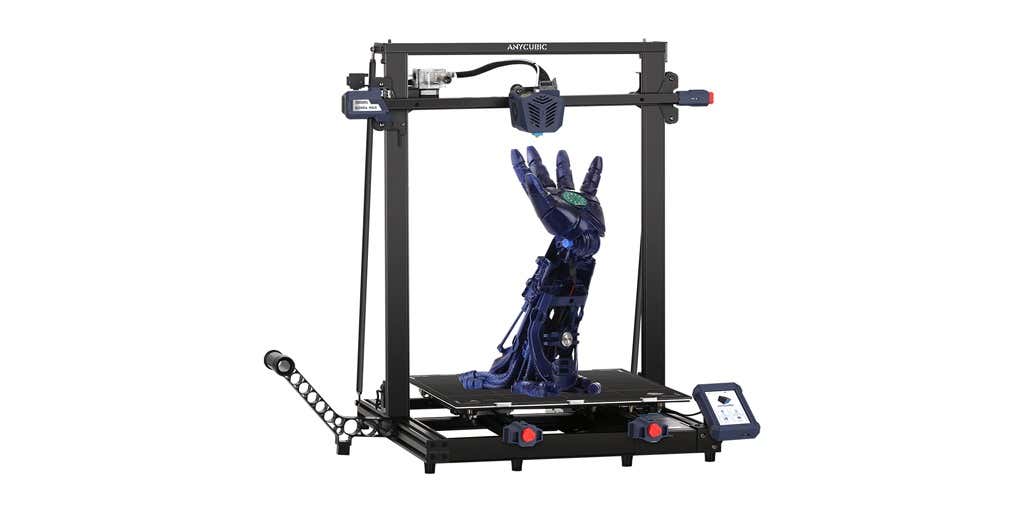
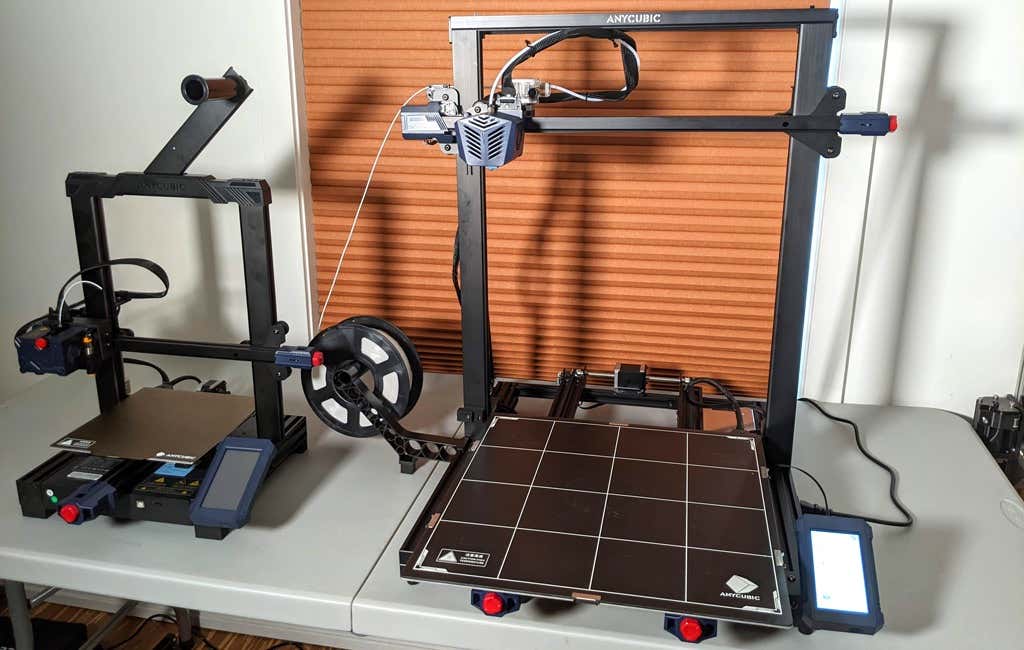
3D printer manufacturer, Anycubic, recently released two new printers—the Anycubic Kobra and its bigger, badder uncle, the Anycubic Kobra Max. We were interested in testing both products in our hunt for the best entry-level 3D printers. We’re looking for ease-of-use and affordability, as well as build and print quality.
We’ve published a number of 3D printer reviews from Anycubic—for both FDM printers like the Anycubic Vyper that print with spools of filament and SLA resin 3D printers like the Anycubic Photon Mono X 6K that use a liquid resin as its raw material—and we can say that the Kobra Max has quickly become one of our favorites.
Features of the Anycubic Kobra Max 3D Printer
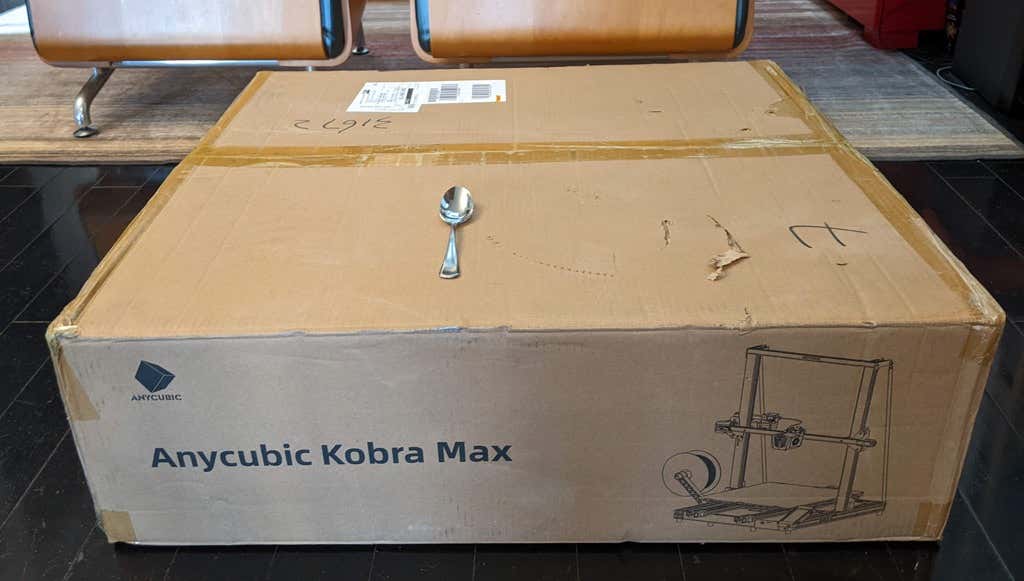
The most obvious feature of this printer is its size. It is absolutely massive. That means you can print huge items in a single piece. Think of a full helmet or an entire ukulele—these are things you couldn’t print in one piece on a normal-sized 3D printer. Truly, the word “Max” doesn’t sufficiently capture just how big this printer is. Good luck fitting the packaging into your trash or recycling bins!
We were skeptical that a Cartesian printer of this size (which relies on a moveable print bed) would perform well since it has a lot of weight to move around. Admittedly, it’s not the speediest printer out there because of those design tradeoffs, but it works great.
The Kobra Max has an impressive list of technical specifications:
- Leveling: Automatic, 25 points leveling using the Anycubic Leviq technology
- Panel area: 7.95 in² / 51.3 cm²
- Filament run-out detection: support
- Printing material: PLA / ABS / PETG & TPU
- Nozzle size: ø 0.4 mm (replaceable)
- Nozzle temperature: ≤ 500 °F / 260 °C
- Hot bed temperature: ≤ 194 °F / 90 °C
- Average speed: 3.1 – 3.9 in./s (80mm/s – 100m/s)
- Control panel: 4.3 inch LCD touch screen
- Z-axis: double threaded rod
- Print size: 17.7 x 15.7 x 15.7 in. / 45 x 40 x 40 cm (HWD)
- Build volume: 19.02 gal. / 72.0 L
- Machine dimensions: 72 x 71.5 x 66.5cm
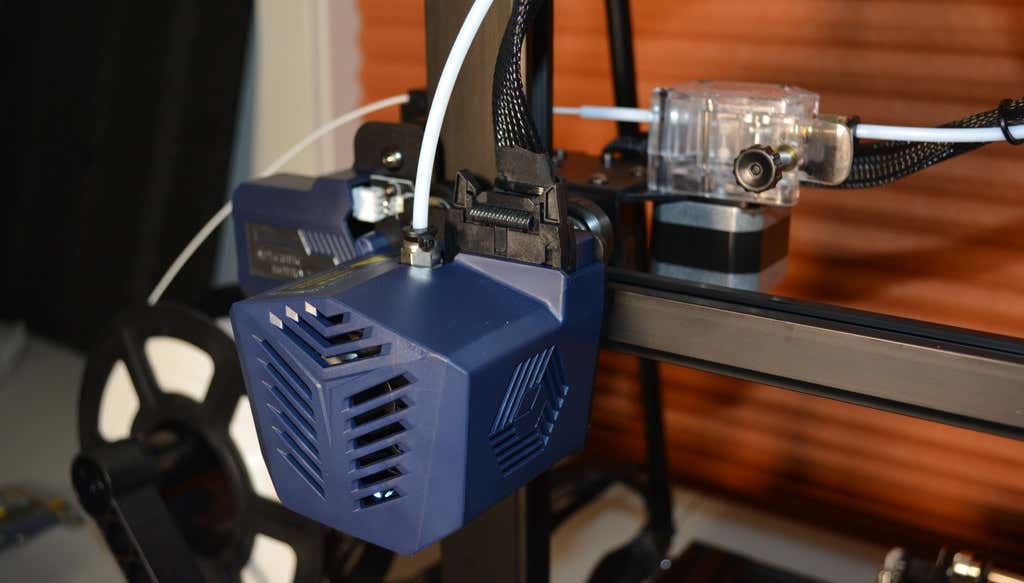
As far as we can tell, the extruder is identical to the extruder and print head on the Anycubic Vyper. Furthermore, the Kobra Max has the same automatic bed-leveling system as the Vyper. The system uses a pressure sensor instead of an inductive sensor.
The bed-leveling sensor is right on the nozzle itself, ensuring that it can probe every printable part of the bed. And since the sensor is pressure-based, you could replace the glass bed with any other material and the bed-leveling system will still work. (Inductive sensors require metal to work, so you won’t find them on printers with glass beds.)
Since the Kobra Max’s printing platform is a rigid glass sheet, you can’t remove and flex it to pop your prints off. We prefer removable spring steel build plates, but glass is still a nice printing surface. If your printer doesn’t have a removable bed, glass is ideal because you can use metal scrapers to remove your prints without worrying about scratching the surface.
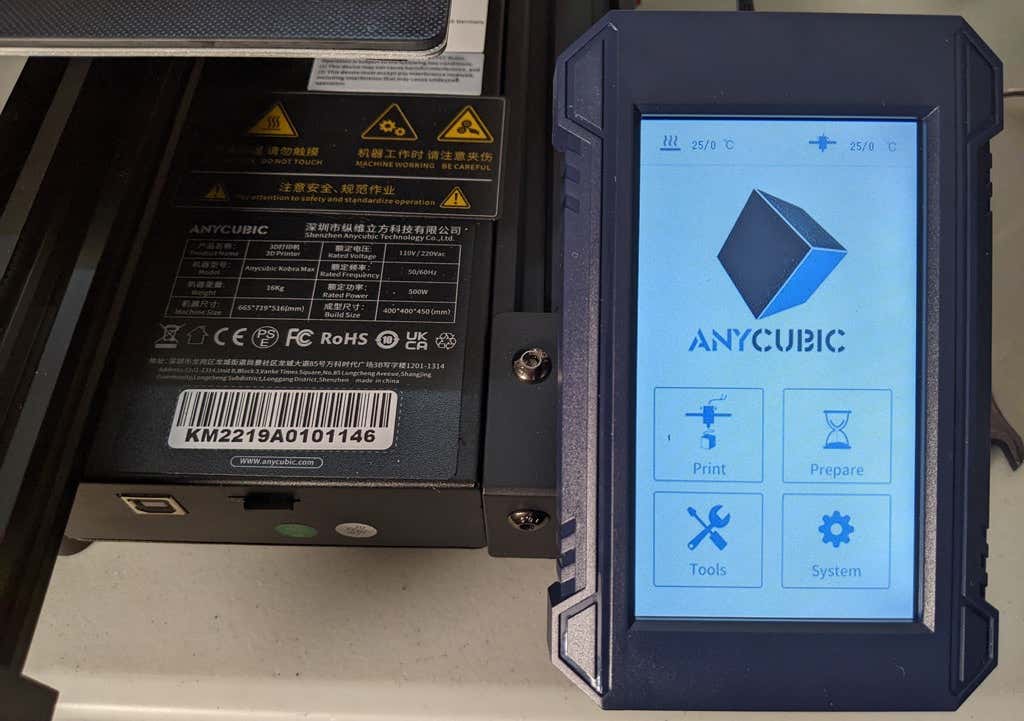
The LCD touchscreen is identical to the screens used on many other Anycubic printers. As usual, it’s responsive and easy to use.
A note about filament types: the Kobra Max will print with PLA, PETG, TPU, and ABS. However, if you really want to print with ABS and get the best possible results, the printer should be inside an enclosure. Given its size, it may be challenging to build a suitable enclosure for the Kobra Max.
Assembling the Kobra Max 3D Printer
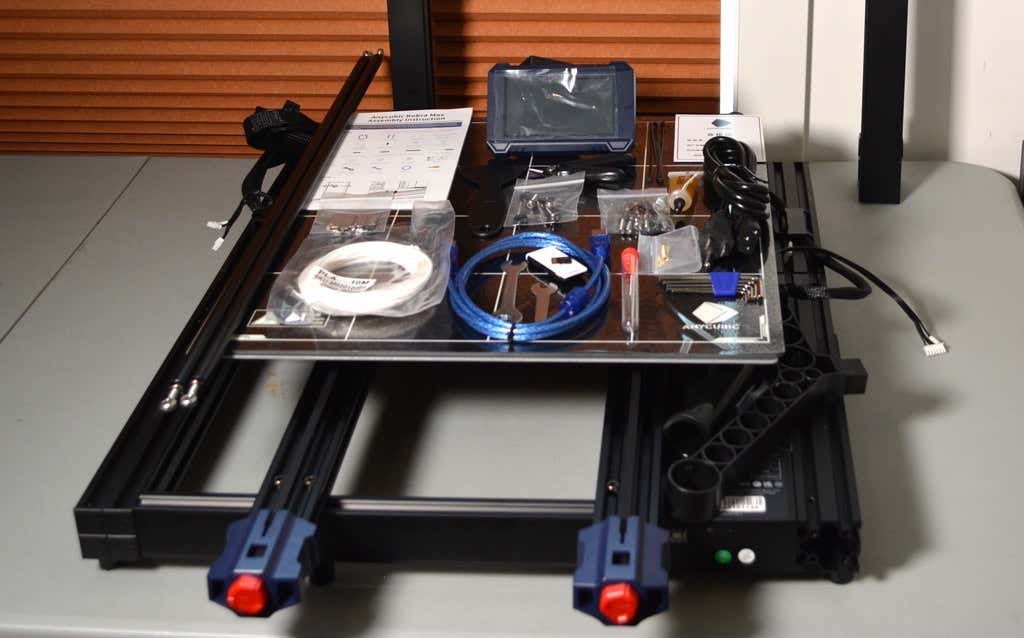
When assembling the new Kobra Max, make sure you have sufficient working space. Since the bed moves forward and backward, you need more space than you’d think. We put it on a 30” folding table, and when it’s printing, it needs about 36 inches, front to back.
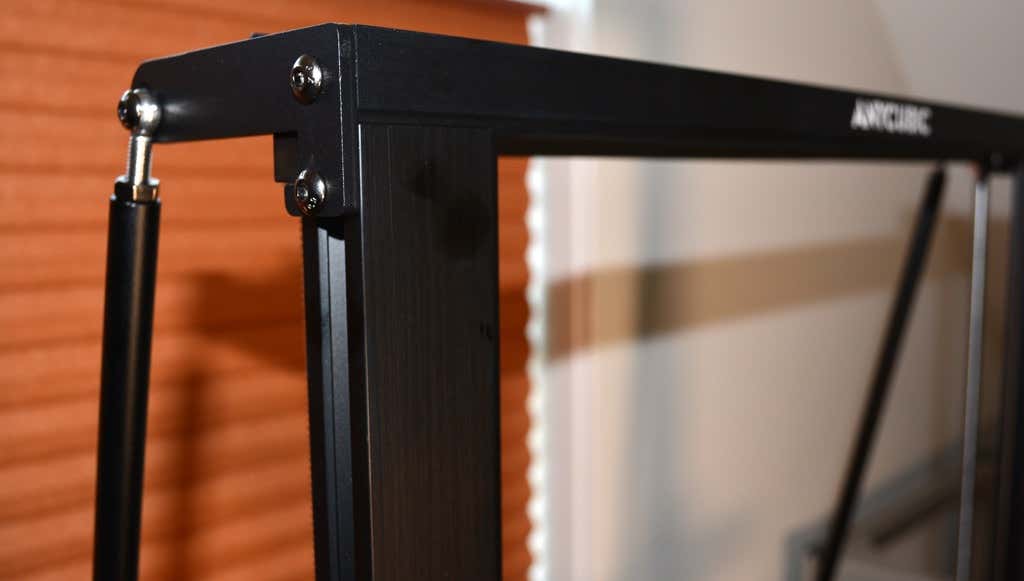
Assembly of the Kobra Max is no more difficult than assembling the Kobra or Vyper. The only additional items are the diagonal braces which add stiffness to the frame, reducing mechanical vibration.
It took two people about 15 minutes to assemble. Double-check that you’ve cut all the zip ties used to stabilize the printer during shipping. There are a lot of them.
Calibration
The auto-bed-leveling system is easy to use. Anycubic recommends that you check the x- and the y-axes to make sure they don’t wobble. If they do, you can adjust the eccentric nuts until the wobbling stops. There was no wobble on our printer, so we didn’t have to do anything.
Additionally, the x- and y-axes have belt tensioners. We needed to slightly tighten the x-axis on ours. The tensioners are easy to use and are features a lot of other printers lack. Who wants to take apart the extruder assembly just to tighten the belts? Not us, and probably not you.
Build Quality of the Kobra Max
Due to the addition of the diagonal braces, the frame is really stiff. The dual z-axis screws are an improvement over the smaller Kobra. They virtually eliminated sagging of the x-axis assembly.
The spool holder sits on the base of the printer, reducing wobbling when printing tall items. It’s better than having the spool on the top like on the Kobra.
This printer is built with aluminum extrusions with aesthetically-pleasing plastic covers for the hotend and the tenionsers. It’s got an optical z endstop. The x and y endstops are mechanical. The whole thing feels solid.
First Print
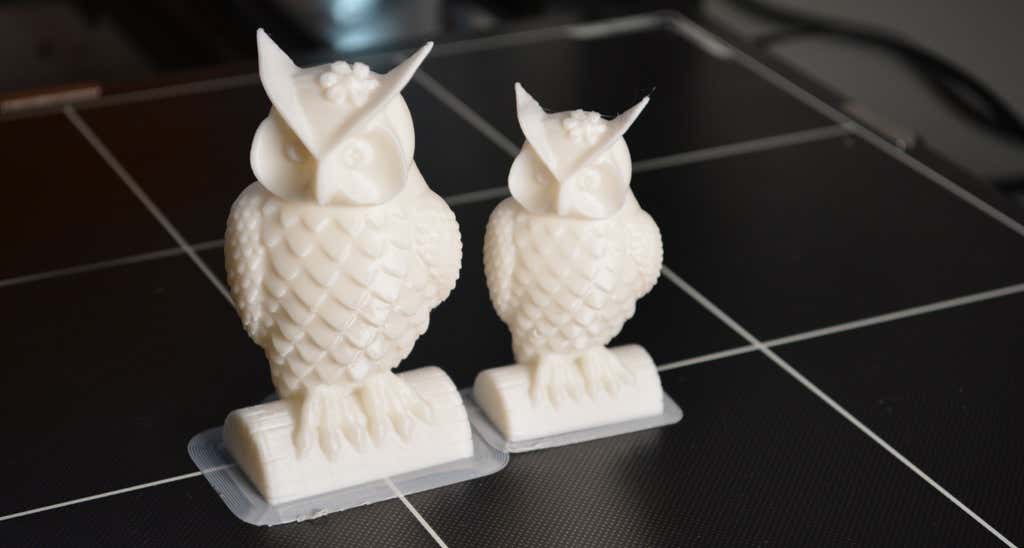
For the first print, we used the test file provided by Anycubic. Appropriately, the owl is about twice the print volume of the owl test print that comes with the smaller Kobra. Given the bowden setup (which makes sense for a printer this size), we were surprised that the ears on the owl turned out so well.
The ears look better than they did on the owl printed on the Kobra which has a direct drive extruder system. We suspect that’s due to the slower print speed. Many times, retractions on bowden extruders will create artifacts, but we didn’t notice any blobs or stringing. It approaches the quality you’d expect from a direct-drive.
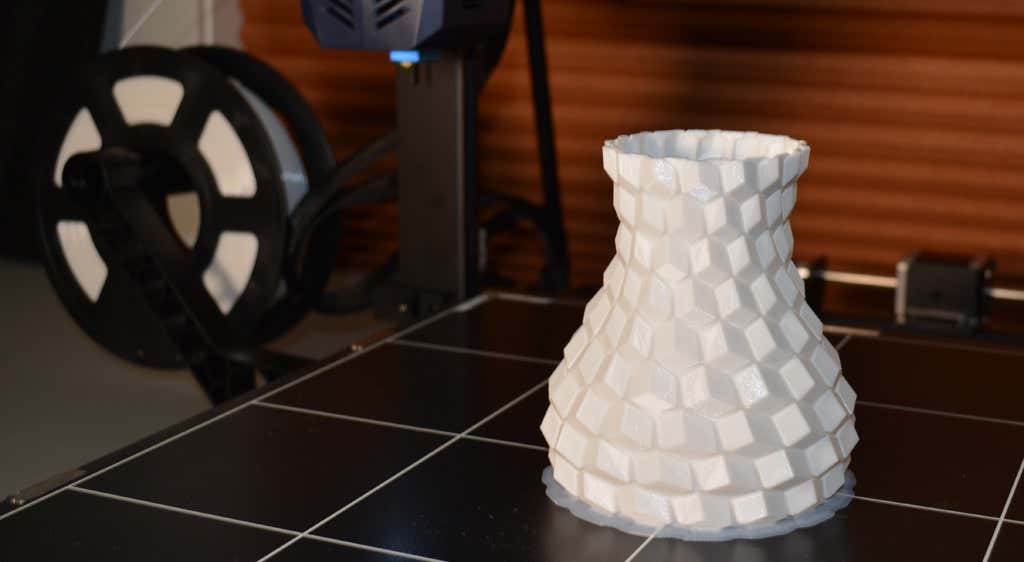
Next, we printed a vase with a large, flat base with a 0.2mm layer height. Removing prints from the glass bed is certainly not as easy as removing prints from smaller, flexible beds, but it’s not a deal-breaker either. We didn’t have any adhesion problems. The prints didn’t release when the glass bed cooled, which is what we expected and hoped for.
Curious what the power requirements would be for a printer this size, we were worried we wouldn’t be able to run multiple printers on the same circuit. We measured the power usage while the Kobra Max was printing, and, as expected, power usage is highest while the printer is warming up. Ours topped out at 473 watts. While printing, it was a more manageable 200-300 watts. We thought it would be more than that. You could probably run three of these printers on a 20 amp circuit.
Cut to the Chase
To drive home just how big the Kobra Max is, we put the Kobra on the bed of the Kobra Max. Insane. (We do not recommend you try this.)
A small printer is limiting, so if you find yourself printing large objects in small pieces and assembling them, consider buying a Kobra Max. If you’re new to 3D printing, keep in mind that it takes a long time to print big objects—potentially days and days. Typically, we’d recommend a smaller printer to beginners, but at the price point of $569.00 if you purchase on the Anycubic site, it’s worth considering as an entry-level printer.
One downside is that smaller prints will take a little longer than they would on a smaller, faster printer. That’s just physics. Bigger printers have more inertia to overcome and take longer to move. For example, the print time for our vase was thirteen hours. On our Prusa MK 2.5 with similar settings, it would have taken about twelve hours—not a huge difference.
*Special thanks to FormerLurker for help in reviewing AnyCubic’s Kobra Max 3D printer.
- WhatGeek x 3inuS Kebohub EE01 Mechanical Keyboard Review
- Mobile Pixels Duex Max Portable Monitor Review
- Trifo Lucy: The AI Robot Vacuum and Mop
- The OBSBOT Tiny 4K: an Impressive Webcam for PC & Mac
- Review of Anycubic’s Kobra 3D Printer
Maggie Marystone is a freelance technology writer, human rights worker, and storyteller based in Chicago. Read Maggie’s Full Bio
