No matter which version of Windows you use, there is a lot of features that are installed with the system by default, many of which you probably will never use. Disabling Windows features you don’t use can optimize your system, making it faster and saving precious hard disk space.
This article shows you how to enable and disable features in Windows 7/8/10, Vista, and XP.
Windows Vista, 7/8/10
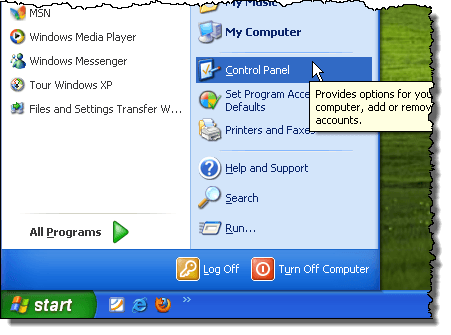
To turn Windows features in Windows Vista to Windows 10 on or off, click Control Panel on the Start menu. You can also click on Start and then type in control panel.
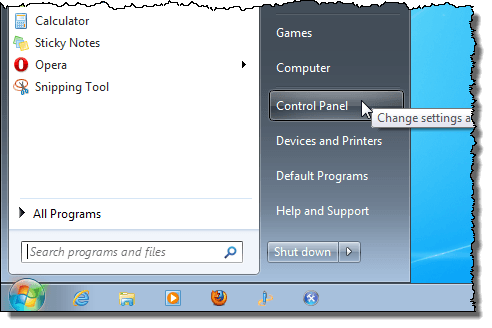
Click the Programs link.
NOTE: If you are in Classic View, the link reads Programs and Features .
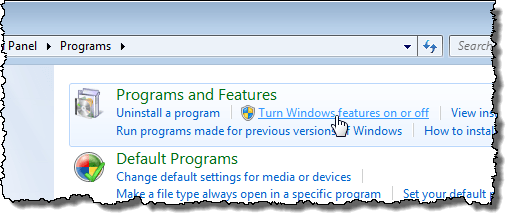
Under the Programs and Features heading, click the Turn Windows features on or off link.
NOTE: If you are in the Classic View, the Turn Windows features on or off link is on the left panel.
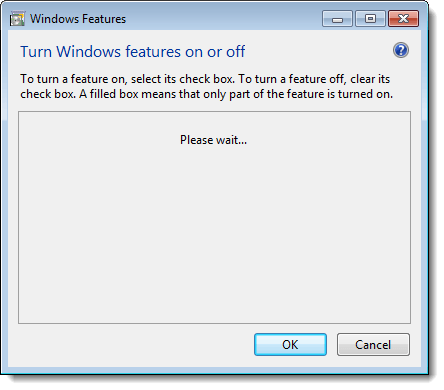
When the list of features displays, you can move your mouse over one of the features and view a description of that feature.
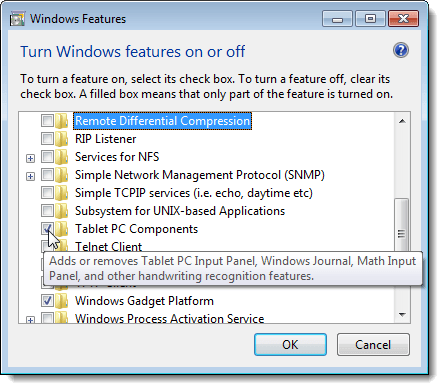
For each feature you want to turn off, select the check box to the left of the feature so there is NO check mark in the box. For example, since we are not using a Tablet PC, we decided to turn off the Tablet PC Components feature, along with some other features we don’t use. Once you have made your changes, click OK to close the Windows Features dialog box.

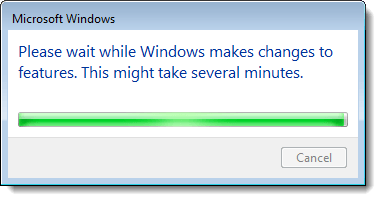
A dialog box displays showing the progress of the changes being made to your Windows system.
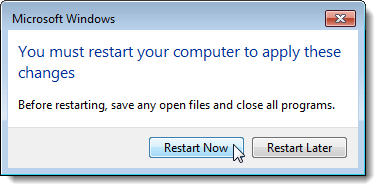
You must restart your computer for the changes to be completed. Click Restart Now if you are ready to restart the computer now. If you want to wait to restart the computer, click Restart Later .
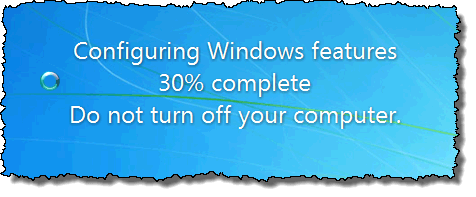
While the computer is shutting down and again while it is starting up, the following message displays. Be sure you don’t shut off the computer while the features are being configured.
Windows XP
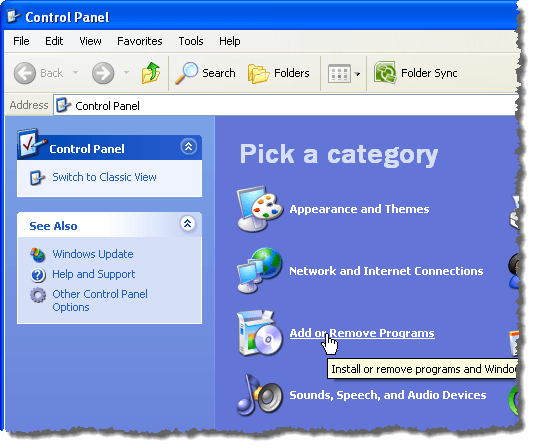
To turn Windows features in Windows XP, click Control Panel on the Start menu.
Click the Add or Remove Programs link (or the icon in Classic View) on the Control Panel window.
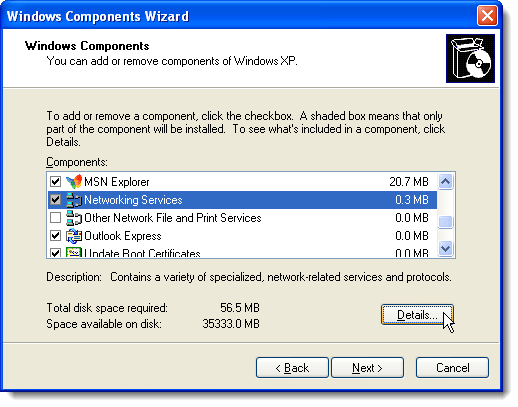
On the Add or Remove Programs dialog box, click Add/Remove Windows Components in the left panel.

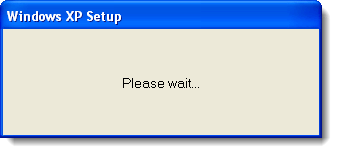
A dialog box displays asking you to wait while the list of Windows features is generated.
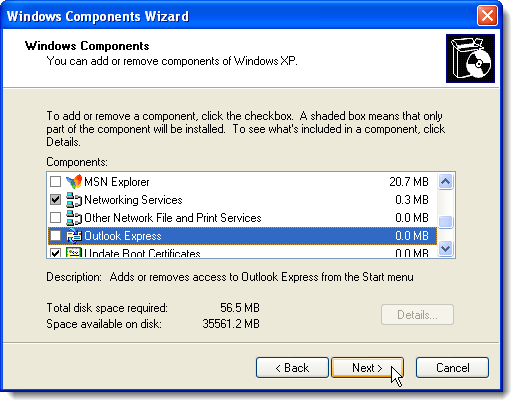
The Windows Components Wizard displays with a list of Components . If the check box to the left of a component has a gray background, there are sub-components within that component. Click Details to view the components under that main component.
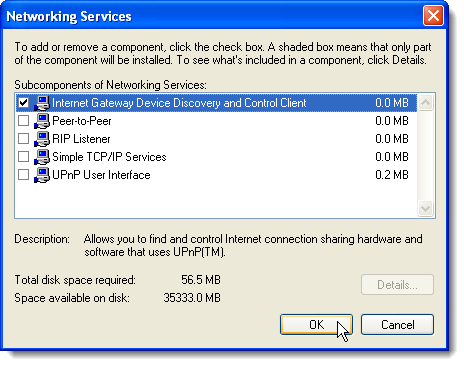
For example, the following dialog box shows the components available under the Network Services main component. You can turn on or off any of these components and click OK to accept your changes and return to the Windows Components Wizard .
For each feature you want to turn off, select the check box to the left of the feature so there is NO check mark in the box. For example, we are not using MSN Explorer or Outlook Express, in addition to some other features. Once you have made your changes, click Next .
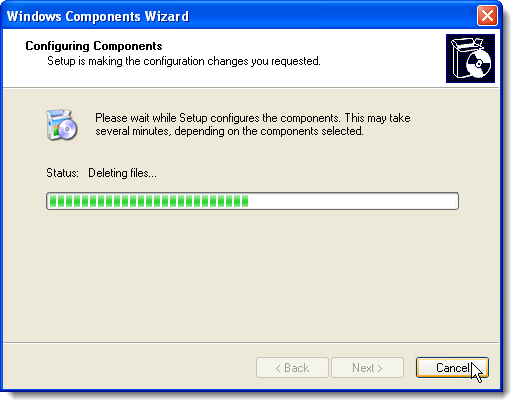
The Configuring Components screen displays the progress of the changes being made to your system.
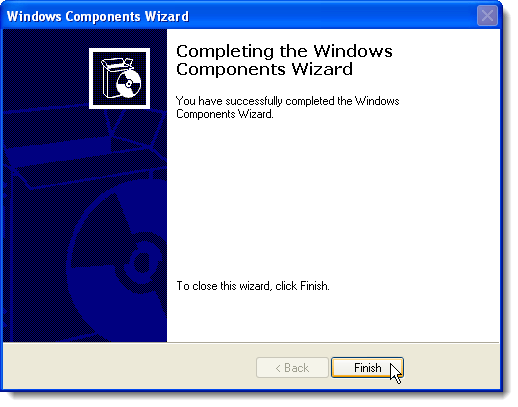
When the changes have been made, the Completing the Windows Components Wizard dialog box displays. Click Finish .
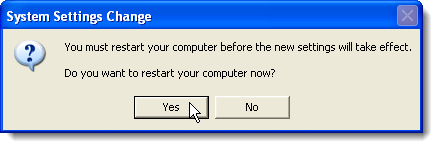
You must restart your computer for the changes to be completed. Click Yes if you are ready to restart the computer now. If you want to wait to restart the computer, click No .
You can turn on any of the Windows features again, if desired, simply by following these procedures and selecting the check boxes for features you want so there is a check mark in each check box. Enjoy!
- How to Use Event Viewer to Troubleshoot Windows Problems
- How to Boot into Safe Mode in All Versions of Windows
- How to Reset Your Computer Password If You Lock Yourself Out
- 14 Command Prompt (CMD) Commands Windows Users Should Know
- Change from Public to Private Network in Windows
Founder of Help Desk Geek and managing editor. He began blogging in 2007 and quit his job in 2010 to blog full-time. He has over 15 years of industry experience in IT and holds several technical certifications. Read Aseem’s Full Bio
