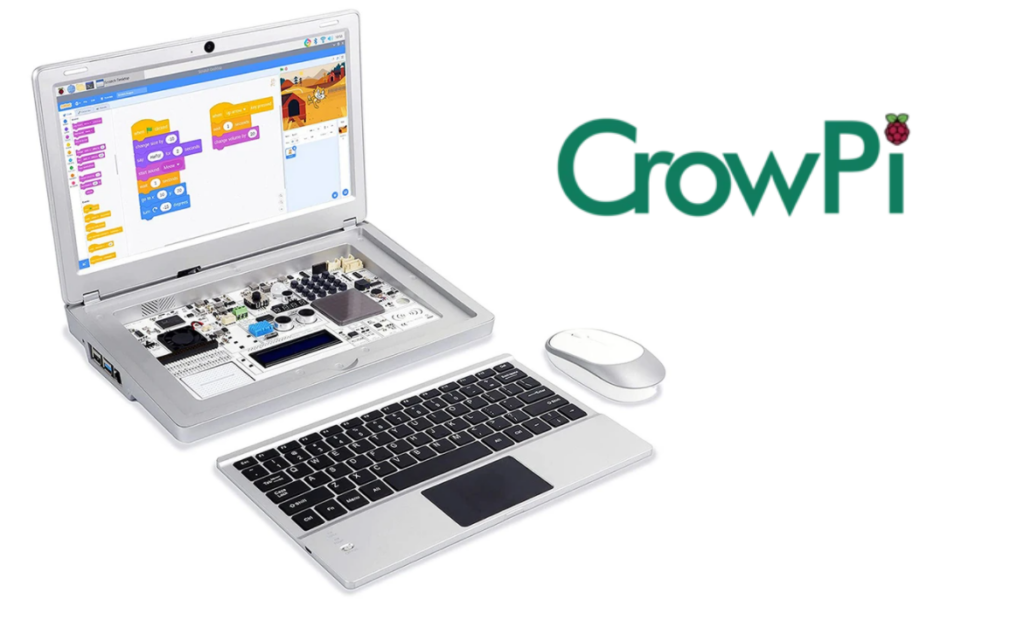
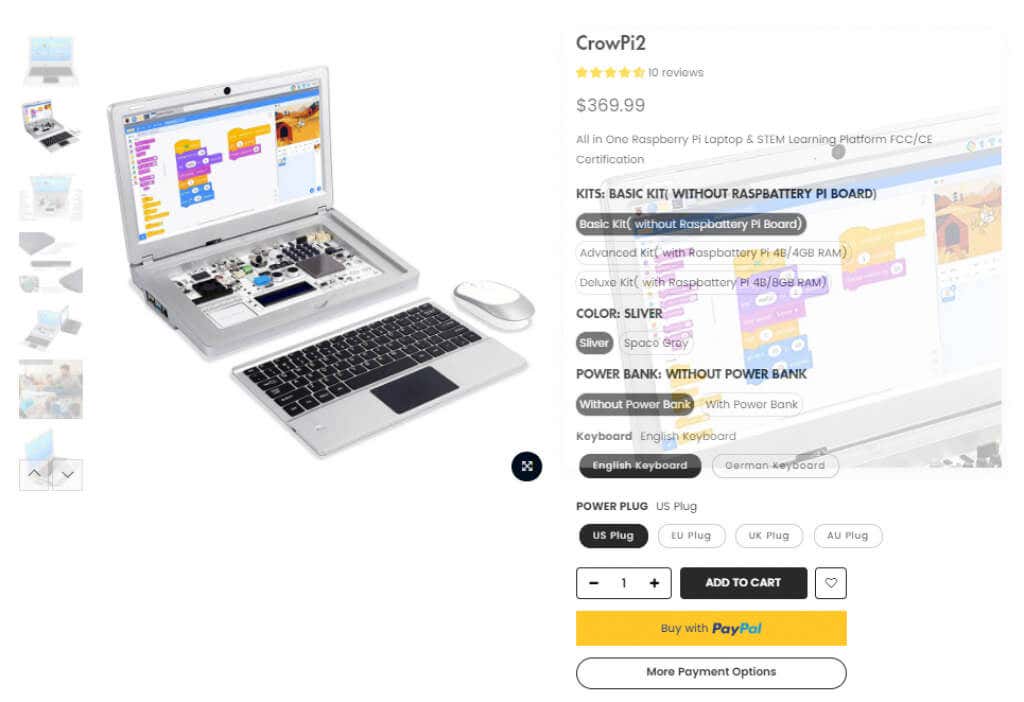
It’s probably safe to say the CrowPi2 is unlike any laptop you’ve used before. It bills itself as one of the only laptops running on Raspberry Pi 4, but it’s so much more than that. We’ll review what you get with a CrowPi2 laptop from Elecrow so you can decide if it’s worth buying.
First, we have to say this thing is wild. It’s a Frankenstein mishmash of different components, but somehow they all work together. The CrowPi2 laptop is intended to be a STEM learning platform for the kids in your life .
The laptop runs Linux, and the system can be used to learn Python, Scratch, AI, and Minecraft by following the step-by-step instructions that come in the kit. Moreover, beneath the keyboard is an all-in-one board with a bunch of sensors to help kids (or, let’s admit it, adults) learn hardware electronics while programming.
What Comes in the Box?
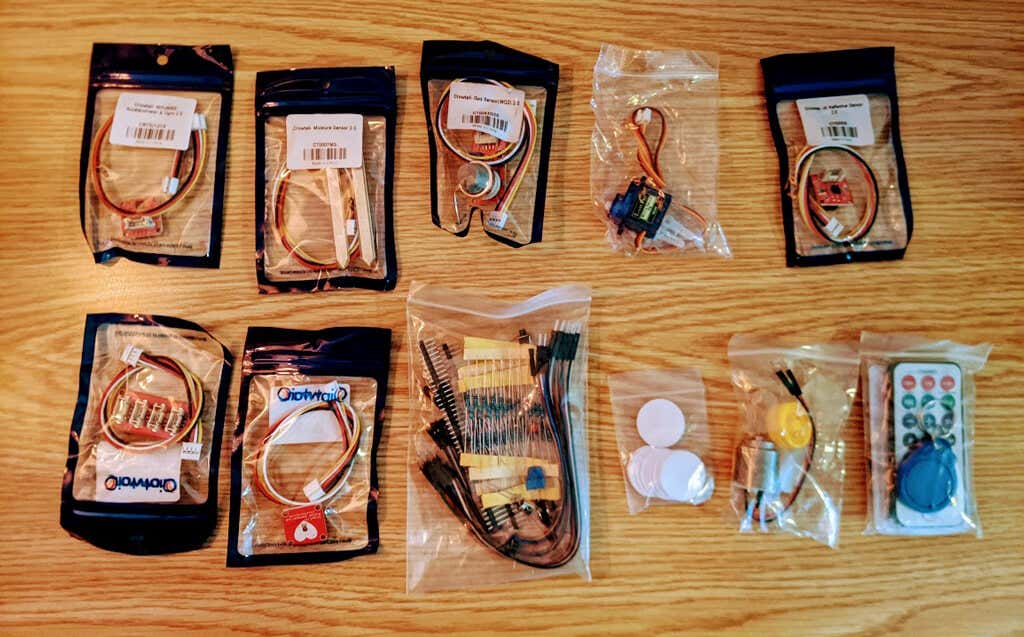
We tried out the CrowPi2 Deluxe Kit which comes with a vast array of components. Here’s an abbreviated list of what you get:
- CrowPi2 laptop with 1920 x 1080 screen, wireless keyboard, 2 MP webcam, microphone, stereo output, headphone jack, HDMI, USB port
- Raspberry Pi 4B 8GB RAM (you can order a version with 4GB RAM)
- Power supply
- 2 game controllers
- HDMI connector
- Micro HDMI connector
- SD card for the Pi with Elecrow’s proprietary learning system
- SD card for the PI with RetroPie for gaming
- Screwdriver
- 2.4 G wireless mouse
- Infrared remote control
- IR receiver
- RFID white card with tag
- Moisture sensor with cable
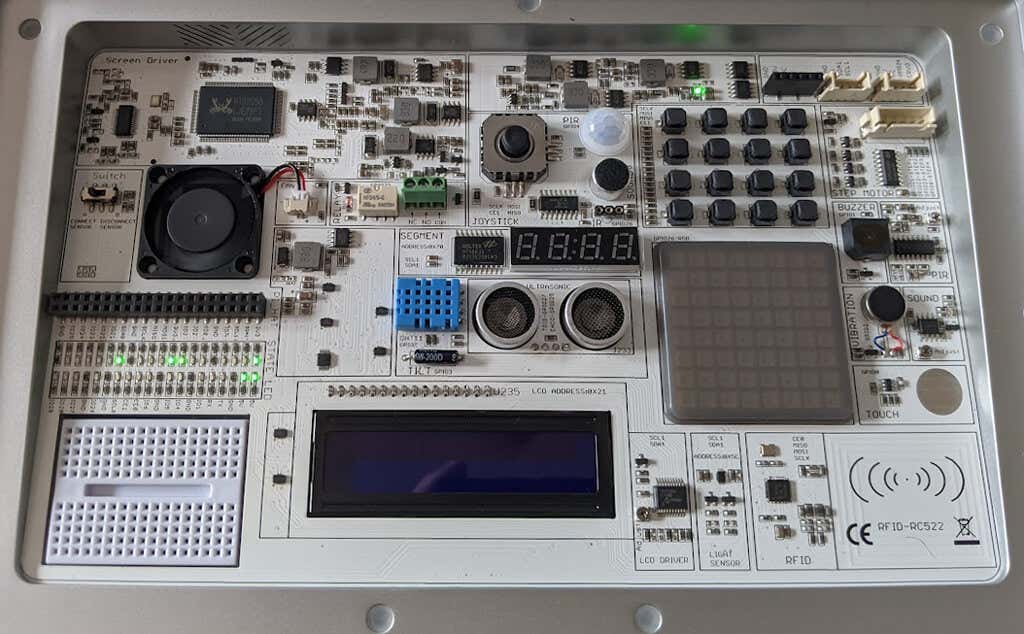
- All-in-one board with an impressive number of various sensors for learning hardware and software
- Python programming instruction book
- Scratch programming instruction book
- Mine craft
- User manual
Opening the box was overwhelming. The sheer number of tiny plastic bags with components was a sure sign that the Elecrow CrowPi2 laptop was going to provide hours of education and entertainment.
The laptop case feels cheap but certainly no worse than a Raspberry Pi case that you 3D print yourself . When we first opened the CrowPi2, the trackpad had disconnected from the ribbon powering it. It took some patience and a pair of tweezers, but we got it connected again, and it’s been working fine ever since.
CrowPi2 for General Computing
If you’ve used a Raspberry Pi running Linux before, this aspect of the CrowPi2 will be familiar to you. You could easily use the CrowPi2 laptop as a general-use laptop for running office applications. In fact, it comes with LibreOffice installed on the provided “System” Micro SD card, so you can hit the ground running.

From the main CrowPi2 startup screen, select Project, and that will take you to the Raspbian desktop.

CrowPi2 for Gaming
We have to admit, after the initial setup and getting wifi working, the first thing we did with the CrowPi2 laptop was to install the RetroPie SD card that came in the kit. It took a little finagling, but soon we were playing Super Castlevania IV.
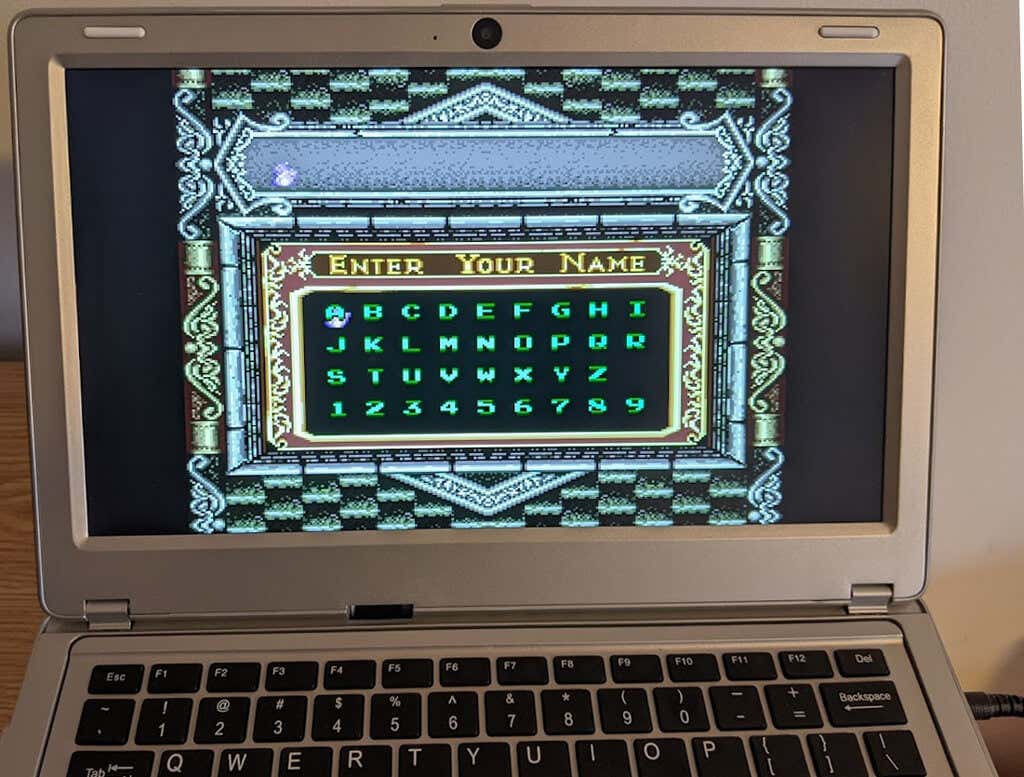
RetroPie allows you to turn your Raspberry Pi into a full-blown retro gaming machine. It is modular and allows you to install various emulators for many different consoles and legacy computer systems.

Configuring RetroPie is a bit tricky if you’ve never used it before, but fortunately, there are a lot of step-by-step videos out there to help you out. You can also install many games directly from the interface, free of charge.

You can categorize your games in RetroPie for easy browsing. By default, games are separated by the type of machine they were made for, but you are free to organize them however you wish by creating collections. You can even add themes to your collections, and there are tons of pre-made collections for you to choose from. If you don’t find any themes you like, you can create your own.
CrowPi2 for Coding
To really start working with the sensors and electronic gizmos that come with the CrowPi2 laptop, learning some Python is essential. It can be daunting for a newcomer to the STEM world, but fortunately, the CrowPi2 comes with a ton of lessons and resources.
To a complete Python novice, the lessons were straightforward and useful. Our Python expert also took a look at the learning materials and was impressed by how much of the language is covered. Suffice it to say, you do not need to be a programming expert to follow and understand the lessons and tutorials that come with the CrowPi2.
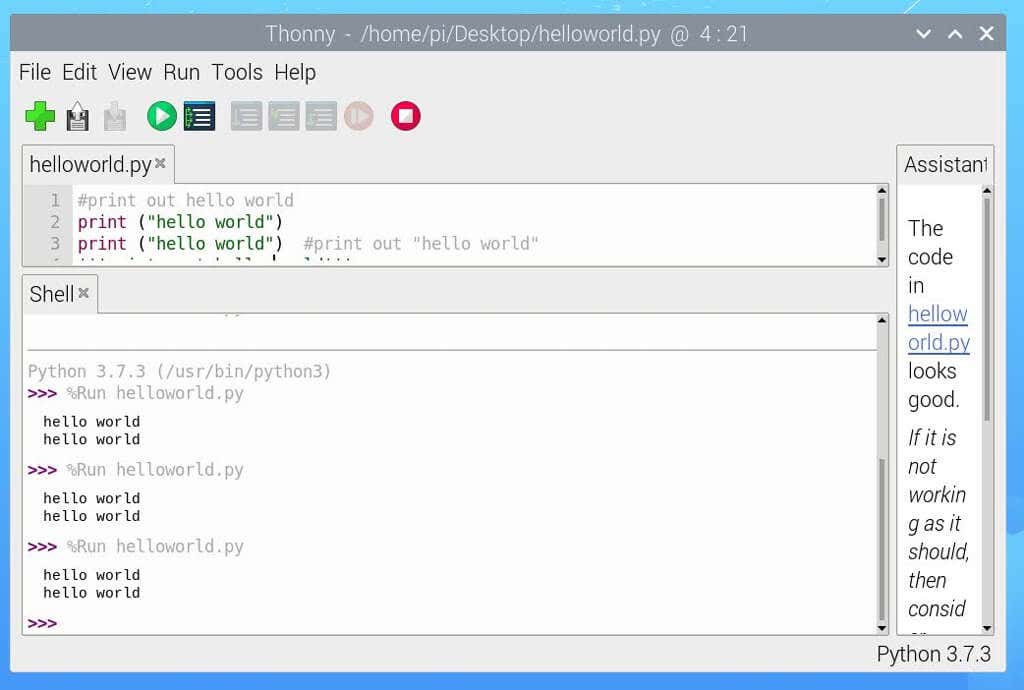
After going through a few lessons, we were learning how to do more complicated things, like identifying prime numbers.

If you or someone in your household is interested in learning Python from scratch, the CrowPi2 laptop is a great teacher.
CrowPi2 for Creating
We’ve already mentioned the all-in-one board hidden beneath the CrowPi2’s keyboard. The CrowPi2 comes with the Arduino IDE, an open-source electronic prototyping platform that enables users to create interactive electronic objects. The module list is lengthy:
- Joystick
- Segment LED
- Relay
- Cooling fan
- A switch to toggle between the sensors and the Raspberry Pi
- GPIO pin socket
- GPIO indicator LED
- Temperature and humidity sensor
- Breadboard
- Hall sensor
- Motion sensor
- PIR sensitivity adjuster
- Sound sensor
- IR receiver
- I/O/ACD/UART extension port
- IIC port
- 9G servo
- Stepper motor
- LCD display
- 4×4 button matrix
- Buzzer
- Vibration motor
- Touch sensor
- 8×8 RGB matrix
- RFID sensor
- Moisture sensor
- Light sensor
- Ultrasonic sensor
- Screen driver
- LCD brightness adjuster
- Sound sensor adjuster
We were impressed by how well the board was set up. Wiring all these electronics up yourself would take a lot of time away from learning how to code and interact with the various electronics modules that are included. Once you’re comfortable using the pre-built sensors and devices, you can move on to more advanced projects that require you add one of those external components that come with the kit.
To get started, install the “System” Micro SD, boot the laptop, and select Learning from the startup screen. From there, choose Python or Scratch to program your own projects using the on-board sensors. These projects with step-by-step instructions will help kids (or big kids like you) learn collaboratively and use logic and reason.

While the lessons are great, and you and your kids will definitely learn what the CrowPi2 says you’ll learn, we did notice that the English language translations were a little…off. For example, the intro to the Scratch lessons says, “Let’s begin our first lesson to know about what is Scratch.” The less-than-stellar translations might not be a big deal for most, but they could present an extra challenge for some users. If you get stuck, many videos are available online to help you.
Should You Buy the CrowPi2?
Depending on how comfortable you already are with Raspberry Pis, purchasing the basic kit and adding the Pi separately is the most budget-friendly option. However, if you have the cash to spare, the deluxe kit makes it easy to get everything up and running right away. Either way, the CrowPi2 laptop is sure to get your creative juices flowing and give a huge advantage to any young ones in your life who are interested in pursuing a STEM-oriented vocation. Where was this device when we were kids?
- WhatGeek x 3inuS Kebohub EE01 Mechanical Keyboard Review
- Mobile Pixels Duex Max Portable Monitor Review
- Trifo Lucy: The AI Robot Vacuum and Mop
- Review of Anycubic Kobra Max 3D Printer
- The OBSBOT Tiny 4K: an Impressive Webcam for PC & Mac
Maggie Marystone is a freelance technology writer, human rights worker, and storyteller based in Chicago. Read Maggie’s Full Bio
Raspberry Pis are getting more popular, and it’s no wonder. You can do so much with so little when you use a Raspberry Pi. These tiny computers that run on Linux are portable and affordable, often making them the perfect solution for your projects.
It’s a good idea to get a case for your Pi to shield it from its environment. You never know what can happen—you could spill a drink on your Pi or accidentally slide a paperclip into an open circuit causing damage to your sweet little wonder computer. While you can certainly purchase a case, anyone with a 3D printer can choose from a wide variety of case designs to print at home.
We’ll look at a sampling of the coolest case designs for Raspberry Pi 4, Raspberry Pi 3, Raspberry Pico, as well as some unusual custom case designs for specific circumstances and goals. All these 3D printed Raspberry Pi case designs are freely available on Thingiverse .
3D Printed Cases for the Raspberry Pi 4
The cases listed below work great for the Raspberry Pi 4 and its variants.
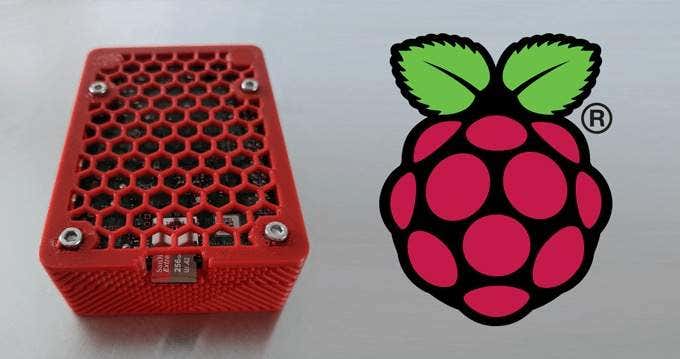
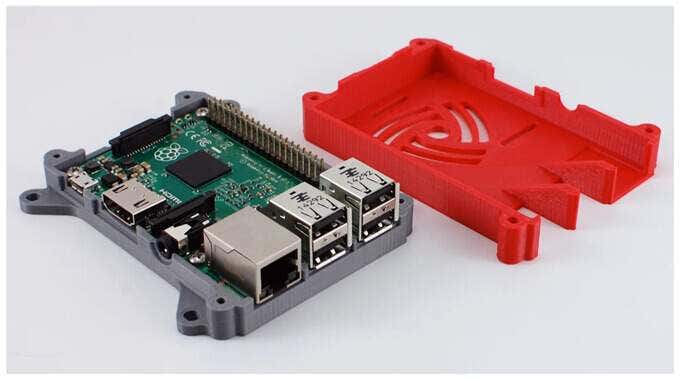
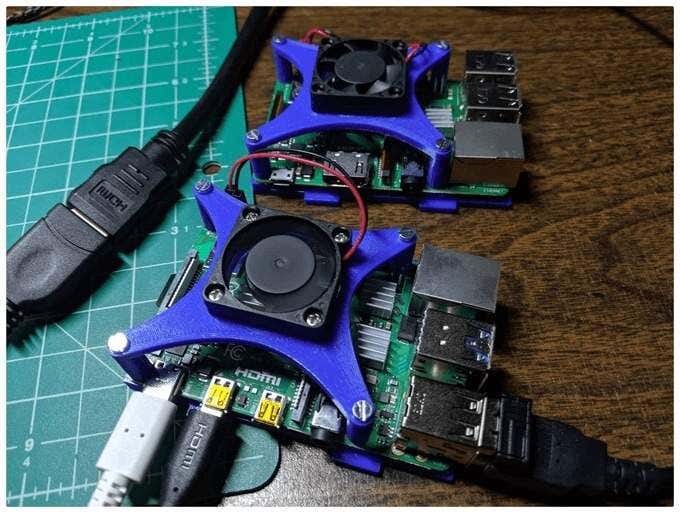
1.Raspberry Pi 4 Case
John Sinclair has designed a case for the Pi 4 that accommodates a 40mm fan. Sinclair says that the fan is designed to fit into the case’s lid without the need for glue or screws. Notably, it is printed with no top or bottom layers, which makes the infill visible and gives this case its distinctive hexagonal look.
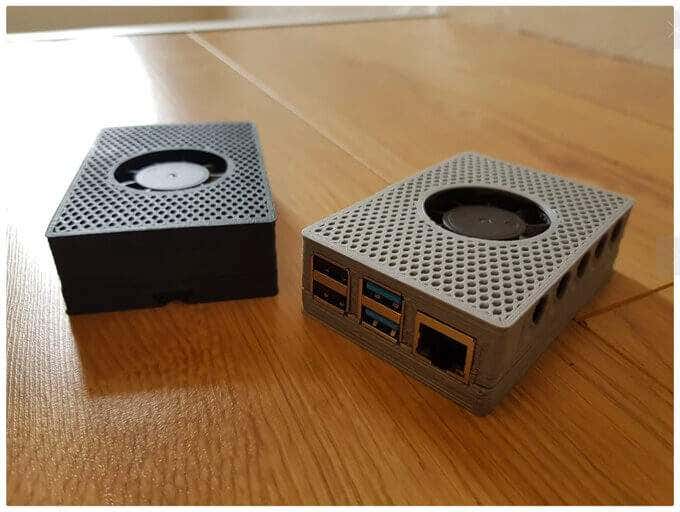
2.Raspberry Pi 4 Case, Active Cooled with Wall Mount
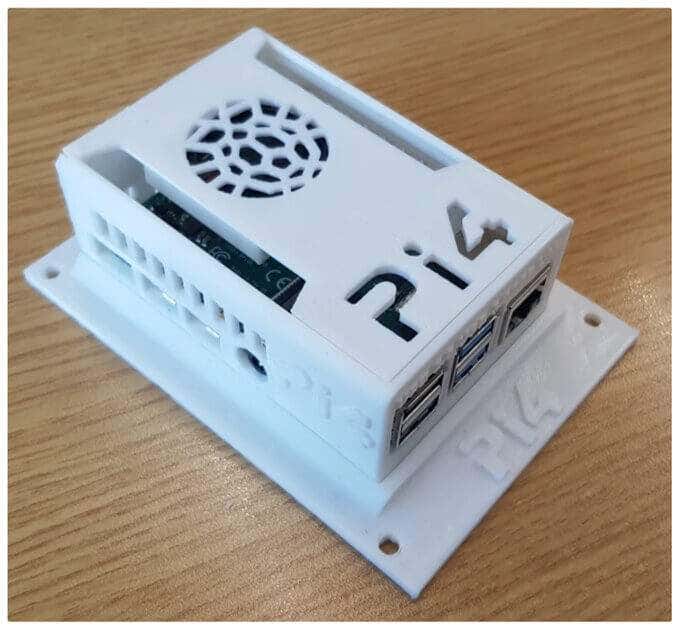
British engineer Tim Skillman came up with this well-ventilated case design that slides together without the need for glue or screws. The case itself comes in two parts, and the design also includes a single-piece wall mount.
The lid is customizable; the ports are labeled, and it’s easy to remove the Micro SD card, something that can be difficult to do with other case designs.
3.Raspberry Pi 4B Wind Tunnel Case

If you’ve added a hat to your Pi that covers the entire board, you’re going to want to get some airflow going so your Pi doesn’t overheat. This case is designed to cool the air between the board and hats that cover the entire board. Michael Kellsy’s design directs air through a duct from a fan mounted beneath the board.
3D Printed Cases for the Raspberry Pi 3
There’s no shortage of designs for 3D printed cases for the Raspberry Pi 3. Here are two that are designed to impress.
4.Raspberry Pi 3 (B/B+), Pi 2 B, and Pi 1 B+ Case with VESA Mounts and More
If you search for 3D printed Raspberry Pi cases on Thingiverse, this case is likely to appear at the top of the search results. Offered by user 0110-M-P on Thingiverse, this case design has been downloaded over 169,000 times and has over 288 remixes, which means that other designers have riffed on this original design.
It’s compatible with the Raspberry Pi 3 Model B+ and Model B as well as the Raspberry Pi 2 Models B and B+. It’s got an access slot for a Pi camera, built-in VESA mounting tabs, and a screw-together design that mounts the case to the Raspberry Pi. It’s licensed through a Creative Commons – Attribution – Share Alike license.
5.Malolo’s Screw-less/Snap Fit Customizable Raspberry Pi 3 model B+ Case & Stands
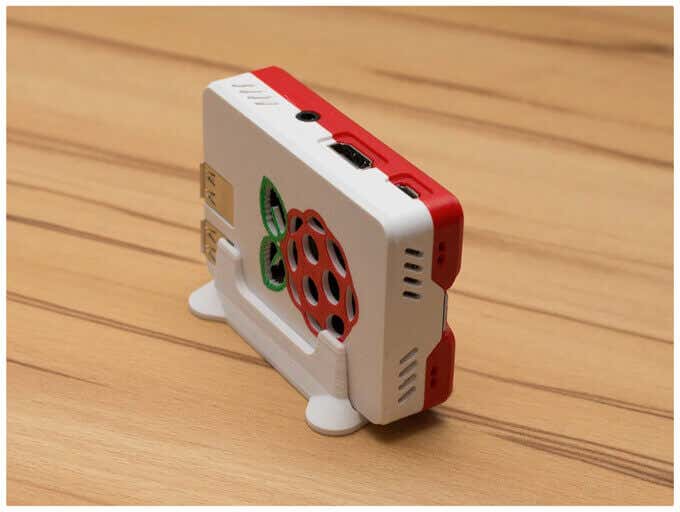
Maker Malolo has given us an easy-to-print case that doesn’t require any screws or glue. The snap-fit design is slim and compact, and it comes with three different kinds of stands: vertical, horizontal, and flat.
Even if you don’t have a multi-material printer, you can print a case with multiple colors by following his multi-color printing instructions. Be sure to click through the photos to get an idea of some different color combinations you could use.
3D Printed Cases for the Raspberry Pi Pico
The Raspberry Pi Pico is a tiny, fast microcontroller board that costs just four dollars. Amazing. It’s relatively new, so there aren’t many 3D case designs for it yet, but one of the case designs below should suit your needs.
6.Raspberry Pi Pico Case
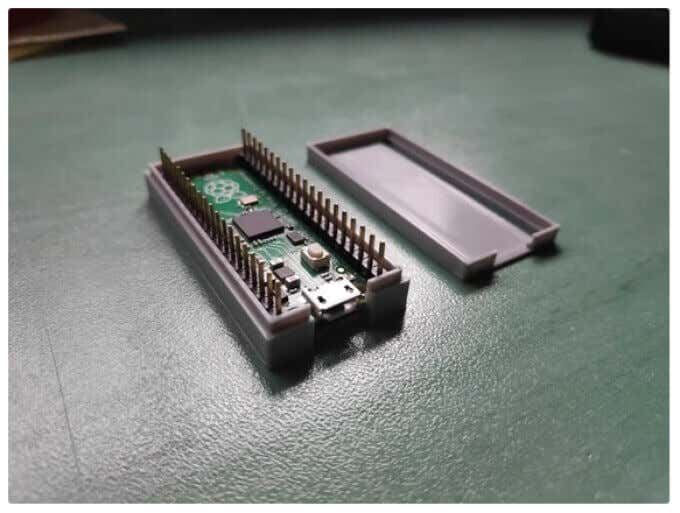
This customizable case design from David Becerro includes several setups. It’s printed in two parts, and both have versions with holes which you’ll need if you use a pin strip. Note that the holes for the required screws are not threaded, so get out your screwdriver.
7.Raspberry Pi Pico Lego Case
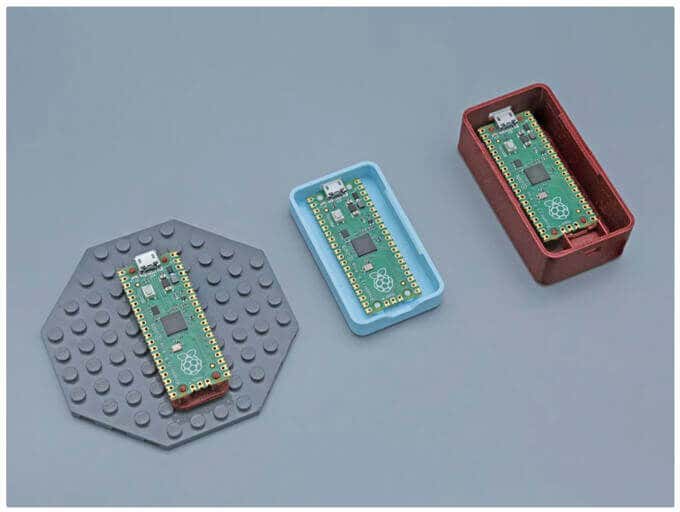
Adafruit Industries brings us a cute little Lego case for your Pi Pico. This design is compatible with LEGO. It has built-in standoffs, so your Pico will snap-fit right onto the base plate. The enclosure has space for two switches for buttons.
Specialty 3D Printed Raspberry Pi Cases
Part of the lure of 3D printing is that it’s fast and cheap to test out crazy ideas. Check out these unusual case designs for several different use cases.
8.Raspberry Pi Open “Case”
Are you the kind of person who likes to let it all hang out? If so, this is the case for you. The open design of this case by Tim Murphy allows you to position an external fan so it’s blowing directly on the heatsink. It’s a mashup of several other designs, taking the best from each and putting them all together in this innovative case design.
Murphy, who goes by knowledgecravings , calls himself a novice designer, but you wouldn’t know it.
Cat owners beware, however! The designer of this case warns, “One serious downside of an open case design is that a curious cat might decide that it’s fun to stop the fan with a claw and then bite it.”
9.Folding Raspberry Pi Case
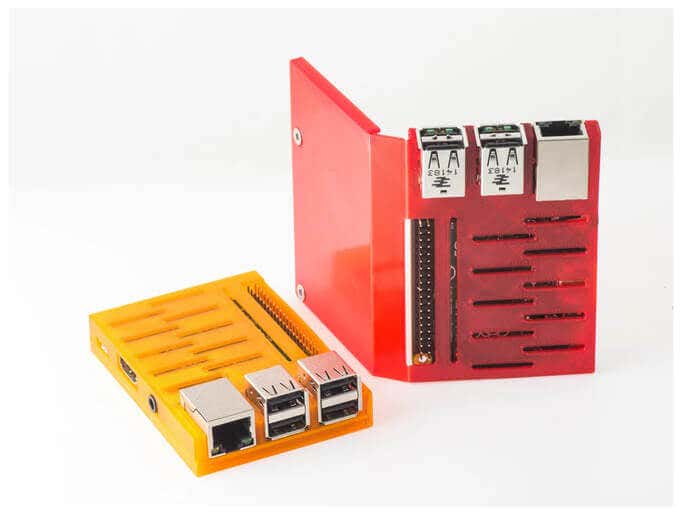
Designer Walter Hsiao brings us a folding Raspberry Pi case that prints flat and then wraps around your Pi. It’s available for The Pi 2 models B and B+ and the Pi 3 models B and B+. You’ll need two flathead screws to hold it all together.
10.RackPi Rack Shield
From Daniel Reinke, known as SliderBOR , we get the RackPi Raspberry Pi Rack Shield with OLED and Power Switch. This design features an OLED info screen with a button for rebooting and shutting down the Pi as well as an LED status light.
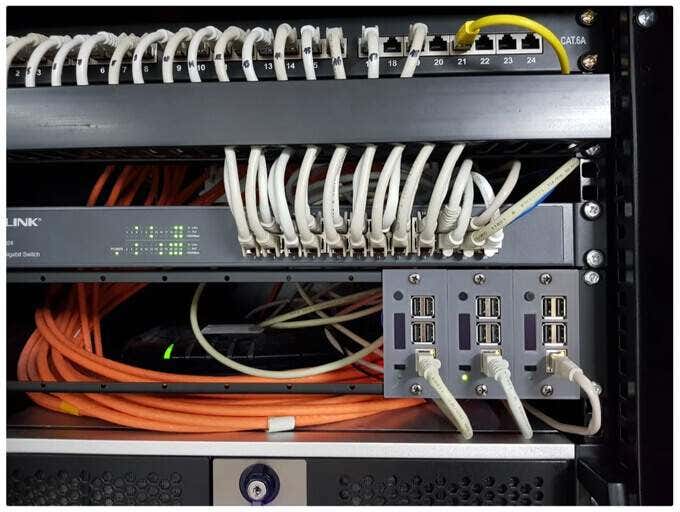
On the Raspberry Pi 4B and 3B+, the switch will turn the Pi completely off, but you’ll need some extra supplies to print this design. SliderBOR’s instructions take you through all the materials and steps to print and assemble the whole project.
- The Best Free AI Courses to Boost Your Skills
- 6 Best Procreate Alternatives for Windows PC
- 5 Best Podcast Apps for Windows
- Best 10 Free PDF Editors for Windows
- 5 Best Audiobook Players for Windows
Maggie Marystone is a freelance technology writer, human rights worker, and storyteller based in Chicago. Read Maggie’s Full Bio
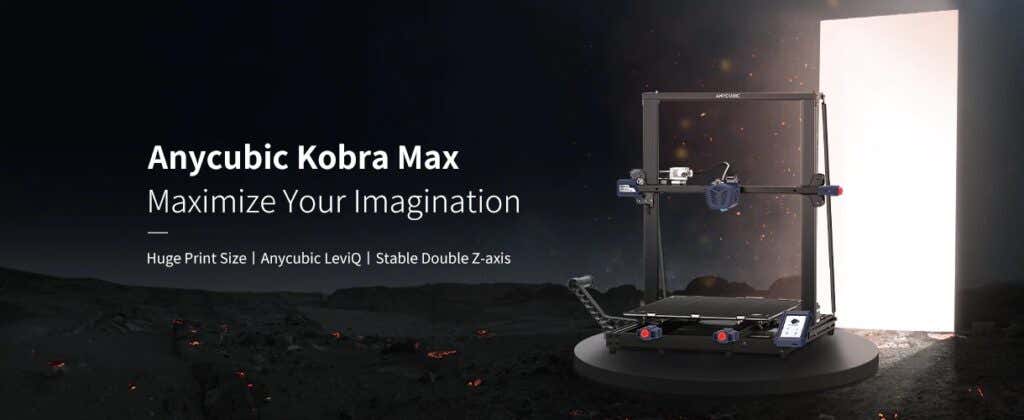
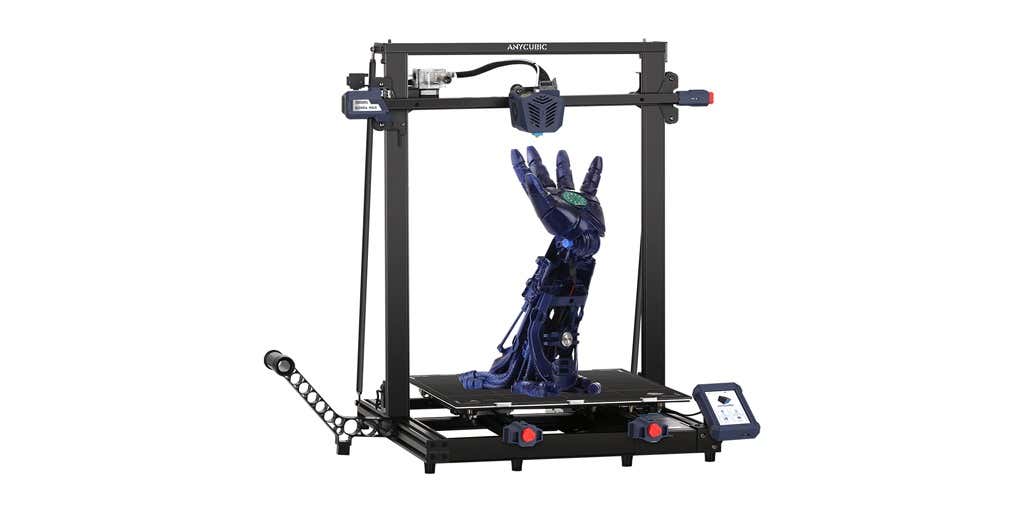
3D printer manufacturer, Anycubic, recently released two new printers—the Anycubic Kobra and its bigger, badder uncle, the Anycubic Kobra Max. We were interested in testing both products in our hunt for the best entry-level 3D printers. We’re looking for ease-of-use and affordability, as well as build and print quality.
We’ve published a number of 3D printer reviews from Anycubic—for both FDM printers like the Anycubic Vyper that print with spools of filament and SLA resin 3D printers like the Anycubic Photon Mono X 6K that use a liquid resin as its raw material—and we can say that the Kobra Max has quickly become one of our favorites.
Features of the Anycubic Kobra Max 3D Printer
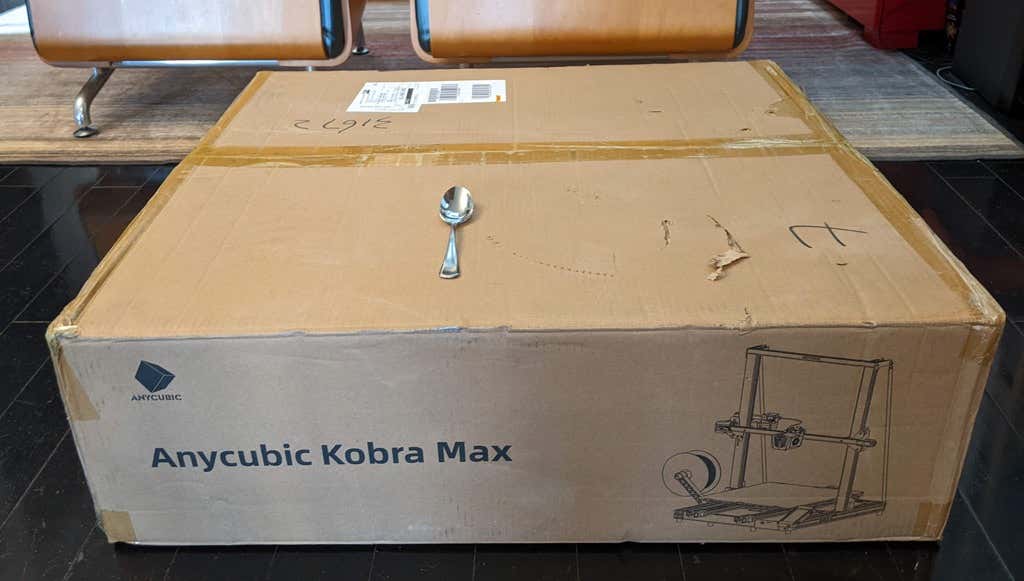
The most obvious feature of this printer is its size. It is absolutely massive. That means you can print huge items in a single piece. Think of a full helmet or an entire ukulele—these are things you couldn’t print in one piece on a normal-sized 3D printer. Truly, the word “Max” doesn’t sufficiently capture just how big this printer is. Good luck fitting the packaging into your trash or recycling bins!
We were skeptical that a Cartesian printer of this size (which relies on a moveable print bed) would perform well since it has a lot of weight to move around. Admittedly, it’s not the speediest printer out there because of those design tradeoffs, but it works great.
The Kobra Max has an impressive list of technical specifications:
- Leveling: Automatic, 25 points leveling using the Anycubic Leviq technology
- Panel area: 7.95 in² / 51.3 cm²
- Filament run-out detection: support
- Printing material: PLA / ABS / PETG & TPU
- Nozzle size: ø 0.4 mm (replaceable)
- Nozzle temperature: ≤ 500 °F / 260 °C
- Hot bed temperature: ≤ 194 °F / 90 °C
- Average speed: 3.1 – 3.9 in./s (80mm/s – 100m/s)
- Control panel: 4.3 inch LCD touch screen
- Z-axis: double threaded rod
- Print size: 17.7 x 15.7 x 15.7 in. / 45 x 40 x 40 cm (HWD)
- Build volume: 19.02 gal. / 72.0 L
- Machine dimensions: 72 x 71.5 x 66.5cm
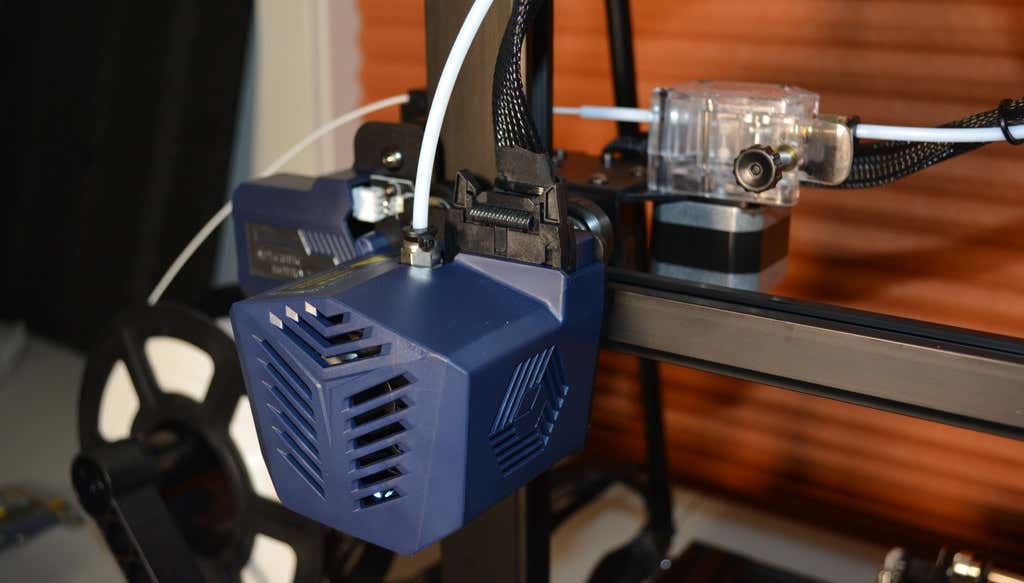
As far as we can tell, the extruder is identical to the extruder and print head on the Anycubic Vyper. Furthermore, the Kobra Max has the same automatic bed-leveling system as the Vyper. The system uses a pressure sensor instead of an inductive sensor.
The bed-leveling sensor is right on the nozzle itself, ensuring that it can probe every printable part of the bed. And since the sensor is pressure-based, you could replace the glass bed with any other material and the bed-leveling system will still work. (Inductive sensors require metal to work, so you won’t find them on printers with glass beds.)
Since the Kobra Max’s printing platform is a rigid glass sheet, you can’t remove and flex it to pop your prints off. We prefer removable spring steel build plates, but glass is still a nice printing surface. If your printer doesn’t have a removable bed, glass is ideal because you can use metal scrapers to remove your prints without worrying about scratching the surface.
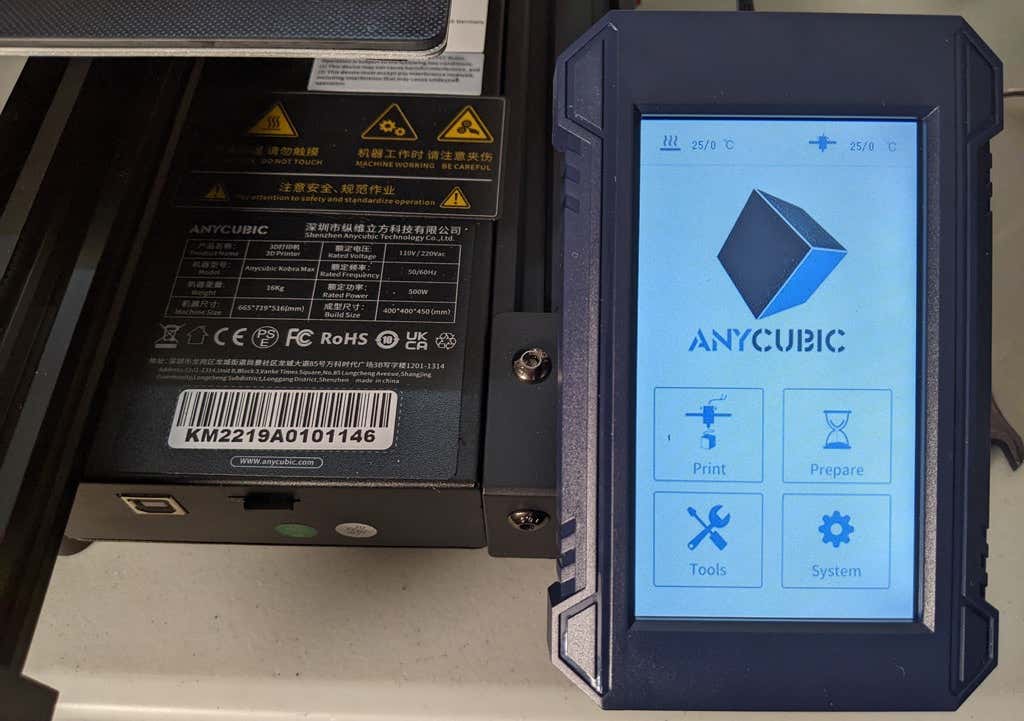
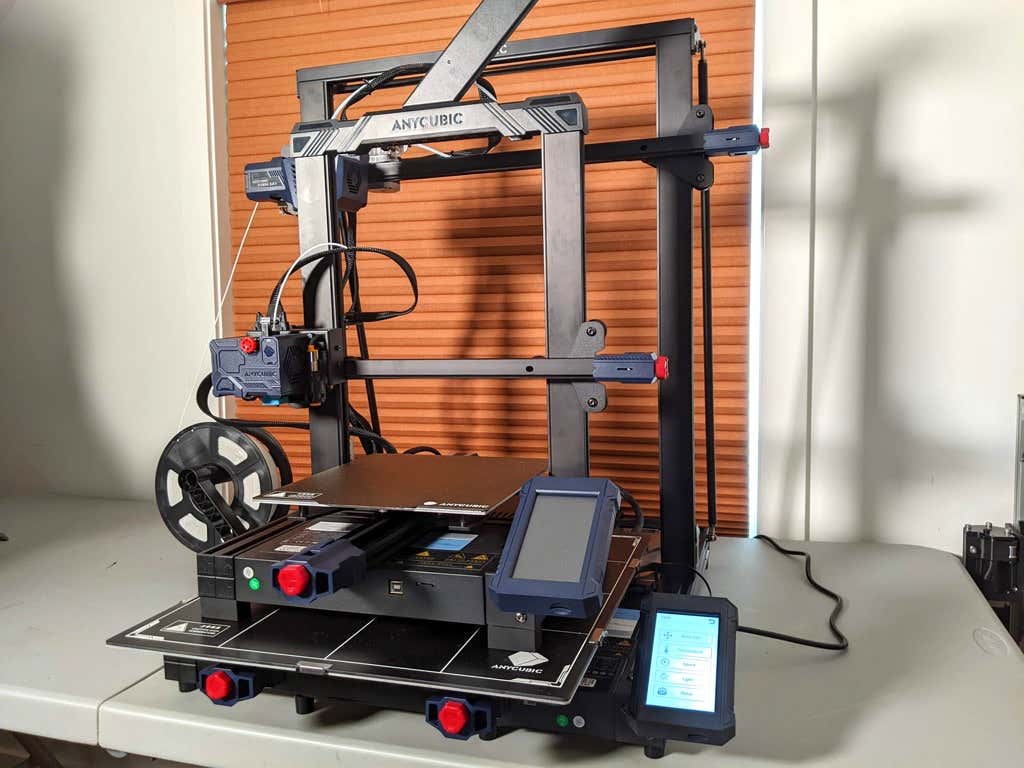
The LCD touchscreen is identical to the screens used on many other Anycubic printers. As usual, it’s responsive and easy to use.
A note about filament types: the Kobra Max will print with PLA, PETG, TPU, and ABS. However, if you really want to print with ABS and get the best possible results, the printer should be inside an enclosure. Given its size, it may be challenging to build a suitable enclosure for the Kobra Max.
Assembling the Kobra Max 3D Printer
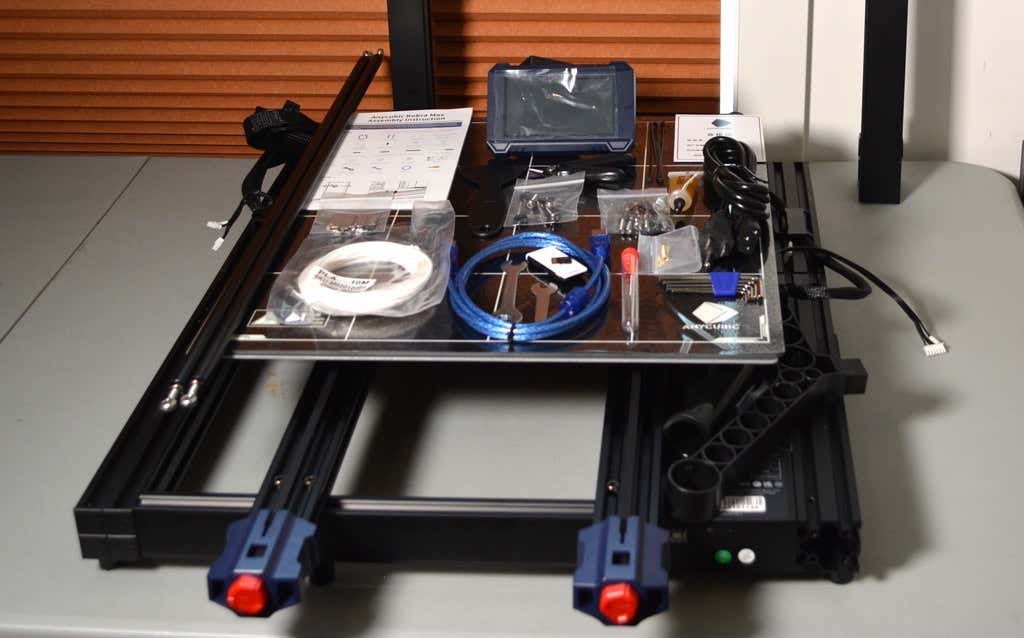
When assembling the new Kobra Max, make sure you have sufficient working space. Since the bed moves forward and backward, you need more space than you’d think. We put it on a 30” folding table, and when it’s printing, it needs about 36 inches, front to back.
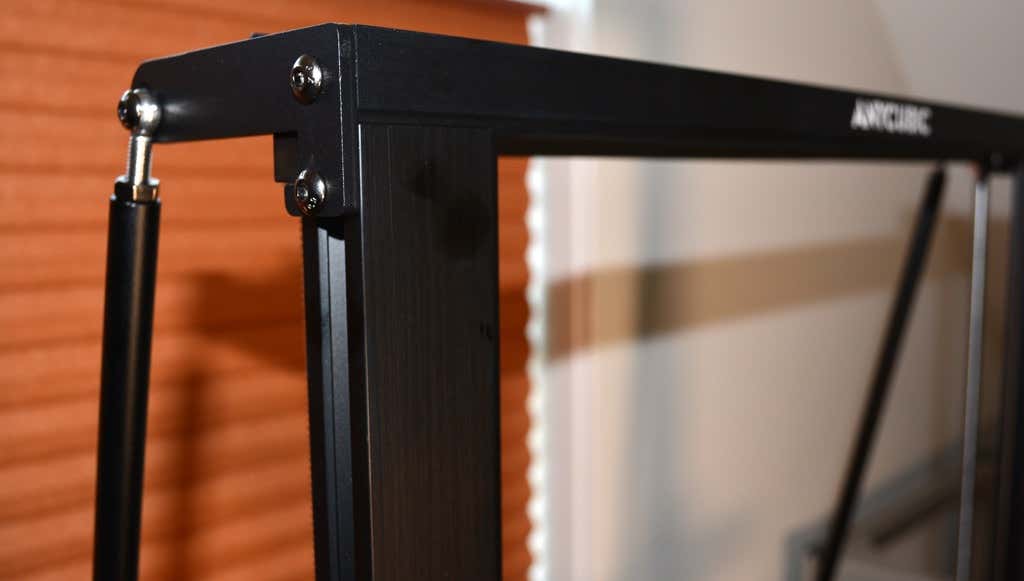
Assembly of the Kobra Max is no more difficult than assembling the Kobra or Vyper. The only additional items are the diagonal braces which add stiffness to the frame, reducing mechanical vibration.
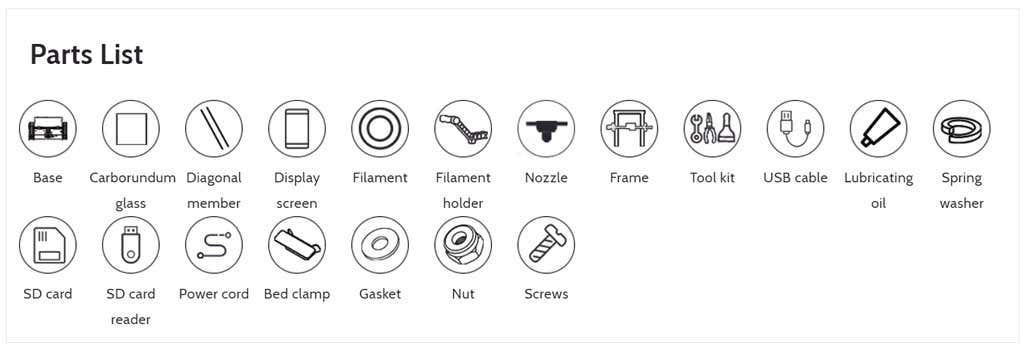
It took two people about 15 minutes to assemble. Double-check that you’ve cut all the zip ties used to stabilize the printer during shipping. There are a lot of them.
Calibration
The auto-bed-leveling system is easy to use. Anycubic recommends that you check the x- and the y-axes to make sure they don’t wobble. If they do, you can adjust the eccentric nuts until the wobbling stops. There was no wobble on our printer, so we didn’t have to do anything.
Additionally, the x- and y-axes have belt tensioners. We needed to slightly tighten the x-axis on ours. The tensioners are easy to use and are features a lot of other printers lack. Who wants to take apart the extruder assembly just to tighten the belts? Not us, and probably not you.
Build Quality of the Kobra Max
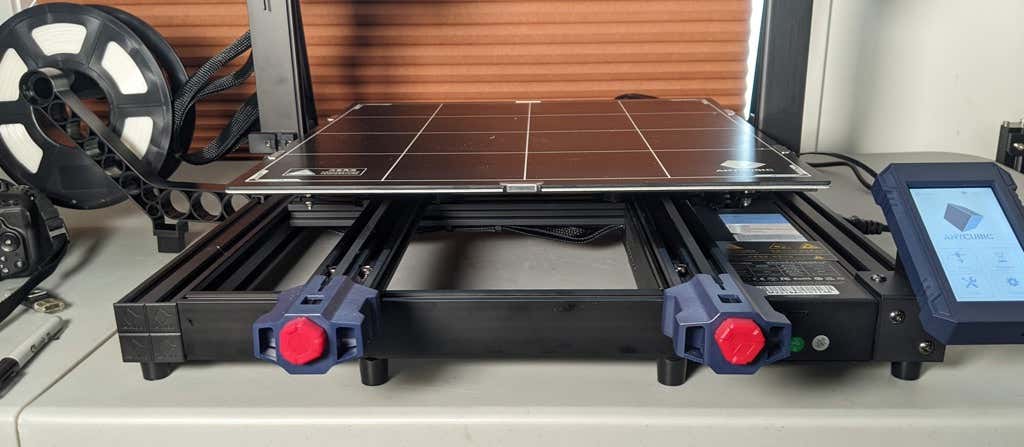
Due to the addition of the diagonal braces, the frame is really stiff. The dual z-axis screws are an improvement over the smaller Kobra. They virtually eliminated sagging of the x-axis assembly.
The spool holder sits on the base of the printer, reducing wobbling when printing tall items. It’s better than having the spool on the top like on the Kobra.
This printer is built with aluminum extrusions with aesthetically-pleasing plastic covers for the hotend and the tenionsers. It’s got an optical z endstop. The x and y endstops are mechanical. The whole thing feels solid.
First Print
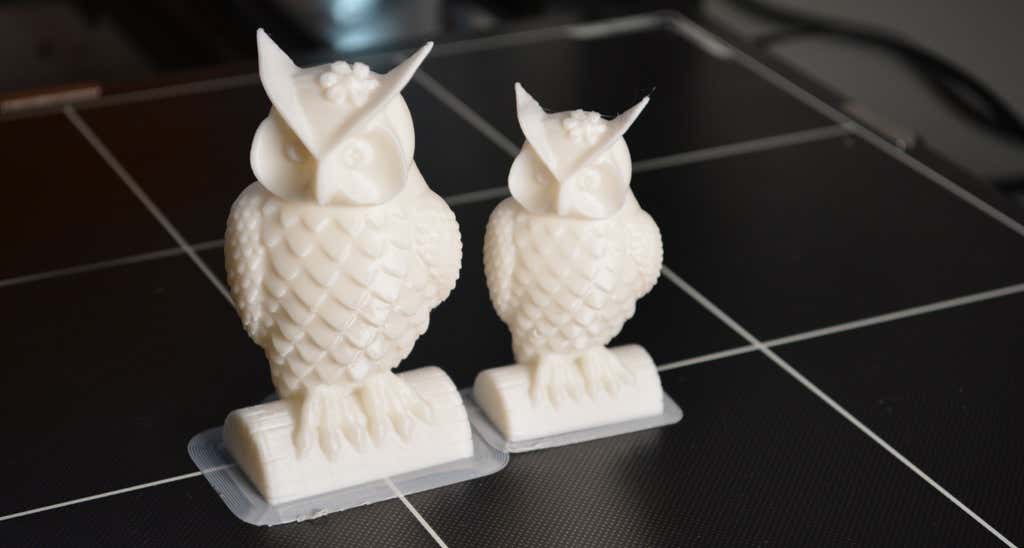
For the first print, we used the test file provided by Anycubic. Appropriately, the owl is about twice the print volume of the owl test print that comes with the smaller Kobra. Given the bowden setup (which makes sense for a printer this size), we were surprised that the ears on the owl turned out so well.
The ears look better than they did on the owl printed on the Kobra which has a direct drive extruder system. We suspect that’s due to the slower print speed. Many times, retractions on bowden extruders will create artifacts, but we didn’t notice any blobs or stringing. It approaches the quality you’d expect from a direct-drive.
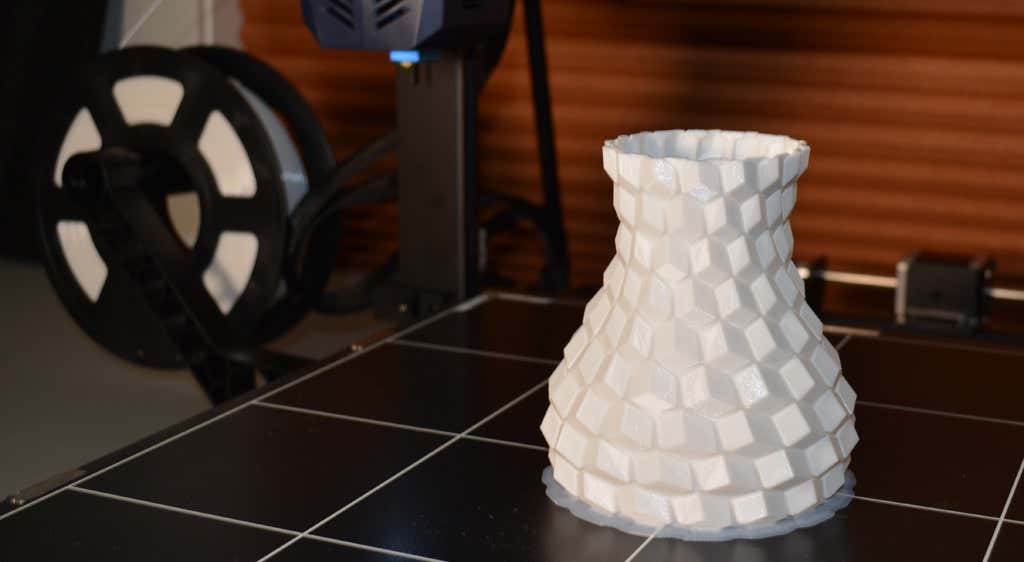
Next, we printed a vase with a large, flat base with a 0.2mm layer height. Removing prints from the glass bed is certainly not as easy as removing prints from smaller, flexible beds, but it’s not a deal-breaker either. We didn’t have any adhesion problems. The prints didn’t release when the glass bed cooled, which is what we expected and hoped for.
Curious what the power requirements would be for a printer this size, we were worried we wouldn’t be able to run multiple printers on the same circuit. We measured the power usage while the Kobra Max was printing, and, as expected, power usage is highest while the printer is warming up. Ours topped out at 473 watts. While printing, it was a more manageable 200-300 watts. We thought it would be more than that. You could probably run three of these printers on a 20 amp circuit.
Cut to the Chase
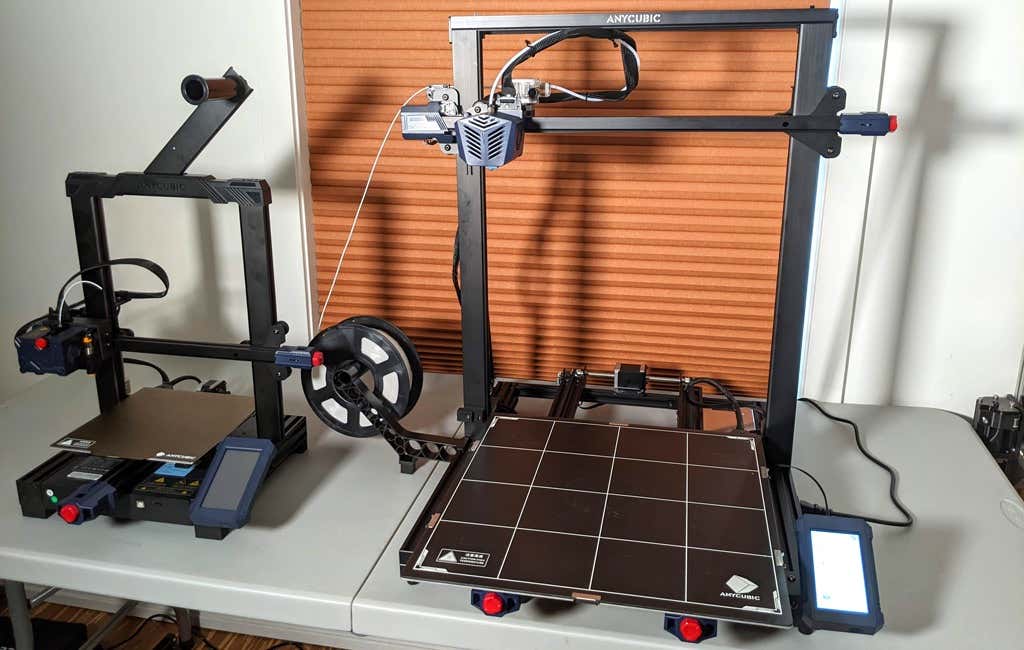
To drive home just how big the Kobra Max is, we put the Kobra on the bed of the Kobra Max. Insane. (We do not recommend you try this.)
A small printer is limiting, so if you find yourself printing large objects in small pieces and assembling them, consider buying a Kobra Max. If you’re new to 3D printing, keep in mind that it takes a long time to print big objects—potentially days and days. Typically, we’d recommend a smaller printer to beginners, but at the price point of $569.00 if you purchase on the Anycubic site, it’s worth considering as an entry-level printer.
One downside is that smaller prints will take a little longer than they would on a smaller, faster printer. That’s just physics. Bigger printers have more inertia to overcome and take longer to move. For example, the print time for our vase was thirteen hours. On our Prusa MK 2.5 with similar settings, it would have taken about twelve hours—not a huge difference.
*Special thanks to FormerLurker for help in reviewing AnyCubic’s Kobra Max 3D printer.
- WhatGeek x 3inuS Kebohub EE01 Mechanical Keyboard Review
- Mobile Pixels Duex Max Portable Monitor Review
- Trifo Lucy: The AI Robot Vacuum and Mop
- The OBSBOT Tiny 4K: an Impressive Webcam for PC & Mac
- Review of Anycubic’s Kobra 3D Printer
Maggie Marystone is a freelance technology writer, human rights worker, and storyteller based in Chicago. Read Maggie’s Full Bio
