The highest level of security for a computer is for it to be air-gapped. It’s the only way to reduce the chance of the computer being hacked to as close to zero as possible. Anything less and a dedicated hacker will get into it somehow.
Why Would I Want To Air Gap a Computer?
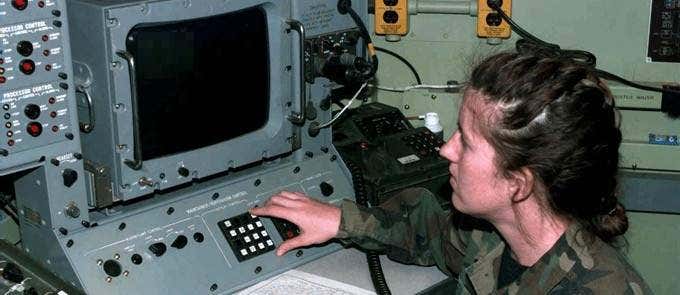
The average person doesn’t need to air gap a computer. This is mostly the domain of corporations and governments. For a government, it could be a sensitive database , project, or maybe controlling a weapons system. For a corporation, it could house trade secrets, financial information, or running an industrial process. Activist groups might also do this to prevent having their work shut down.
You’re probably not worried about those things if you’re only running a home computer. Still, implementing just one or two of these measures will increase your security dramatically.
What’s An Air Gap?
When you air gap a computer there’s nothing between the computer and the rest of the world but air. Of course, since WiFi came along it has changed to mean no connection to the outside world at all. Nothing that isn’t already on the computer should be able to get on it. Nothing on the computer should be able to be taken off of it.
How Do I Air Gap My Computer?
Air gapping a computer is not as simple as just unplugging the network cable and disabling the wifi . Remember, this is a high-value target for criminal hackers and Nation-State Actors (NSAs) who work for foreign governments. They’ve got money and time. Plus they love a challenge, so going after an air-gapped computer is enticing to them.
Let’s start from the outside of the computer and work our way inside:
- Operational security (OpSec) is important. OpSec can be oversimplified as being on a need-to-know basis. No one needs to know what’s in the room, let alone what the computer is for or who is authorized to operate it. Treat it as if it didn’t exist. If unauthorized people know about it, they’re susceptible to social engineering attacks .

- Make sure it’s in a secure room. The room should have just one entrance and it must be locked at all times. If you go inside to work, lock the door behind you. Only authorized operators of the PC should have access. How you do this is up to you. Physical and electronic smart locks each have their pros and cons. Be cautious of drop ceilings. If an attacker can pop out a ceiling tile and go over the wall, the locked door means nothing. No windows, either. The room’s sole purpose should be to house that computer. If you’re storing stuff in there, then there’s an opportunity to sneak in and hide a web camera , microphone , or RF listening device.

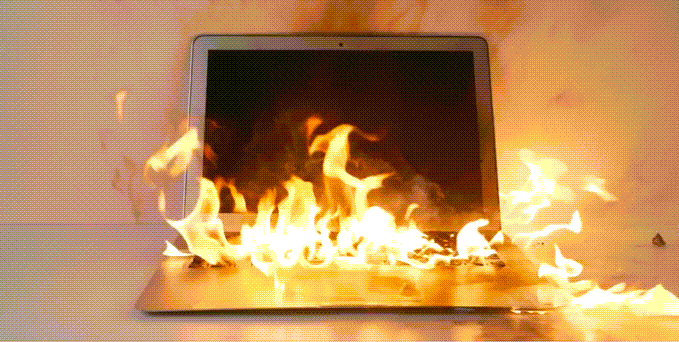
- Make sure it’s a safe room. Safe for the computer, that is. The room should provide the ideal climate for the computer so that it lasts as long as possible. Anytime an airgap computer breaks down and there’s disposal, there’s a chance to get information off the discarded computer. You’ll need computer-safe fire suppression as well. Something using inert gases or halocarbon compounds is appropriate. It has to be non-destructive to the computer, or the hacker may try to destroy the computer by turning on the sprinklers if they can.
- Keep all other unnecessary electronic devices out of the room. No printers , cellphones , tablets , USB flash drives , or key fobs. If it has a battery in it or uses electricity it doesn’t go in that room. Are we being paranoid? No. Check out the air-gap research Dr. Mordechai Guri is doing and see what’s possible.

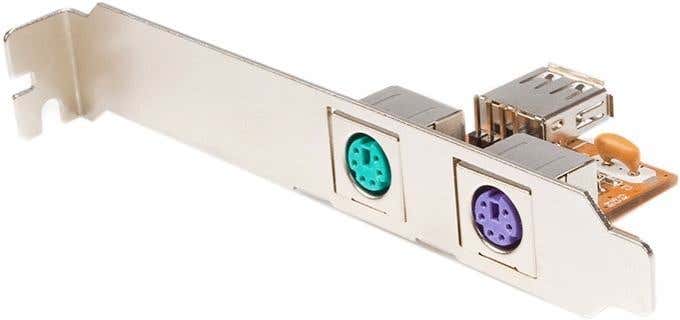
- Speaking of USB, plug or remove any unnecessary USB ports . You might need a USB port or two for the keyboard and mouse . Those devices should be locked in place and not removable. Any other USB port should be removed or blocked using something like a USB port blocker . Better yet, use a USB to PS/2 keyboard and mouse converter adapter , with a PS/2 keyboard and mouse . Then you don’t need any external USB ports at all.
- Eliminate all methods of networking possible. Remove the WiFi , Ethernet , and Bluetooth hardware or start with a computer that doesn’t have any of that. Just disabling those devices isn’t enough. Any necessary network cable needs to be shielded. It might be a controller for an industrial process so some cables may be necessary.

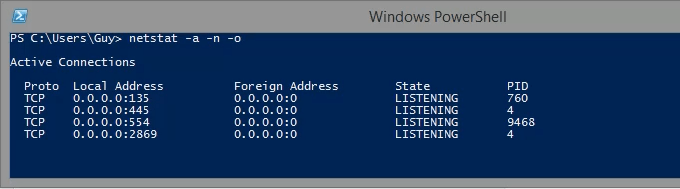
- Disable all common network ports on the computer. This means the ports like 80 for HTTP , 21 for FTP, and other virtual ports. If the hacker somehow gets physically connected to the computer, at least these ports won’t be sitting there ready and waiting.
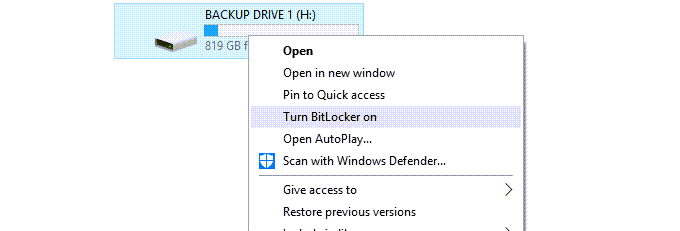
- Encrypt the hard drive . If the hacker still gets to the computer, at least the data is encrypted and useless to them.
- Shut the computer down whenever it isn’t needed. Unplug it, even.
Is My Computer Safe Now?
Get used to the terms acceptable risk and reasonably secure. As long as there are hackers, both white hat and black hat , new ways to jump the air gap will continue to be developed. There’s only so much you can do, but when you air gap your computer it’s at least a good start.
- How to Backup an iPhone Without iCloud?
- Sluggish Windows 11 PC? Try These 5 Windows 11 Tricks to Free up Virtual Memory
- macOS Tahoe Privacy Settings You Need to Secure Your Mac
- How To Turn Off Notifications On Windows 11?
- How to Recover Lost Files After Windows Update?
Guy has been published online and in print newspapers, nominated for writing awards, and cited in scholarly papers due to his ability to speak tech to anyone, but still prefers analog watches. Read Guy’s Full Bio
Printers experience several forms of malfunctions, some of which are easy to fix. Fixing printer issues can be a headache—especially on Windows devices—because there’s a wide range of things that could be wrong.
The problem could stem from your PC, the printer, or the connection between both devices. This tutorial highlights ten likely troubleshooting measures for printers that won’t print.
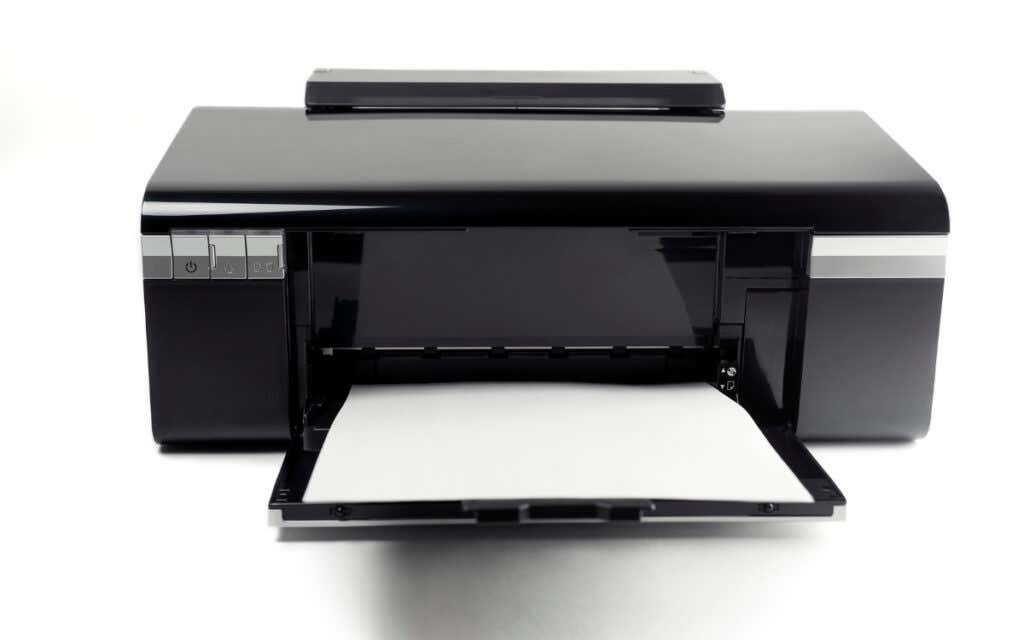
1. Check Paper Tray and Printer Connection
Many printer models won’t print if there’s a loose USB connection or if they’re out of ink or paper. Verify your printer’s ink levels, clean the printhead, fill the paper tray, and avoid using substandard paper. Low-quality paper can cause “Ghost Paper Jams” and other issues that stop your printer from printing documents.
For printers using a wired connection, ensure both cable ends are plugged firmly into your printer and computer. Go through the printer’s manual for instructions on connecting the device to your Windows or Mac computer.
Wireless printers won’t print documents if connected to the wrong Wi-Fi network. Make sure your printer and computer are on the same wireless network. Likewise, check your router settings, disable VPN connections, and make the printer’s IP address static. Refer to our tutorial on troubleshooting Wi-Fi (wireless) printers for more fixes.
2. Run the Printer Troubleshooter
Windows has a suite of troubleshooting tools that diagnoses and resolves hardware and software problems. We recommend running the Printer Troubleshooter before trying other more complex measures.
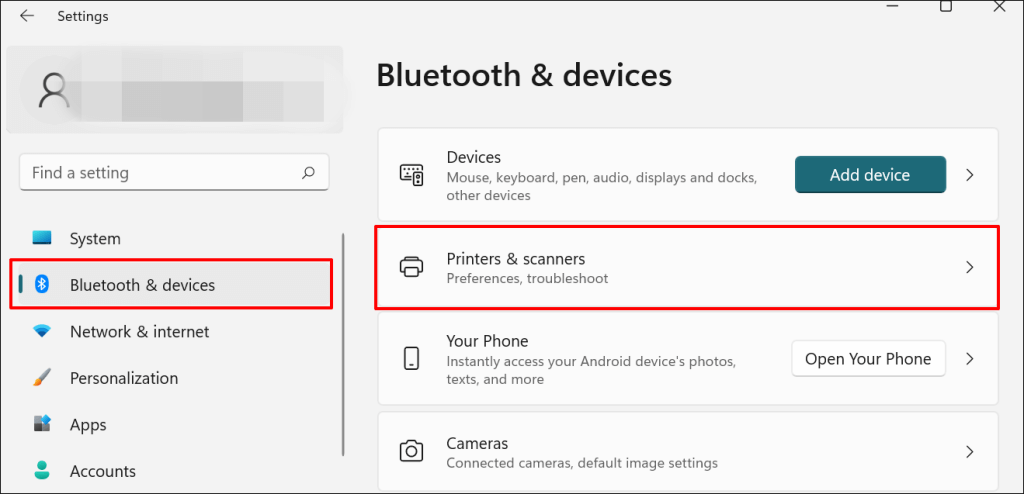
- Go to Settings > Bluetooth & devices > and select Printers & scanners .
In Windows 10, go to Settings > Devices > Printers & scanners .
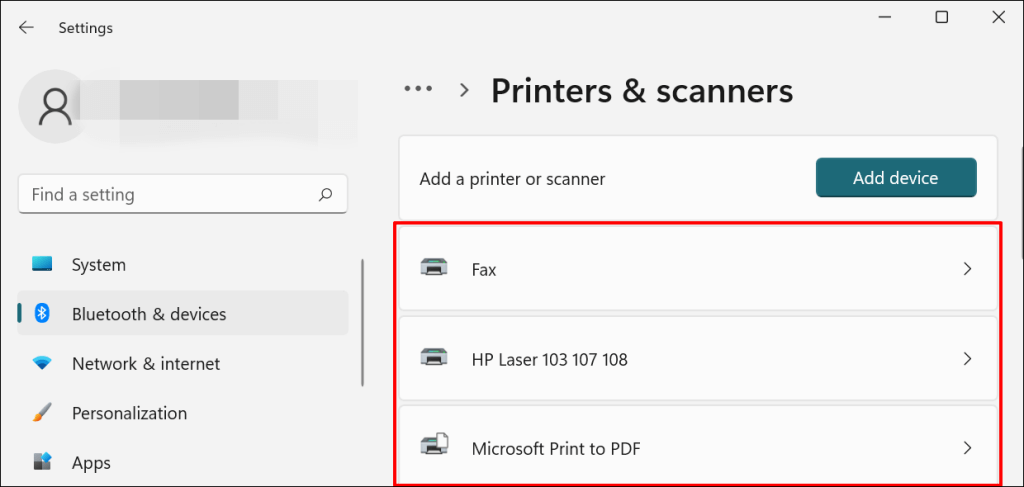
- Select the problem printer from the list of connected devices.
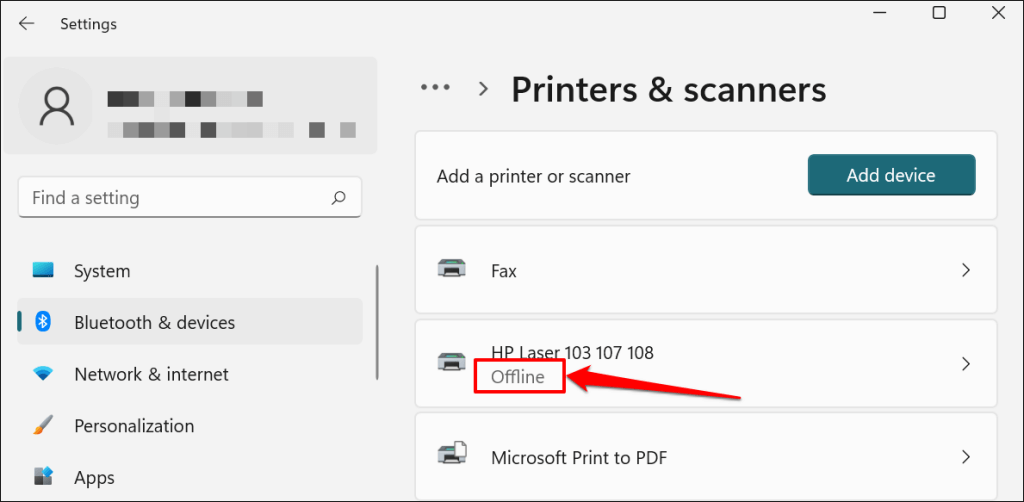
Note: If your printer status reads “Offline,” refer to our troubleshooting tutorial on getting an offline printer back online . Proceed to the next step if your printer is online.
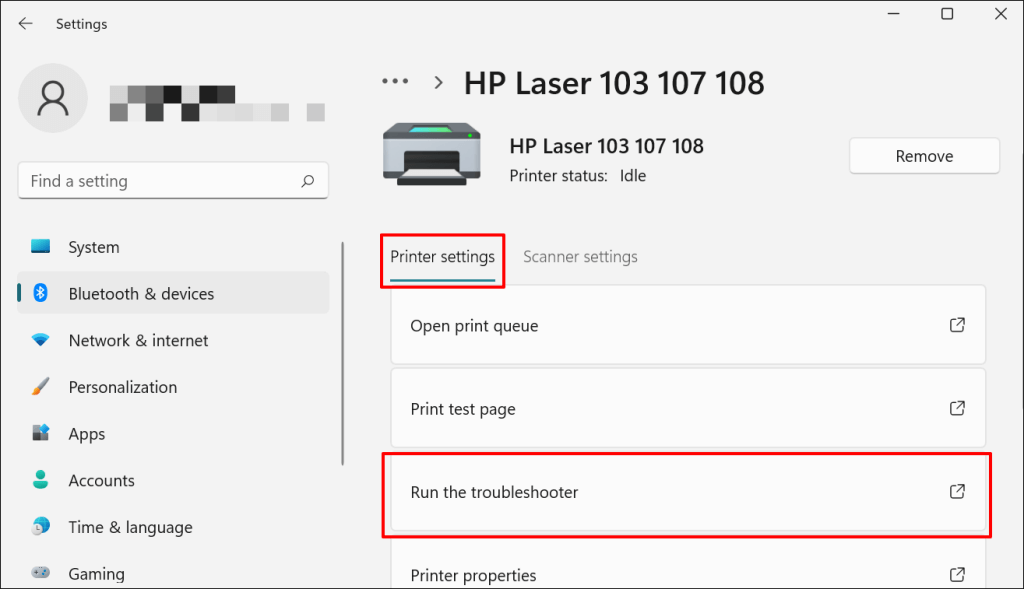
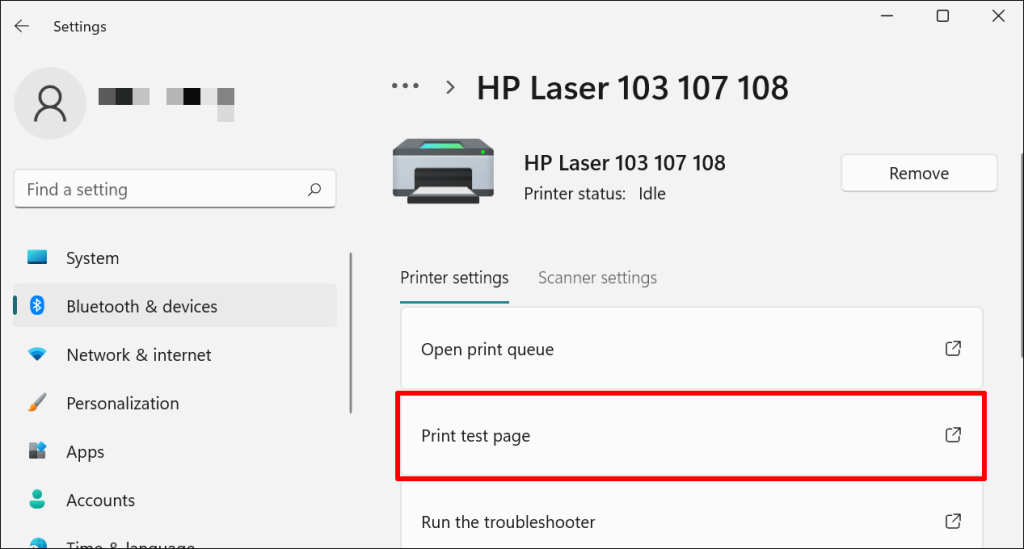
- Select Run the troubleshooter in the “Printer settings” tab.
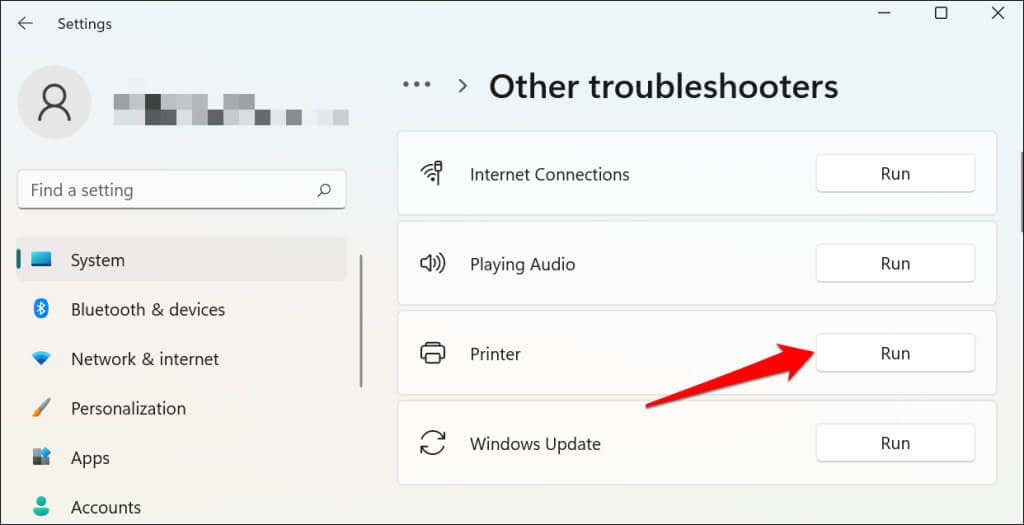
There’s another way to access the printer troubleshooter in Windows 11. Go to Settings > System > Troubleshoot > Other troubleshooters and select Run next to “Printer.”
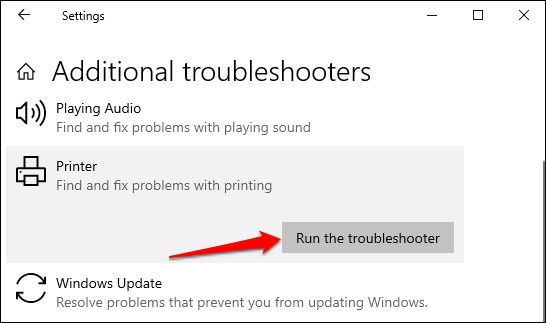
In Windows 10, go to Settings > Update & Security > Troubleshoot and select Additional troubleshooters > Printer > and select Run the troubleshooter .
Wait for the troubleshooter to run the necessary check on the printer, its drivers, and other associated processes.
3. Set the Printer As Default
Windows has a feature that dynamically changes your PC’s default printing device based on your location and other factors. The feature is near-perfect but not failproof. If your PC doesn’t print documents, it might be that an inactive printer is the default printing device.
macOS also sets the last printer connected as your Mac’s default printer. Check your computer settings and ensure the active printer is the default device.
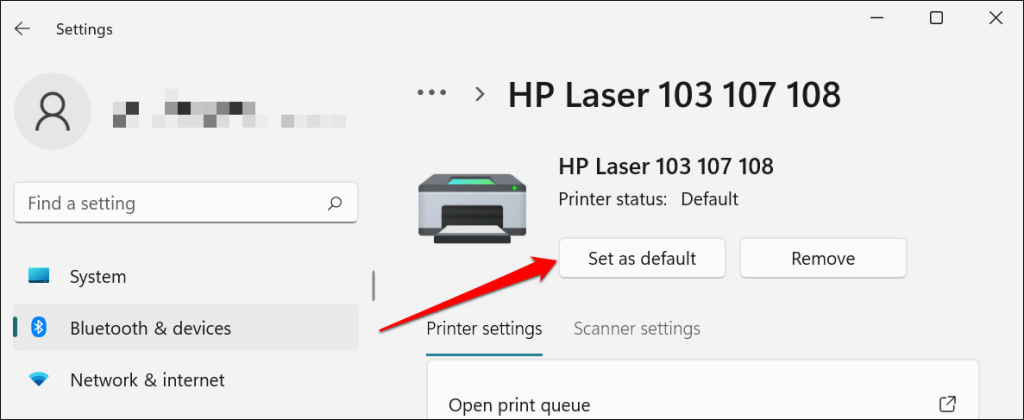
In Windows, go to Settings > Bluetooth & devices > Printers & scanners , select the printer, and select the Set as default button.
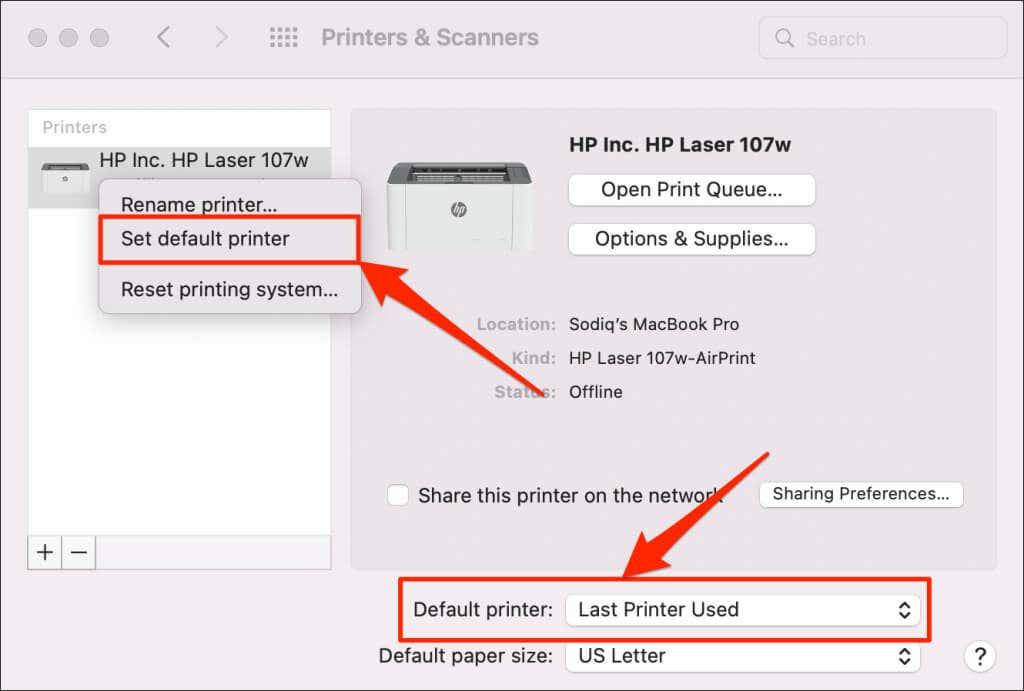
On Mac computers, go to System Preferences > Printers & Scanners on Mac computers , right-click the printer, and select Set default printer . Alternatively, open the Default printer drop-down menu and select the printer as the default.
4. Clear Your Computer’s Print Queue
When you send a document for printing, your computer first sends the “print job” to the print queue. The print job is immediately removed from the print queue when the printer prints the document. It’s usually a seamless process, but there are times when completed print jobs remain in the queue.
If that happens, subsequent print jobs will also get stuck in the queue and prevent your printer from printing files. Clearing your computer’s print queue might resolve the problem.
Clear Print Queue in Windows
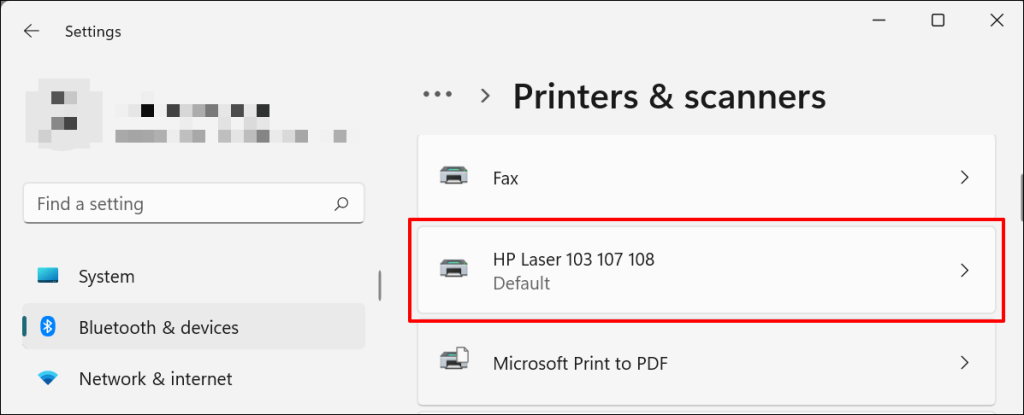
- Go to Settings > Bluetooth & scanners > Printers & scanners and select your printer.
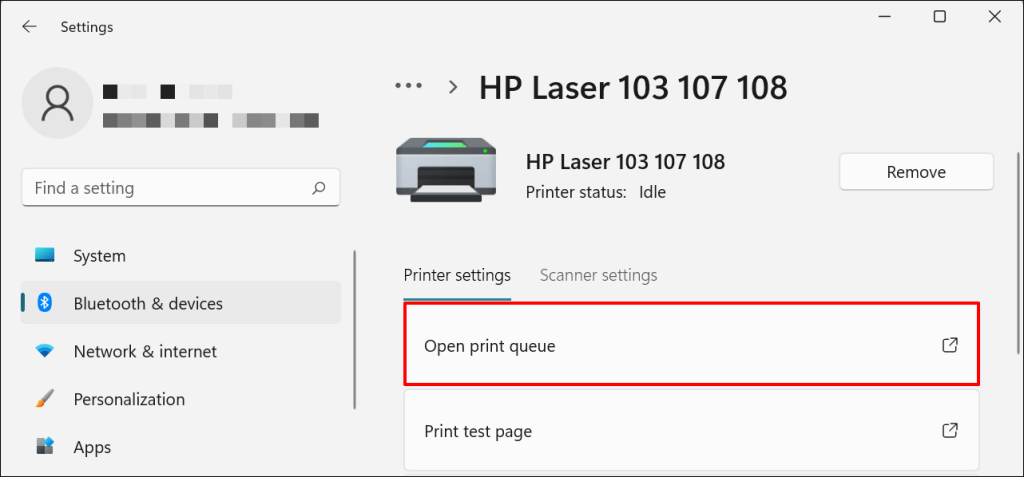
- Select Open print queue .
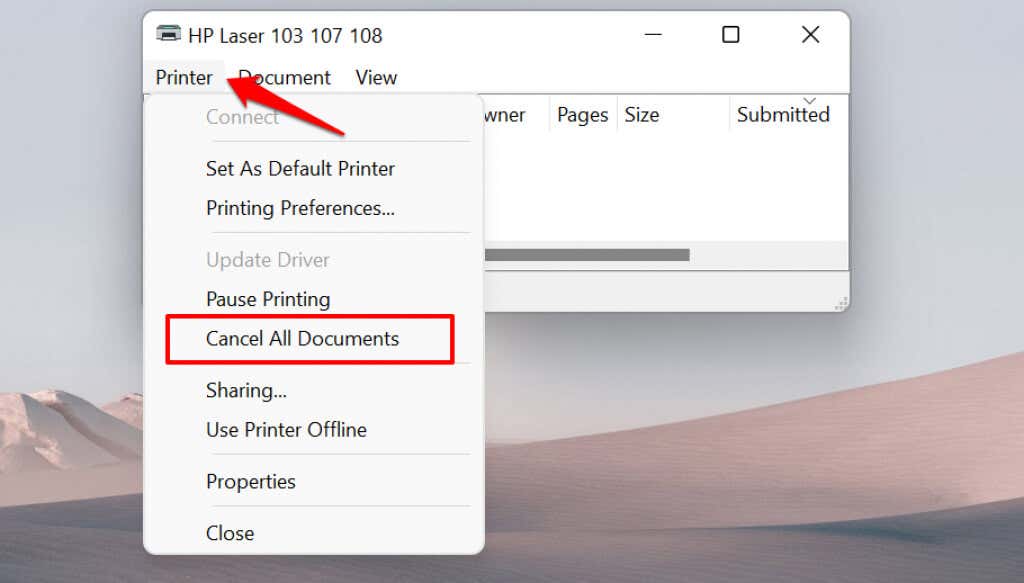
- Select Printer on the menu bar and select Cancel All Documents .
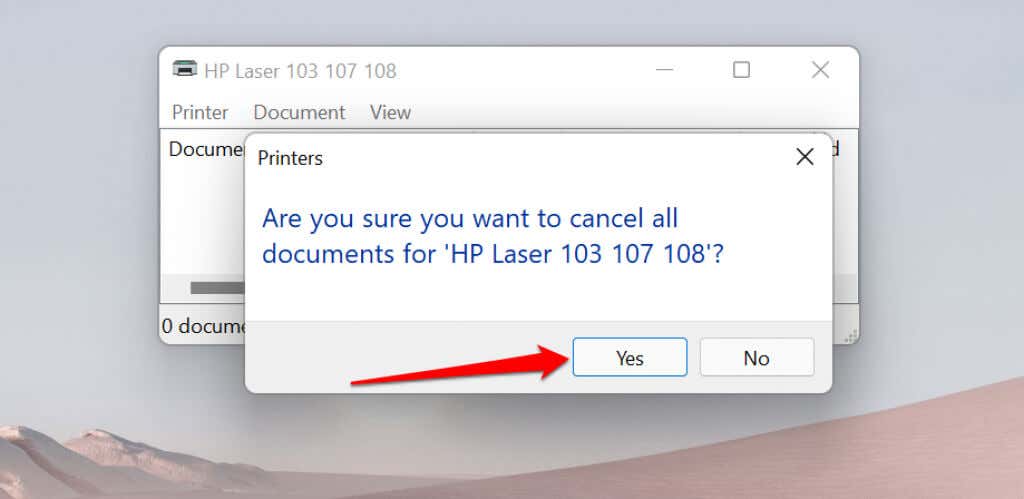
- Select Yes on the confirmation prompt.
[14-why-windows-pc-wont-print-documents]
Try printing any document or a test page and check if clearing the queue fixed the problem. Open the printer menu and select Print test page .
If completed documents remain in the print queue, refer to our troubleshooting tutorial on deleting stuck print jobs in Windows .
Clear Print Queue in macOS
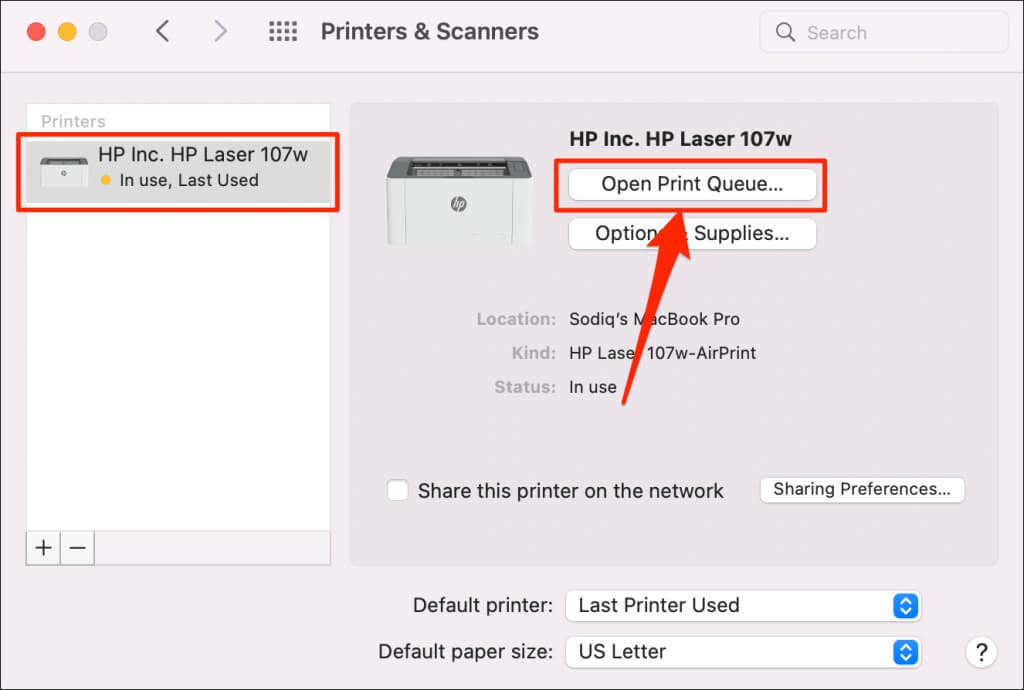
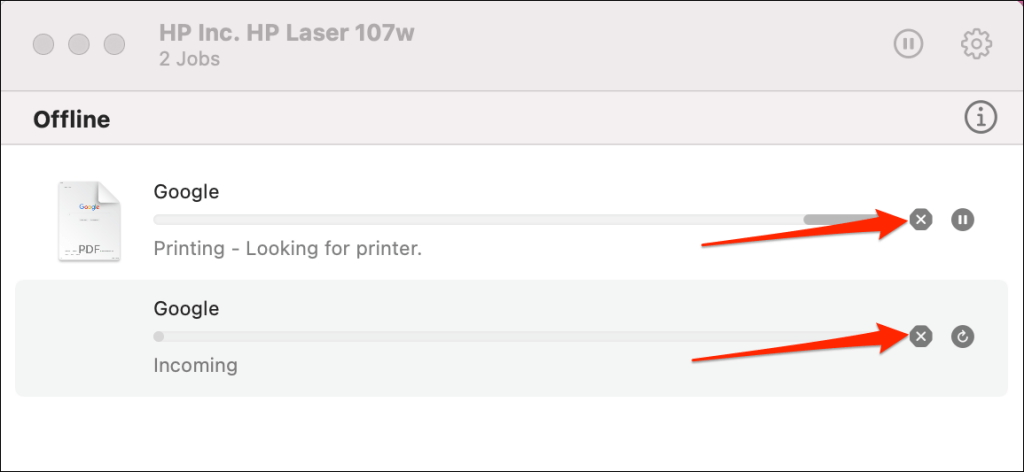
- Go to System Preferences > Printers & scanners , select the printer on the sidebar, and select Open Print Queue .
- Select the x icon next to the pending print jobs to remove them from the queue.
5. Update Printer Driver
Your printer might not receive print jobs from your PC if its driver is corrupt or outdated. Although Windows automatically installs driver updates, some factors (e.g., a metered internet connection) may prevent that from happening. Here’s how to manually install a driver from your computer or the internet.
Check the printer’s manufacturer website and download the latest driver updates for your printer model. Plug the printer into your computer and follow the steps below.
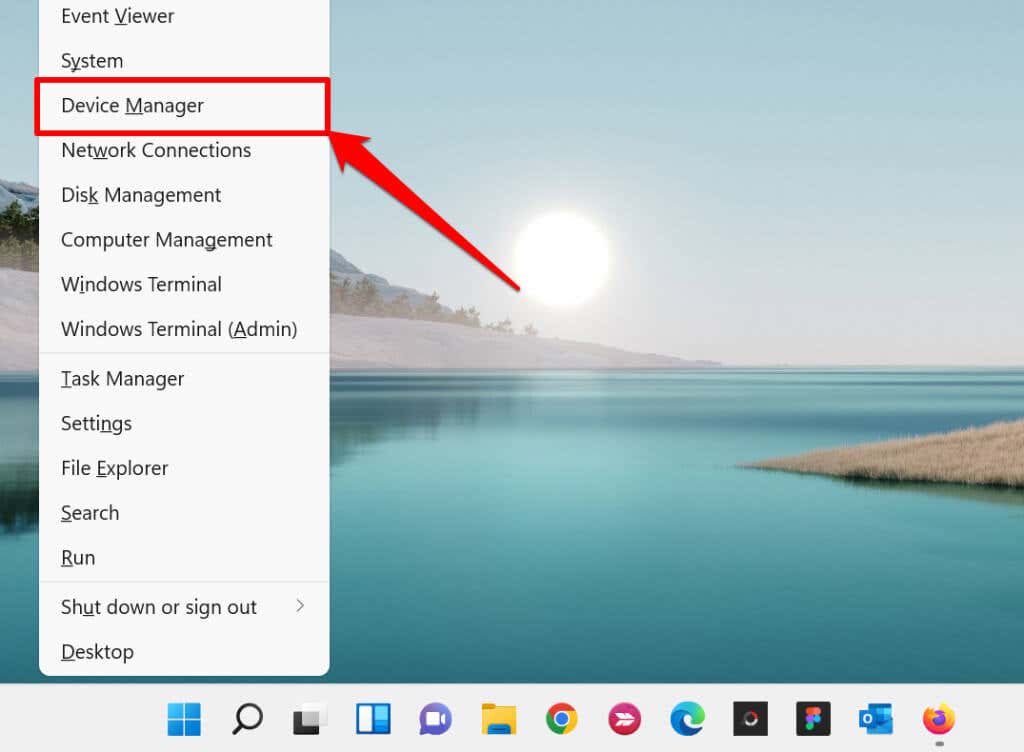
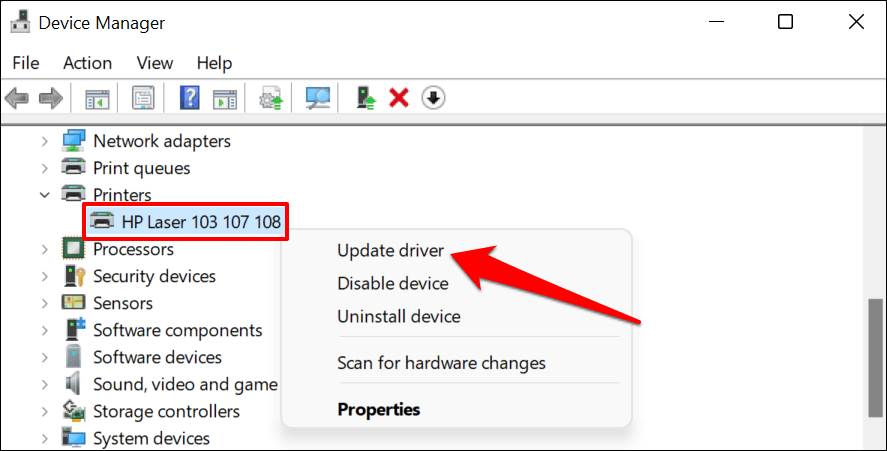
- Right-click the Start Menu or press the Windows key + X to open the Quick Access Menu. Select Device Manager to proceed.
- Expand the “Printers” category, right-click the printer’s driver, and select Update driver .
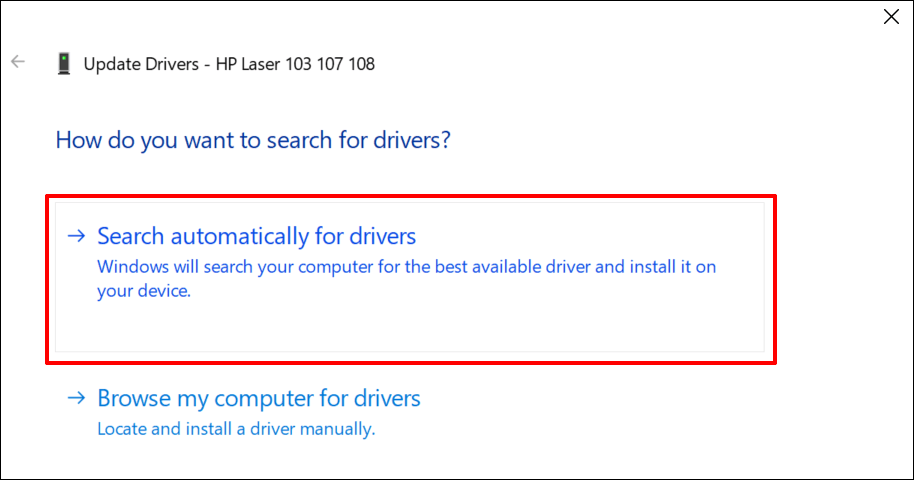
- Select Search automatically for drivers and wait for Windows to search for the best driver available for the printer. The process requires an internet connection, so ensure your PC is connected to a Wi-Fi or Ethernet network.
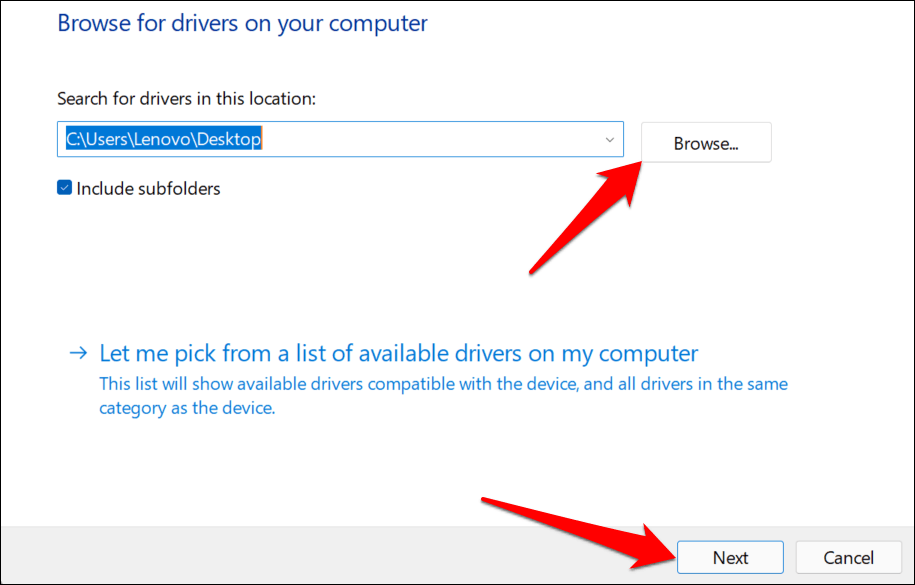
Alternatively, select Browser my computer for drivers to manually install a driver you downloaded from the printer manufacturer’s website. Afterward, choose Browse , navigate to the driver’s location on your PC, and select Next to install the update.
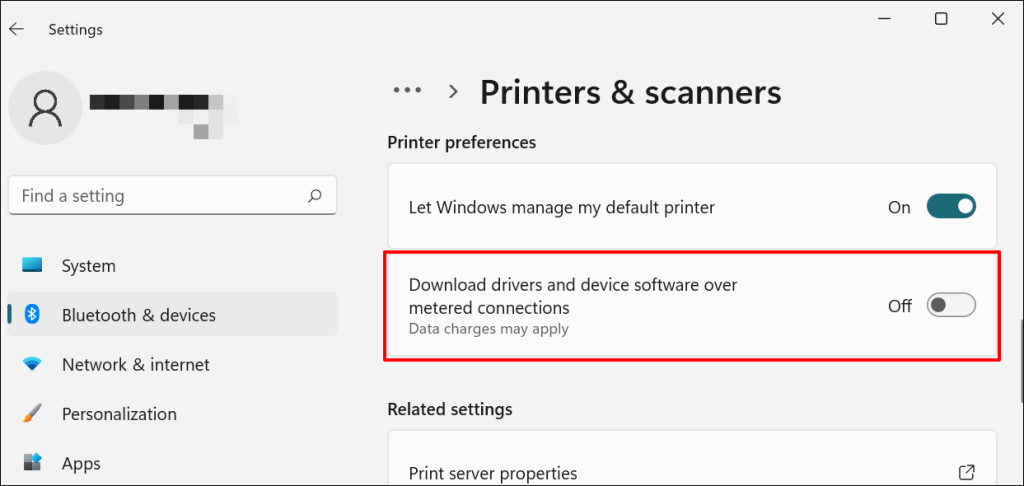
We recommend configuring Windows to automatically download drivers for your printer, especially if you’re using a metered connection.
Go to Settings > Bluetooth & devices > Printers & scanners and toggle on Download drivers and device software over metered connections .
If the Device Manager says the printer’s driver is up-to-date, check the manufacturer’s website for confirmation. You’ll find driver update history in the “Download,” “Software,” or “Drivers” section of the printer manufacturer’s website. Contact the manufacturer if you don’t know how to find, install, or update your printer’s driver update.
6. Reboot Your Devices

Power-cycling your printer and computer can help both devices re-establish a connection. Unplug your printer’s power cord and shut down your computer. Remember to close any open apps or documents so you don’t lose unsaved changes.
Restart both devices, connect your printer to your PC, and check if you can now print documents.
7. Reinstall Printer Driver
Reinstalling a faulty or corrupt driver can resolve issues causing your printer to malfunction. The operation entails deleting or uninstalling the printer driver , restarting your computer, and installing it from scratch. Note that this operation may affect any customizations made on the printer’s settings and preferences on your computer.
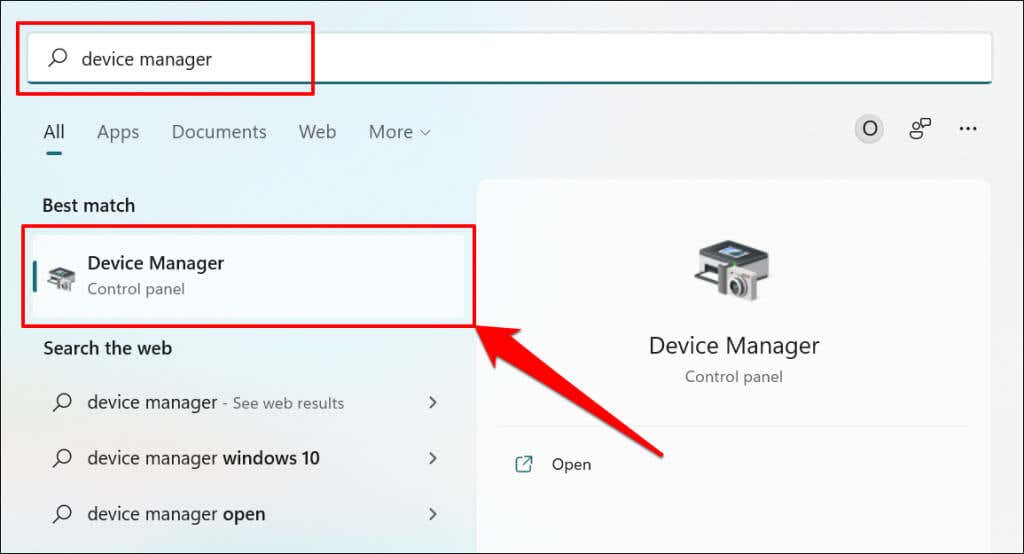
- Type device manager into Windows Search and select Device Manager .
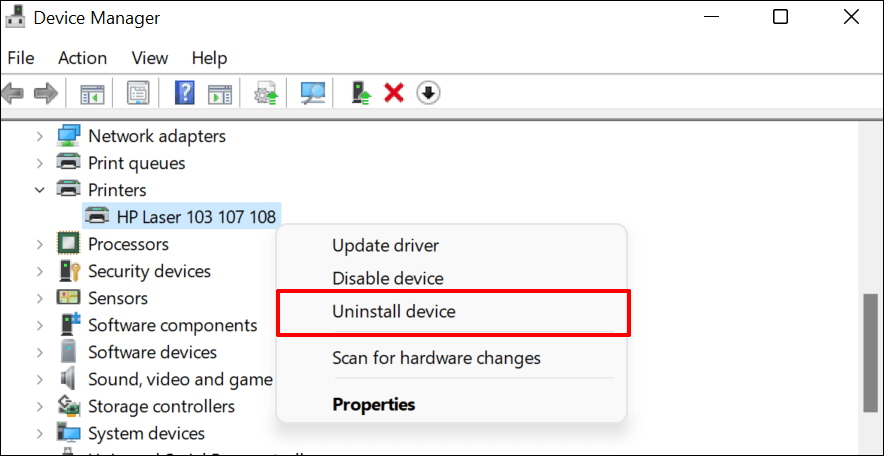
- Expand the “Printer” section, right-click the printer’s driver, select Uninstall device , and select Uninstall on the pop-up.
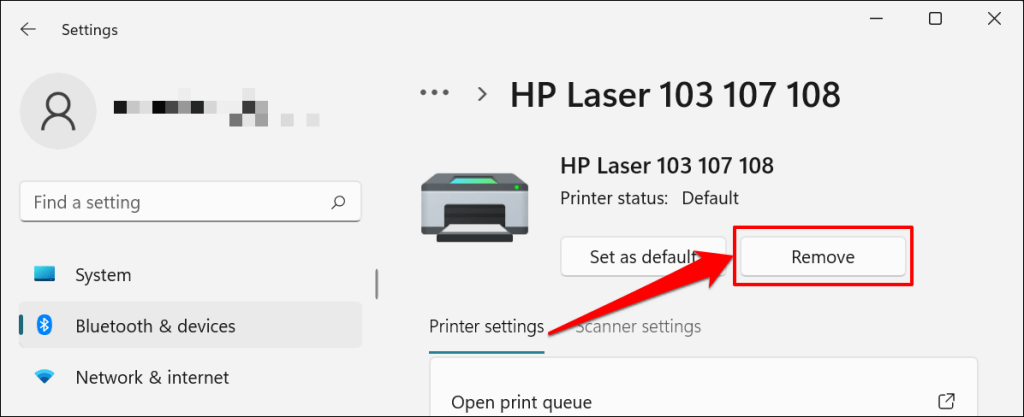
You should also remove the printer from your PC’s memory.
- Go to Settings > Bluetooth & devices > Printers and scanners , select the printer, and select the Remove button.
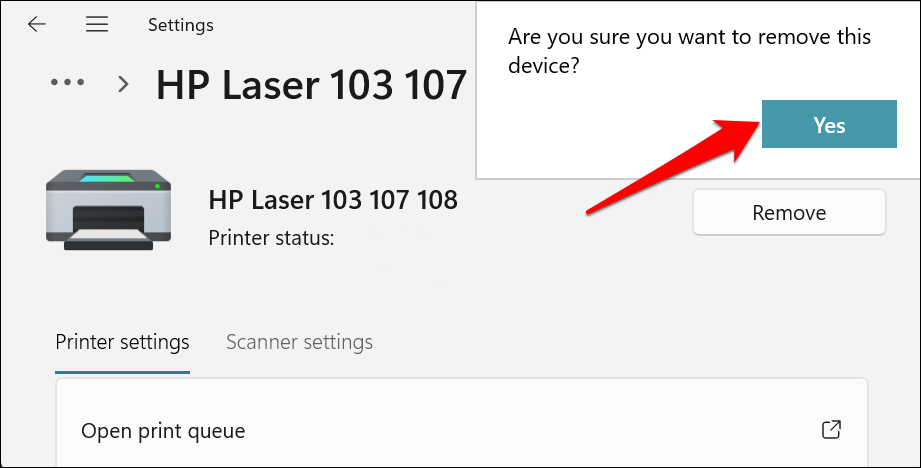
- Select Yes on the confirmation prompt.
Restart Windows and reconnect the printer to your computer. Windows should automatically install the printer’s driver when it connects to your PC.
8. Restart the Printer Spooler
Printer Spooler is the system service that manages printers and print jobs on Windows devices. Temporary system glitches can affect the Printer Spooler’s performance and trigger printing-related problems. Restarting the print spooler service can restore the service to normalcy.
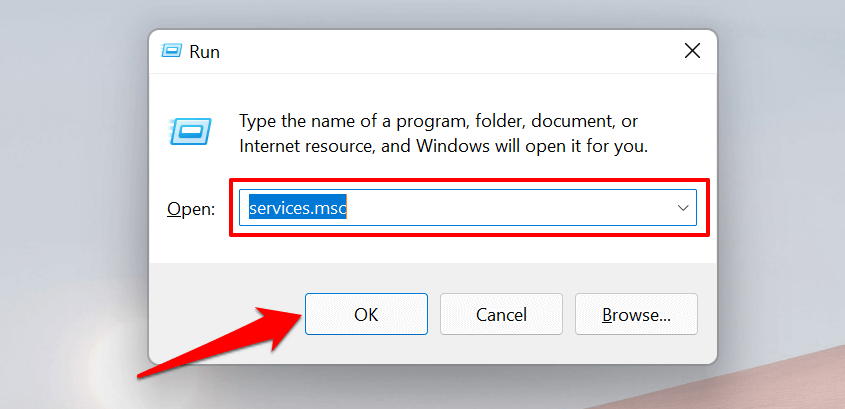
- Open the Windows Run box (press Windows key + R ), type services.msc in the dialog box, and press Enter .
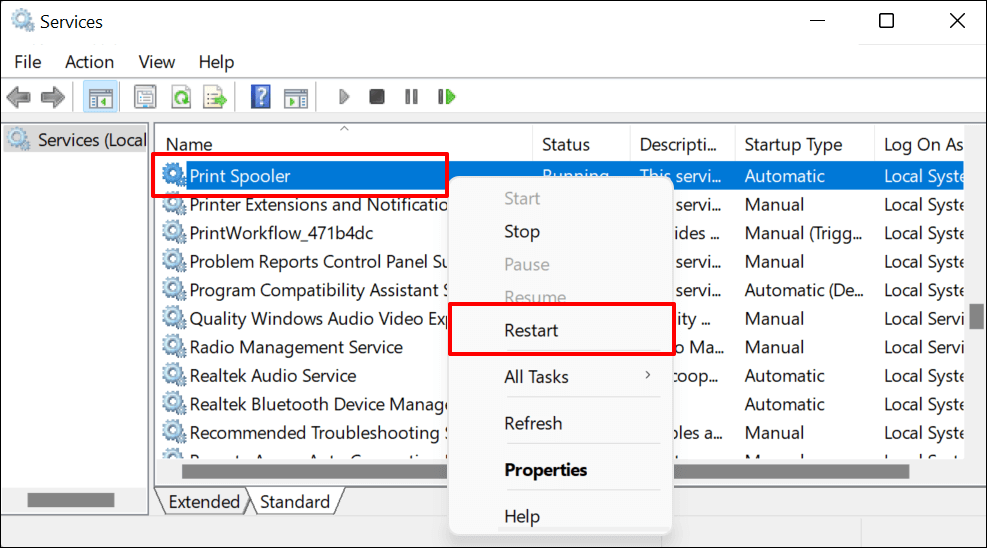
- Right-click Printer Spooler and select Restart .
9. Update Your Computer
Asides from fixing software bugs, Windows Updates also updates outdated or buggy drivers. Head to the Windows Updates menu and install the latest Windows build or security patches available for your computer.
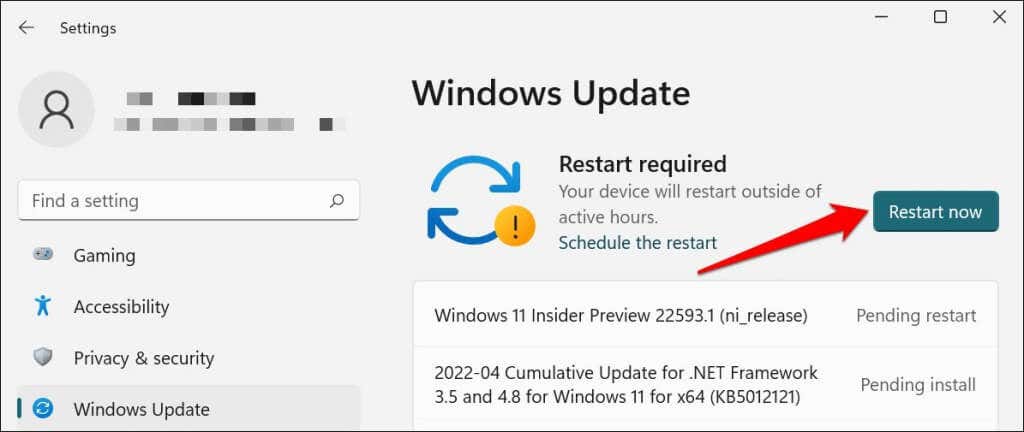
In Windows 11, go to Settings > Windows Update and wait for Windows to check for updates. You may need to restart your computer if Windows has already downloaded the update. Select Restart now to update and reboot your computer.
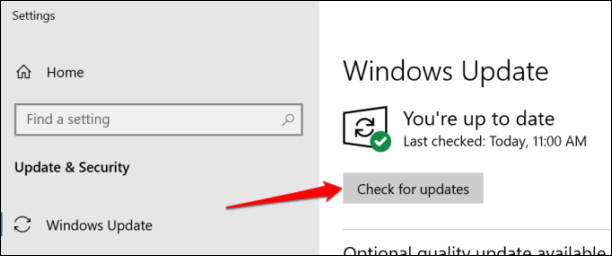
In Windows 10, head to Settings > Updates & Security > Windows Update and select Check for updates . Make sure your computer has an internet connection.
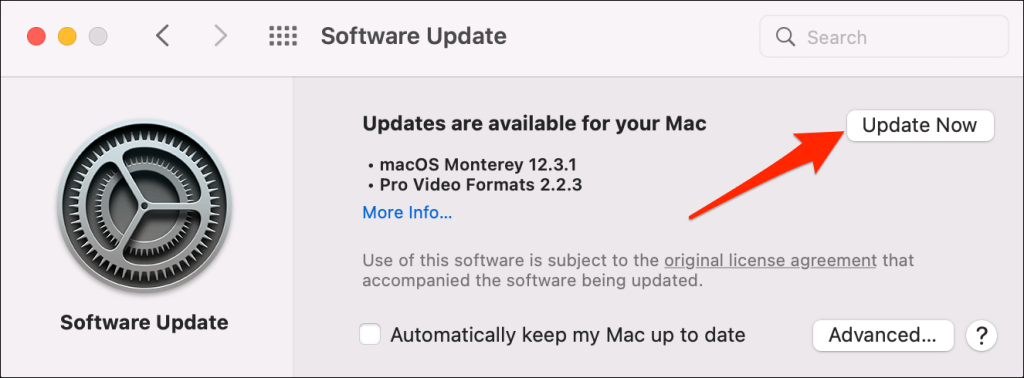
In macOS, go to System Preferences > Software Updates and select Update Now (or Upgrade Now ).
[32-update-mac-computer]
10. Run the Printer’s Utility Software
HP has a Print and Scan Doctor utility (HP Smart for Mac) that diagnoses problems with HP printers. The tool can detect empty ink cartridges, outdated driver software, blocked nozzles, print feed errors, and other printer problems.
Samsung Printer Experience is the utility that manages Samsung printers. The app has loads of troubleshooting guides for printing problems on Samsung printers. The Canon Inkjet Print Utility is also available for Canon inkjet printers.
Download and install your printer’s utility software on your computer and run the tool according to the manufacturer’s instructions.
Pay Attention to Physical Indicators
Printers have status lights or LCD screens that display error codes. These lights point out the root cause of some printing issues. Check the printer’s instruction manual to learn what the indicator lights and error codes mean and their respective solutions. Contact the printer manufacturer if your printer still won’t print after running these troubleshooting measures.
- How to Fix the “Error – Printing” Status Error in Windows
- HP Printer Not Printing Black? 10 Fixes to Try
- How to Fix Missing or Failed Printhead Error on HP Printers
- How to Add a Printer to Your Chromebook
- How to Fix the Printer Error “0x0000011b” on Windows
Sodiq has written thousands of tutorials, guides, and explainers over the past 4 years to help people solve problems with Android, iOS, Mac, and Windows devices. He also enjoys reviewing consumer tech products (smartphones, smart home devices, accessories, etc.) and binge-watching comedy series in his spare time. Read Sodiq’s Full Bio
