If you’re using Google Docs to type up a letter or an article, you’ll start with a representation of a blank piece of paper on your screen. The size of the virtual paper matches the usual page layout and size you’d see if you printed your document on a typical piece of document paper using A4 (or 210mm by 297mm) sizing.
If you plan to print on different paper, or if you’re changing page orientation , you may need to alter the page margins. You can also change margins in Google Docs to move your text closer or further away from the edge of the page. If you want to know how to change margins in Google Docs, here’s what you’ll need to do.
How to Change Google Docs Margins Manually
By default, Google Docs defaults to a typical A4 document page layout. This means that the virtual page you’ll see is 210mm by 297mm in size, with margins set to be 25.4mm away from each edge (top, bottom, left, and right).
What this means is that, when you start typing into a Google Docs document with this standard layout, the text cursor is positioned at least 25.4mm (or 2.54cm) away from the top and left edges of the page. If you want to change the margins quickly, you can do so by moving the margins using the document ruler .
- To show the document ruler, select View > Show ruler in your Google Docs document.
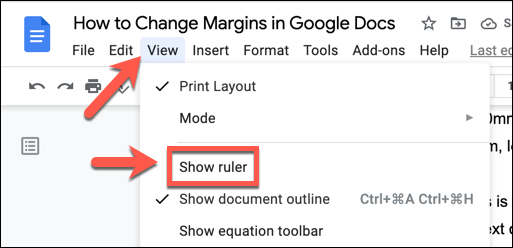
- The ruler will become visible at the top and to the left of your document pages. The document margins are positioned at the line where the ruler switches from gray to white on both sides of the ruler, with the top ruler controlling the side margins, and the left ruler controlling the top and bottom.
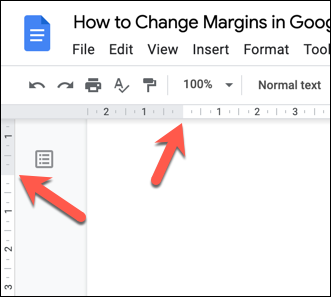
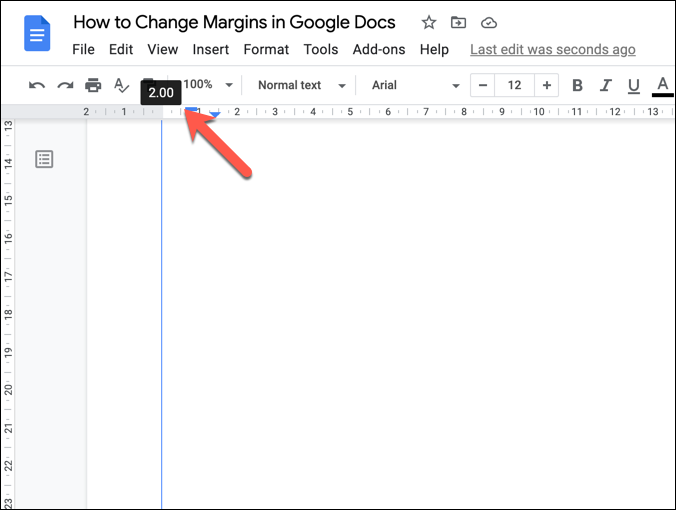
- To move the margins inwards or outwards, hover your mouse cursor over the line between the white and gray areas on the top or left ruler. Using your mouse, select the line and move it inwards to move the margin closer towards the center of the page, or outwards to move it closer to the edge.
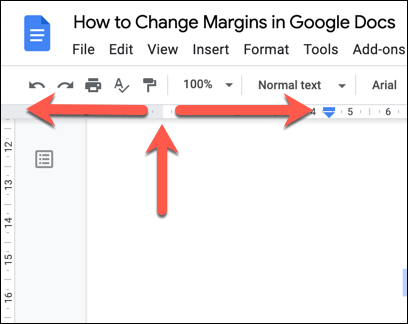
- The updated margin size (in centimeters) will appear above the ruler, with a blue line showing the new position of the margin on your page. When you’re happy with the position of your margin, release your mouse button to apply the new margin.
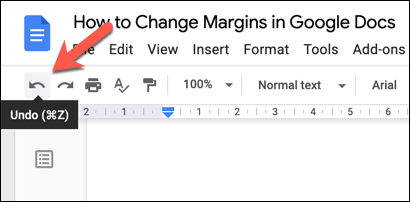
- If you want to return your page margin to the previous position, select the Undo button immediately afterwards.
How to Change Google Docs Margins Using Page Setup
Another way you can change margins in a Google Docs document is to use the page setup menu. This gives you a quick overview of the page margin sizes, allowing you to choose between standard page sizes and standards (such as A4), as well as allowing you to customize your page with custom layouts and margins.
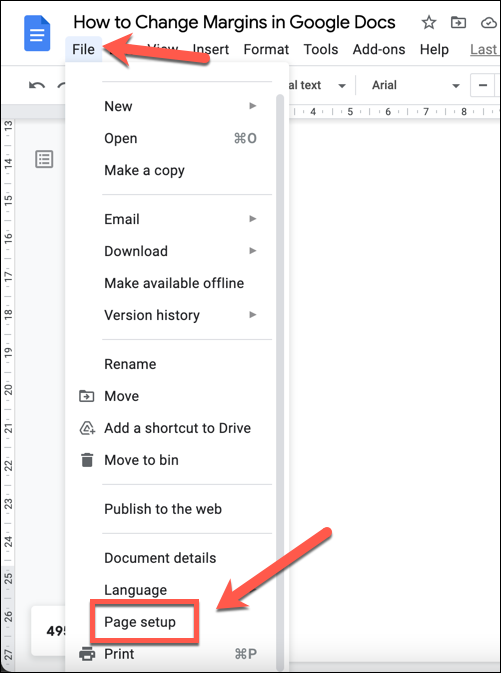
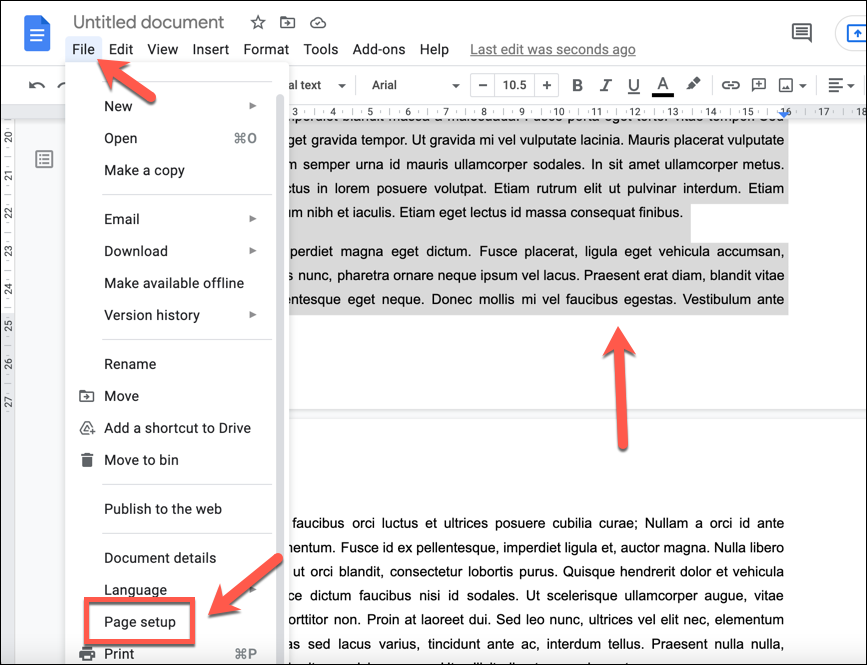
- To access the page setup menu, open your Google Docs document and select File > Page Setup .
- In the Page Setup menu, you can choose a standard page layout by selecting one of the paper sizes using the Paper size drop-down menu.
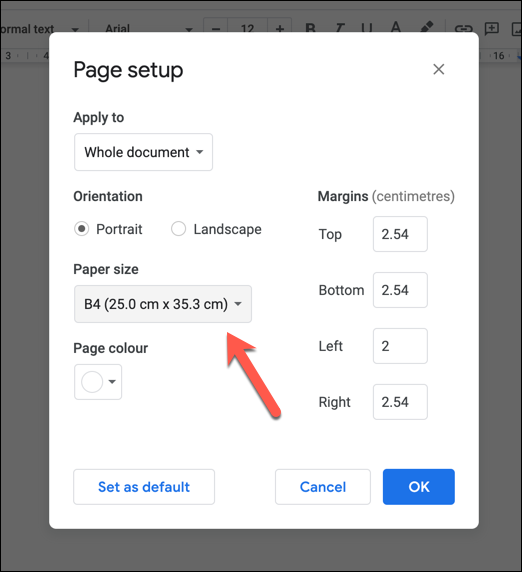
- To change the margins, replace the margin value sizes (in centimeters) using the Margins boxes on the right.

- If you want to customize the page margins for all future documents, select the Set as default button after customizing your margin sizes. Otherwise, select OK to apply the margin changes to your current document.

Customizing the Print Margins in Google Docs
If you change your margins in Google Docs, your text and images will move closer or further away from the edges of the page. If you decide to print your document , a custom margin could have an impact on how your document appears on physical paper. Not all printers will allow you to print close to the page edge, for example.
If you want to change this before you print, you can customize the margin size before you print in the Print menu.
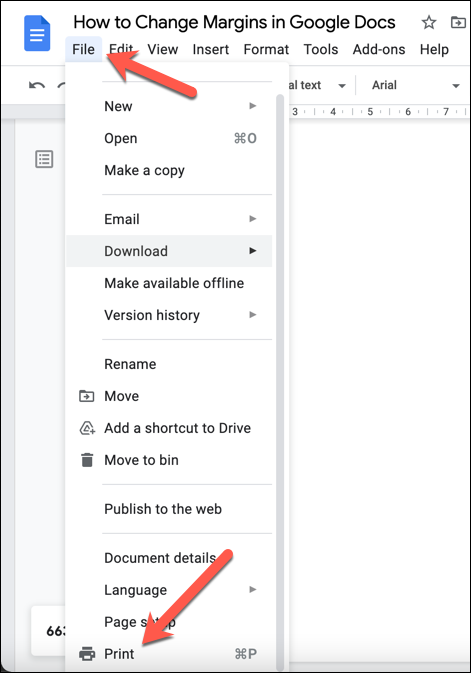
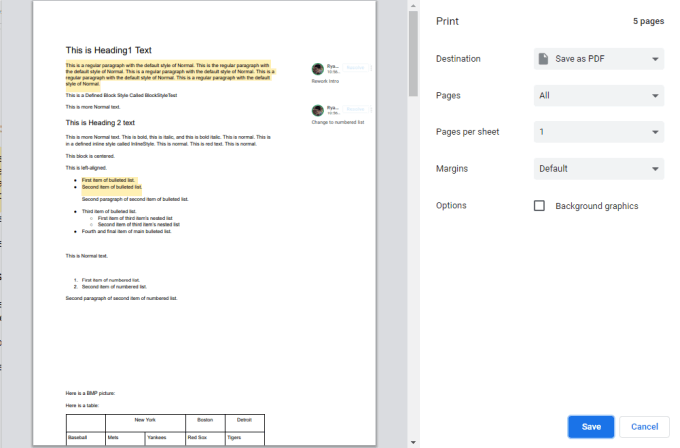
- To begin, select File > Print to view your available print options. Alternatively, press Ctrl + P (on Windows) or Command + P (on Mac) to access this menu.
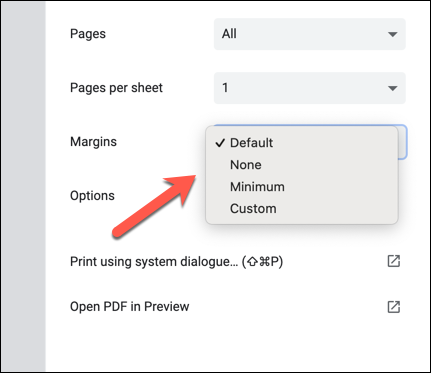
- This will open the Google Docs Print menu, where you can customize your document layout (including margins) before you print. Select None to use no margins (not recommended), Minimum to use your printer’s default minimum margin size, or Default to use your document’s default margin sizes.
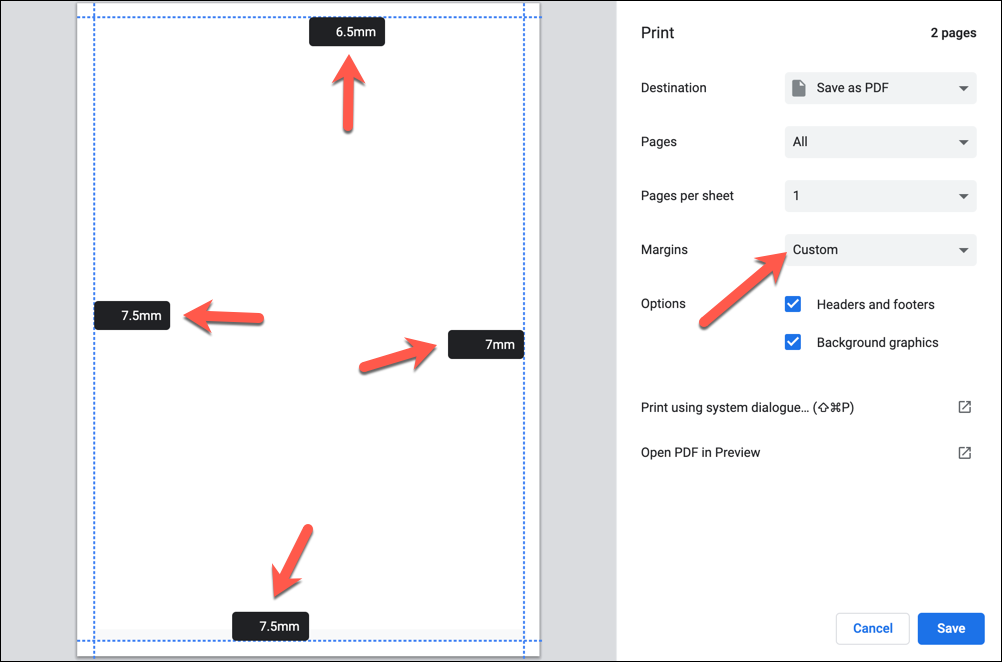
- Alternatively, select Custom to change the margins manually in the Print menu. To change the margins, hover over the Print Preview area on the left to view the blue margin ruler lines, then drag the margin lines on each side to a new position. The margin size (in millimeters) will update afterwards.
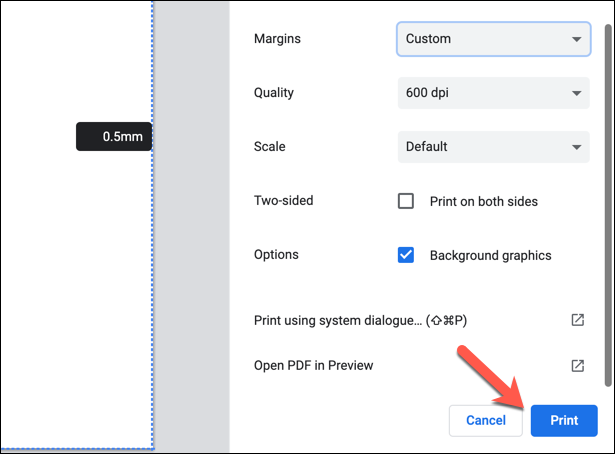
- To print your document using your custom margins, press Print in the bottom-right.
How to Change Margins for a Single Page in Google Docs
The methods above will change the page margins for a whole document. If you want to change the page margins for a single page (or for several pages, but not the whole document), you’ll need to select your pages first. You can then change the margins for the selected area using the page setup menu.
- First, open your Google Docs document and use your mouse to select text or images on the pages you want to change. With the text selected, select File > Page Setup .
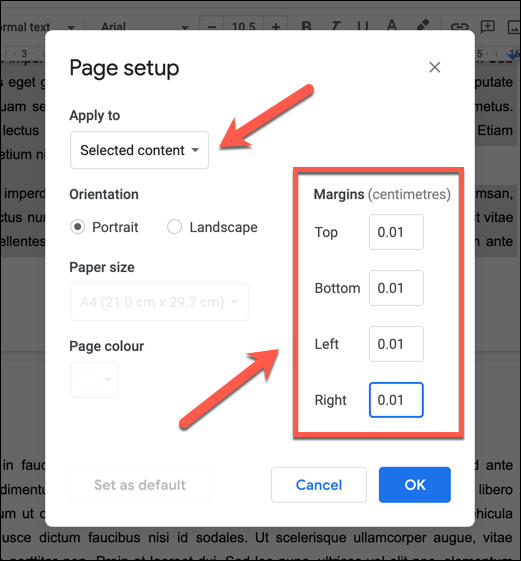
- In the Page Setup menu, make sure that Selected content is selected in the Apply to drop-down menu. Using the Margins boxes, change the values for the margins on your selected pages to move the margins closer or further away from the page edge.
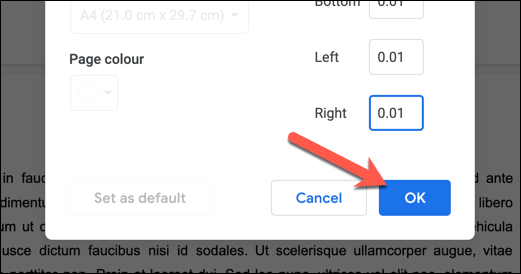
- When you’re ready, select OK to save the changes to your selected pages.
Once saved, your new margins will appear on the page with the content you’ve selected. If you need to revert the changes, select the Undo button, or repeat the steps above to restore the page margins to their previous values.
Creating Documents in Google Docs
By changing the margins in Google Docs, you can create custom documents to fit all types of purposes, from small flyers and business cards to large canvas print-outs. Google Docs is a powerful tool, allowing you to insert signatures into important letters or use specialist templates to create a new resume .
- How to Check for Plagiarism in Google Docs
- Google Docs Voice Typing Not Working? 6 Fixes to Try
- How to Create a Hanging Indent in Google Docs
- How to Change Background Color on Google Docs
- How to Add a Gantt Chart in Google Docs
Ben Stockton is a freelance technology writer based in the United Kingdom. In a past life, Ben was a college lecturer in the UK, training teens and adults. Since leaving the classroom, Ben has taken his teaching experience and applied it to writing tech how-to guides and tutorials, specialising in Linux, Windows, and Android. He has a degree in History and a postgraduate qualification in Computing. Read Ben’s Full Bio
Export The Google Document To Microsoft Word
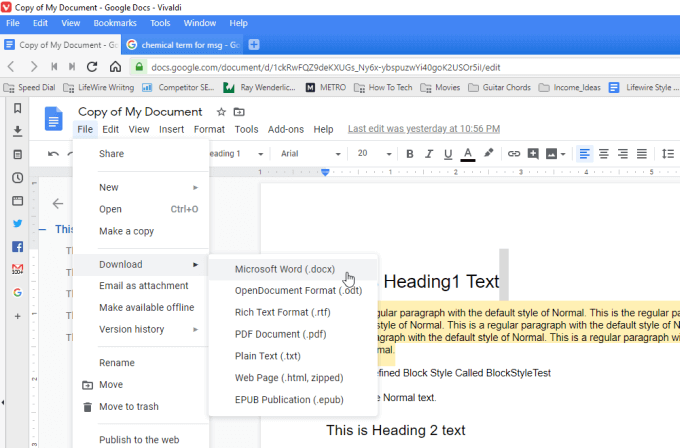
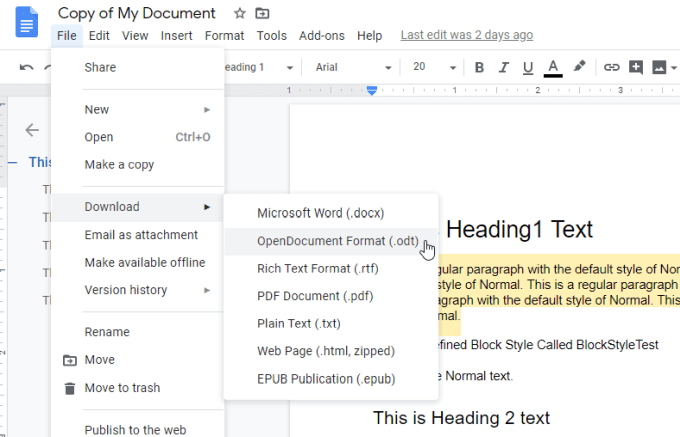
To do this, with your Google Docs document open, select File from the menu, select Download , and then select Microsoft Word (.docx) .
Export The Google Document To OpenOffice
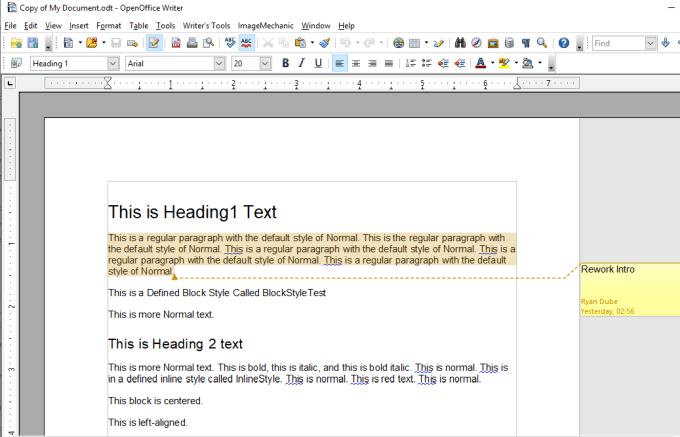
If you don’t have a licensed copy of Microsoft Word, another option is to export the document as an OpenDocument (.odt) file. You can open this file with a number of OpenDocument compatible programs like Apache OpenOffice, LibreOffice, and more.
To do this, inside of Google Docs you can export to ODT by selecting File from the menu, select Download , and select OpenDocument Format (.odt) .
Save the ODT file to your computer.
Download The Google Document As a Web Page
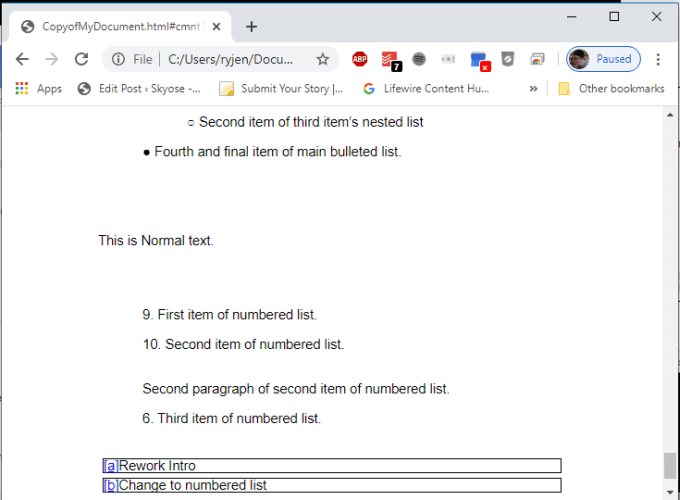
To do this, select File from the menu, select Download , and select Web Page (.html, zipped) .
This will save a zipped file onto your computer. Unzip the file and then open the HTML file with Chrome.
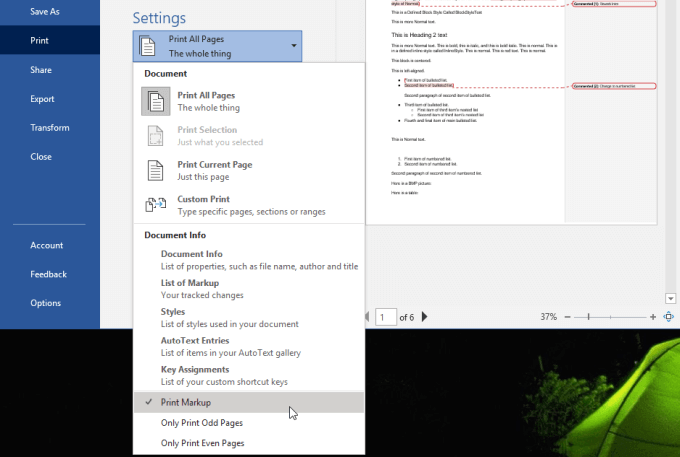
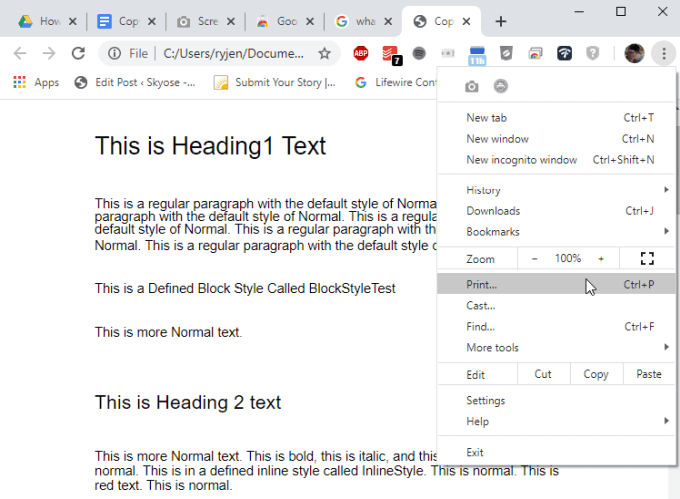
To print the document, just press the three dot menu icon at the upper right corner of the Chrome window, and select Print .
Use The Full Page Screen Capture Chrome Extension
If you prefer using your Chrome browser but don’t like the formatting of the export to HTML feature, you can instead install the Full Page Screen Capture Chrome extension .
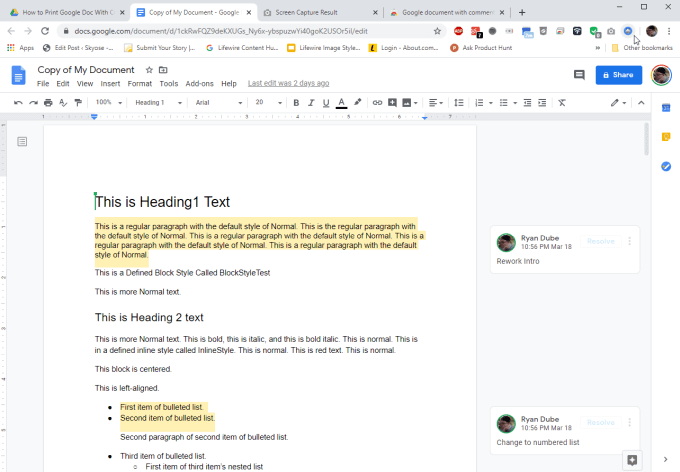
This feature inserts a small camera icon at the top of your Chrome browser that you can click to capture a screenshot of your entire Google Docs document.
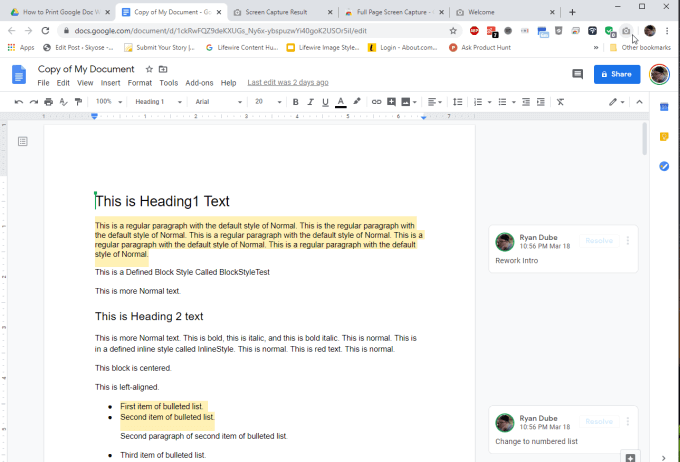
When you’ve installed the extension and you’re ready to capture your document, press the camera icon.

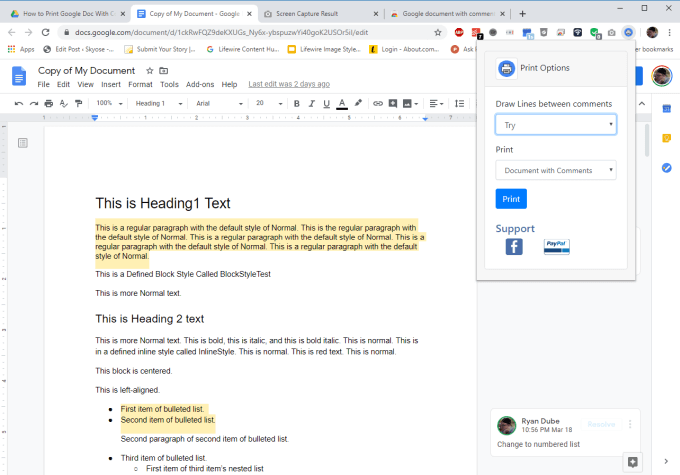
To print it, just select the PDF icon at the top to download the document in PDF format and print it from your computer.
Whether you choose an outside application like Microsoft Word, an HTML printout, or one of the Chrome extensions, really comes down to personal preference. Each option is just as simple and easy as the next.
- How To Embed HTML Into a Google Doc
- How to Check for Plagiarism in Google Docs
- How to Fix Speech Services by Google Waiting for Network Connection Error
- Google Docs Voice Typing Not Working? 6 Fixes to Try
- How to Turn Off Google Assistant on Various Platforms
Ryan has been writing how-to and other technology-based articles online since 2007. He has a BSc degree in Electrical Engineering and he’s worked 13 years in automation engineering, 5 years in IT, and now is an Apps Engineer. Read Ryan’s Full Bio
