In 3D printing communities, there’s a lot of discussion around the best 3D printer bed cleaning methods. Whether you’re a newcomer or a veteran, we’ve got some tips for success.
We’ll discuss various cleaning products and how to use them to clean the beds of FDM printers.
Why Clean the Print Bed?
It may seem obvious, but plastics stick better to clean surfaces. If you have poor bed adhesion, your printing quality may suffer. To get the best adhesion, remove any buildup of filament, oil, dirt, and dust.
Plus when you have a clean 3D printer bed, you might not need to use hacks like glue sticks, painters tape, and hairspray to improve adhesion.
Safety First
As with anything involving chemicals and electricity, a little common sense will go a long way to protect yourself and your property.
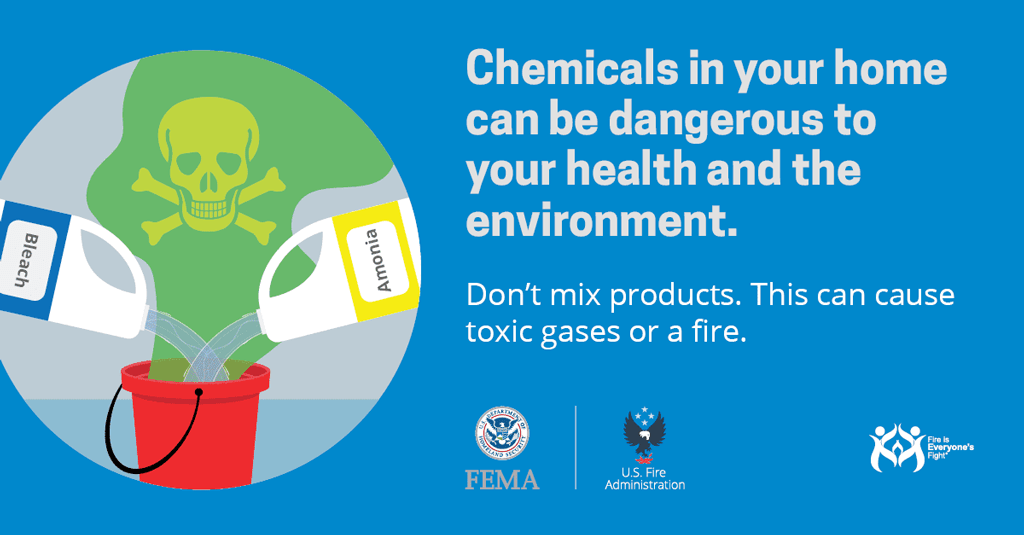
Never mix chemicals. You may end up inadvertently creating toxic and dangerous substances. Specifically, never mix acetone and isopropyl alcohol. It forms a toxic chemical, peracetic acid, which can cause chemical burns or worse.
Don’t use any of these products in a confined space, and make sure you have good ventilation.
Also remember that acetone and all kinds of alcohol are highly flammable. All it takes to start a fire is a spark from the electronics or heated bed.
Cleaning Solutions
Only a few cleaning products are effective and safe to use to clean the bed surface.
Isopropyl Alcohol (IPA)

In a pinch, you can use 70%, but keep in mind it won’t remove as much oil from the build surface, and it may contain chemicals other than just alcohol and water. When alcohol and water dry, they might leave a thin film of other, unknown compounds on your bed.
In our experience, 70% isopropyl will do a great job on beds that are already fairly clean. If you see fingerprints or smudges on your build plate that don’t come off with 70% isopropyl, you may need something stronger. We’ve found 90% isopropyl to be the sweet spot between price and effectiveness.
Ethyl Alcohol
In theory, ethyl alcohol is also a good cleaning solution. However finding it in a strong enough concentration is difficult, and in some U.S. states it’s illegal to purchase over the counter.
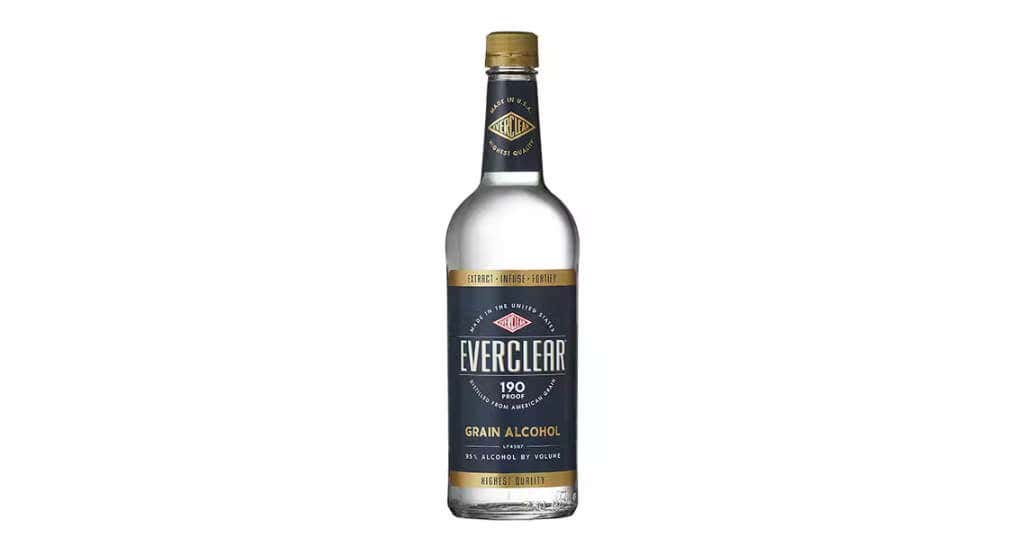
Everclear is a brand of ethyl alcohol that you can buy at a liquor store. Everclear is 190 proof, which means it’s 95% alcohol.
On the whole, though, ethyl alcohol is more likely than isopropyl alcohol to have impurities, and it’s more expensive. For these reasons, we recommend isopropyl over ethyl alcohol.
Acetone
You might already have some acetone in your home. It’s the main ingredient in some nail polish removers. Read the label, because not all nail polish removers contain acetone. You can find 100% acetone at hardware stores, and it’s a relatively inexpensive solvent.
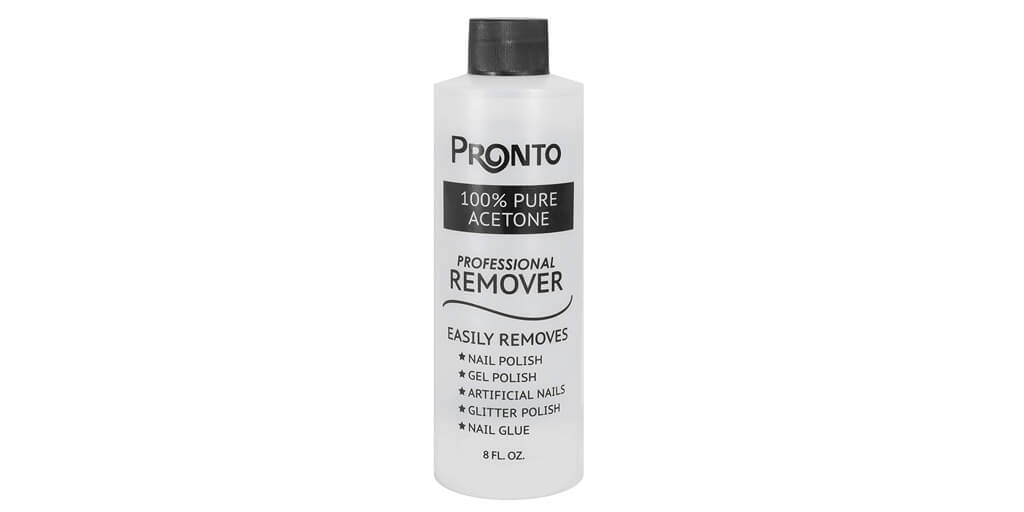
Acetone is extremely good at removing oil, and it evaporates very quickly. It has a very strong smell and is highly flammable. It can also dissolve some plastics like ABS and acrylic. For that reason, be very careful about what you’re putting acetone on. Prevent damage to your skin, your 3D printer, floors, and furniture by avoiding contact with any other surface besides the bed.
Even though it’s extremely good at cleaning the build plate, we don’t recommend using acetone regularly. In fact, it may damage beds that have a PEI coating.
Soap and Warm Water
Alcohol and acetone, though they can take off grease, aren’t good at removing glue sticks, which some people use to help with first layer adhesion. Dishwashing soap and water work well to remove both grease and glue stick. It’s easier to use dish soap and water if you have a removable bed because you can take it to your sink.
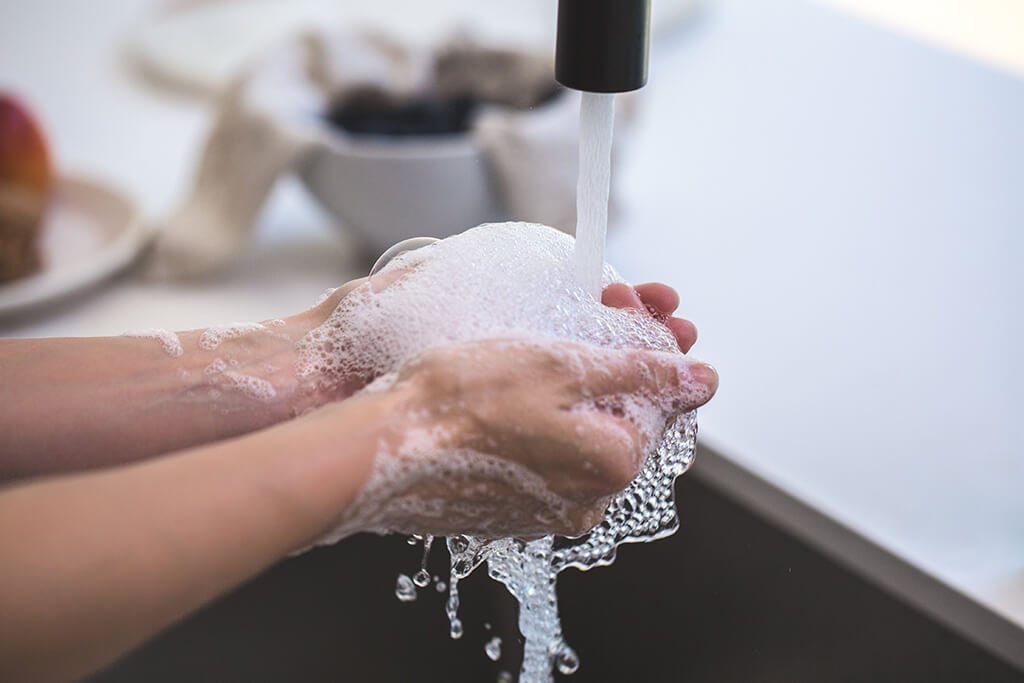
Remember, soap and water mixtures are conductive, so don’t get any on the electronics on your 3D printer. It might cause a short, or, worst case, a shock.
All in all, soapy water may be the best mix because it can remove all types of contaminants.
Glass Cleaner
Glass surface cleaners like Windex aren’t just for cleaning glass. They can act as release agents too. Windex will remove some oil from the bed as well as some other water-soluble contaminants, but it will also leave its own film behind. That might result in less adhesion—which isn’t always a bad thing.
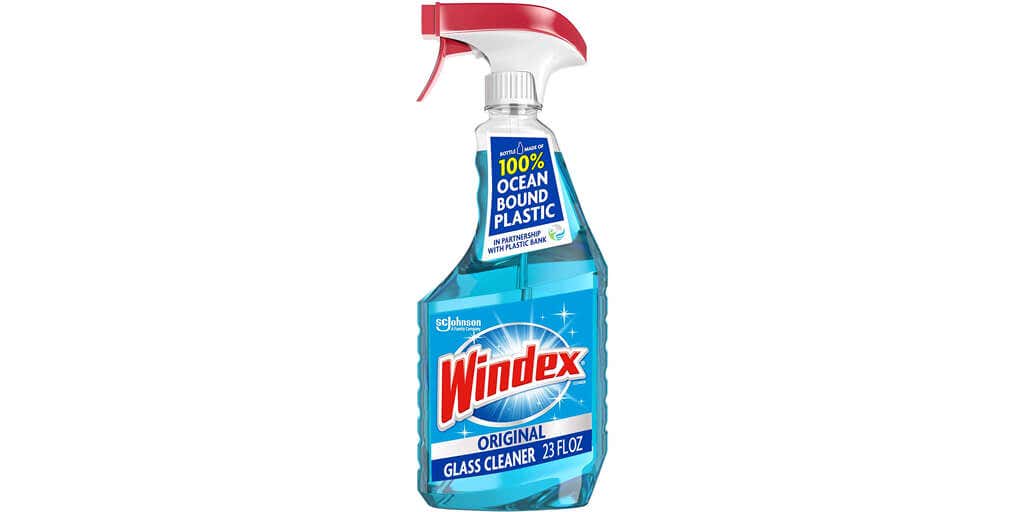
In some cases—like when printing with PETG onto a PEI-coated printing surface— your prints may stick so well that they can pull up the PEI coating when you try to remove them. If you’re having that problem, consider using a window cleaner to clean your bed, or just spray some on to help reduce adhesion, even if your bed is perfectly clean. Just remember to clean it again if you switch to a filament type that doesn’t adhere as well, like PLA or ABS.
How to Clean Your 3D Print Bed
The steps for cleaning the bed of a 3D printer are largely the same, whether you have a glass bed (like the Anycubic Kobra Max), a metal bed (like the Voxelab Aquila ), a magnetic bed (like the Anycubic Vyper), or a PEI-coated bed (like some Ender 3 printers).
There’s really only one exception. You shouldn’t use acetone to clean PEI sheets because it might damage the PEI sheet over time. With that in mind, follow these steps for cleaning beds of different materials.
These are the steps for cleaning with isopropyl alcohol, ethyl alcohol, acetone, or Windex:
Using a scraper, remove any leftover filament residue or adhesive tape from the glass plate, metal bed, or PEI sheet.
Make sure the bed is at room temperature. Otherwise, the cleaning fluid will evaporate. You want to give it time to soak the oil off.
Don’t touch the bed directly with your hands, lest you recontaminate it. Pretend you’re a surgeon.
Always add your cleaning solution to a clean paper towel or cloth and avoid spraying it directly on the bed because the mist might get into your electronics. Put enough cleaning solution on the paper towel so you’re able to wipe down the whole bed before it starts evaporating.
Methodically clean the entire bed, applying pressure evenly throughout the cleaning process.
Optionally, introduce a second paper towel or clean cloth to dry the bed. Drying can remove even more surface contaminants and oil, and it can dust off any remaining dirt or pieces of the first paper towel. The first pass is dissolving the contaminants. The second pass is removing those contaminants. If your bed is relatively clean, you can skip the second pass. If you’re having adhesion issues, definitely dry the bed.
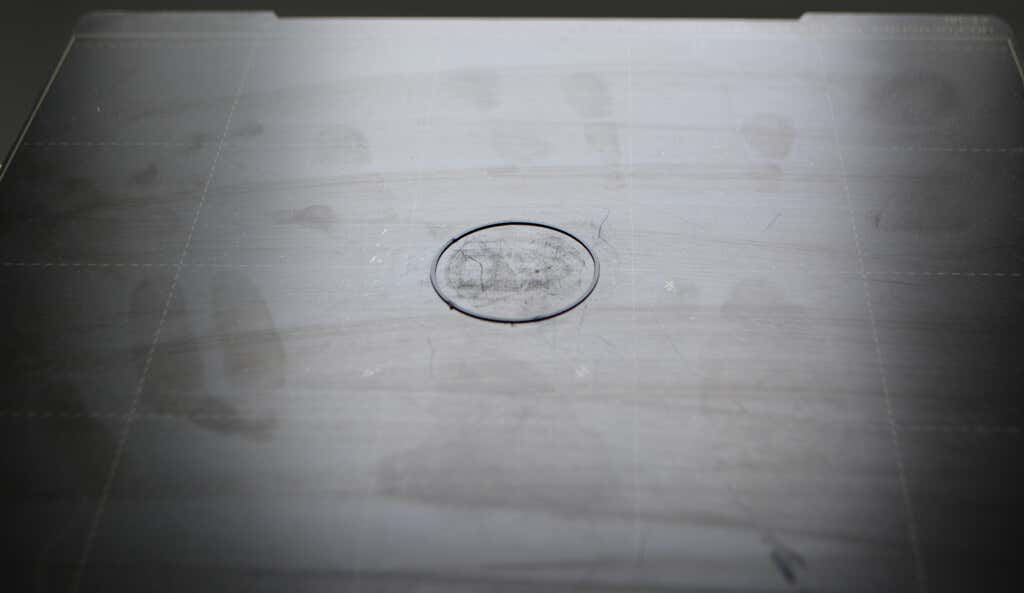
If you see any remaining smudges, fingerprints, etc., repeat the steps above until they’re gone.
With Soap and Water
When using soap and water to clean the bed, follow these steps:
- First, wash your hands thoroughly.
- Wash the bed like you would a dish, but don’t use anything abrasive. A soft sponge or cloth will work. You could just use your hands, but you’ll get off more grease if you use a sponge, cloth, or paper towel.
- Add some pressure while you’re soaping it up to help dislodge the oil.
- Then rinse all the soap off. Don’t leave any behind. You don’t want any soap left on the bed at all.
- Lastly, dry the bed thoroughly with a new, clean cloth.
Keeping Your Bed Clean
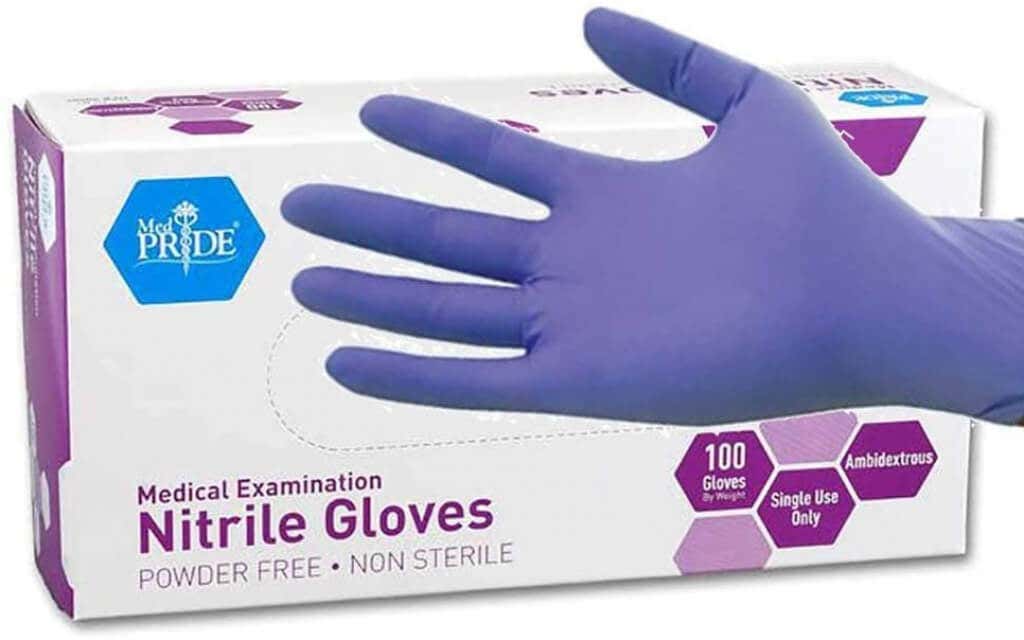
The best way to have a clean bed is to not get it dirty in the first place. Avoid touching the bed at all, if possible. Thoroughly clean your hands if you do need to handle the bed. Better yet, wear clean gloves. Nitrile or latex gloves work great.
Once you’ve cleaned the bed, only touch it on the sides. Keeping your bed clean means future prints are more likely to be successful.
*Special thanks to FormerLurker for his 3D printing expertise.
- How to Fix Slow Wi-Fi on Your Smartphone
- 7 Best Machine Translation Software (or AI) to Try in 2025
- What Does the Green Dot Mean on Facebook?
- How to Turn off Hardware Acceleration in Chrome
- How to Check VRAM in Windows 10, 11, and macOS?
ÿØÿà JFIF ÿÛ C $ &%# #"(-90(*6+"#2D26;=@@@&0FKE>J9?@=ÿÛ C =)#)==================================================ÿ ÿÄ ÿÄ ÿÚ û0 (ž"&$#0ndö’¬ Å$:N ”ã" úIõ <
ÿØÿà JFIF ÿÛ C ‘!%"."%()+,+ /3/2’+*ÿÛ C ***************************************************ÿ « ÿÄ ÿÄ ÿÚ ú?lL‘“D‰‰Y%”:d¢TѬ2ªe§:¦ZáJ²Ä¶ËjÛ,,IÔÒd‰¤©Œ‘„0( 1… •„ HˆEVR¾k;üÍÏXbºpSKVÂIn§¶sûözu;ò„±–µ©’¬ß©¢/[aˆ ”¶K<
ÿØÿà JFIF ÿÛ C $ &%# #”(-90(*6+"#2D26;=@@@&0FKE>J9?@=ÿÛ C =)#)==================================================ÿ ÿÄ ÿÄ ÿÚ ö` _åÜõ{ª|¿ëÝK¸=ÅïÃãÓÌÞnö•YK<éUs,»^} sUô<Ã?Ò=¦Ù]/šq{‰‰‰ñî/~o´ôžãé’›W±†÷´·‘3Ø 3_C̳ý’Ïi¿÷?7˜½Åî’þzÄú[³t˽F=,ý‡®hù{‰g suô<
Whether you want to print out tools and parts for DIY projects, or something fun like a 3D printed Baby Yoda, you’ll need to find 3D printer models. It’s still a new space, and creating detailed models is a lot of work, so resources are still limited.
There are still a few gems out there that offer some great models for you to download and print for your own personal use. We’ve picked out a number of them that you’re sure to like.
Unless we explicitly state it in the opening paragraph, all websites featured in this article offer 3D models for free download. If you’re looking for 3D printers instead, here’s a list of great starter models.
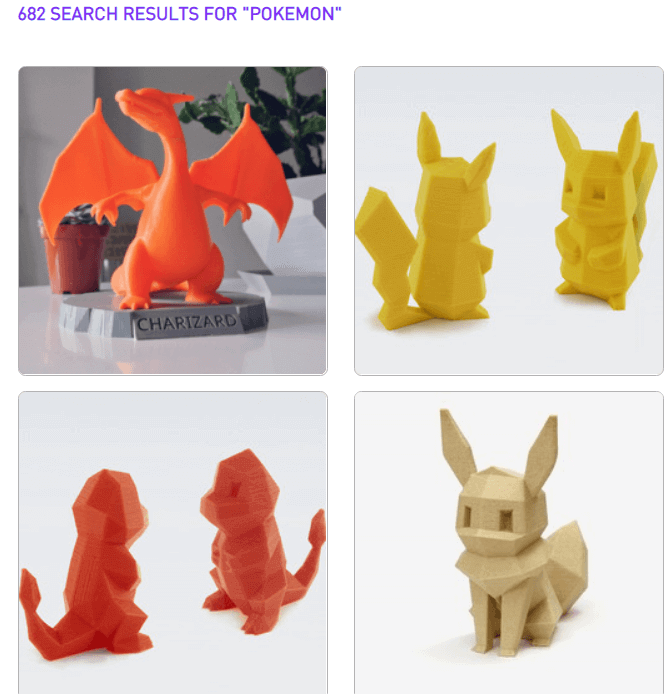
Cults 3D– 3D Printer Model Platform
Cults 3D is a huge platform for creating, selling, and buying 3D printer models. Whilst some models must be purchased, there are also thousands of free 3D printer models to download too.
To get started, simply visit the website and search for something you’d like to print. Alternatively, visit the collections page and look for 3D models within certain collections. Popular collections include Star Wars, Harry Potter, and Pokemon.
For more productive prints, the useful objects collection might take your fancy. This includes projects like 3D printed smartphone holders, clamps for DIY work, or kitchen tools like egg separators and bag clips.
Please note that all of these 3D printer models are user submitted, so print instructions, model quality, and support will all vary from model to model. You can sort your search results by download or like count to make it easier to find good models.
If you can’t find what you’re looking for, you can find a creator to make a 3D model for you with the on demand feature. You must list the specifications of the model, give a budget, and choose a deadline. The more you provide in terms of specifications and illustrations for the print, the better.
Yeggi– Search Engine for 3D Printer Models

Yeggi doesn’t offer up 3D printer models itself, but instead provides a powerful tool to search for 3D models. Yeggi has been around since 2013 and since then there hasn’t really been any decent competition to make us suggest an alternative. Since Yeggi sends you to approved third party websites, some 3D models are only available for purchase. However, 90% of all models that appear in Yeggi’s search engine are free to download.
Yeggi has over 2 million 3D printer models in its database, so a quick search should return some good results. The search tools aren’t as comprehensive as Google, but you can still sort results by best match, popularity, or most recently added.
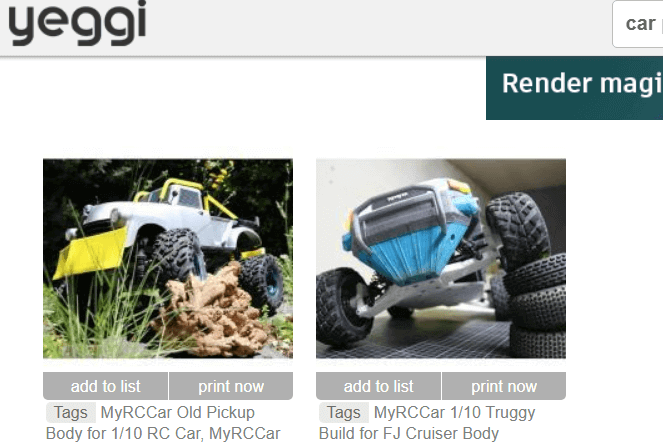
You can also filter out free or for sale models so that you get the results you need. Our only gripe with Yeggi is that searching for that perfect model often leads to clicking back and forth between multiple different websites, so be prepared to go through plenty of tabs on your browser.
Thingiverse– Find 3D Printing Projects
Despite the name, Thingiverse isn’t just about printing out things. It’s a great platform for finding fun, educational projects and to join a community. Take this LTB weather station for example. It’s also a great place to engage with other 3D printer owners and learn about what they’re building.
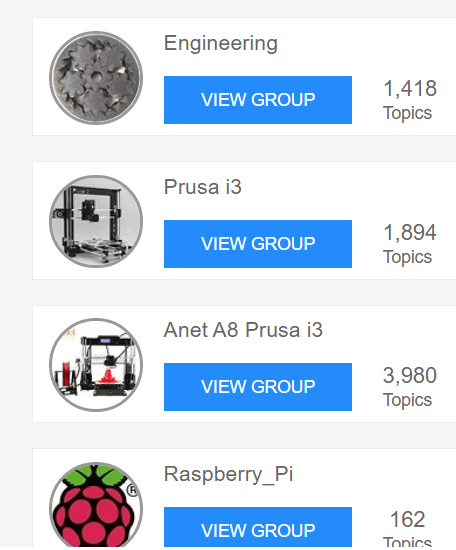
You can find specific groups so that you can interact with like-minded people. For example, some popular groups include engineering, Raspberry Pi enthusiasts, board game creators, Star Wars, and Warhammer 40K.
If you are after things to print out, that’s possible, too. The search bar is the best tool to use to find 3D printer models to print out. For example, a quick search for Baby Yoda returned hundreds of results, sorted by popularity.
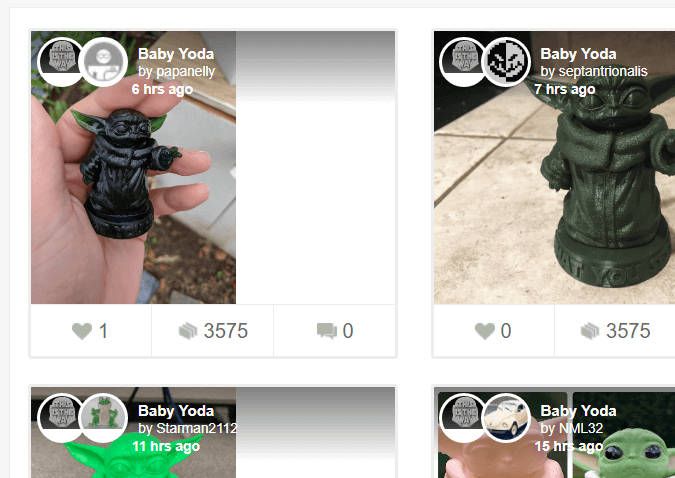
Because of the community-led focus, you’ll have more tools to engage with each creator’s project. Let’s say you wanted to see how a specific 3D Baby Yoda print would actually turn out. You can see the Makes tab to view other user’s results after printing the model you are currently viewing.
YouMagine– Community Created Prints
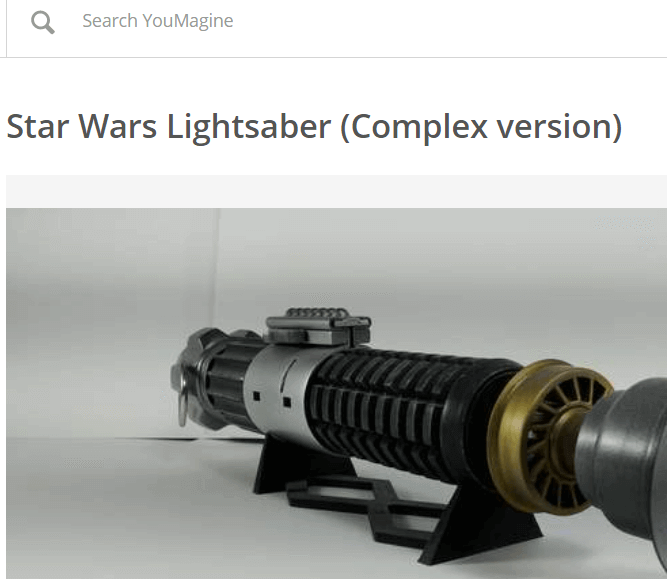
YouMagine is driven by the community, perhaps more so than the other platforms we’ve listed so far. The goal behind YouMagine is to create an open source platform where individuals can work to create, edit, and collaborate on 3D printer models without any content restrictions.
That means models will often use a Creative Commons license. Typically, models will use CC Attribution Noncommercial Share Alike, which means you can download 3D models for free, edit, and reshare any work, but you cannot use it commercially.
For now, YouMagine’s community is a little smaller, but if you’re looking to collaborate with others on 3D printer models or want to find the starting work for your own 3D designs that you can print later, YouMagine is a great tool.
Instructables– For 3D Printing Projects
Instructables isn’t just about 3D printer models but it’s a great website to find fun, engaging projects that do utilize 3D printing. You’ll be able to find projects with full guides and downloadable model files.
Not only does this mean that you can print out some useful models, but you can learn how to do everything along the way. Download parts to build your own 3D printed toys, or learn how to create your very own 3D printable models too.
- The 8 Best Sports Streaming Sites in 2025
- The 10 Best Free Image Hosting Sites in 2025
- 8 Best Crowdsourcing Sites to Fund Your Business Idea in 2025
- 10 Best Free Audio Converter Tools (Online & Offline)
- 7+ Free Tournament Bracket Generators and Templates
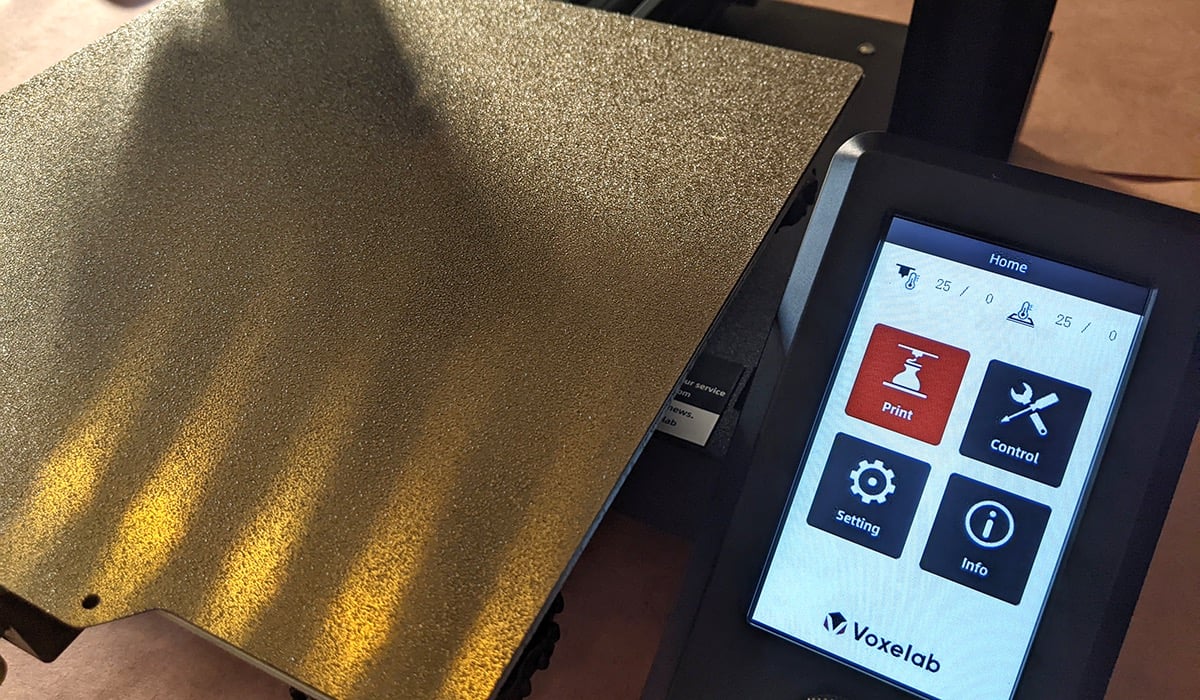
In this 3D printer review, we’ll let you know what you get when you buy an Aquila S2, what it’s like to build it, and our first impressions about its quality and usability.
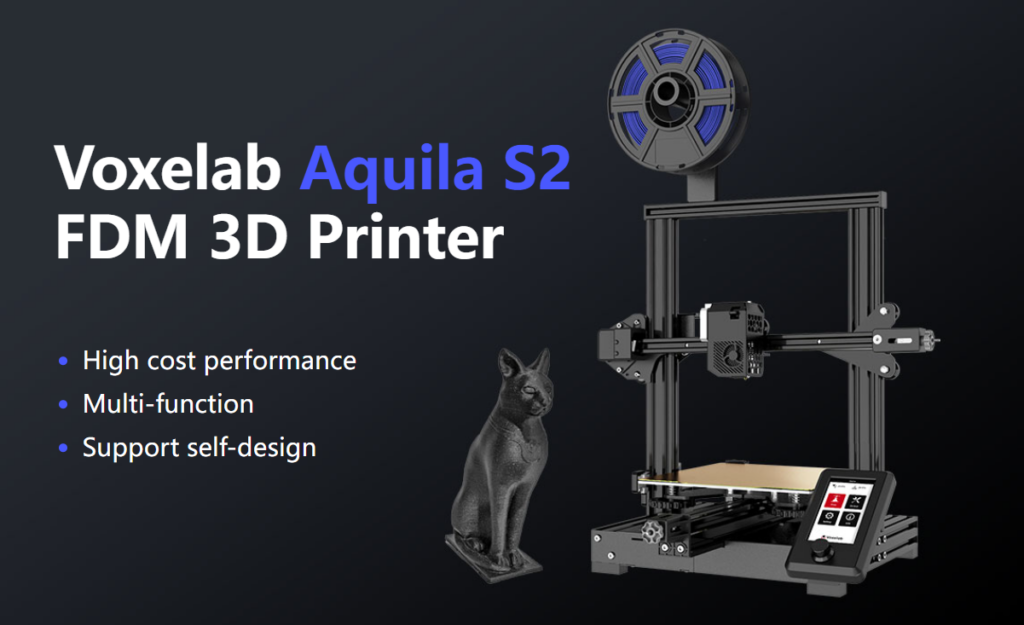
Features of the Voxelab Aquila S2 by Flashforge
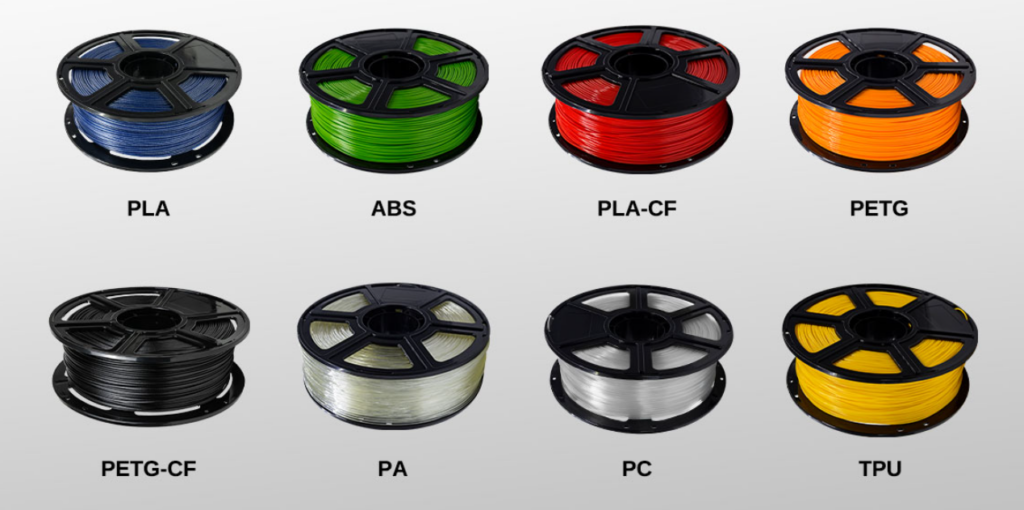
The Voxelab Aquila S2 is an FDM filament printer that will print with PLA filament as well as PETG, PETG-CF, TPU, and ABS filaments and more. FDM is an additive process, making these some of the most versatile and easy-to-use 3D printers, especially compared to resin printers , which are amazing , but are more difficult to use and can be quite messy.
The build volume is a generous 8.7 x 8.7 x 9.4 inches (220mm x 220mm x 240mm), quite similar to the print volume of the Creality Ender 3 V2. Earlier models came with glass beds coated in Carborundum, which is also similar to the Ender. Ours came with a magnetic print bed, which we loved.
We’ll discuss the magnetic bed more below, but suffice it to say, it’s one of the best features of this printer or any printer.
The Aquila is very quiet. The fan is the loudest part. Additionally, it has a hot end with an unusually high temperature for an entry-level printer—up to 300 degrees Celsius, allowing you to use all common filament types.
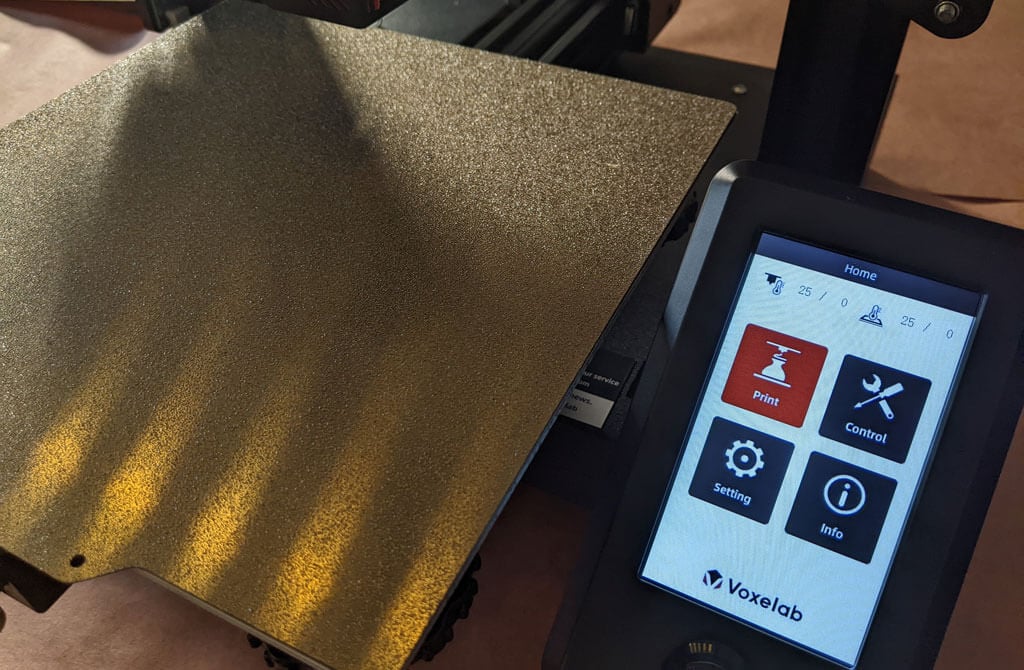
It has a fantastic LED display, quite like the display on the AnyCubic Vyper. It’s big. It’s clear and colorful. Despite the fact that it’s not a touch-screen, it’s intuitive to use. It has a rotary knob control that you push to make a selection.
A few other observations about the Aquila’s features:
- If you have frequent power outages in your area, you’ll be happy to know that the Aquila can resume printing after a power interruption.
- The Aquila runs a fork of Marlin, probably the most popular open-source 3D printing firmware available.
- You can load files to print via the MicroSD card reader or you can use a serial interface like Pronterface.
- Since most models of the Aquila include the N32 chip, that means you could run OctoPrint and all of the great OctoPrint plug-ins on this printer.
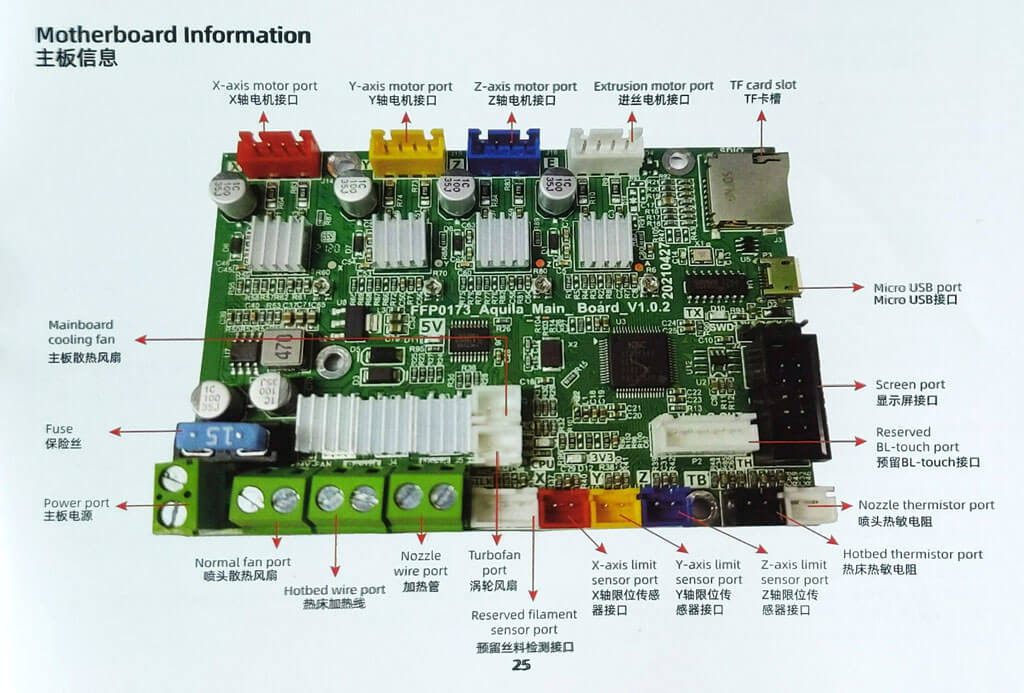
The user manual includes a full schematic of the motherboard, which will come in handy when you inevitably mod your printer.
Assembling the Voxelab Aquila S2 3D Printer
If you have any experience with 3D printing, you know to expect a certain amount of frustration when assembling your new printer.
There are a lot of typos and confusing language in the manual. We muddled through, and everything turned out fine.
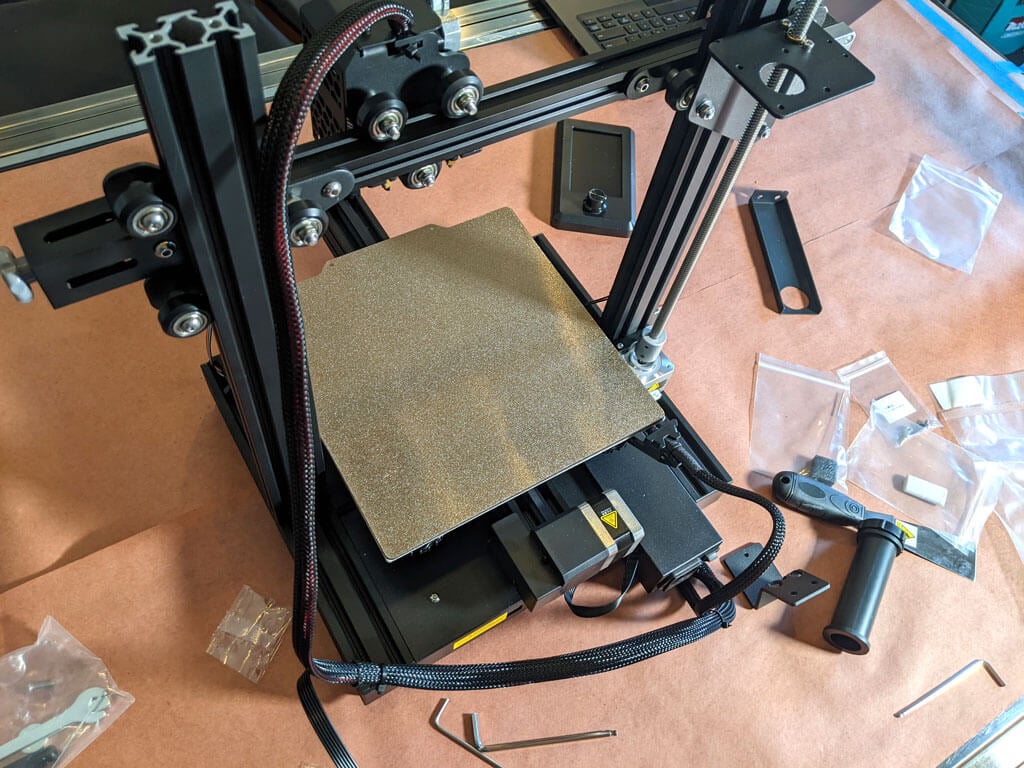
Beginners will find this printer is easier to build with two people. Also, 3D printers need maintenance. Putting it together yourself will give you the confidence you need to do that maintenance. The included tools are all good quality. You’ll want to keep the particularly good Allen wrenches.
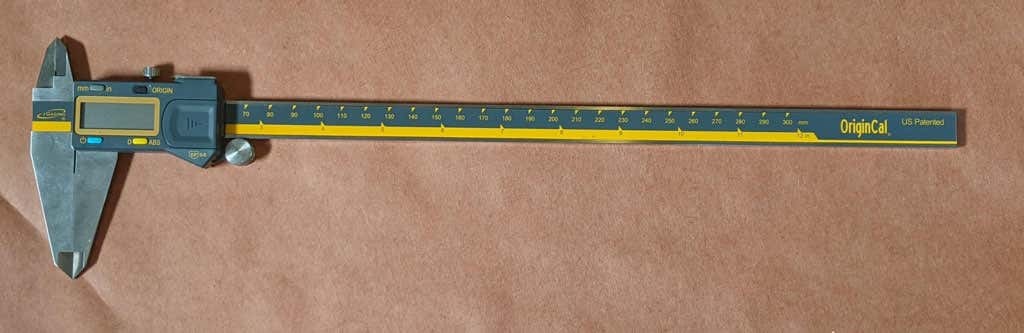
The bolts weren’t labeled, so you might want to use a pair of calipers to figure out which ones are which. It’s not difficult to figure that out, but it would have been nice if they had been labeled.
A beginner might get stuck trying to put this printer together using only the included user manual. It took about an hour to build the printer. They do have a YouTube video that will straighten out any confusion.
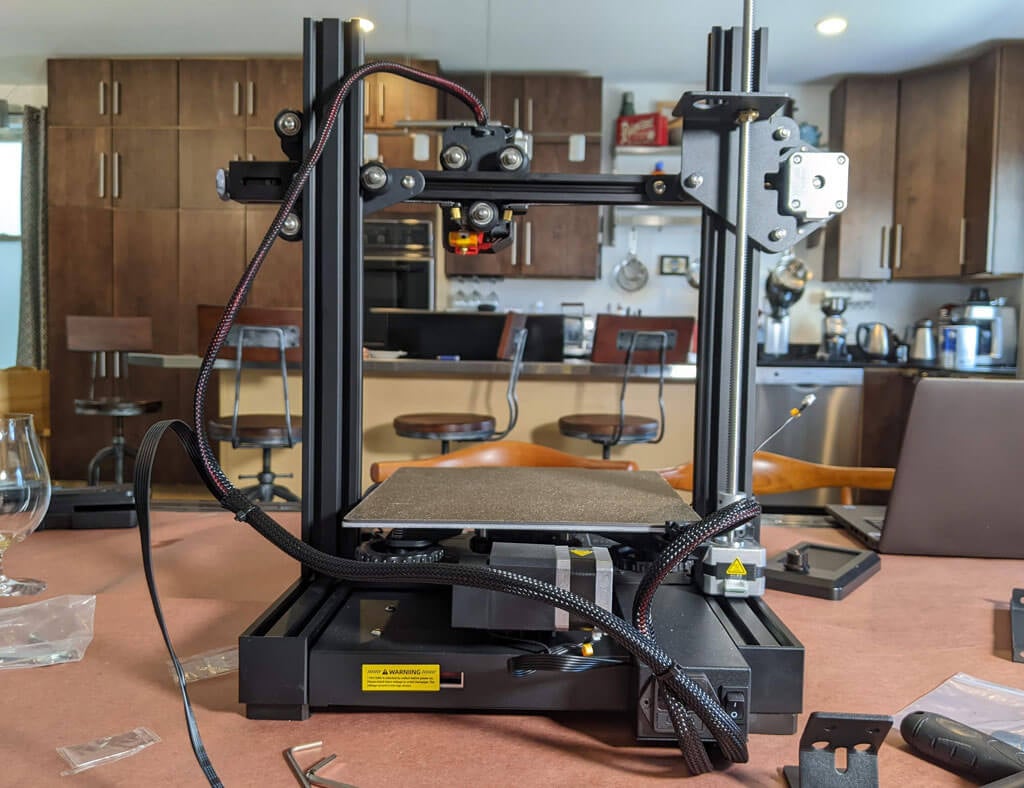
Build Quality of the Voxelab Aquila S2
This is a very well put together entry-level printer. It has a direct-drive extruder. It has aluminum extrusions for the x, y, and z axes. The only thing that makes this an entry-level printer vs. a high-end printer is the lack of auto-bed-leveling and the fact that it only has one z-axis screw.
The removable, magnetic PEI bed is something we’d never go without. It’ll save you a lot of grief, time, and scratches.
The belt-tensioners are a great feature that are often lacking in other printers—even some much more expensive printers. Belts need occasional tightening, and it’s nice to be able to do that without disassembling your printer.
The Aquila comes with a spool holder, but that’s the first thing you’ll want to replace and move. You’ll want to take the weight off the top of the printer. It’s a right of passage to print your own spool holder, and one is even included in the sample files that come on the SD card.
Calibration
All printers with manual bed-leveling have a learning curve because the threads are upside-down, so it’s easy to get confused. You could add your own auto-bed-leveling kit to it. That would be a nice project once you get the basics of 3D printing down. To be fair, leveling the bed manually only took about five minutes. If this is your first 3D printer, it might take you a little longer.
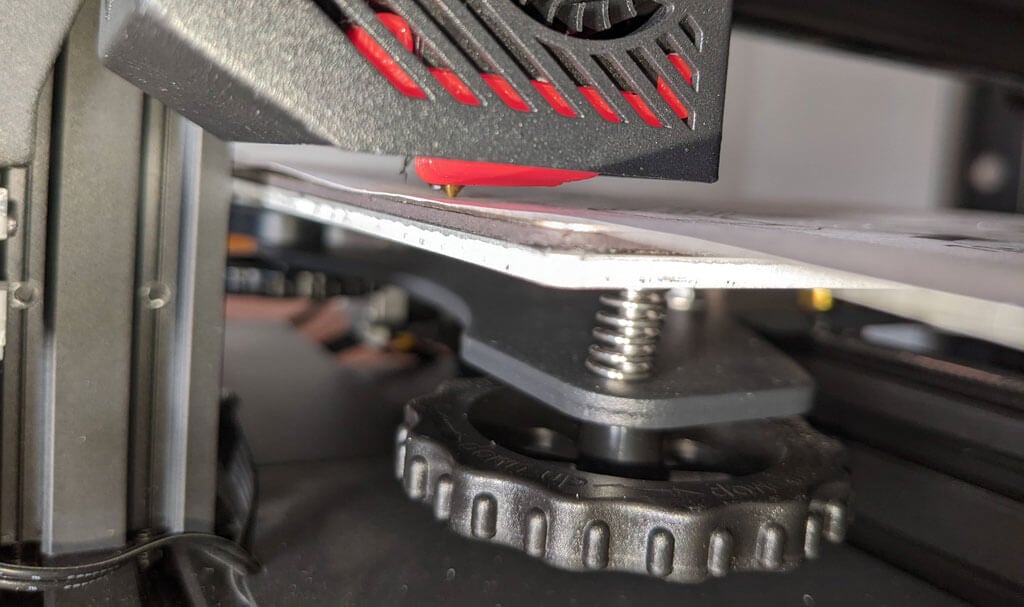
Once your bed is level, and you’ve successfully printed the test print, you’ll want to print your own models. Voxelab has a profile you can import into Cura, a free, open-source slicer that can convert STL 3D model files and other formats into instructions your printer understands (gcode). You can use any slicer you want; however, VoxelMaker slicing software is included on the SD card that comes with the printer.
First Print
We recommend starting with the included test model because it’s already calibrated for the printer. It’s on the MicroSD card, and you can access it via the LCD panel. There were no adhesion problems while it was printing, and the print popped off the build plate on its own as it cooled—exactly what you want.
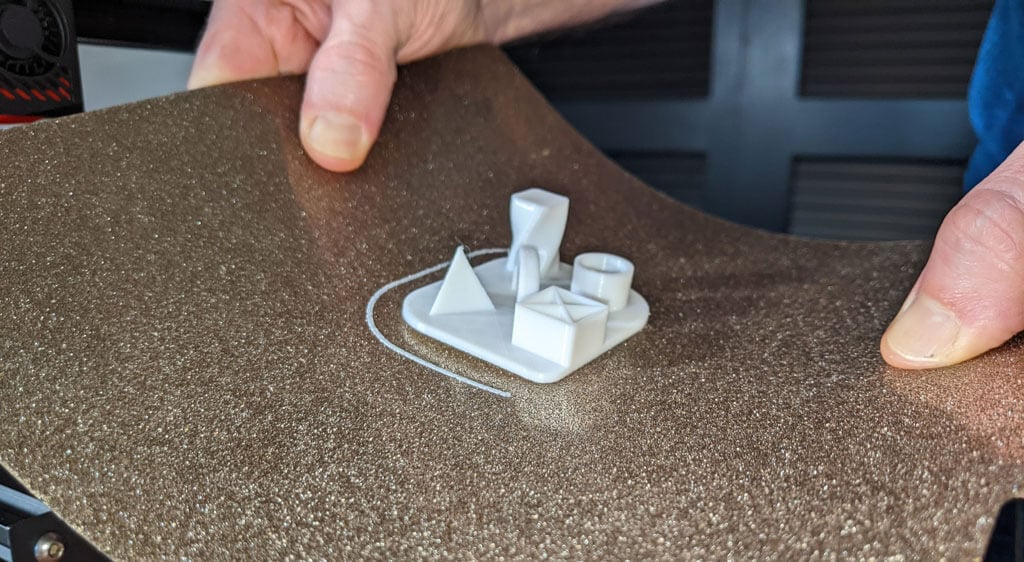
The print speed of the sample file is clearly slower than the printer is capable of, which makes sense for a test print. We did not experience any stringing, and we found the print quality to be impressive given the cost of the printer.
We started printing at a .2mm layer height. The minimum layer thickness is .1mm. If you want higher resolution than that, you may want to consider a resin printer.
Cut to the Chase
This printer is very similar to the Ender 3, and:
- It’s cheaper.
- It has a removable magnetic bed.
- The LCD screen is better.
We recommend the Voxelab Aquila S2 for users who want to save some money and still get some of the features of pricier, high-end printers. We wish it had auto-bed-leveling, but at this price point, we have to say the Aquila S2 exceeded our expectations.
*Special thanks to FormerLurker for help in reviewing the Voxelab Aquila S2 3D printer from Flashforge.
- Tribit StormBox 2: The Under $70 Portable Speaker that Stands Out
- ENGWE L20 2.0 Review: The Best Budget-Friendly Foldable E-Bike?
- TopDon TC004 – a Thermal Imaging Camera That Will Give You Predator Vision
- Newyes Portable Wireless Thermal A4 Printer Review
- Eskute Star Folding Fat Tire Electric Bike Review
