Times change and so does Windows. If you’ve recently moved from a Windows Server 2012 and Windows 7 or 8 environments into Windows Server 2019 and Windows 10 , things are a little different.
The old ways to connect to a network printer are still there. They may look a little different, too. So we’ll show you how to connect to a network printer in Windows 10 or Server 2019. Our favorite way is the last method.
Use Add Printers & Scanners
The new Windows Settings world works the same as in the Control Panel , but it looks different enough to cause confusion for some. Note that if this is at work and you’re not an administrator, the printer must be on the network and the driver already installed. If it’s not installed, you’ll get a prompt to enter the administrator account name and password.
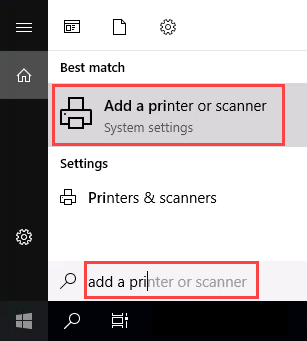
- In the Start menu, type add printers . When the result Add a printer or scanner shows, select it.
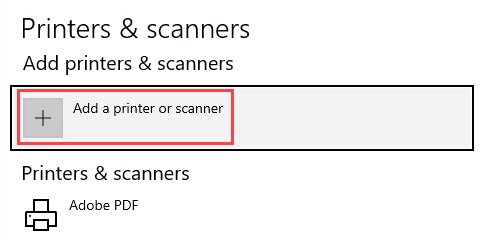
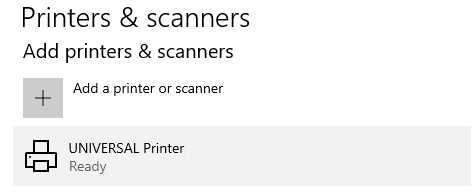
- When the Printers & scanners window opens, select Add a printer or scanner . It will start searching for available printers.
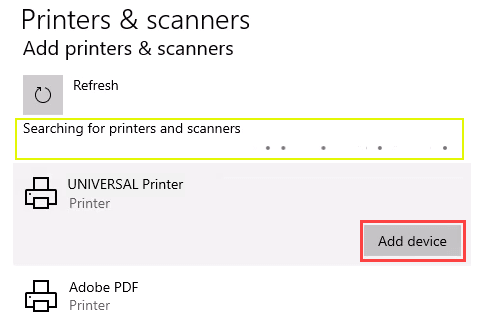
- It may look like it’s still searching, even though all the printers available are showing. Find the printer needed, select it, and then the Add device button will show. Select it.
- The printer will install. There’ll be a progress bar and when it’s done, it’ll say Ready .
Connect to a Network Printer Through a Network Share
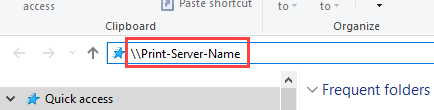
Here’s a way to install a printer that’s different from what you may be used to. It requires that the printer is shared and on the network. Unless you’re the administrator, the driver needs to be installed on your local machine or server. You need to know the path to the share as well. It will look something like Print-Server-Name , where Print-Server-name is the name of the server.
- Open File Explorer . In the location bar, enter the printer share path and then press the enter key. File Explorer will find the share.
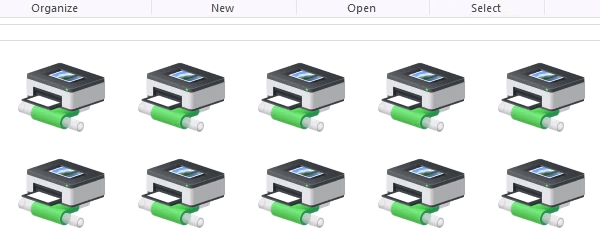
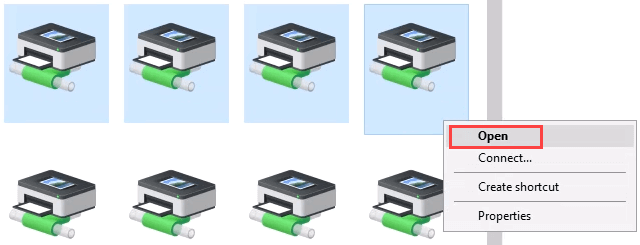
All the shared printers will show.
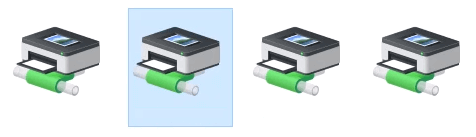
- There are two options: Install a single printer Install several printers at one time
To install a single printer, double-click on it.
When the installation finishes, you’ll see the newly installed printer’s print queue window.
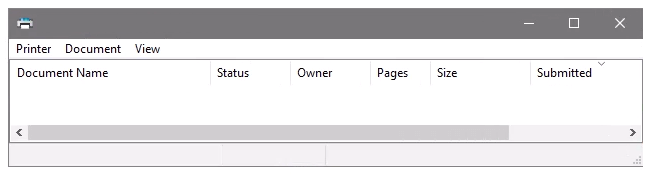
- To install several printers at once, select printers by clicking and dragging a rectangle around them, or hold down the Ctrl key while selecting printers individually. Either right-click and select Open or simply press the Enter key.
Connect to Network Printer via Control Panel
The good old control panel is still there. If you’ve used it before, you know what to do. If not, it’s almost the same as adding a printer through Settings.
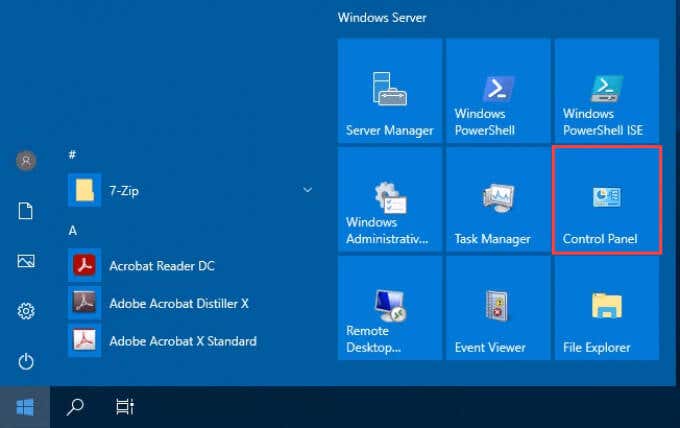
- Open the Start menu and select Control Panel . If it’s not there, start typing control and it will show.
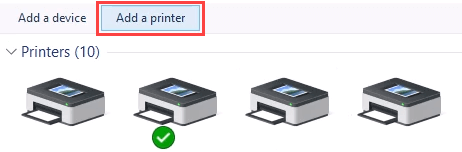
- Select Add a device in the Hardware category.
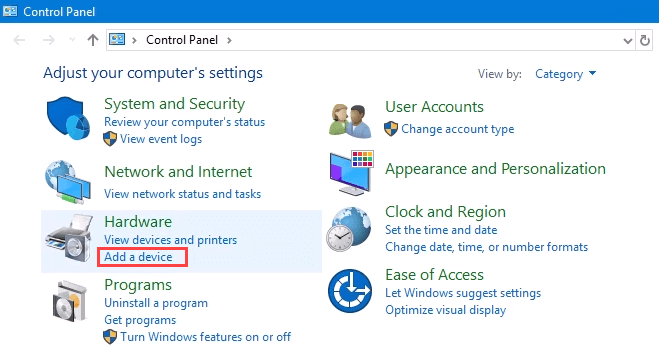
- Select Add a printer .
- It will show a selection of printers. Select the one needed and then select Next .
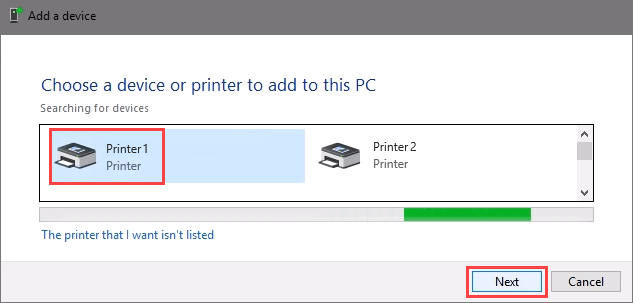
The printer will start installing. It may take a few seconds or minutes.

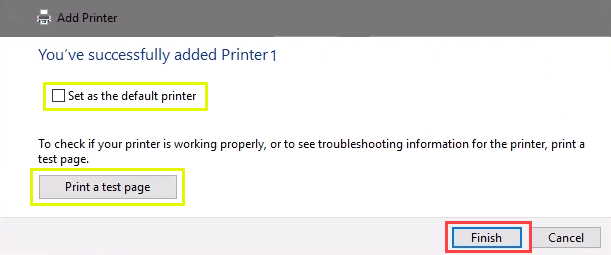
- Once the success window opens, there are options to Set as the default printer and Print a test page . Set the printer as default if needed. It’s always a good idea to print a test page. To exit, select Finish .
Connect to Network Printer via IP Address
The printer you want to install might not be easily visible, but if you have the IP address for it you can use that to connect with the printer. Administrator rights may be required. The first part is the same as adding a printer through the Control Panel until you get to the step to choose the printer. Let’s pick it up from there.
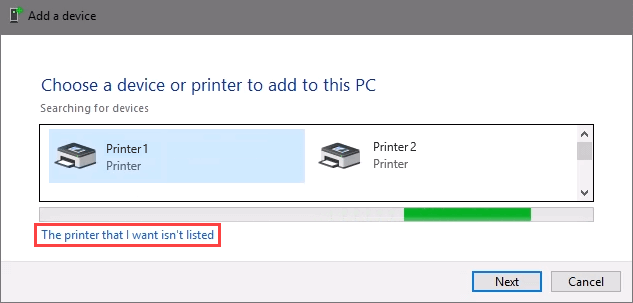
- At the Add a device window, select The printer that I want isn’t listed .
- If administrator rights are required, select Add a local or network printer as an administrator .
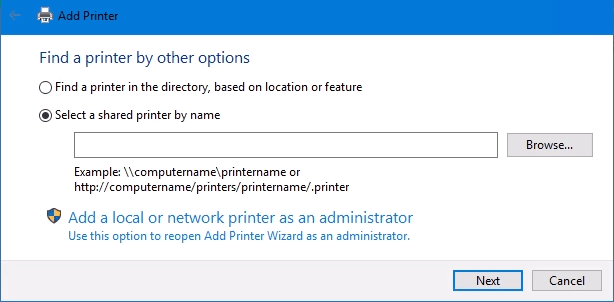
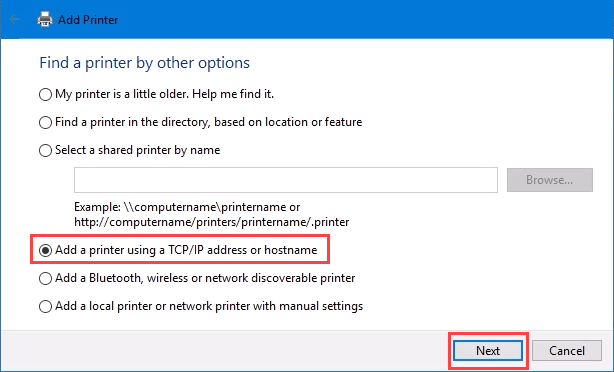
Otherwise, the window below will show. Select Add a printer using TCP/IP address or hostname then select Next .
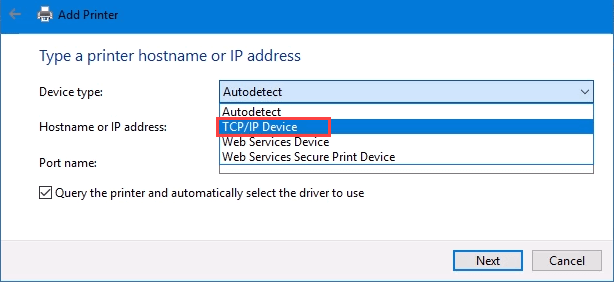
- For Device type: there are several choices. Web Services Device and Web Services Secure Print Device are used for special cases. If you don’t know what those mean, you probably don’t need them. Autodetect may make the wrong choice as well. Select TCP/IP Device .
Enter the IP address in the Hostname or IP address: field. Notice how the Port name: field auto-populates with whatever is entered. The port name can be left as is or changed. In most cases, Query the printer and automatically select the driver to use remains checked.
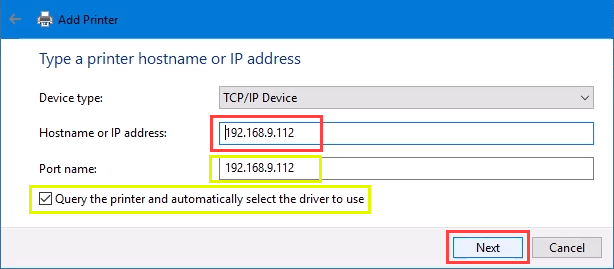
Sometimes an organization will use a universal printer driver to keep things simpler and use less storage. It also keeps the registry small and login times faster. The HP Universal Print Driver works well for HP and many other printers. Select Next .
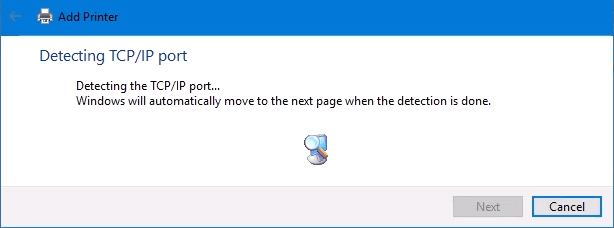
It detects the TCP/IP port to see if it exists.
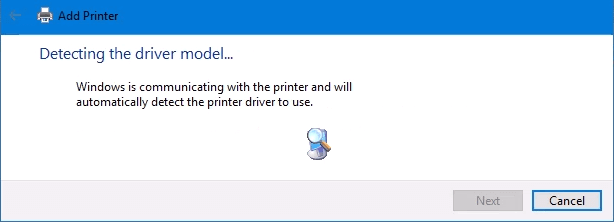
Then it detects the driver model needed.
- Normally, Windows will find a driver already installed, offer the option to replace the driver, or ask to install a driver. If it’s on the network already, it probably installed the driver already. Select Use the driver that is currently installed and select Next .

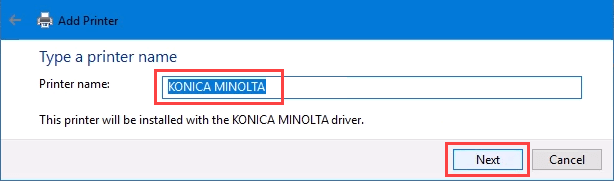
- It will auto-select a name for the printer. That can change as needed. Select Next .
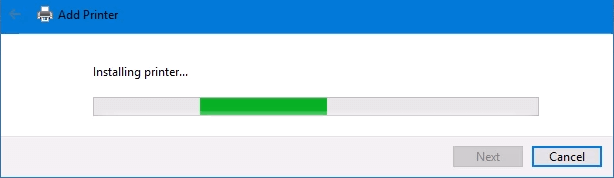
The real installation begins.
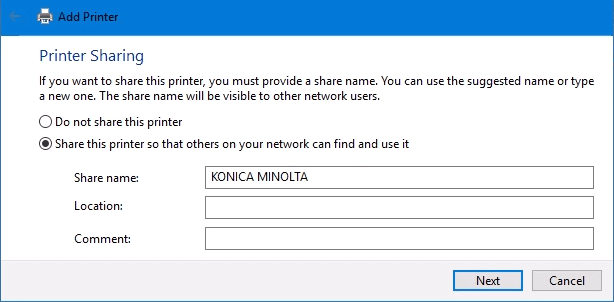
- If sharing the printer, add a location so others can see where the printer is located.
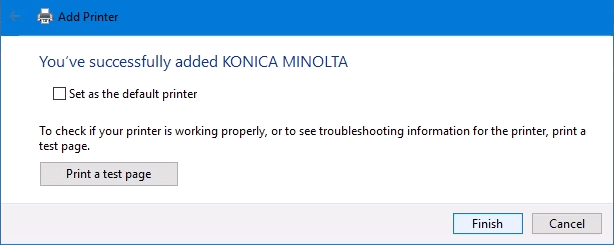
It successfully installed the printer. Set it as the default or not as needed. As always, it’s a good idea to Print a test page . Select Finish closes out the window.
Connect to a Network Printer via PowerShell
Finally, the last, and possibly best, way to connect network printers is with PowerShell . Why is this best? If you’re a System Administrator and have dozens of printers to connect, or if you need to make sure the printer is connected every time the server starts or someone logs in, a PowerShell script is best. It’s fast, done once, and easy to call many times.
You will need to know:
- Printer IP address
- Printer driver name
- What to name the printer
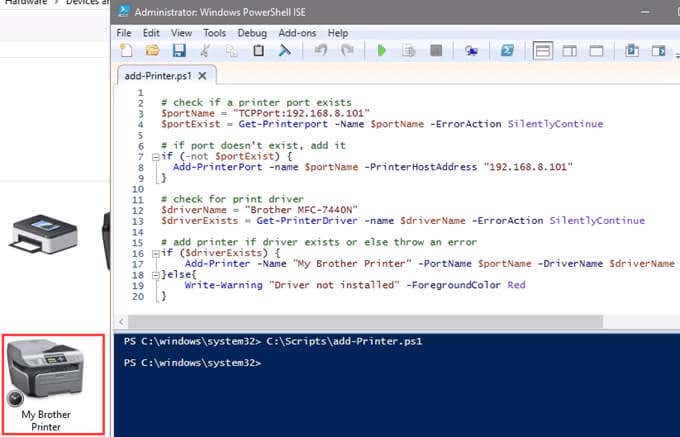
Following is a sample script. Make it into a looping script to install several printers at a time, or make it a function to call from other processes.
check if a printer port exists
$portName = “TCPPort:192.168.8.101”
$portExist = Get-Printerport -Name $portName -ErrorAction SilentlyContinue
if port doesn’t exist, add it
if (-not $portExists) { Add-PrinterPort -name $portName -PrinterHostAddress “192.168.8.101” }
check for print driver
$driverName = “Brother MFC-7440N”
$driverExists = Get-PrinterDriver -name $driverName -ErrorAction SilentlyContinue
add printer if driver exists or else throw an error
if ($driverExists) { Add-Printer -Name “My Brother Printer” -PortName $portName -DriverName $driverName } else { Write-Warning “Driver not installed” -ForegroundColor Red }
When the script is run, it takes maybe 3 seconds. Then you’ll see the printer installed.
Any Other Ways to Connect to a Network Printer?
We’ve given you several ways to connect to a network printer or several printers. One of them will be the best way for you. There is at least one other way, and that’s by the Command Prompt.
- Preparing for Windows 10 End of Support: Upgrading to Windows 11
- How to Fix a “This file does not have an app associated with it” Error on Windows
- How to Fix an Update Error 0x800705b4 on Windows
- How to Resolve “A JavaScript error occured in the main process” Error on Windows
- How to Fix the Network Discovery Is Turned Off Error on Windows
Guy has been published online and in print newspapers, nominated for writing awards, and cited in scholarly papers due to his ability to speak tech to anyone, but still prefers analog watches. Read Guy’s Full Bio
One common problem I have run into with clients is trying to share a printer connected to a Windows XP machine with Windows 7/8/10. There are lots of people out there that have USB connected printers attached to one computer, sometimes even a Windows XP machine.
If you get a new laptop running Windows 7/8/10, it makes sense to share that printer so that any computer can print to it. Unfortunately, trying to print to a shared printer on XP from Windows 7/8/10 is not as simple as it should be!
In this article I will walk you through the steps for XP to Windows 7/8/10 printer sharing. I am assuming your printer is directly attached to a Windows XP machine and you want to print from a Windows 7/8/10 machine.
Setup Printer Sharing
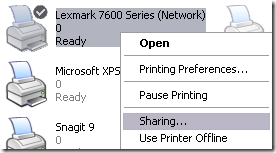
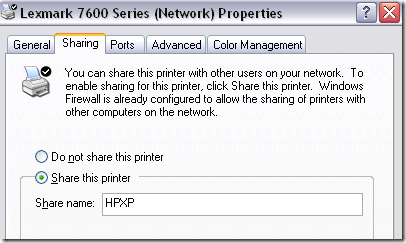
Step 1 : First make sure that the printer on the XP machine is shared. You can do this by right-clicking on the printer and choosing Sharing .
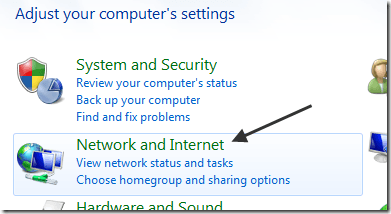
Step 2 : Make sure you can see the printer share from the network browsing area in Windows 7/8/10. You can do this by going to Control Panel and clicking on Network and Internet .
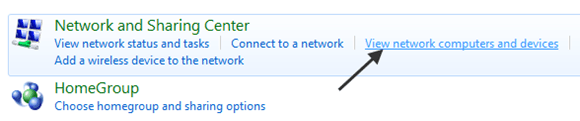
Then click on View network computers and devices under Network and Sharing Center.
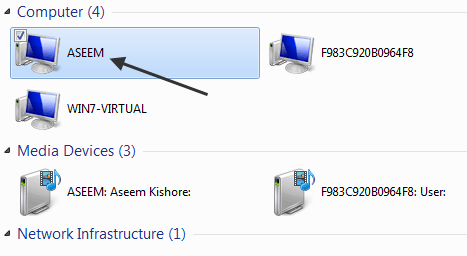
At this point, you should see the name of your XP computer in the list of computers. My XP machine is called Aseem.
Double-click on the computer name and you should see your shared printer in the list. Here you can try to add the printer by right-clicking on it and choosing Connect .
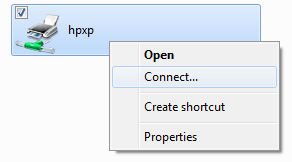
If everything goes perfectly, Windows 7/8/10 should automatically add the printer to your set of printers. However, if you get a message like “Cannot connect to printer”, follow the next steps.
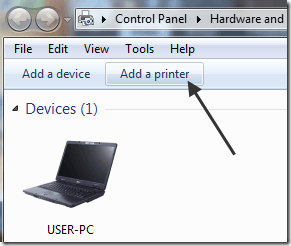
Step 3 : Click on Start and then click on Devices and Printers . At the top, click on the Add a printer link.
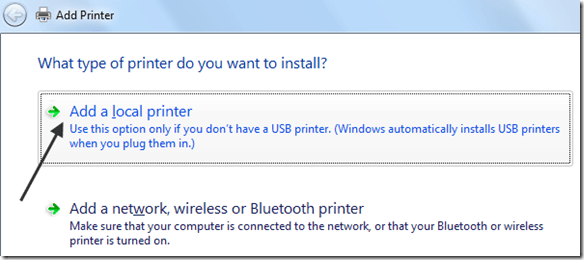
Step 4 : Next choose Add a local printer . Yes, that sounds counter-intuitive, but this is what you have to do!
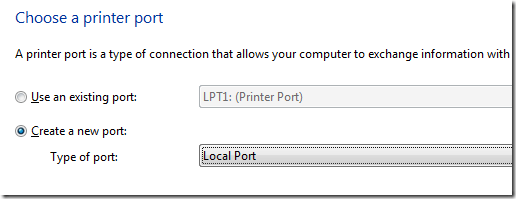
Step 5 : Next, click Create a new port and choose Local port from the list of options.
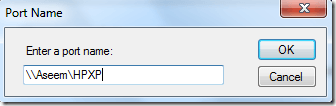
Step 6 : Click Next and in the Port name box, type in the path to the shared printer. It should be something like \Aseem\HPXP , where Aseem is the name of your XP machine and HPXP is the shared name of the printer.
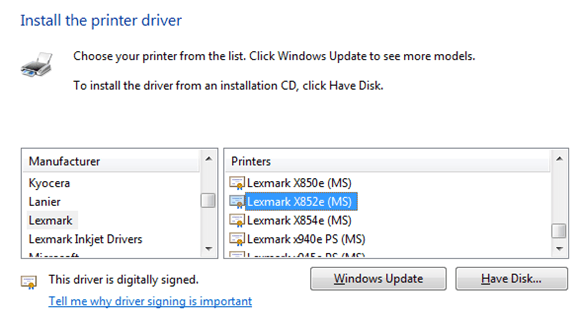
Step 7 : Now choose the printer driver from the list or download the latest driver for the printer and choose Have Disk . Note that if you printer is a little older, it’s a good idea to download the Windows 7/8/10 driver for the printer and before clicking Have Disk.
That’s it! Windows 7/8/10 will load the driver and you’ll be able to print to the XP machine from Windows 7/8/10! The main things to remember are sharing the XP printer and downloading the latest driver for the printer on the Windows 7/8/10 machine.
If you have any problems sharing your printer on XP and printing from Windows 7/8/10, post a comment here and I will try to help! Enjoy!
- How to Use Event Viewer to Troubleshoot Windows Problems
- How to Boot into Safe Mode in All Versions of Windows
- How to Reset Your Computer Password If You Lock Yourself Out
- 14 Command Prompt (CMD) Commands Windows Users Should Know
- Change from Public to Private Network in Windows
Founder of Help Desk Geek and managing editor. He began blogging in 2007 and quit his job in 2010 to blog full-time. He has over 15 years of industry experience in IT and holds several technical certifications. Read Aseem’s Full Bio
‰PNG IHDR X ë ‚y [PLTEÿÿÿú÷þª«9=Aø÷ûÞÛßãäçBDIáßä=@CFIMª«°beiæåéORVX[_79
‰PNG IHDR Ü ‰ ±Iy7 sPLTEÿÿÿÐéÿÒèÿ««ãäè:=B©«¯Óêÿ`cg9?FÉëÿøÿÿ7;>CFKRV[¬°LOTàãæååêFKQVZ^ëèì@DH/38µÌætê|?@DîíðehlPSWñÿÿÕÖØÚÛÞÏÐÒÊÊÍ58
