The built-in ChromeOS auto-clicker automatically performs specific actions when your cursor stops. The tool allows you to left/right click, double-click, and select text without pressing your Chromebook’s touchpad or clicking mouse buttons.
It’s an accessibility-focused feature designed to help Chromebook users with motor impairments. This tutorial covers everything about enabling, using, and customizing the built-in auto-clicker on your Chromebook.

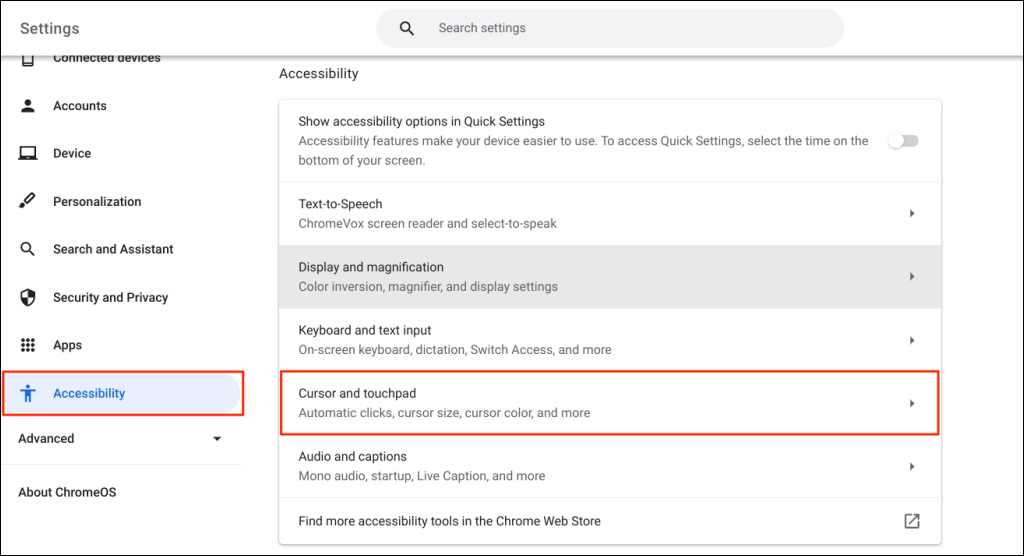
How to Enable Auto-Clicker on Chromebooks
- Open Settings , open the Accessibility tab (on the sidebar) and select Cursor and touchpad (or Mouse and touchpad ).
- Turn on the Automatic clicks option.

Your Chromebook will select items or perform a left click when the mouse pointer stops moving. Point your cursor to the item you want to click/select and wait for a second.
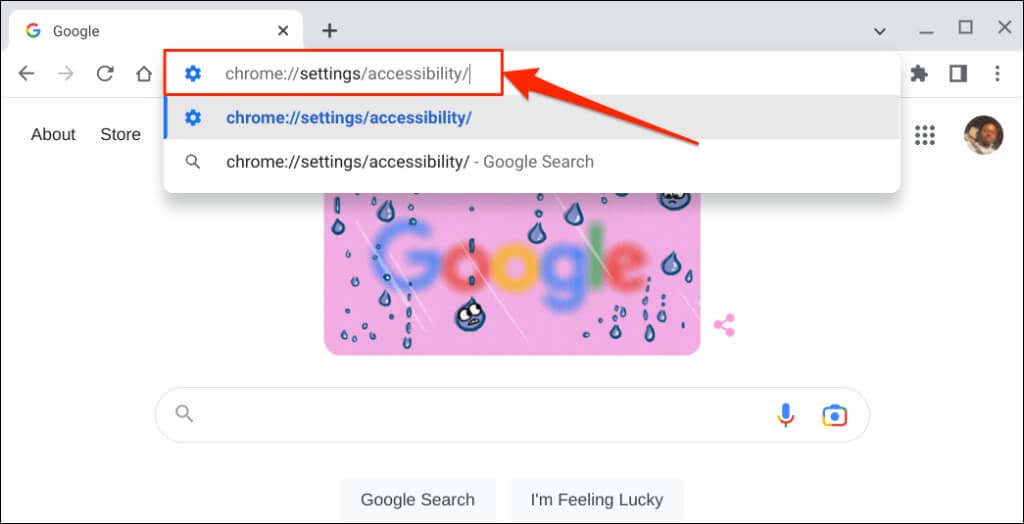
Enable Auto-Clicker through Google Chrome
You can also enable the automatic clicker through your Chromebook’s browser.
- Open the Google Chrome browser, type or paste chrome://settings/accessibility/ in the address bar, and press Enter .
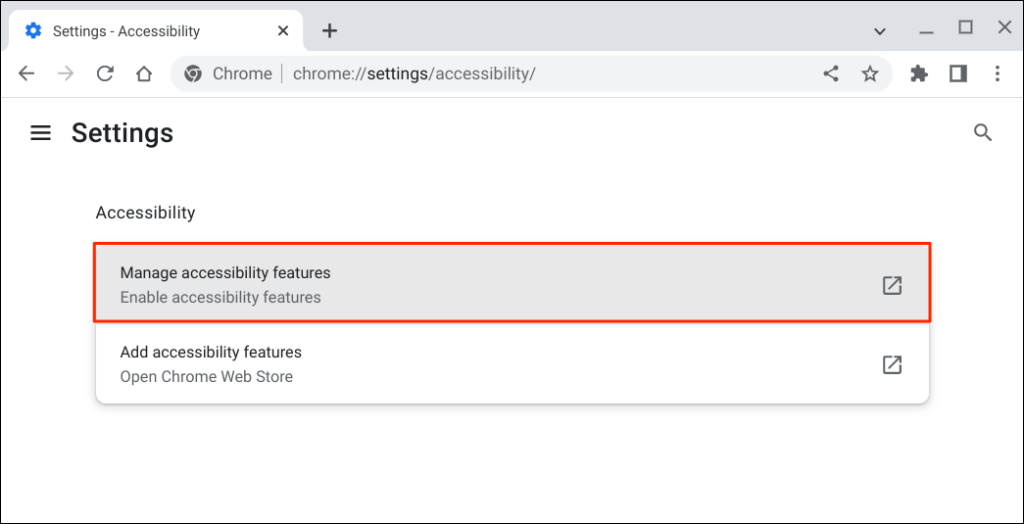
- Select Manage accessibility features . That’ll open the “Accessibility” page in your Chromebook’s settings app.
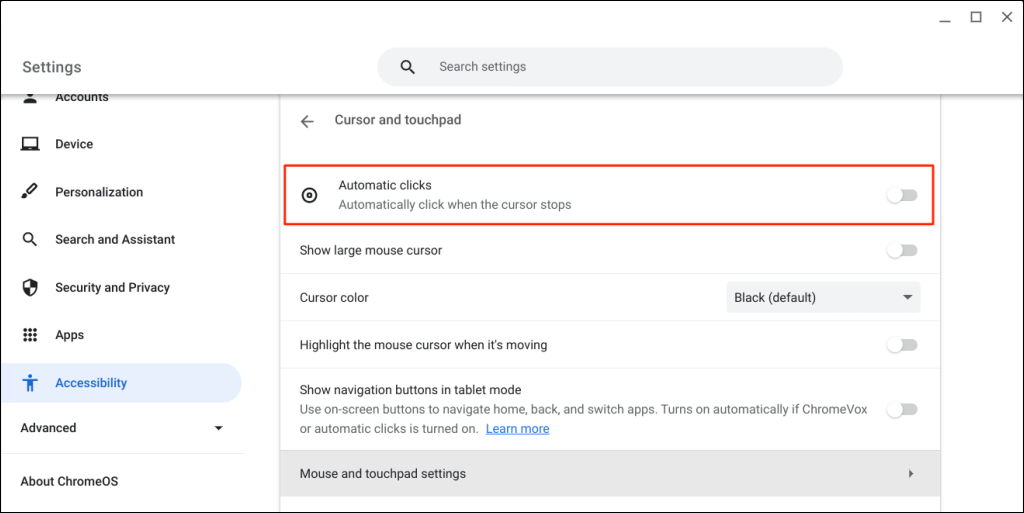
- Select Cursor and touchpad .

- Toggle on Automatic clicks .
Change the Auto-Clicker Delay
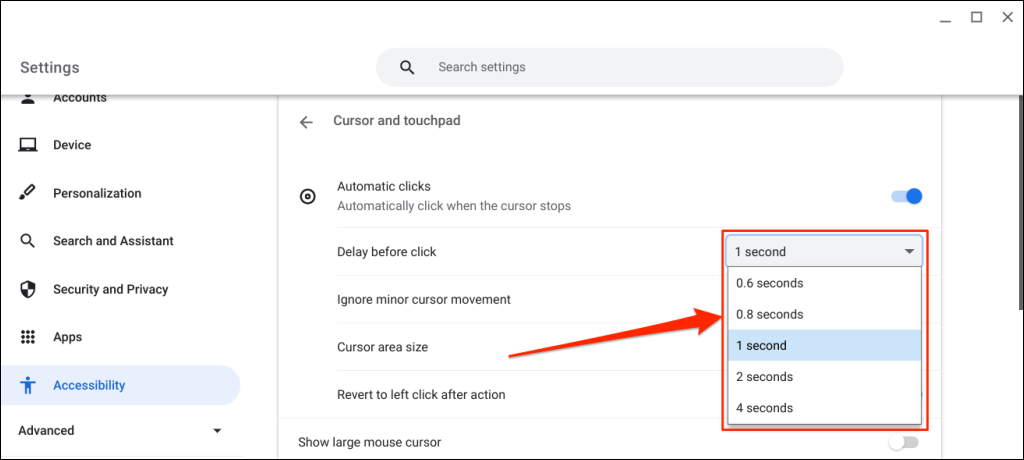
By default, the ChromeOS auto-clicker acts after a one-second delay. You can extend or reduce the delay to your preference on the “Cursor and touchpad” settings page.
Turn on Automatic clicks , expand the “ Delay before click ” drop-down menu, and choose how long your Chromebook pauses before performing an auto-click action.
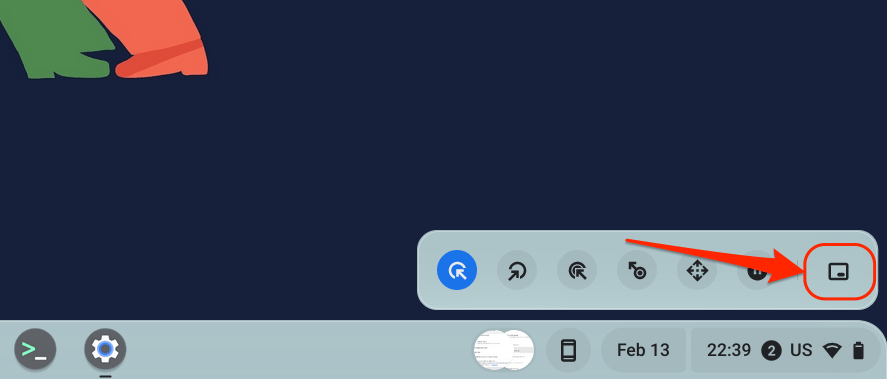
The Floating Auto-Clicker Menu
A floating auto-clicker menu appears in the bottom-left corner of your Chromebook’s screen when you turn on “Automatic clicks.”
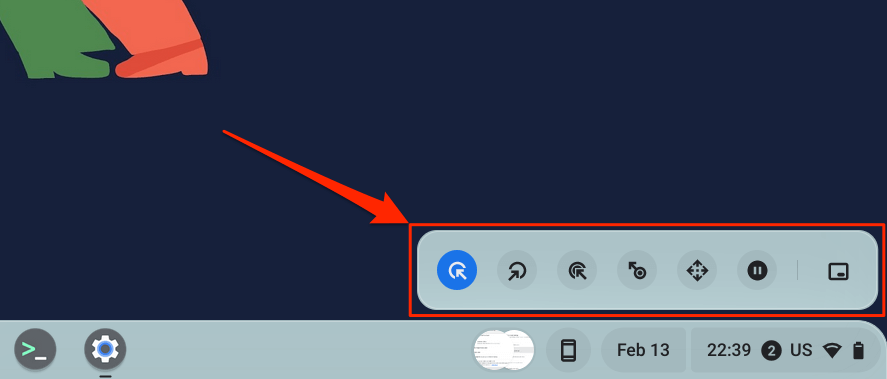
The menu packs the following types of clicks and actions:
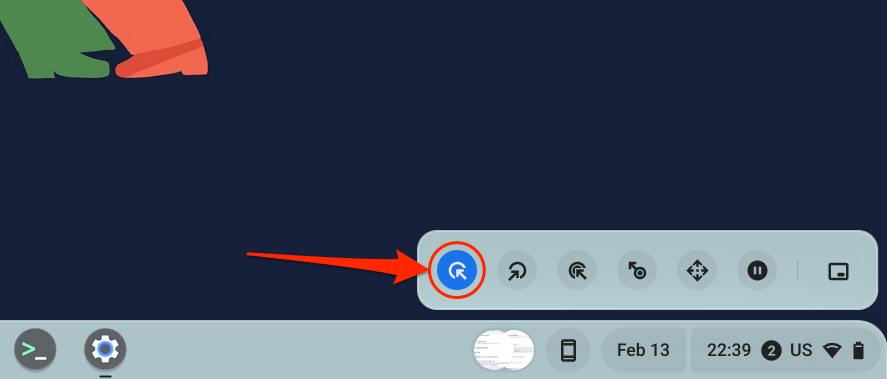
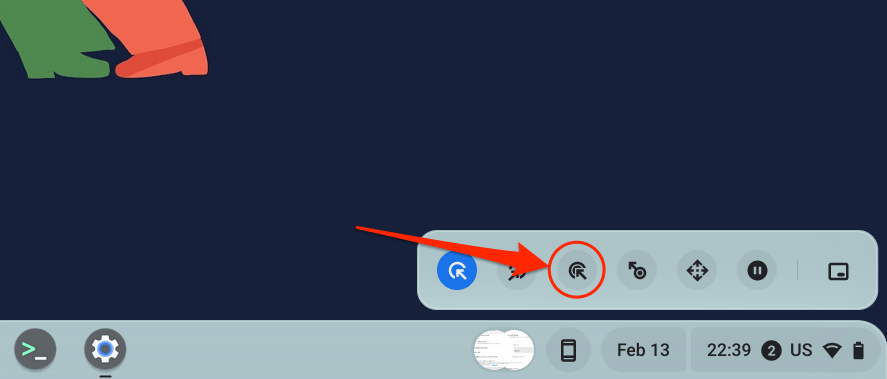
- Left-click: This is the icon on the floating menu’s left wing. Select the icon to perform a left click when you point to an item.
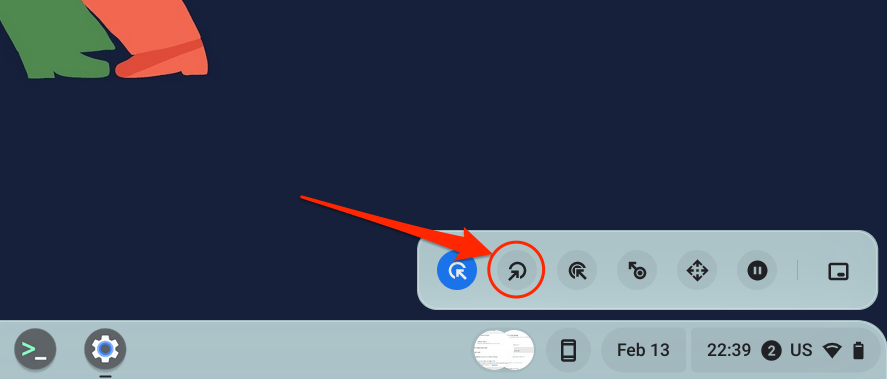
- Right-click: Selecting this configures the auto-clicker to open the right-click context menu when your Chromebook’s cursor stops moving.
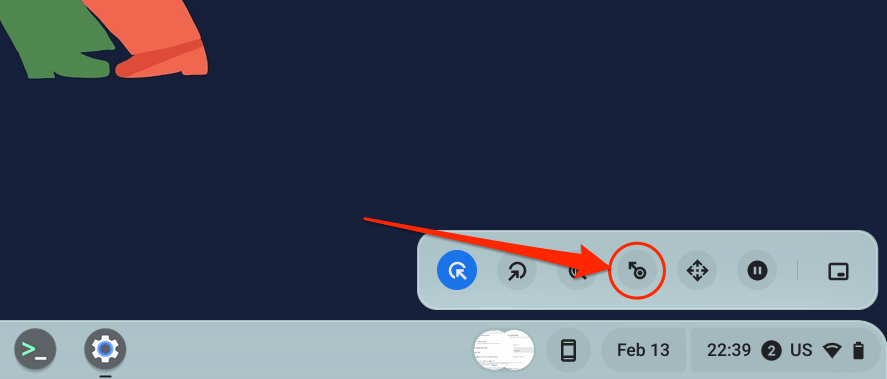
- Double-click: This instructs the auto-clicker to double-click an item.
- Click and drag: This action allows you to select text using the auto-clicker. Choose the Click and drag icon and place your cursor at the beginning of the text you want to select. Wait for the auto-click delay and move your cursor to the end of the text.
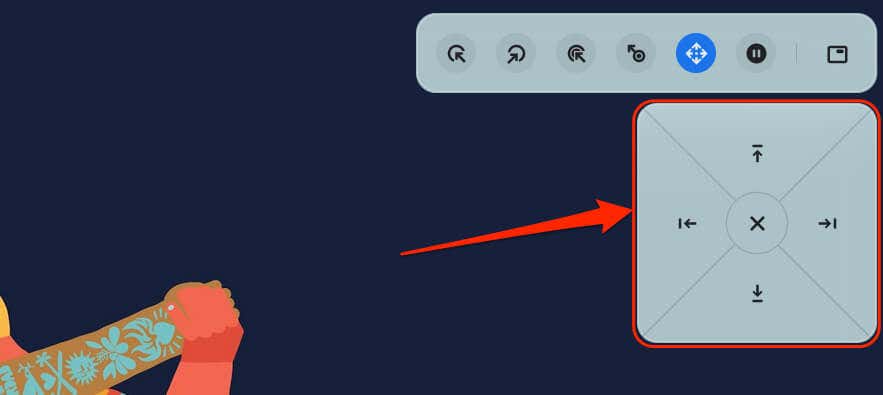
- Scroll: This allows you to navigate and scroll through web pages, documents, and any app using the auto-clicker. Select the Scroll icon to reveal the navigation bar.

Place your cursor on the page or app you want to navigate and wait for the auto-click delay. Afterward, hover your cursor on the left/right/up/down arrow keys or scroll options to navigate the page. Finally, press the X icon in the middle to close the navigation bar—the auto-clicker reverts to the left-click option.
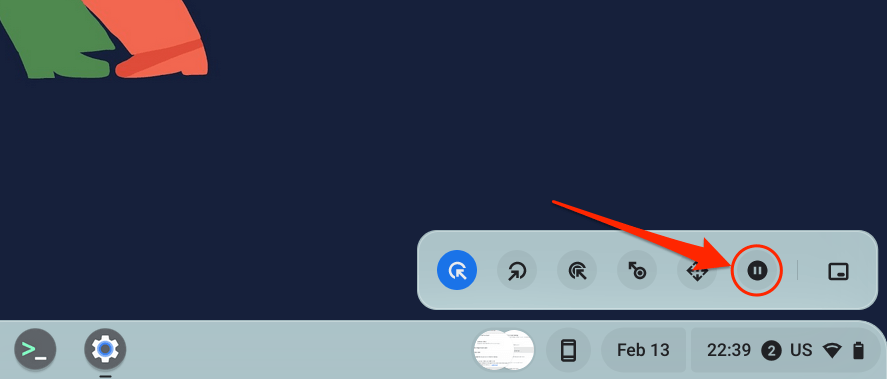
- Pause or No action: Select this icon to suspend the auto-clicker from performing any action when the cursor stops moving. This option allows you to temporarily disable the auto-clicker without turning it off in the system menu.
- Toggle menu position: This action changes the location of the floating auto-clicker menu. Select the icon to move the floating move around the corners of your Chromebook’s display.
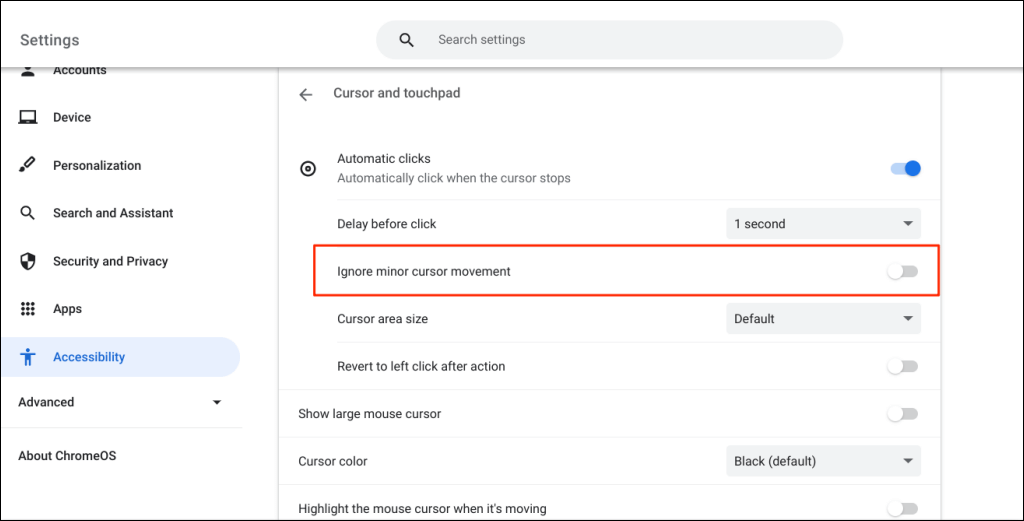
Customize Auto-Click Settings
In addition to increasing or decreasing the auto-click delay, there are other ways to configure your Chromebook’s auto-clicker.
Enable Automatic clicks in your Chromebook’s settings ( Settings > Accessibility > Cursor and touchpad ) and explore these automatic click features:
- Ignore Minor Cursor Movement: Enabling this setting prevents the auto-clicker from performing any action when you make minor or accidental mouse/cursor movements.
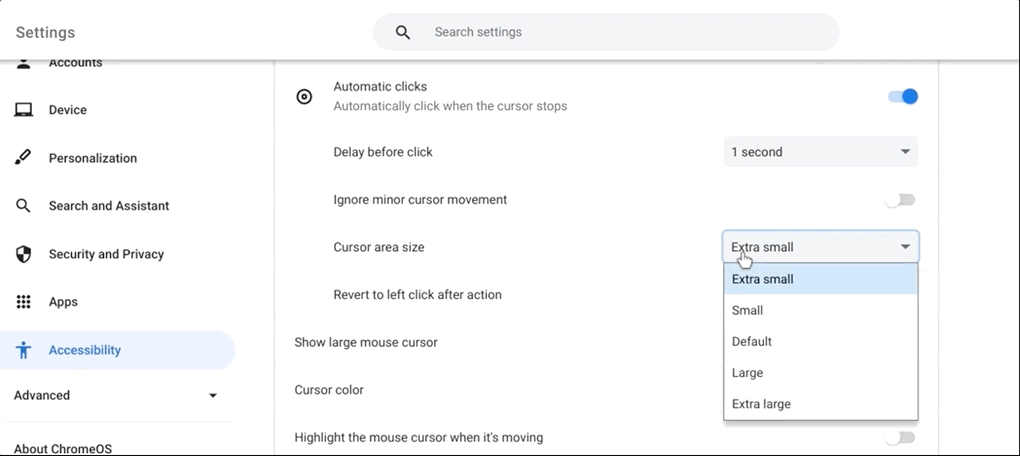
- Cursor Area Size: This setting allows you to change the cursor ring or area size. Open the drop-down menu and choose a preferred cursor area size— Extra small , Small , Default , Large , or Extra large .
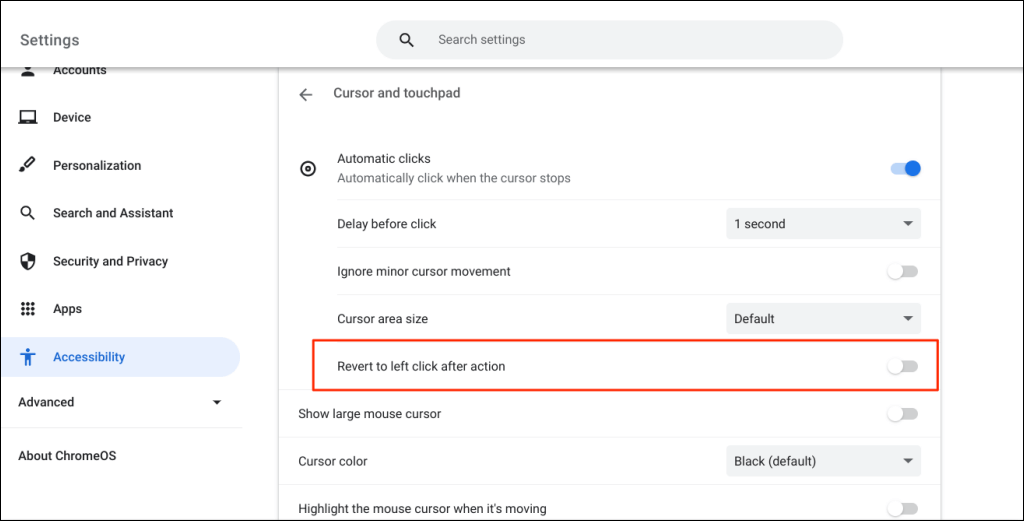
- Revert to left-click after action: Toggle this on to have the auto-clicker revert to the left-click option after every action.
Disable Your Chromebook’s Auto-Clicker
Want to turn off the auto-click tool? Head to Settings > Accessibility > Cursor and touchpad and toggle off Automatic clicks .

Enjoy Stress-Free Navigation
- Top 4 Ways to Fix Chromebook White Screen Issues
- Chromebook Keeps Turning Off? 9 Fixes to Try
- How to Install and Use VirtualBox on Your Chromebook
- How to Install and Run Windows Apps on Your Chromebook
- How to Play Videos on Chromebooks (And the Best Video Players to Use)
Sodiq has written thousands of tutorials, guides, and explainers over the past 4 years to help people solve problems with Android, iOS, Mac, and Windows devices. He also enjoys reviewing consumer tech products (smartphones, smart home devices, accessories, etc.) and binge-watching comedy series in his spare time. Read Sodiq’s Full Bio
