When you really want to focus without any distractions, using full screen on your computer is a great idea. What happens when you want to exit full screen, though? We’ll show you how to exit full screen in Windows 11 in a few different ways.
Three Ways to Exit Full Screen on Windows 11 Computers
There are actually three separate ways to exit full screen on your Windows 11 computer, whether you’re using a laptop or a desktop. We’ll take you through each method so that next time you’re in full screen, you can choose which one works best for you.
How to Exit Full Screen in Windows 11 Using F11
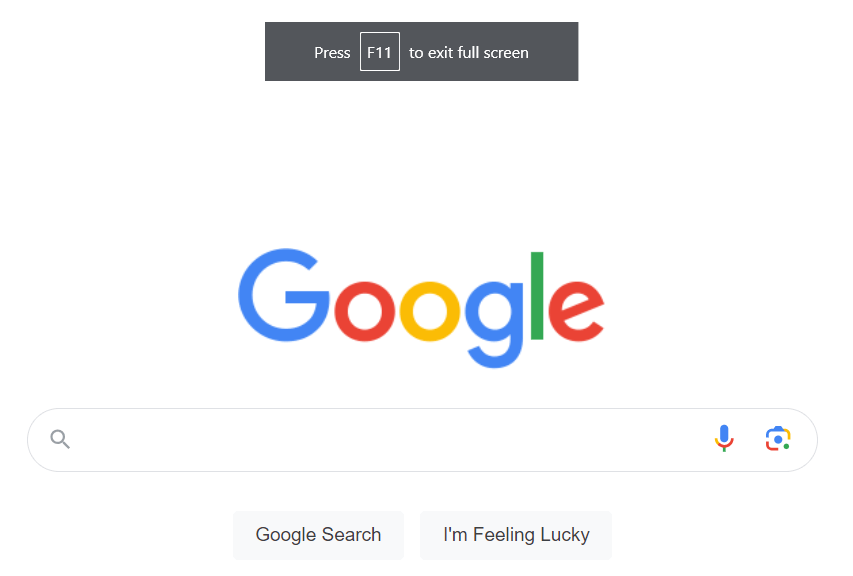
The quickest and easiest way to enter and exit full screen on your Windows 11 computer is to tap F11 on your keyboard. On some laptops, the F11 key is also the Print Screen shortcut. If that applies to your laptop, just hold down the Fn key and F11 keys simultaneously to enter or exit full screen. It’s as simple as that!
Exit Full Screen With Esc
There’s another pretty quick way to exit full screen in Windows 11. Just hit the Escape button (Esc). Note, however, that this doesn’t work on all laptops, so your mileage may vary and you might need to use one of the other methods here instead.
Use X to Exit Full Screen
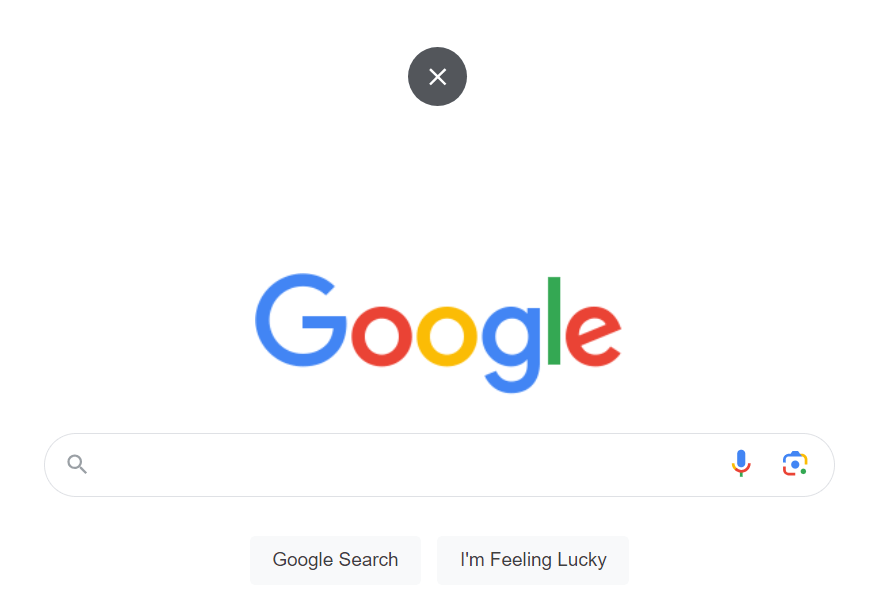
If you’d rather not use your keyboard at all to exit full screen, move your cursor to the top and middle of your screen using your mouse, when you’re in full screen. You should see a white X in a black circle. Click it and you should exit full screen!
Either one of these three methods should get you out of full screen in Windows 11, though using the Esc key may not work on all Windows 11 laptops. Now you know how quick and easy it is to exit full screen on your computer, you won’t have any hesitation using it for distraction free work or gaming in future.
- Sluggish Windows 11 PC? Try These 5 Windows 11 Tricks to Free up Virtual Memory
- How To Turn Off Notifications On Windows 11?
- How to Fix Windows 11 Boot Loops After Jan 2026 Update
- How to Remove Copilot AI in Window 11? New Update Available in Beta
- January 2026 Patch Tuesday: 7 Things Windows Users Should Do Before and After Updating
Paula Beaton is a freelance technology and food writer based in Scotland. Before making the move to writing, Paula worked as a call handler for the police, served refreshments on trains, and even trained as a nursery nurse. Since she became a writer in 2012, Paula has written everything from how-to guides to reviews, specialising in Android, Windows, and gaming. She’s also a foodie fascinated by food history and culture. Read Paula’s Full Bio
The Print Screen button can easily capture your screen in Windows 10 . PrtScr is one of the most well recognized keys on a keyboard and it’s a function that everyone knows how to use. It’s the simplest way to take a screenshot as it captures the entire screen, which can be helpful at times.
However, the tips below can help when Print Screen is not working on your Windows PC or Mac. Macs don’t have a Print Screen button, but the built-in screenshot shortcuts might not work and we’ll help you fix that issue if you’re experiencing it.

What to Do When Print Screen is Not Working
Try some of the quick fixes below and see if they help before moving to other solutions in this guide.
Quick Fixes
- Check the clipboard on your computer to see if the screenshot has been saved there. Press Windows logo key + V to access the clipboard.
- Update your operating system .
- Use the on-screen keyboard to access the virtual PrtScn button and capture your screen. Select Start > AllPrograms > Accessories > Ease of Access > On-Screen Keyboard .
- Hold down the F Lock or F Mode keys to disable them to see if that gets the Print Screen key working again.
- Disable any third party screenshot programs like, Snagit, on your system.
- Check out our guide on how to capture full page screenshots in Chrome & Firefox if the Print Screen button is not working for those browsers.
- Make sure the key itself is functioning properly. You can do this using an online key tester . If broken, you may need to replace the keyboard. It may also be worth investing in a mechanical keyboard , which are known to be more durable and last longer.

How to Fix Print Screen Not Working in Windows 10
You can troubleshoot the Print Screen not working problem on your Windows PC using the following solutions.
Use a Hotkey Combination
Windows 10 has lots of helpful keyboard shortcuts for taking screenshots. Use the hotkey combinations below to see if you can capture these alternative screenshots.
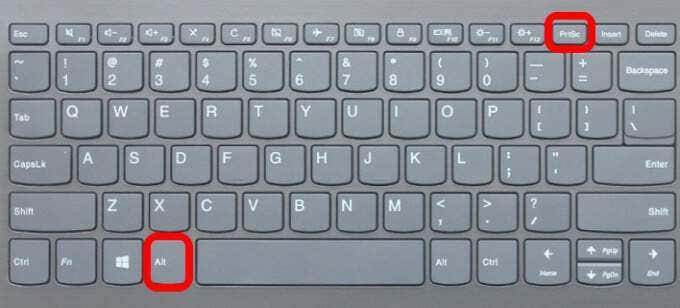
- Press Alt + PrtScn to capture the currently selected window.
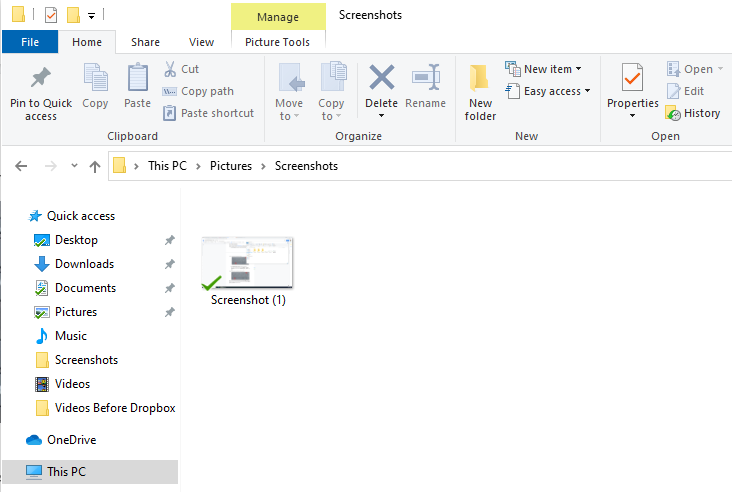
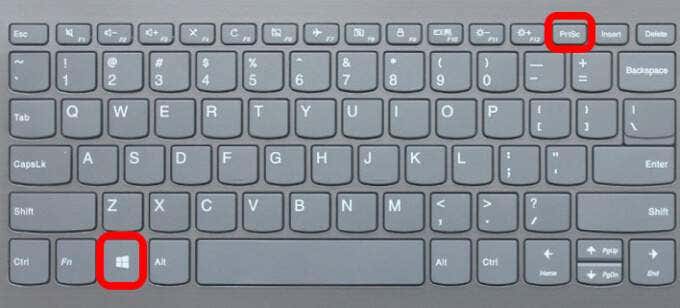
- Press Windows logo key + PrtScn to capture the screenshot. In this case, the screenshot will be saved to File Explorer > Pictures > Screenshots .
You can also use Fn + Windows logo key + PrtScn on your laptop.
- If your PC uses the HID keyboard driver, use the Fn + PrtScn combination to capture your screen. If your device doesn’t have the PrtSc key, use Fn + Windows logo key + Space Bar to capture the screen.
These keyboard shortcuts will save this image to the Windows clipboard. Open a photo app, like MS Paint, and paste the image if you want to save it as a file.
Update Keyboard Driver
If the keyboard driver is outdated, corrupted or incorrect, it may cause the Print Screen function not to work properly and may need an update.
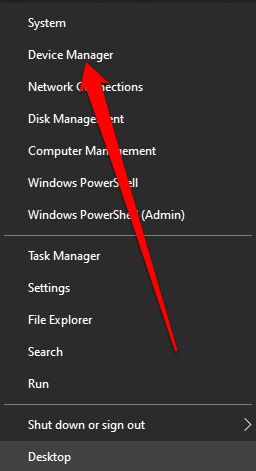
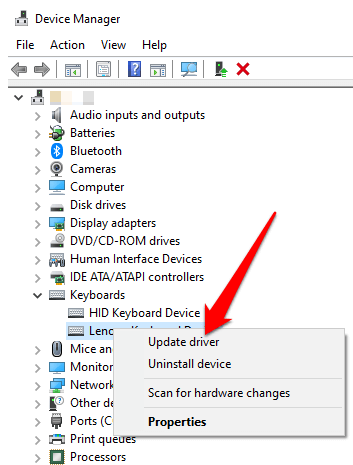
- Right-click Start > Device Manager .
- Select the Keyboards section to expand it, right-click your keyboard and select Update driver .
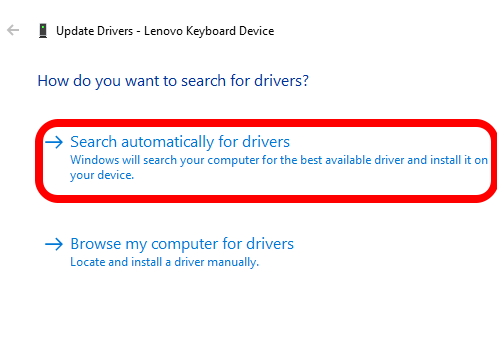
- Next, select Search automatically for updated driver software to install the latest keyboard driver.
- Restart your computer and see if the Print Screen function works.
Note : You can also go to your keyboard manufacturer’s official website, look for the latest driver, download and install it.
Use Game Bar
If you’re still not able to use the Print Screen function, you can use Game Bar to take a screenshot. Game Bar is a built-in feature in Windows 10 that allows you to record your screen and capture screenshots while playing PC games.
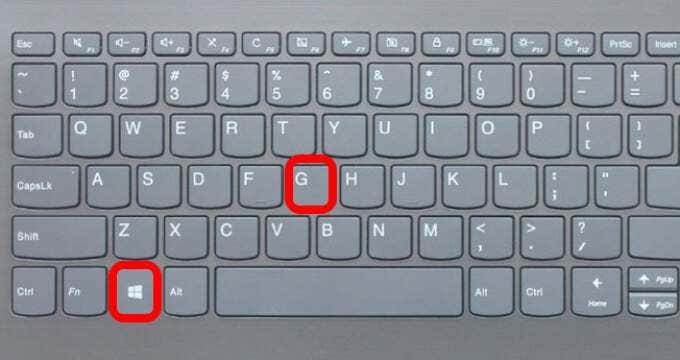
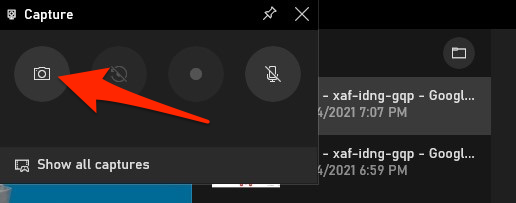
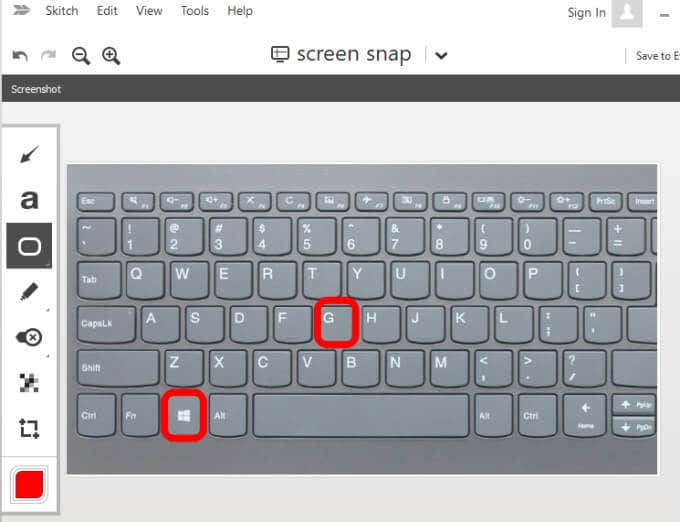
- Press Windows logo key + G to open Game Bar and capture everything on your screen.
- In the Game Bar screen, select the Screen Capture icon.
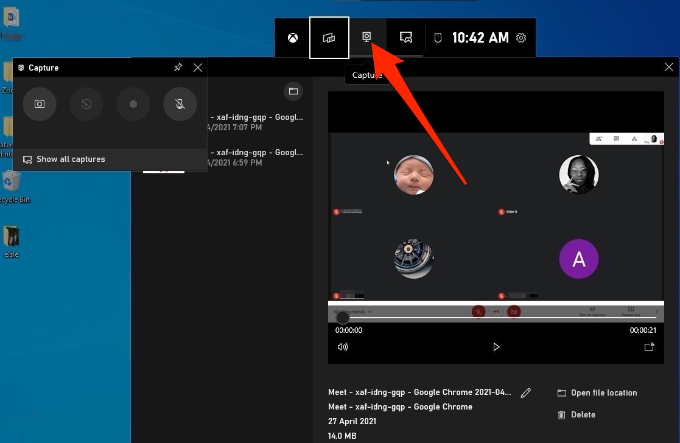
- Next, select the camera icon to take a screenshot.
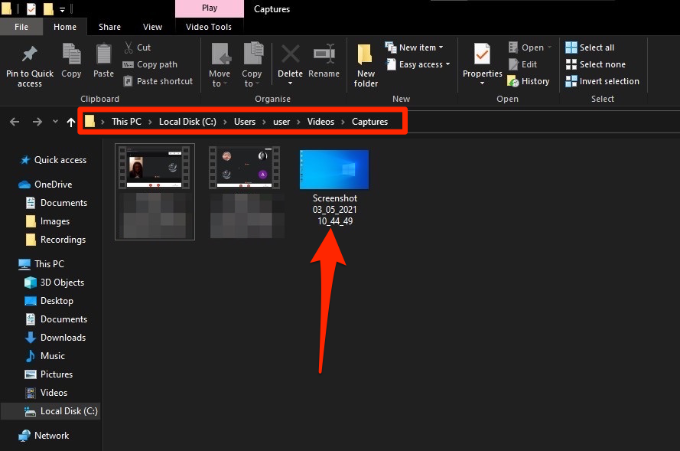
Your screenshot will be saved in the Captures folder. Go to This PC > Local Disk (C:) > Users > User > Videos > Captures .
Edit the Windows Registry
The Windows Registry stores information like user profiles, apps installed on your PC and others, which are needed to configure the system. You can edit the registry to fix the Print Screen button not working problem on your computer.
Note : Follow these steps carefully because any slight mistake could affect your computer adversely. Before you begin, create a System Restore point or back up your computer including your media files.
- Right-click Start > Run , type regedit in the Run box and press Enter or select OK .
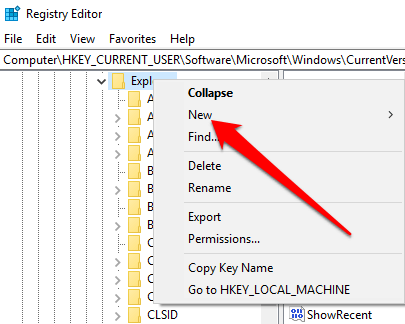
- Navigate to this registry key: HKEY_CURRENT_USER\Software\Microsoft\Windows\CurrentVersion\Explorer .

- Right-click Explorer, select New > DWORD and then rename it ScreenShotIndex .
- Double-click DWORD , set the Value data to 1 and then select OK .

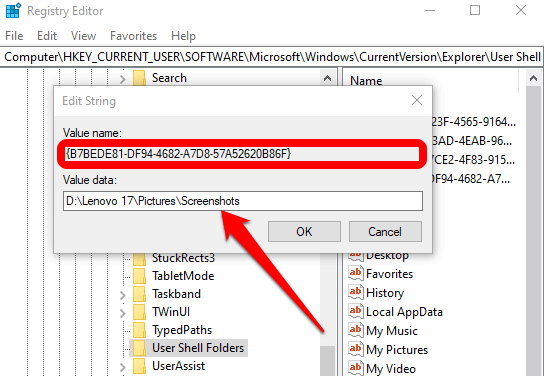
- Navigate to HKEY_CURRENT_USER\Software\Microsoft\Windows\CurrentVersion\Explorer\User Shell Folders .
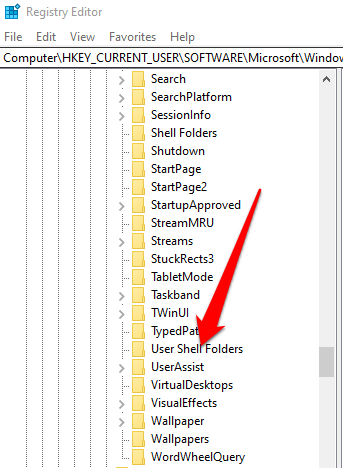
- Check whether the {B7BEDE81-DF94-4682-A7D8-57A52620B86F} string’s Value data reads %USERPROFILE%\Pictures\Screenshots .
- Exit the Registry Editor and restart your computer.
- Click PrtScn or Windows logo key + Fn + PrtSc keys. You can check for the screenshot in File Explorer > Pictures > Screenshots folder.
How to Fix Print Screen Not Working on a Mac
While your Mac may not have the PrtScn button, the built-in screenshot feature may stop working and you may not know how to fix it. Here are a few things to try.

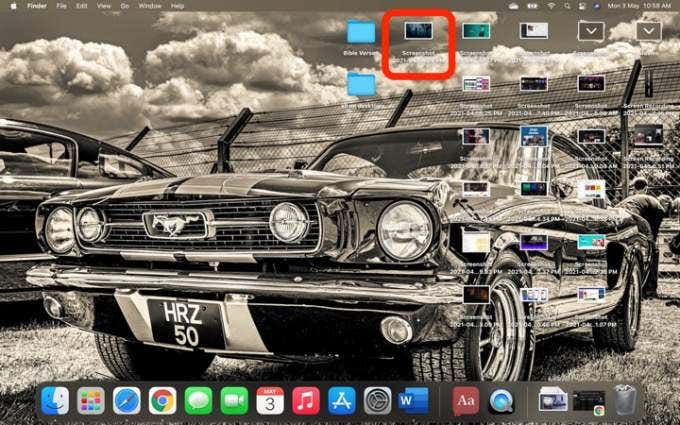
- Confirm that your screenshots are available in the correct location i.e. your desktop, as this will determine whether the screenshot function works or not.
- Use the Preview app or Screenshot app (macOS Mojave or later versions) to take screenshots.
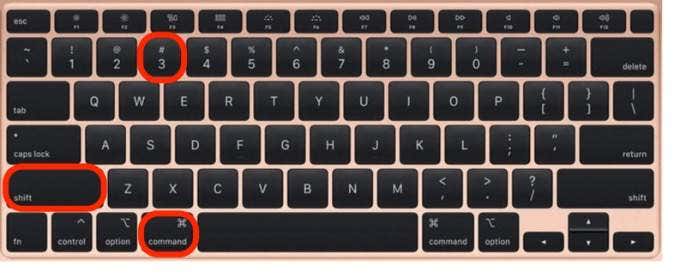
- Restart the Mac and take screenshots using Shift + Command + 3 to capture the whole screen or Shift + Command + 4 to capture a portion of the screen.
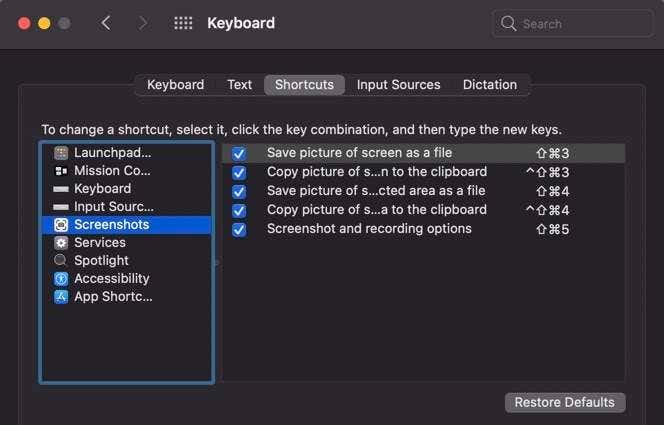
- Check whether the screenshots keyboard shortcuts are enabled, or they’ve been reassigned to other actions. Go to Menu > System Preferences > Keyboard > Shortcuts .
- Use Grab to take a screenshot. Select Go > Applications > Utilities > Grab to open it and then select Capture to take a screenshot. In macOS Mojave and later, Grab has been replaced with a new tool. You can access it by pressing Command + Shift + 5 .
- Reset the NVRAM to resolve issues with functionality and core Mac apps.
Other Alternatives
Listed below are some alternatives to the Print Screen button:
- Use the built in Use Snip & Sketch for Windows .
- Use tools like Snagit or Skitch , which take great screenshots on Windows and Mac computers.
- Preparing for Windows 10 End of Support: Upgrading to Windows 11
- How to Fix a “This file does not have an app associated with it” Error on Windows
- How to Fix an Update Error 0x800705b4 on Windows
- How to Resolve “A JavaScript error occured in the main process” Error on Windows
- How to Fix the Network Discovery Is Turned Off Error on Windows
Elsie is a technology writer and editor with a special focus on Windows, Android and iOS. She writes about software, electronics and other tech subjects, her ultimate goal being to help people out with useful solutions to their daily tech issues in a simple, straightforward and unbiased style. She has a BCom degree in Marketing and currently pursuing her Masters in Communications and New Media. Read Elsie’s Full Bio
