When you encounter an “A device attached to the system is not functioning” error, there’s a good chance your device isn’t properly plugged-in or Microsoft Windows has problems. You can try a few fixes to resolve the issue, but if those don’t work, replacing the device might be your only option.
Common causes of this error include problematic device drivers, corrupt Windows files, malicious apps, and minor system glitches. We’ll offer methods to fix these issues, so your device works with your computer.
Reconnect the Device to Your Windows 10/11 PC
When you face a connection error, the first thing to do is to unplug and replug your device into your PC. This ensures your connection isn’t loose and the device is properly connected.
Try that and see if it works. If your error persists even after reconnecting, read on to find more fixes.
Restart Your Windows PC
Your Windows PC’s minor glitches may be causing the “A device attached to the system is not functioning” error. In this case, turn your PC off and then back on to resolve those problems.
Doing so gives your computer a fresh chance to reload all system and app files. Make sure you save your unsaved work before rebooting your PC, as you risk losing your work.
- Unplug your device from your PC.
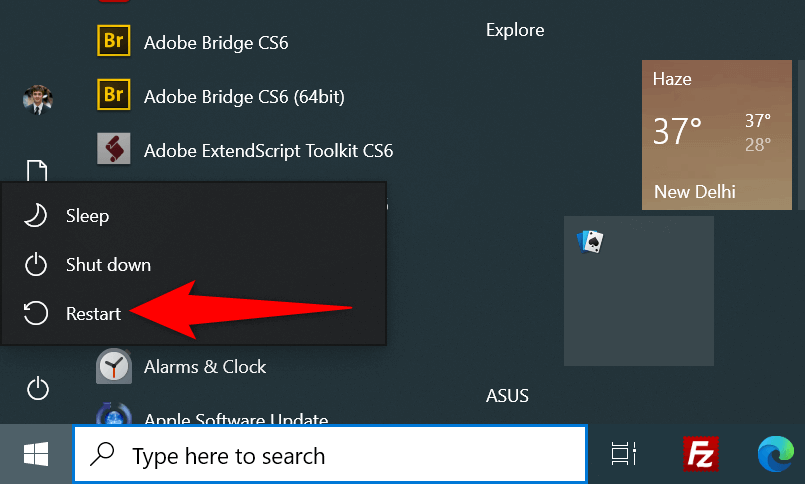
- Open the Start menu and select the Power icon.
- Choose Restart in the Power menu.
- Connect your device to your PC when the PC turns on.
Use a Different USB Port
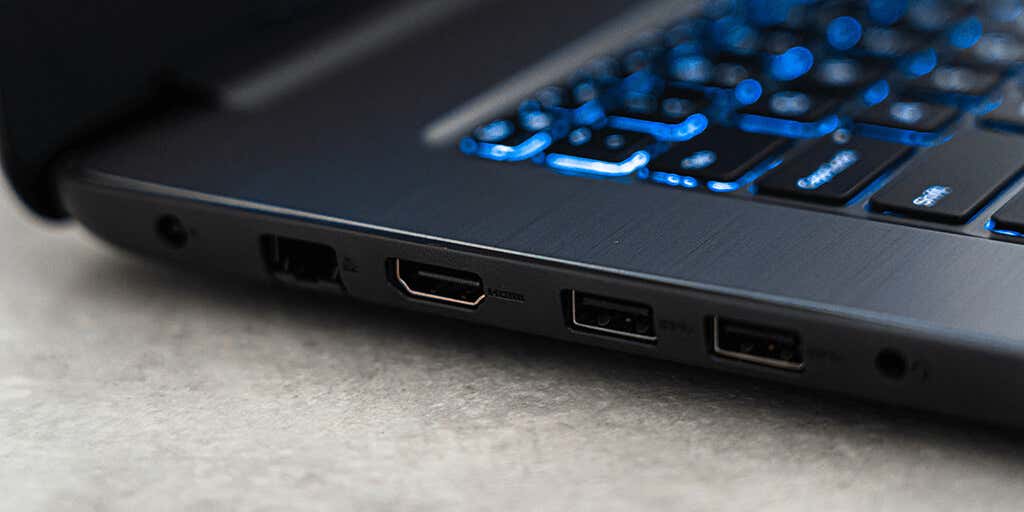
The USB port you use for the connection may be faulty, causing Windows not to recognize your device. This usually happens when the port is physically damaged.
You can try connecting your device to another port on your computer. Most machines have multiple USB ports, so you shouldn’t have problems doing this.
If your device starts working when you plug it into the new port, your previous port was faulty . You may continue using this new port to work with your device. You should try a different USB cable if changing the port doesn’t fix the issue.
Update the Device Drivers
One cause of the “A device attached to the system is not functioning” issue is outdated device drivers. Old drivers often have bugs that are patched in the latest versions.
You can get Windows to download and install the latest driver software, fixing your problem.
- Launch Device Manager by right-clicking the Start menu icon and choosing Device Manager .
- Right-click your device on the list and choose Update driver .
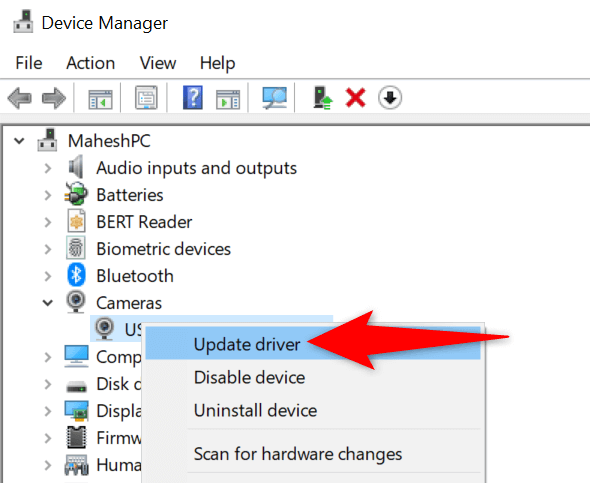
- Select Search automatically for drivers to let Windows find and install the latest drivers.
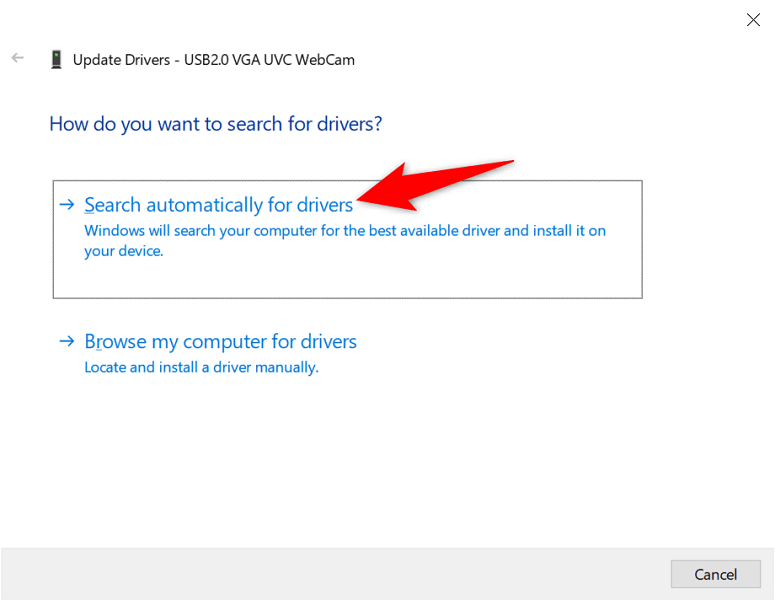
- If no latest drivers are available, you can force your PC to check newer versions via Windows Update by selecting the Search for updated drivers on Windows Update option.
Reinstall the Device Drivers
You may have the correct device drivers installed on your PC, but those files might be corrupt. This prevents your PC from communicating with your device, resulting in various error messages.
Luckily, you can get around that issue by uninstalling and reinstalling the faulty driver files.
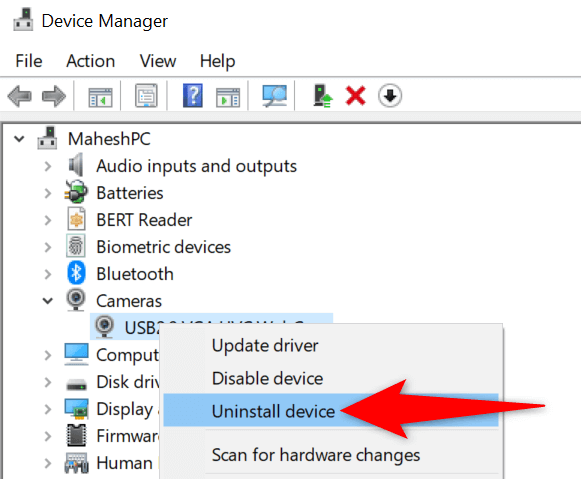
- Open Device Manager by accessing the Start menu, searching for Device Manager , and selecting the app in the search results.
- Right-click your device on the list and choose Uninstall device .
- Enable Delete the driver software for this device and select Uninstall .
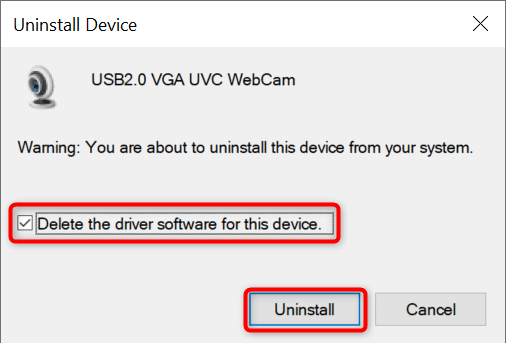
- Restart your Windows PC.
- Let your system automatically install your device’s drivers.
Format the Attached Storage Device
If you’re trying to use an external storage device (such as a hard drive) with your PC, consider formatting the device to see if it works then. Wiping the data helps fix bad sectors on the storage device, possibly fixing your “A device attached to the system is not functioning” error.
Note that this method only works if your external device appears in File Explorer. Also, you’ll lose all your data saved on your device when you format the device.
- Launch This PC by pressing the Start button, searching for This PC , and selecting that item in the search results.
- Right-click your storage device and choose Format .
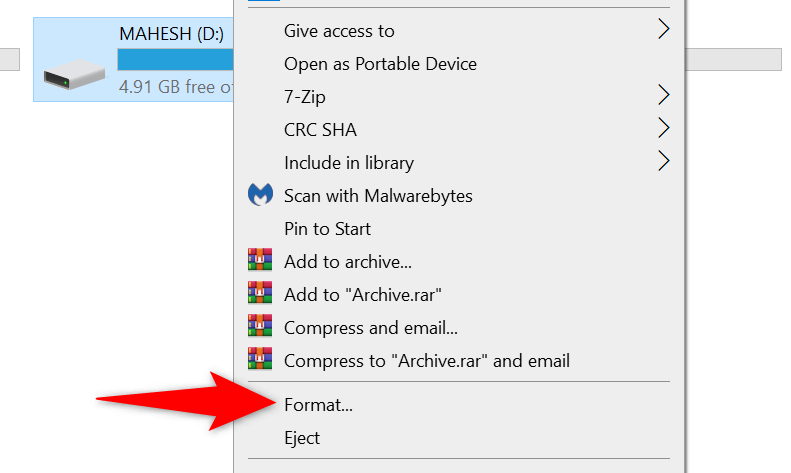
- Disable the Quick Format option.
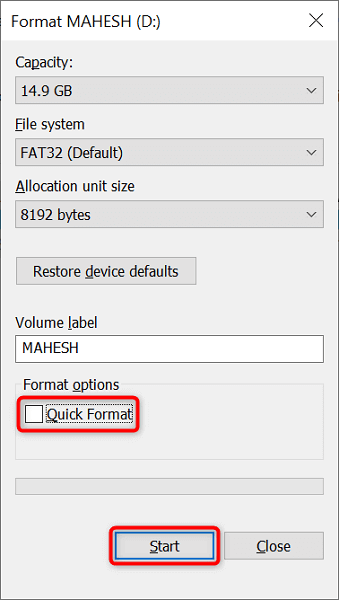
- Choose Format to begin wiping your USB storage device.
Fix Windows Corrupt Files
Windows’ corrupt files can make your connected devices unusable, as the system can’t use the files to recognize your device. In this case, you can run a built-in tool on your PC to automatically find and fix problematic files .
This tool is called System File Checker, and you run it via Command Prompt. The tool detects the corrupt files and replaces those files with working ones. This helps resolve many issues with your operating system.
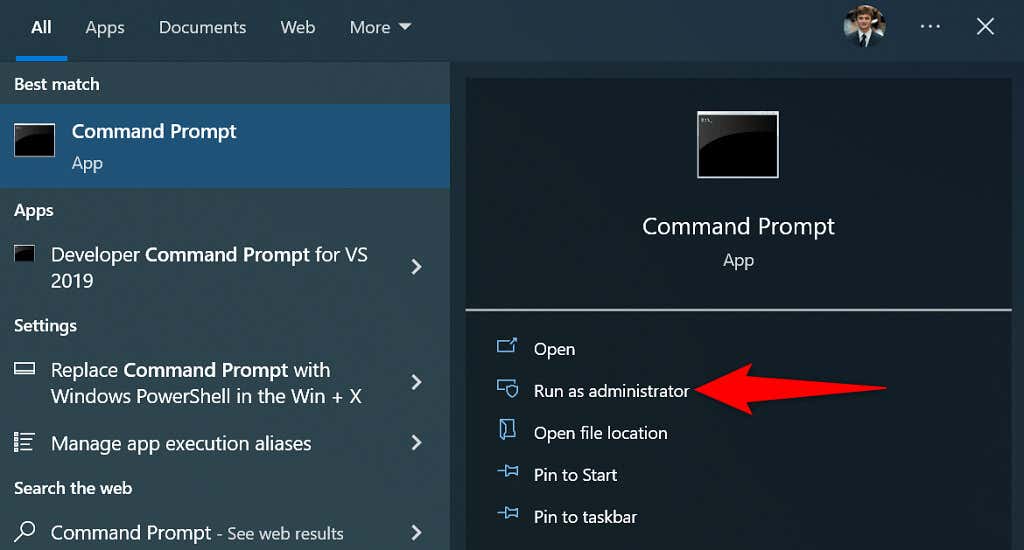
- Open the Start menu, search for Command Prompt , and select Run as administrator .
- Select Yes in the User Account Control prompt.
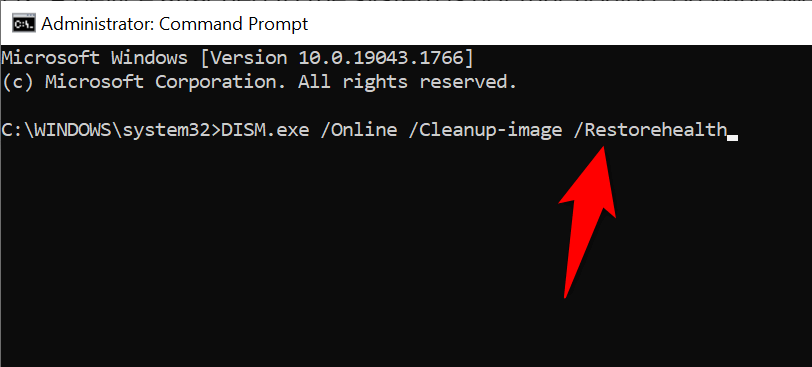
- Type the following DISM command in Command Prompt and press Enter : DISM.exe /Online /Cleanup-image /Restorehealth
- After running the above command, type the following command and press Enter : sfc /scannow
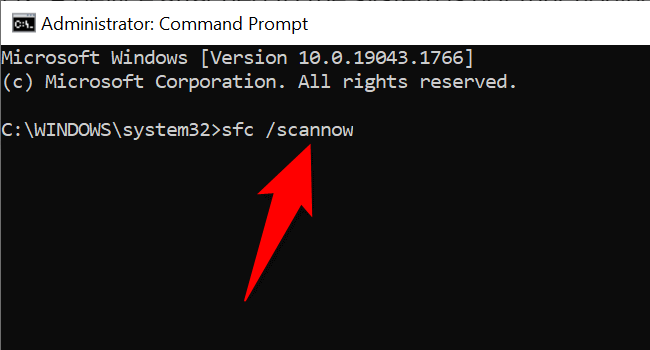
- Wait for the tool to repair your system’s corrupt files.
Use Windows Safe Mode
It’s possible one or more of your installed apps are interfering with your connected device, causing Windows to display an “A device attached to the system is not functioning” error message.
To check if that’s the case, you can reboot your PC in safe mode. This mode only loads your system’s essential files, leaving all the third-party apps out. If your device works in this mode, you’ll have to find and remove the faulty app from your PC.
- Open Settings on your PC by pressing Windows + I simultaneously. Feel free to use other ways to launch the Settings app if you’d like.
- Select Update & Security in Settings.
- Choose Recovery from the sidebar on the left.
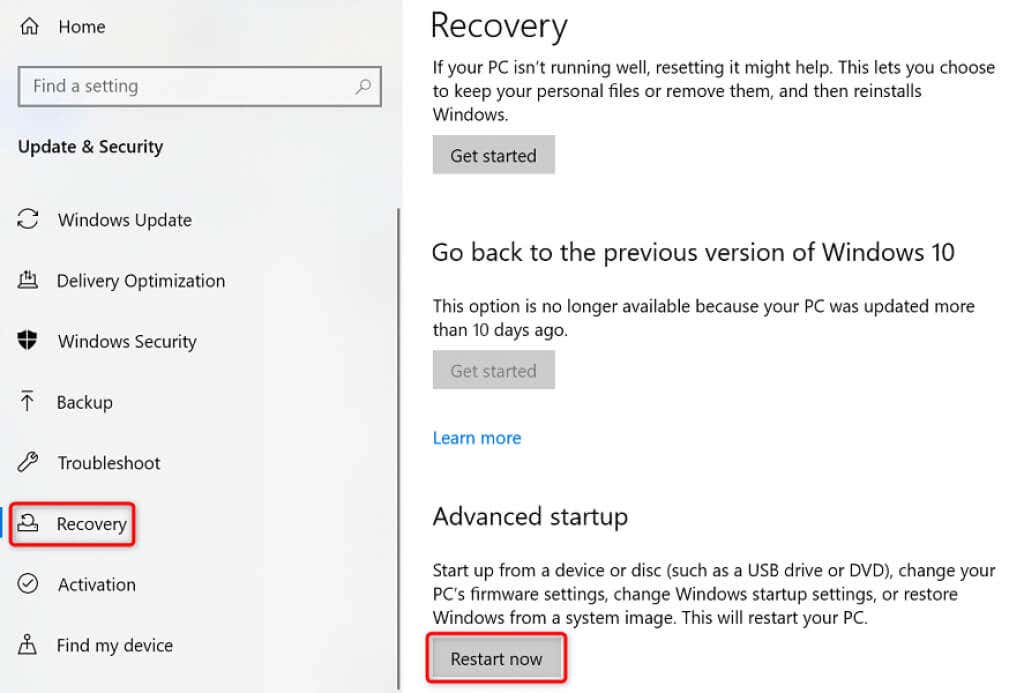
- Select Restart now under the Advanced startup header on the right.
- Navigate to Troubleshoot > Advanced options > Startup Settings > Restart .
- Select number 4 to enter Windows safe mode.
- Check if your connected device works in this mode.
- If your device works, your installed apps are likely the culprit. Review your recently installed app list and remove the ones you think are suspicious.
Let Windows Recognize Your Connected Devices
Windows usually recognizes most devices as soon as you connect them to your computer. However, in the instances where you see the “A device attached to the system is not functioning” error, you’ll have to apply a few fixes before your device works with your machine.
We hope the guide helps you resolve your device connection errors .
- Preparing for Windows 10 End of Support: Upgrading to Windows 11
- How to Fix a “This file does not have an app associated with it” Error on Windows
- How to Fix an Update Error 0x800705b4 on Windows
- How to Resolve “A JavaScript error occured in the main process” Error on Windows
- How to Fix the Network Discovery Is Turned Off Error on Windows
Mahesh has been obsessed with technology since he got his first gadget a decade or so ago. Over the last few years, he’s written a number of tech articles on various online publications including but not limited to MakeTechEasier and Android AppStorm. Read Mahesh’s Full Bio
If you connect to different printers across several locations all the time, you’ll probably not use all of the printers installed on your device – probably just once or twice. However, your device ends up with many printers installed on it without you realizing it.
Thankfully, you can remove any printer you’re no longer using, except it doesn’t completely get erased from your device – the printer driver remains in your device’s inventory in case you need it again.

If you’re sure you won’t need it, you can remove or uninstall old, obsolete or uninstalled printer drivers , and leftover driver packages or registry entries from your device.
We’re going to walk you through five ways to completely uninstall printer drivers in Windows 10.
How To Remove Or Uninstall Printer Drivers In Windows 10
These are a few of the ways you can remove printer drivers in Windows 10:
- Uninstall printer software using Settings.
- Remove printer driver from Print Server Properties.
- Uninstall printer driver using Control Panel.
- Use Print Management to remove old printers.
- Delete old printers via Registry Editor.
- Uninstall printer using Command Prompt.
- Remove a printer using PowerShell.
- Delete remnants from Windows driver store.
Uninstall Printer Software Using Settings
If you don’t need a particular printer anymore, you can follow the usual steps to uninstall a printer from Settings and then uninstall its software, especially if using a third-party utility.
If the Settings app installed other tools to manage your printer automatically, you’ll have to manually remove the leftover software.
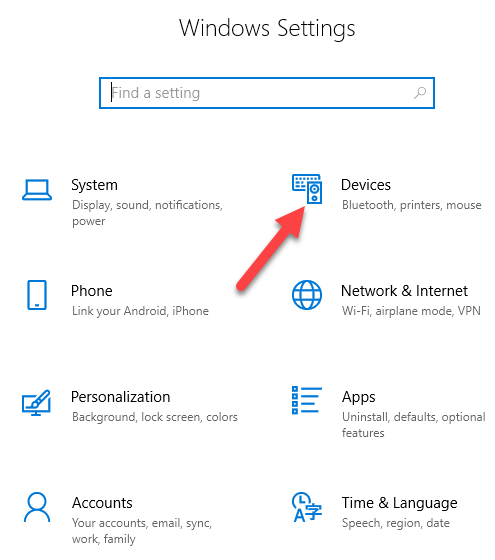
- Open Settings>Devices.
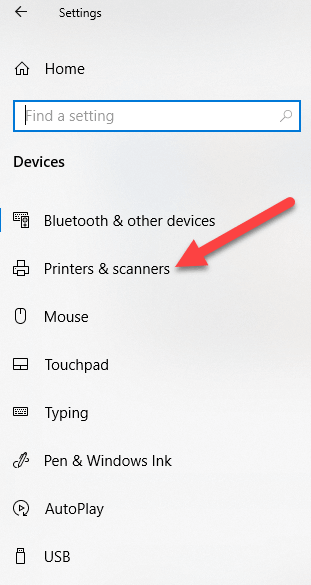
- Click Printers & Scanners .
- Select your printer, click Remove device , and click Yes when asked to confirm the deletion.
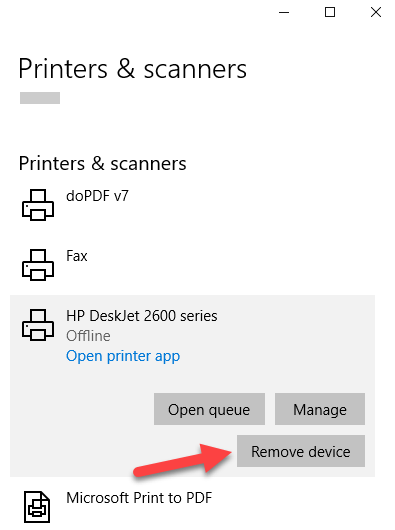
Note: The steps above only remove the printer from the list, so you’ll need to remove any leftover printer software or related applications.
- Open Settings>Apps .
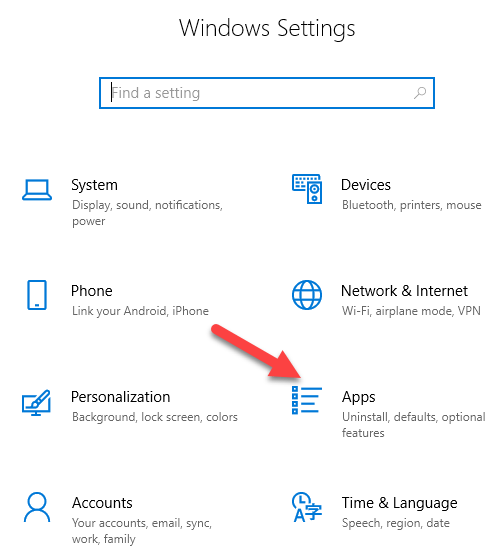
- Click Apps & Features and select the printer software you’d like to remove.
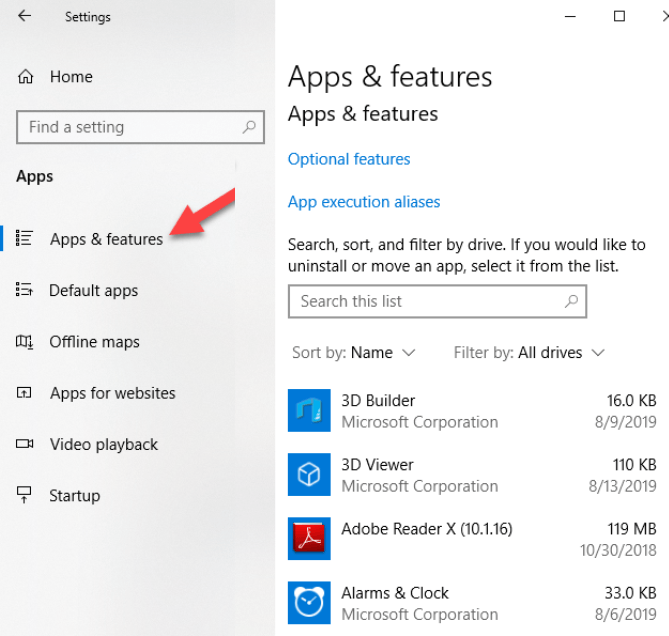
- Click Uninstall and follow the steps to completely remove any leftover printer-related applications.
Remove Printer Driver From Print Server Properties
If you’re still seeing an old printer, or one that you previously uninstalled, appearing on the Printers & Scanners page, you can remove or uninstall the printer driver and driver packages.
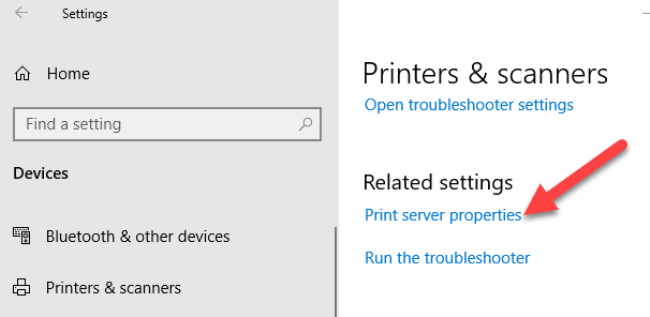
- Open Settings>Devices>Printers and Scanners on the left pane.
- Scroll down to Related settings and click Print Server Properties . Alternatively, you can right-click Start>Run and type printui /s /t2 to go to the Print Server properties page directly.
- Select the Drivers tab. From the list, click on the old printer entry and select Remove .
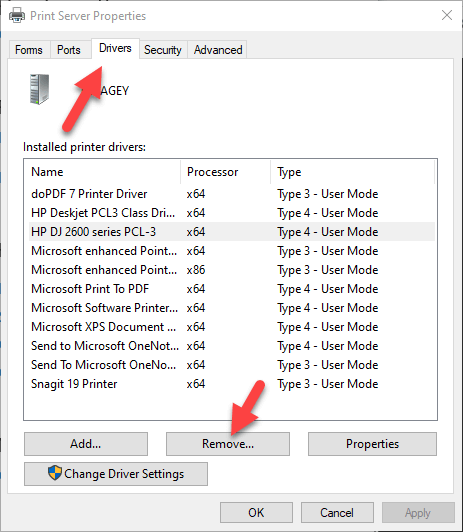
- You’ll get two options in a popup – Remove driver or Remove driver and driver package . Select the latter and click OK .
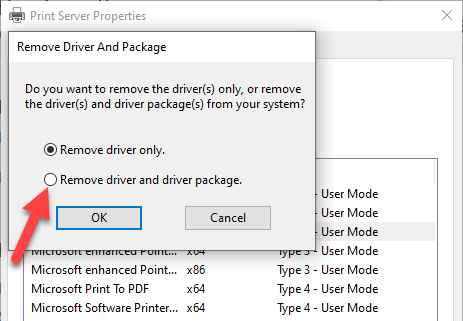
- If you get a confirmation prompt to Remove Driver Package , click Delete .
Uninstall Printer Driver Using Control Panel
You can remove and uninstall your printer and leftover printer driver or related apps from Control Panel using these steps.
- Open Control Panel>Hardware and Sound .
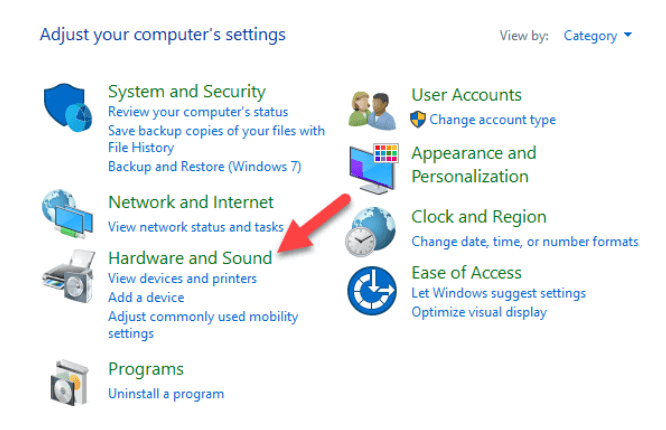
- Click Devices and Printers .

- Under Printers , right-click your device and click Remove device . Click Yes to confirm the action.

- Next, go to Settings>Apps>Apps & Features and select the software you want to remove.
- Click Uninstall and follow the on-screen steps to completely remove the printer software.
Use Print Management To Remove Old Printers
Ideally, if you used the Print Server properties method above, it should remove and uninstall the printer driver. However, you can use the Print Management console to completely remove printers you no longer use, and their drivers.
The Print Management dialog shows you the printers and current print jobs on your device. Before you delete the old printer driver though, make sure it’s not being used by any other printer.
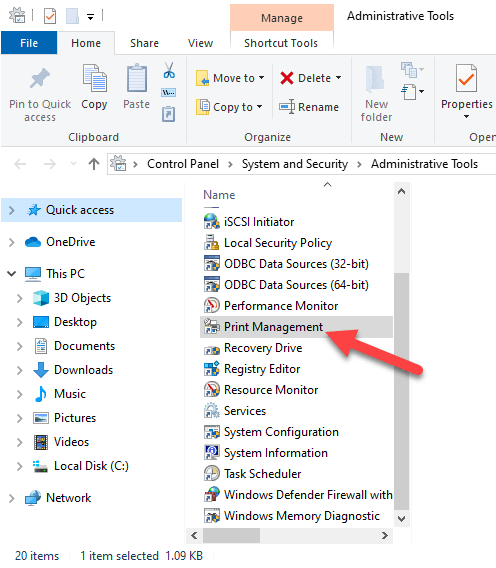
- Open Control Panel>System and Security .
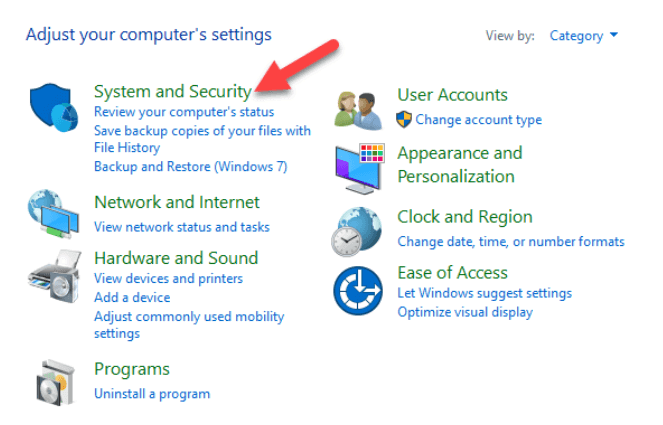
- Click Administrative Tools .
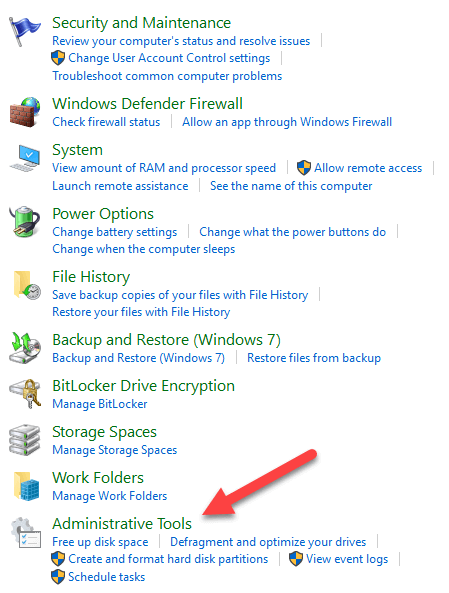
- Double-click the Print Management shortcut.
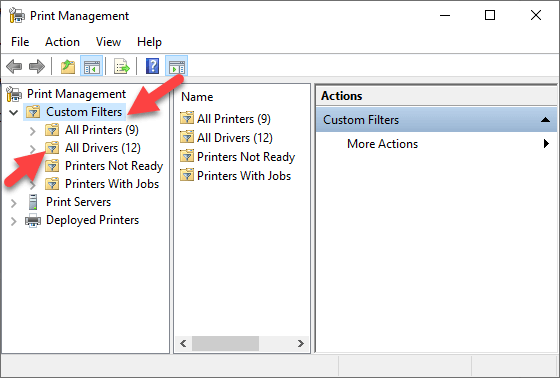
- Under Custom Filters , select All Printers .
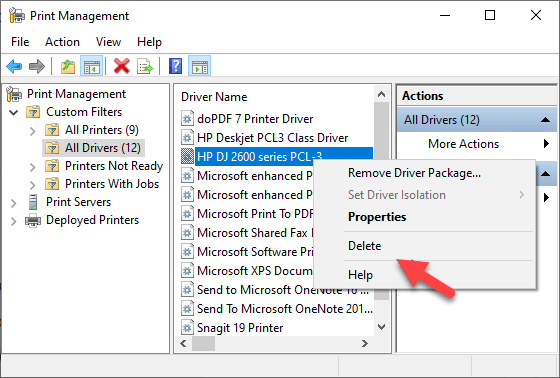
- Right-click the printer you want to remove.
- Click Delete and Yes to confirm the action.
- Open Settings>Apps>Apps & Features and click the printer software you want removed.
- Click Uninstall and follow on-screen instructions to completely remove the printer driver.
Delete Old Printers Via Registry Editor
If you open the Add a printer page and find old printers still listed there, edit the registry to remove leftover entries. To do this, start by creating a system restore point, and then follow the steps below.
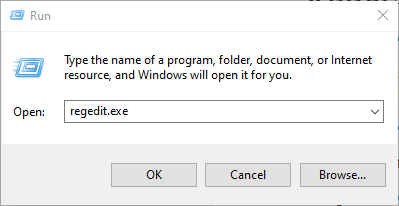
- Right-click Start>Run .
- Type regedit.exe and click OK (or press Enter on your keyboard) to open the Registry Editor.
Find the registry key:
HKEY_CURRENT_USERSOFTWAREClassesLocal SettingsPrintersRoamed
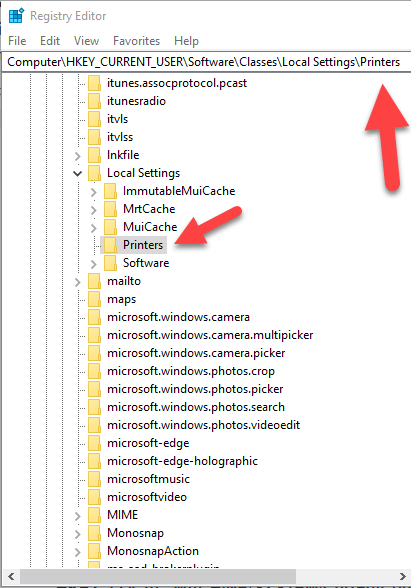
- Right-click the printer from the right pane, and select Delete .
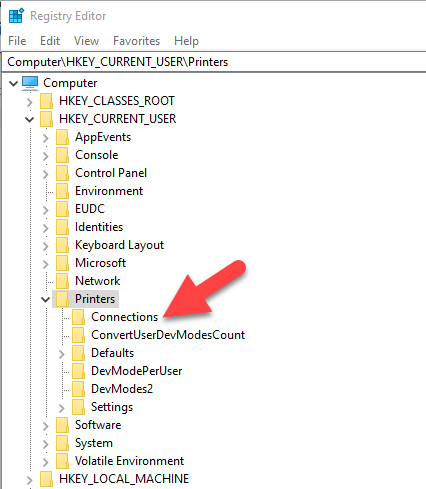
- Check printer entries and delete unwanted items by going to this key: HKEY_CURRENT_USERPrintersConnections
Next, go to this key:
HKEY_LOCAL_MACHINESYSTEMCurrentControlSetControlPrintPrinters
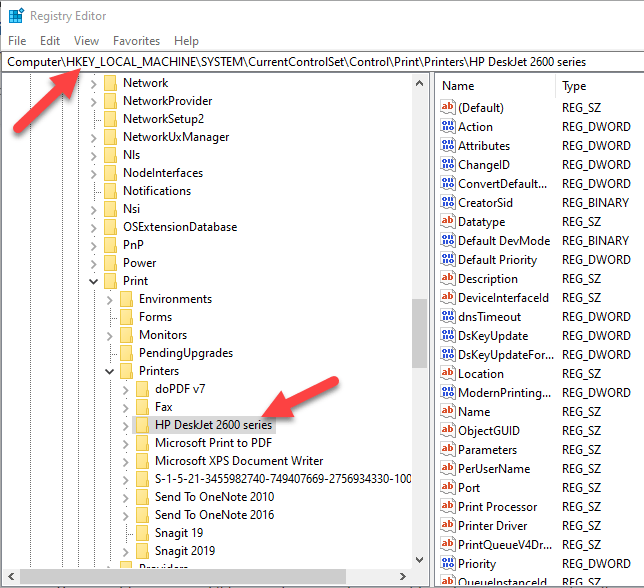
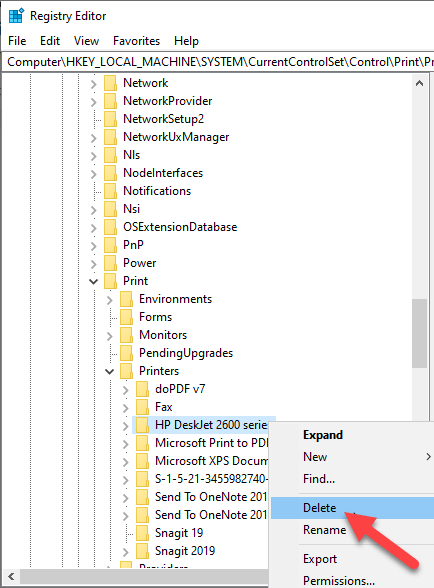
- Click to expand the key, right-click your printer and select Delete .
Some subkeys may still have references to your old printer, so you can clear the following as well:
HKEY_LOCAL_MACHINESYSTEMCurrentControlSetControlPrintEnvironmentsWindows NT x86DriversVersion-3 HKEY_LOCAL_MACHINESYSTEMCurrentControlSetControlPrintEnvironmentsWindows x64DriversVersion-3 HKEY_LOCAL_MACHINESYSTEMCurrentControlSetControlPrintEnvironmentsWindows x64DriversVersion-4
Once this is done, exit the Registry Editor.
Uninstall Printer Using Command Prompt
If you’re a fan of command lines, the Command Prompt is another tool you can use to delete a printer and remove related drivers and apps.
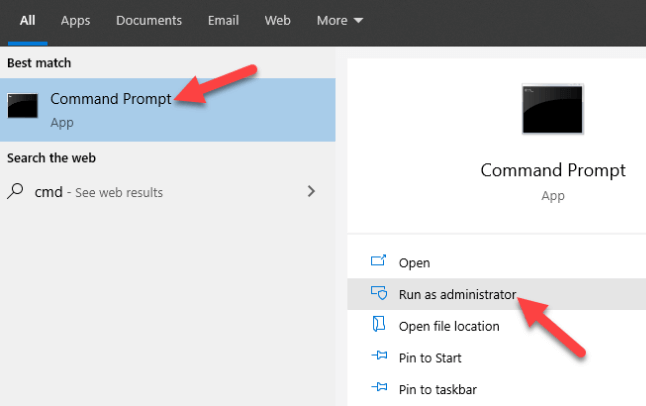
- Click Start and type CMD in the search bar.
- Click Command Prompt and select Run as administrator from the right pane.
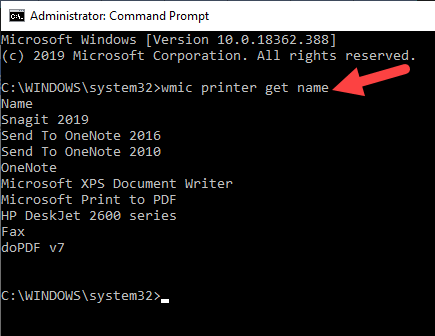
- In the Command Prompt window, type this command: wmic printer get name and press Enter to see the list of printers on your device.
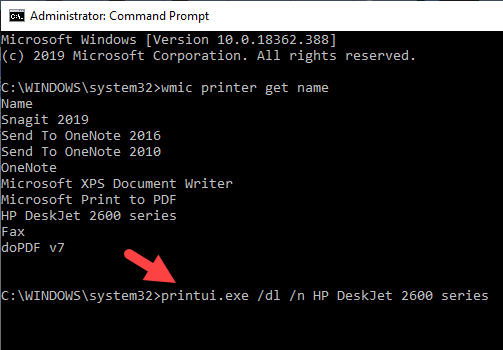
- To uninstall the printer, type printui.exe /dl /n “YOUR-PRINTER-NAME” and press Enter. Remember to replace YOUR-PRINTER-NAME with your printer’s full name. For example, printui.exe /dl /n HP DJ 2600 Series CL3 .
- To uninstall the printer software, open Settings>Apps>Apps & Features and select the printer software you want to remove. Click Uninstall and follow the on-screen instructions to complete the process.
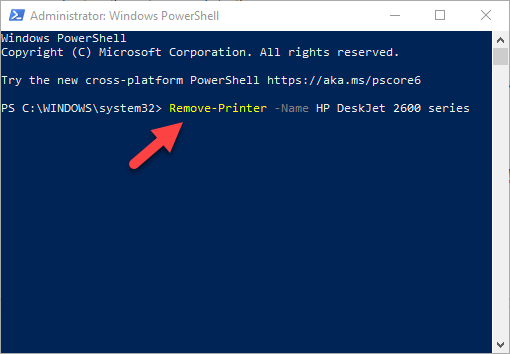
Remove a Printer Using PowerShell
If you prefer PowerShell over Command Prompt, here are the steps to take to remove the printer and related software.
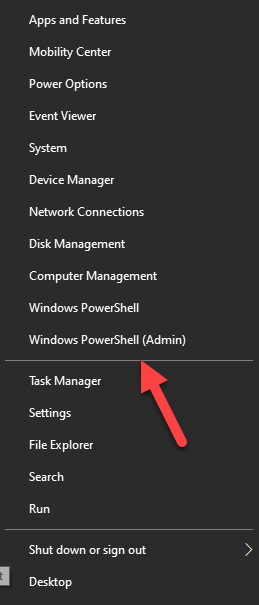
- Right-click Start > Windows PowerShell (Admin) .
- Type this command: Remove-Printer –Name “YOUR-PRINTER-NAME” .
- Open Settings > Apps > Apps & Features , and click the software you want removed.
- Click Uninstall and follow the directions to remove it completely.
Delete Remnants From The Windows Driver Store
This solution is meant to remove any remnants of drivers that may still be on your device even after deleting driver packages.
In the driver store, you’ll find inbox and third-party driver packages, which were installed and stored in the folder even before the driver itself got installed.
Each of the subfolders in the store holds a driver package and corresponding .inf file , but it’s a bit difficult to find the specific driver package you’d like to remove.
The good news is you can use a third-party tool to explore the Windows driver store and completely remove the old printer driver once for all. It’ll also save you lots of space that would otherwise have been occupied by junk files.
What Happens When Drivers Are Deleted?
A device driver is a piece of software that tells your computer’s operating system how to communicate with the device it’s connected to.
For example, to connect to your printer and execute the print command, a printer driver is needed to bridge the gap between the two devices, and deliver the print job to you.
Without the printer driver, your printer is just hardware that doesn’t work. Similarly, deleting the printer driver after deleting the printer from your computer renders it inoperative.
However, if you delete the driver, you can undo the deletion using System Restore , from the previous restore point created when you deleted the driver from your computer.
Alternatively, Windows will automatically install the driver on your operating system by searching for it from its extensive library of drivers. If it doesn’t find a suitable driver, it’ll search for a driver online through Windows Update. Otherwise, you can visit the device manufacturer’s website to find the specific driver for your printer.
- Preparing for Windows 10 End of Support: Upgrading to Windows 11
- How to Fix a “This file does not have an app associated with it” Error on Windows
- How to Fix an Update Error 0x800705b4 on Windows
- How to Resolve “A JavaScript error occured in the main process” Error on Windows
- How to Fix the Network Discovery Is Turned Off Error on Windows
Elsie is a technology writer and editor with a special focus on Windows, Android and iOS. She writes about software, electronics and other tech subjects, her ultimate goal being to help people out with useful solutions to their daily tech issues in a simple, straightforward and unbiased style. She has a BCom degree in Marketing and currently pursuing her Masters in Communications and New Media. Read Elsie’s Full Bio
