As a Windows user, a non-working printer could be a simple fix or a time-consuming disaster. If you see the “Error – Printing” status error on Windows, you won’t have much to go on to try and troubleshoot the problem, which can be frustrating and inconvenient to resolve.
Several factors might cause the “Error – Printing” status error, but, in most cases, simple troubleshooting steps like restarting your printer or checking your printer connections may do the trick. To fix the “Error – Printing” status error on Windows, follow the steps below.
Understanding the “Error – Printing” Status Error on Windows
The “Error – Printing” status is a simple, catch-all error code that appears when your Windows PC can’t successfully print . It can be caused by several factors, such as missing paper, outdated or corrupted printer drivers, incorrect printer settings, or issues with the Print Spooler service on your Windows PC.
It can appear in a few different ways, such as “Error – Printing,” “Printer in error state,” or “Print Spooler service not running.” The message may differ, but the result is the same—your printer can’t process or complete the print job.
If you see this error, try some of the troubleshooting fixes below.
Restart Printer and PC
First, restart your devices to see if this resolves the problem.
It’s a good idea to turn off your printer and disconnect its power cord. Next, shut down your PC and unplug its power cable as well. Wait for at least 30 seconds before plugging everything back in.
After the waiting period, reconnect the printer and PC’s power cords. Turn on your printer first, ensuring it’s up and running. Next, turn on your PC. Finally, try printing a test page to see if the “Error – Printing” status error has been resolved.
This restart process might seem obvious, but a clear shutdown and restart can often resolve minor (and unexpected) issues.
Check Printer Hardware and Connection
Printer still not working? It’s a good idea to look more closely at your printer hardware and its connection with your PC.
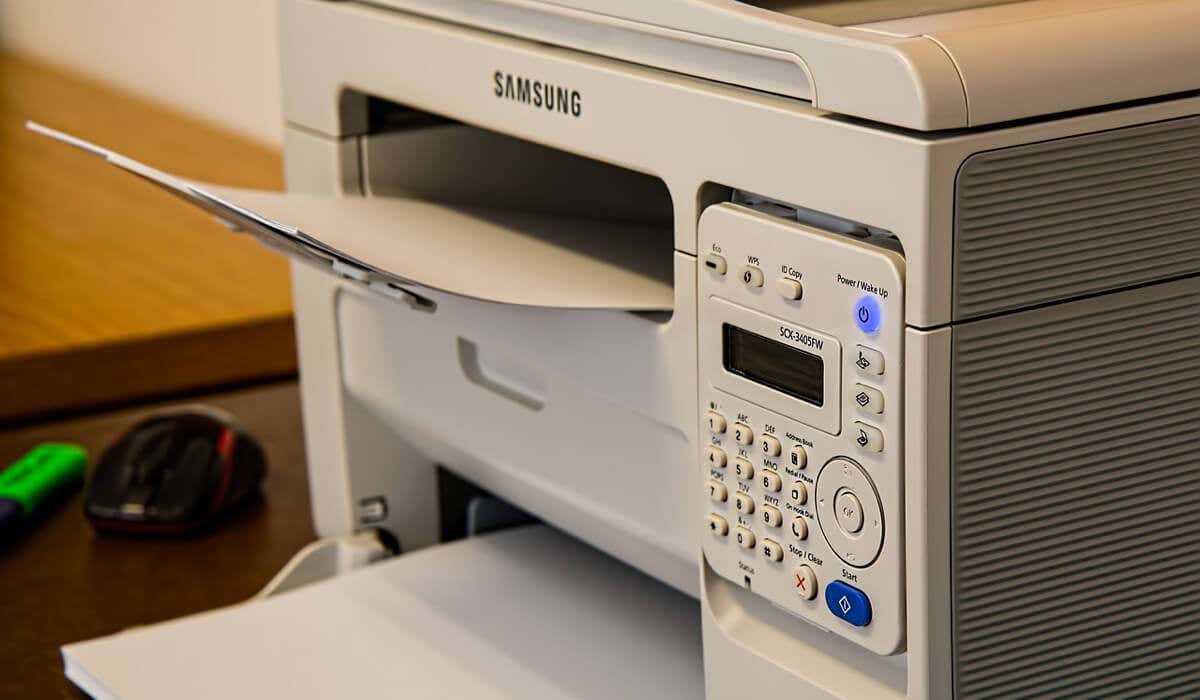
First, verify that your printer is turned on. Look for an LED or display indicating power, and ensure it’s connected to an electrical outlet. If you have a wired printer, inspect the USB cable connecting the printer to your PC. Make sure it’s properly secured at both ends.
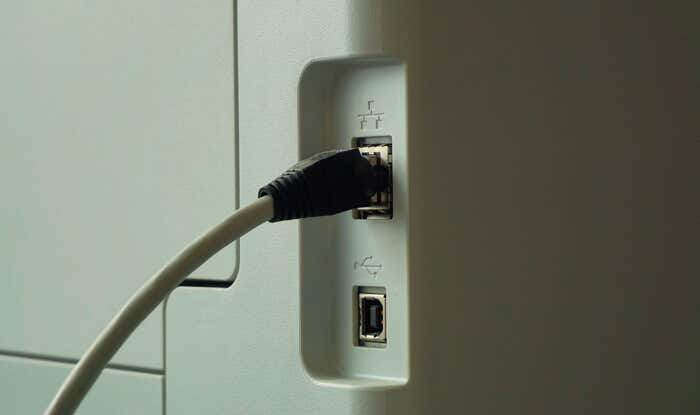
If the USB connection isn’t recognized, try a different USB port or a new cable. Likewise, if the printer is connected over a network, ensure the ethernet cable is connected and the connection is active.
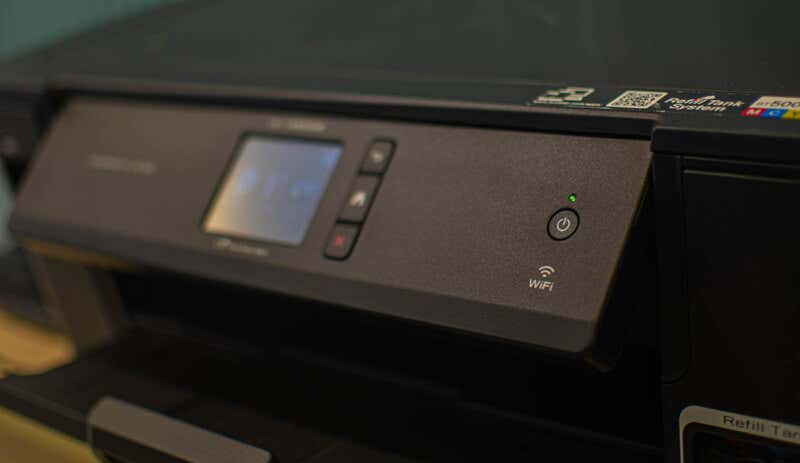
For wireless printers, double-check your Wi-Fi connection. Ensure that your printer connects to the same network as your PC. Most printers have a display or indicator light to show a successful wireless connection. If your wireless printer isn’t connecting , consult your printer’s manual for specific steps to connect to Wi-Fi.
Also, check your printer for issues such as low paper or ink. Without paper or ink, you can’t print, so replenishing the paper or ink should resolve the issue.
Clear Paper Jams
A paper jam may be causing the “Error – Printing” status message on your PC. If your printer can’t push through paper, it can’t continue the printing process.

To resolve this issue, you’ll need to clear any jams from your printer. Depending on your device, this might be difficult to do, so you may need to consult your manual first.
Start by checking the areas where paper enters and exits the printer, then remove any jammed paper. If your printer has an automatic document feeder, open the ADF cover (Automatic Document Feeder) and remove any jammed paper.
Restart Print Spooler Service and Clear Print Queue
After clearing a printer jam, it’s also a good idea to clear your print queue and restart the Print Spooler service (which your printer needs to be able to print). It’s a good idea to do this if your print queue won’t clear after an error occurs during printing.
You can also do this at any point to try and resolve printer errors like the “Error – Printing” message.
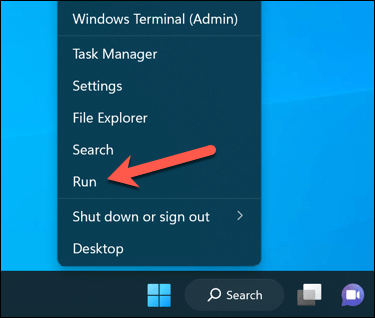
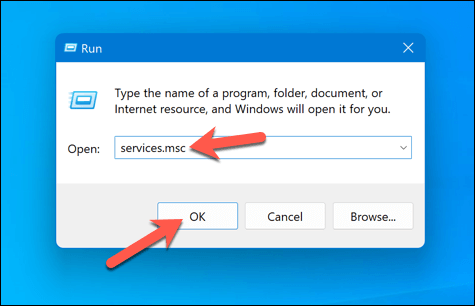
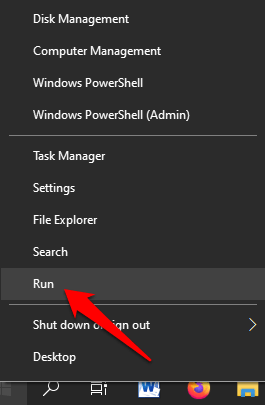
- To begin, right-click the Start menu, select Run, or press the Windows Key + R to open the Run command box.
- In Run , type services.msc and press OK .
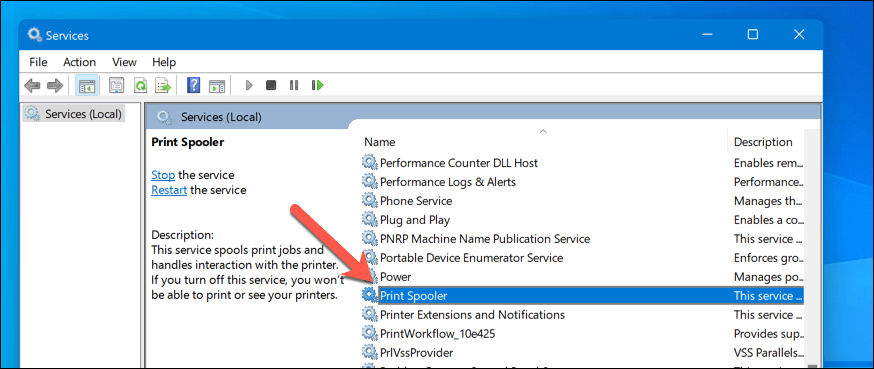
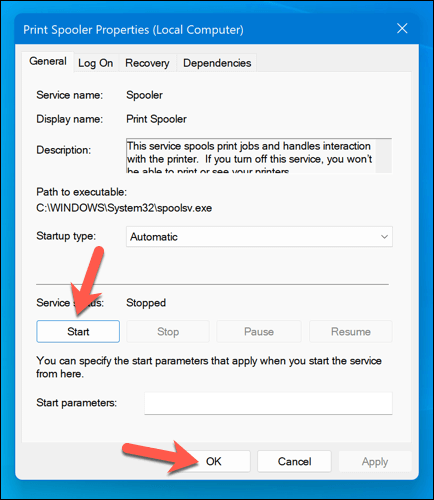
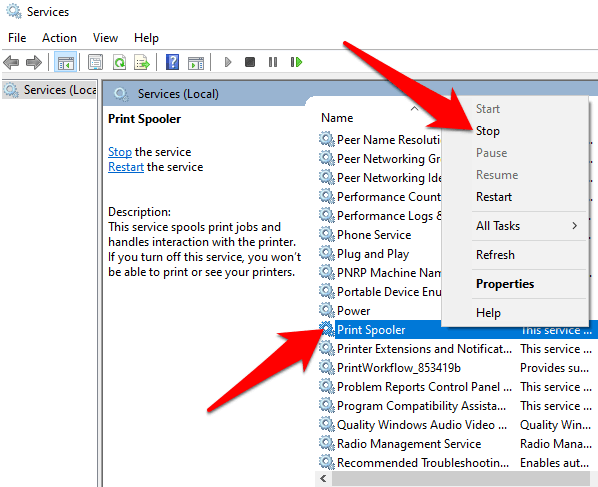
- In the Services window, look for the Printer Spooler service and double-click it.
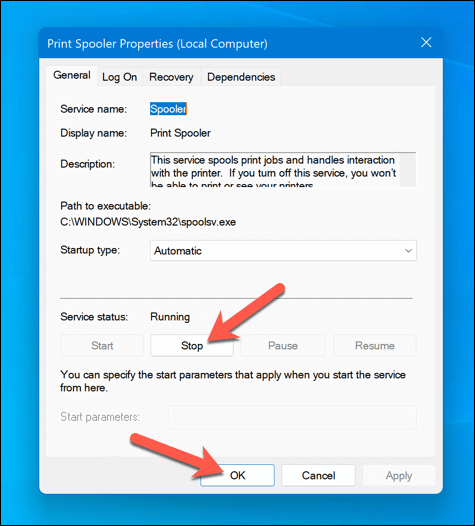
- Press Stop and OK . This will stop the print spooler service, allowing you to clear any leftover print jobs.
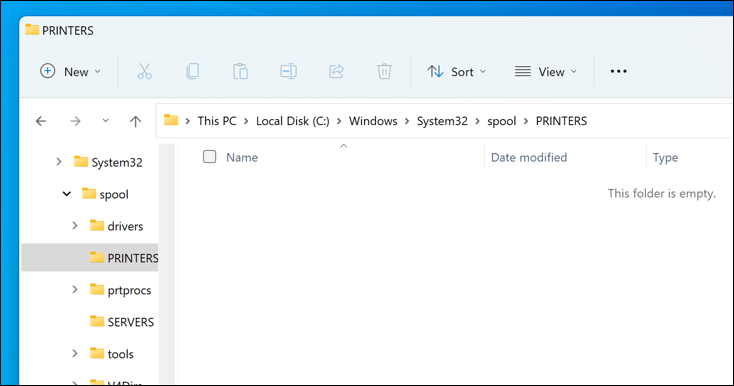
- Next, open File Explorer and navigate to the C:\Windows\System32\spool\PRINTERS folder using the address bar. Delete all files in this folder to completely clear the print queue.
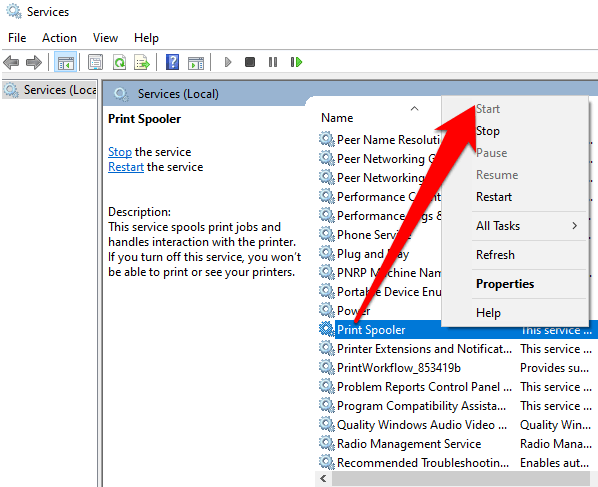
- Return to the Printer Spooler service in the Services window and click Start to restart the spooler.
With the paper jams cleared and the print queue emptied, your printer should now return to a ready state, and you can resume printing your documents without any errors.
Update or Reinstall Printer Drivers and Software
Outdated driver software can sometimes lead to the “Error – Printing” status error in Windows. To fix this issue, you should check for new printer software (including new printer drivers) from the manufacturer.
Follow these steps to ensure your printer driver and manufacturer software are up-to-date. It may be a good idea to uninstall existing printer software before proceeding.
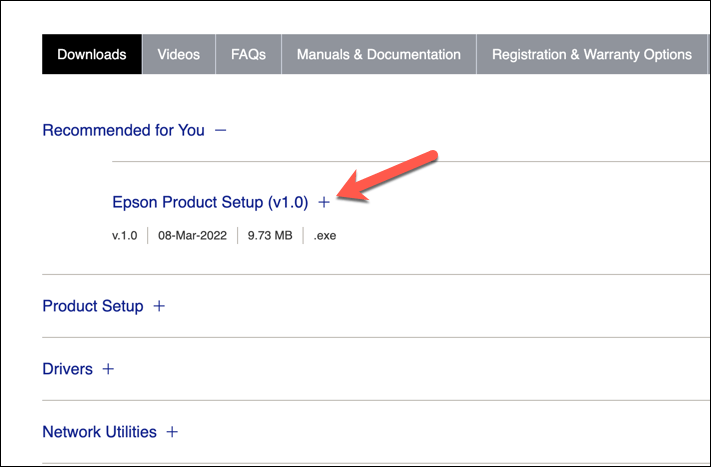
- Visit the printer manufacturer’s website and search for your specific printer model in the support or downloads section.
- Find any available updates or new versions of the printer driver software. Ensure the software is compatible with your version of Windows.
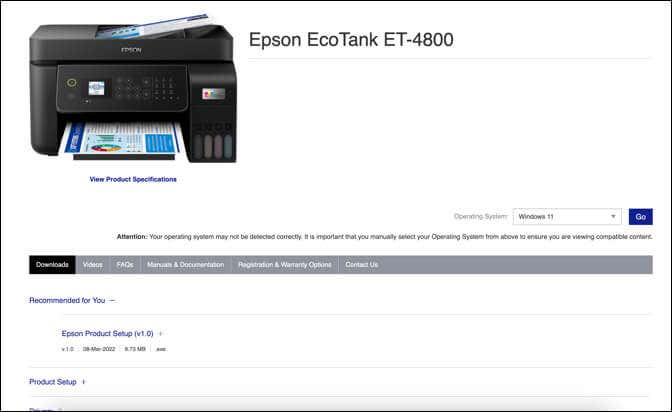
- Next, download the latest driver and printer software. If new software is available, download and save the installer to your computer.
- Run the installer and follow the on-screen instructions to complete the installation.
After completing these steps, your printer should begin to start working. However, you may need to restart your PC for any changes to take effect.
Check for New Windows Updates
A new Windows update can fix bugs, and new updates can help resolve common printing issues. You can manually check for new Windows updates to try and resolve the “Error – Printing” status error on your PC.
To check for new Windows updates, follow these steps.
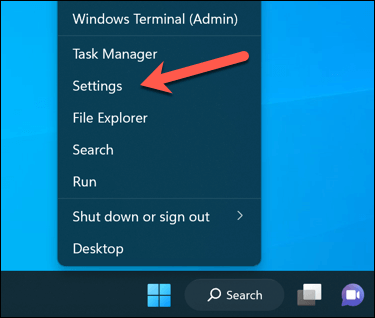
- Right-click the Start menu and select Settings .

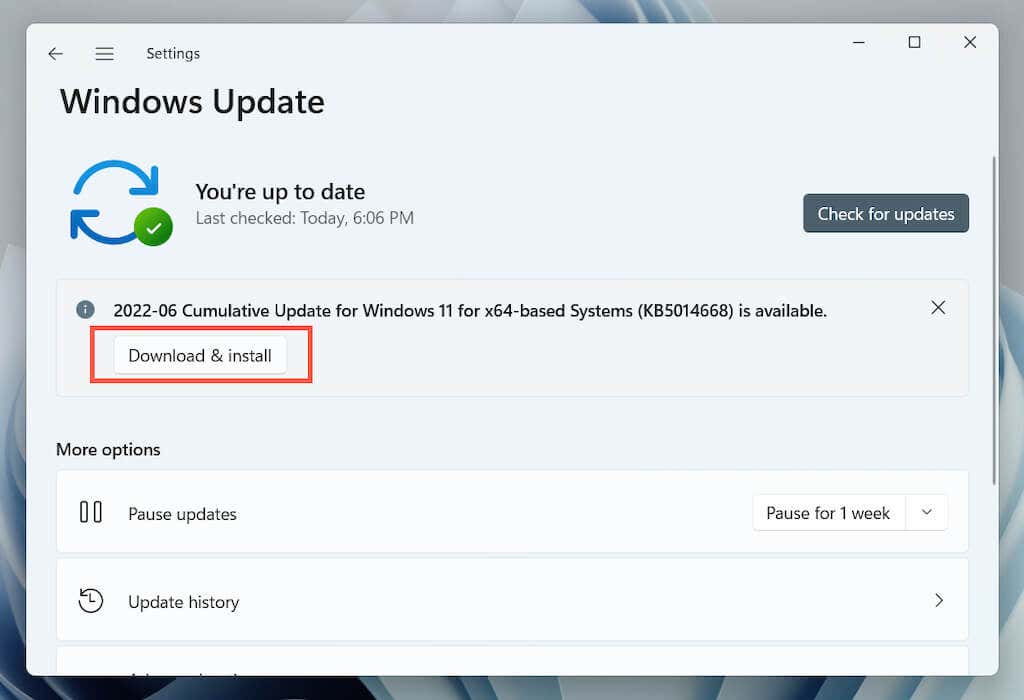
- In the Settings window, select Windows Update from the sidebar.
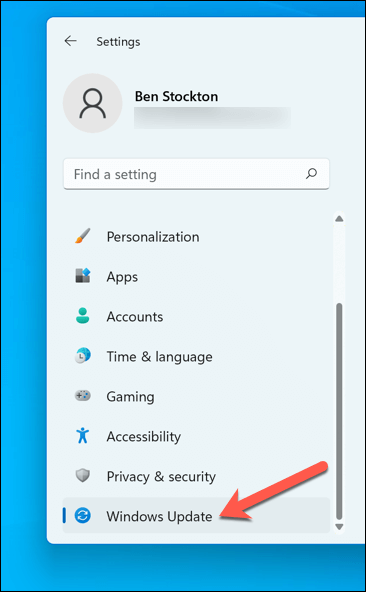
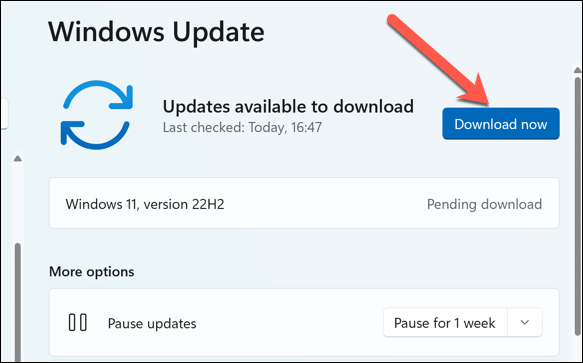
- Next, click the Check for updates button. If there are any pending updates, Windows will automatically start downloading and installing them.
- If it doesn’t, press Download Now to begin the installation.
After updating your PC, restart your computer and try printing again to see if the error is resolved.
Use the Printer Troubleshooting Tool
If you’re still struggling to resolve the “Error – Printing” status error in Windows, you can use the Printer Troubleshooter . This built-in tool helps to identify and fix common hardware and device-related issues.
Follow these steps to run the troubleshooter on your Windows PC.
- Right-click the Start menu and select Settings .
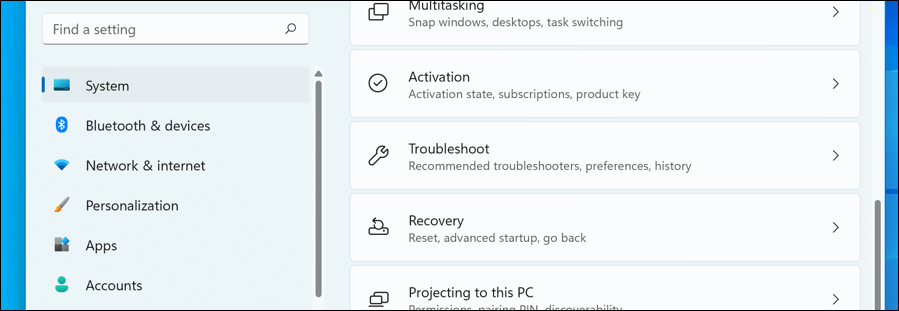
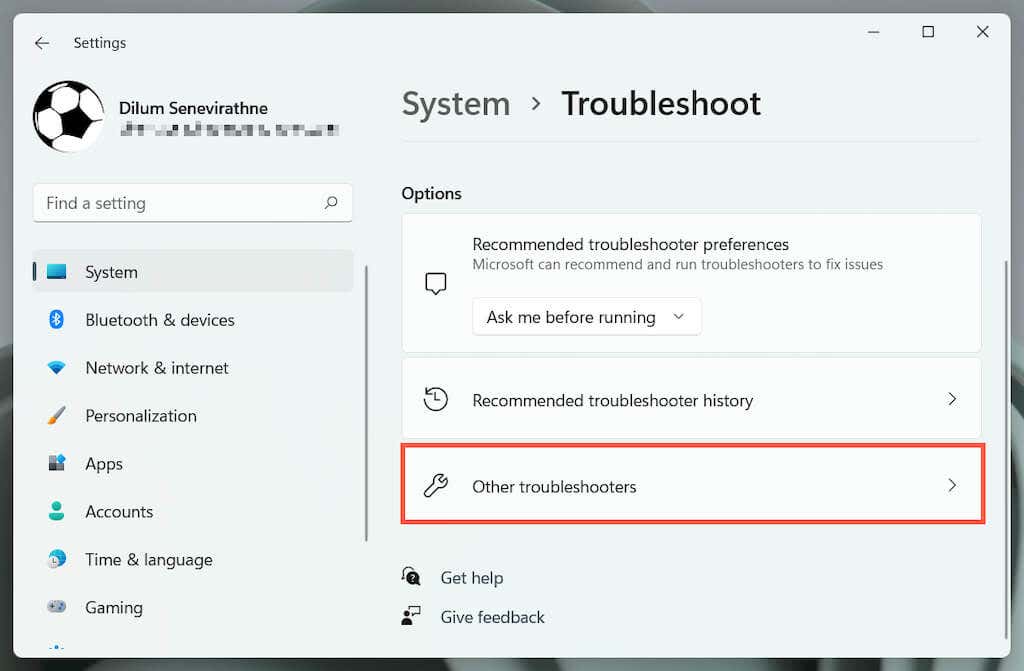
- In Settings , select System > Troubleshoot .
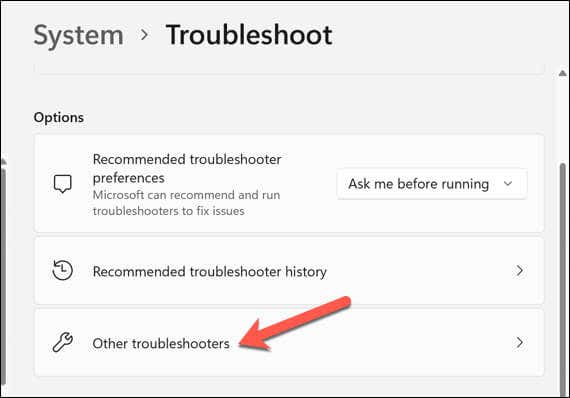
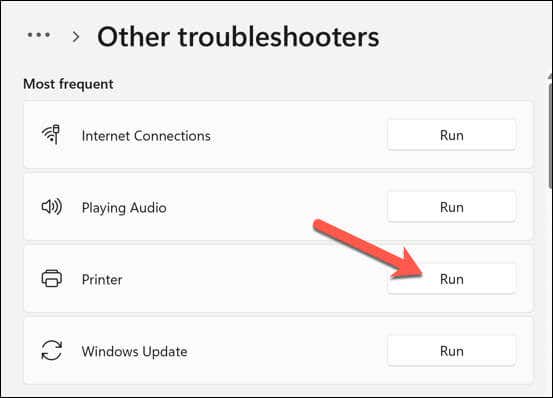
- Select the Other troubleshooters option.
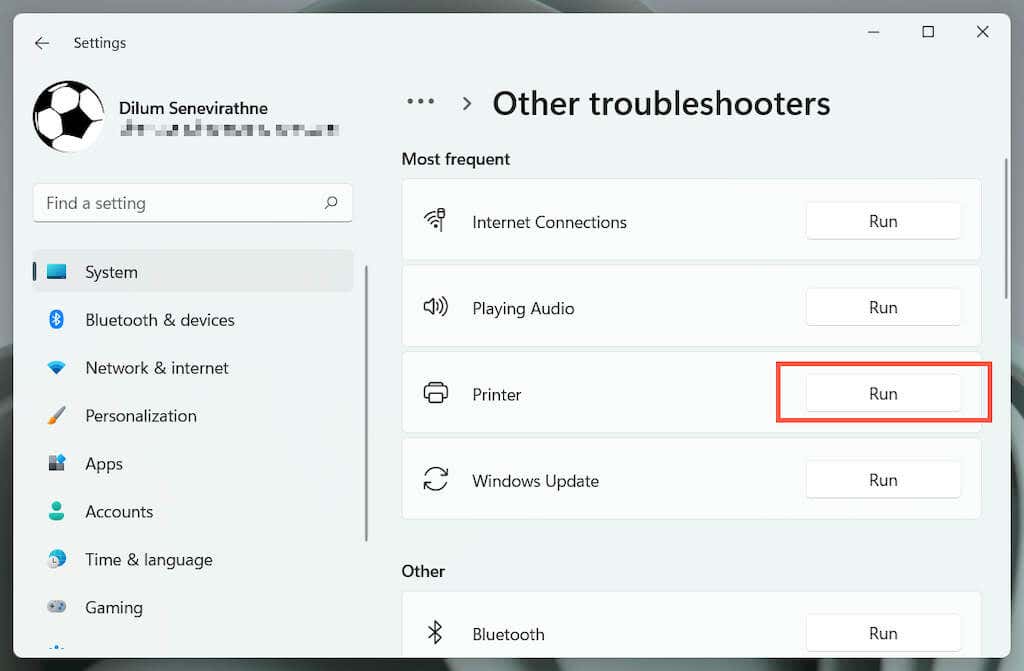
- Next, select the Printer troubleshooter to begin running the printing troubleshooting tool.
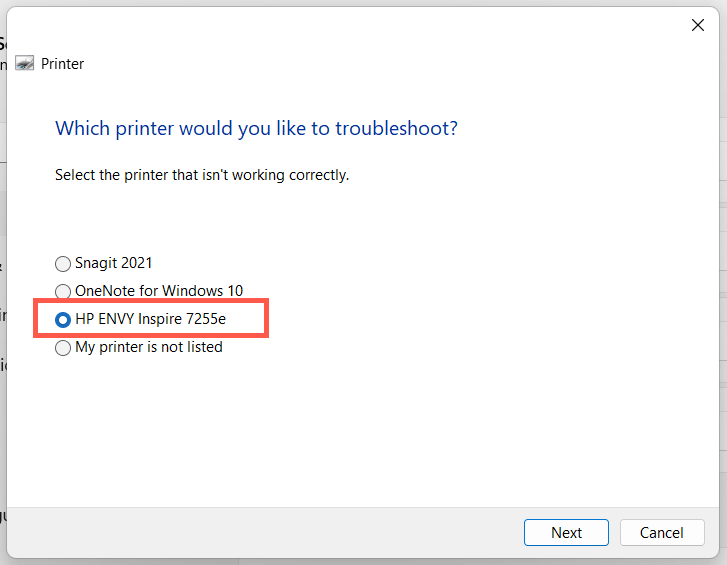
- Click Next and follow the on-screen instructions to detect and fix any problems.
After completing the troubleshooter and resolving any issues it detects, restart your computer, and then check if the “Error – Printing” issue is resolved.
Resolving Common Printer Issues on Windows 11
There isn’t a one-size-fits-all fix for resolving the “Error – Printing” status error on your Windows PC. Most of the time, however, one of the troubleshooting fixes above will resolve the problem.
However, there could be deeper problems with your printer, which means you can’t connect to your printer or print properly. For instance, if you see the error code “0x0000011b” on your PC, there could be a problem with your network that’s preventing you from printing—you’ll need to dig deeper to find and fix the problem.
- 7 Ways to Fix HP Printers ”Driver Is Unavailable” Error on Windows PC
- How to Fix Your Printer’s “Driver is unavailable” Error on Windows
- 7 Ways to Fix ”Windows Cannot Connect to the Printer”
- Print Job Won’t Delete in Windows? 8+ Ways to Fix
- Preparing for Windows 10 End of Support: Upgrading to Windows 11
Ben Stockton is a freelance technology writer based in the United Kingdom. In a past life, Ben was a college lecturer in the UK, training teens and adults. Since leaving the classroom, Ben has taken his teaching experience and applied it to writing tech how-to guides and tutorials, specialising in Linux, Windows, and Android. He has a degree in History and a postgraduate qualification in Computing. Read Ben’s Full Bio
ÿØÿà JFIF ÿÛ C “##! %*5-%‘2( .?/279«<$-BFA:F5;<
Printers experience several forms of malfunctions, some of which are easy to fix. Fixing printer issues can be a headache—especially on Windows devices—because there’s a wide range of things that could be wrong.
The problem could stem from your PC, the printer, or the connection between both devices. This tutorial highlights ten likely troubleshooting measures for printers that won’t print.
1. Check Paper Tray and Printer Connection
Many printer models won’t print if there’s a loose USB connection or if they’re out of ink or paper. Verify your printer’s ink levels, clean the printhead, fill the paper tray, and avoid using substandard paper. Low-quality paper can cause “Ghost Paper Jams” and other issues that stop your printer from printing documents.
For printers using a wired connection, ensure both cable ends are plugged firmly into your printer and computer. Go through the printer’s manual for instructions on connecting the device to your Windows or Mac computer.
Wireless printers won’t print documents if connected to the wrong Wi-Fi network. Make sure your printer and computer are on the same wireless network. Likewise, check your router settings, disable VPN connections, and make the printer’s IP address static. Refer to our tutorial on troubleshooting Wi-Fi (wireless) printers for more fixes.
2. Run the Printer Troubleshooter
Windows has a suite of troubleshooting tools that diagnoses and resolves hardware and software problems. We recommend running the Printer Troubleshooter before trying other more complex measures.
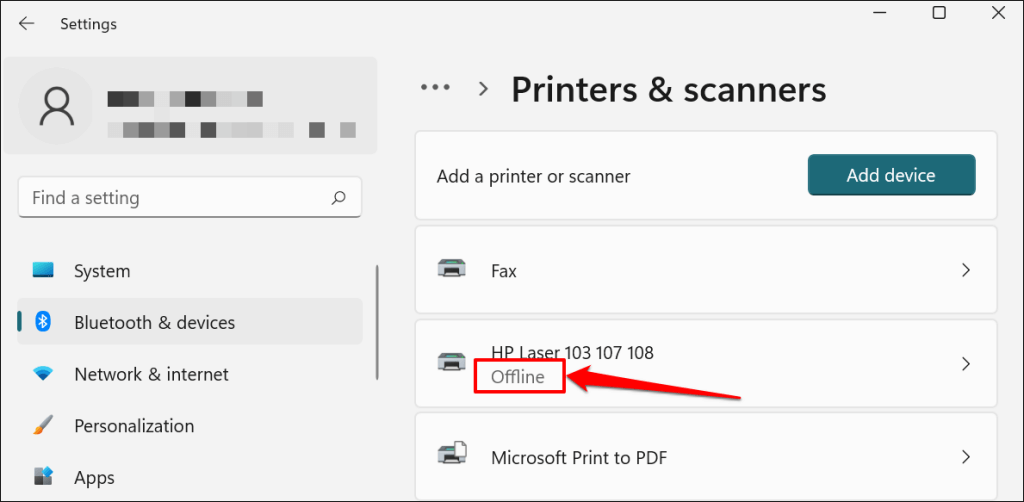
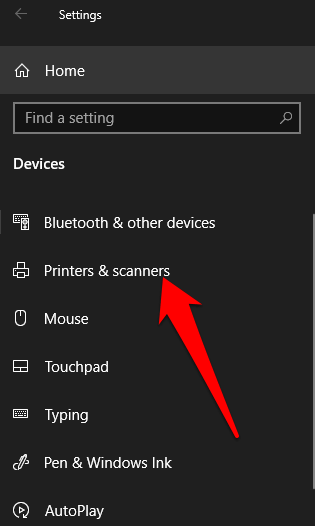
- Go to Settings > Bluetooth & devices > and select Printers & scanners .
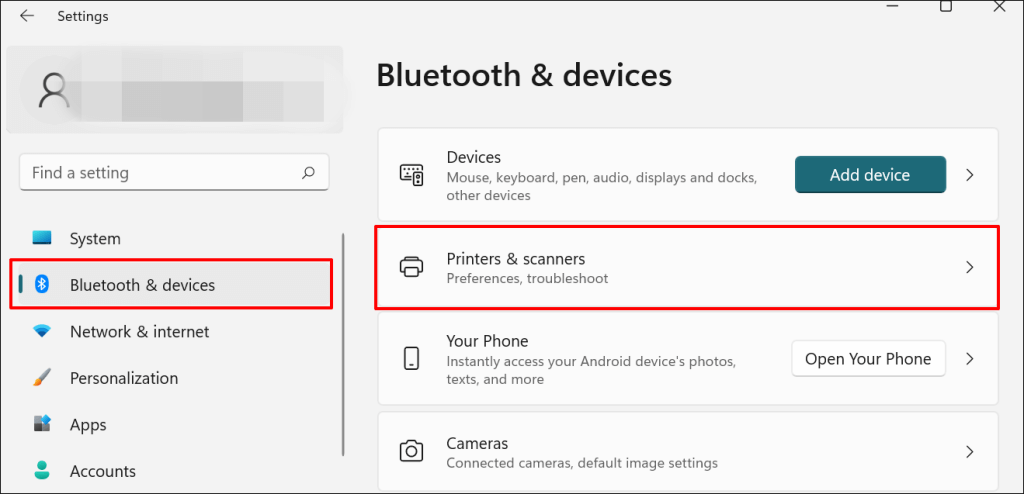
In Windows 10, go to Settings > Devices > Printers & scanners .
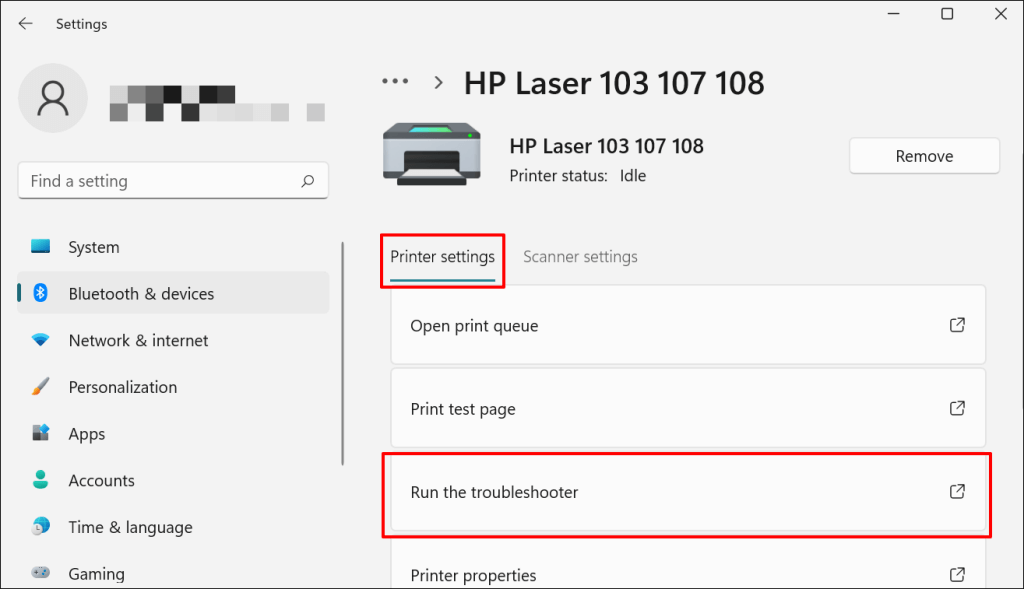
- Select the problem printer from the list of connected devices.
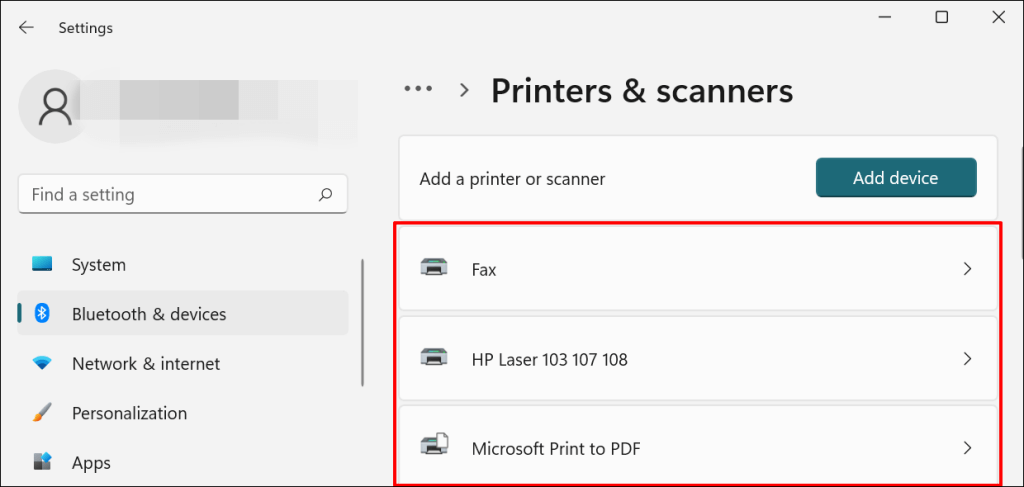
Note: If your printer status reads “Offline,” refer to our troubleshooting tutorial on getting an offline printer back online . Proceed to the next step if your printer is online.
- Select Run the troubleshooter in the “Printer settings” tab.
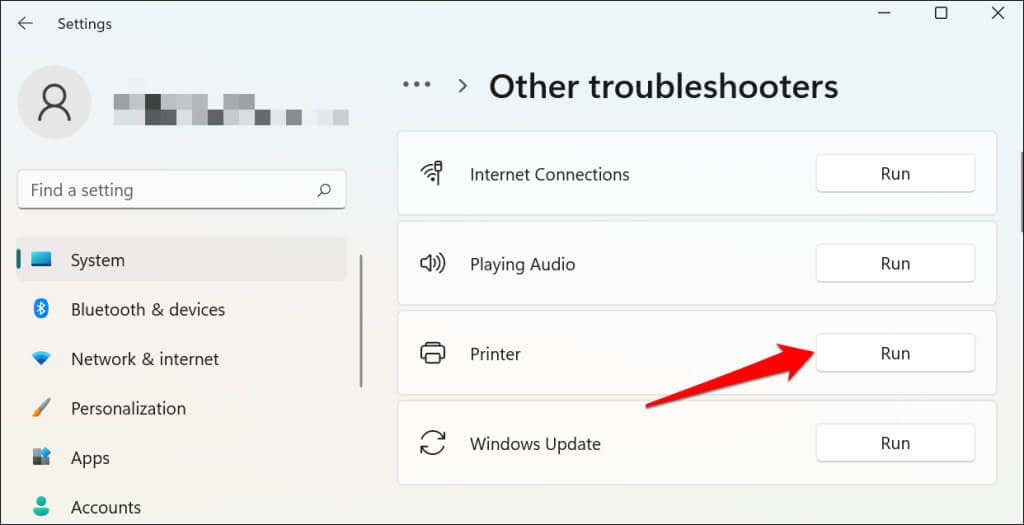
There’s another way to access the printer troubleshooter in Windows 11. Go to Settings > System > Troubleshoot > Other troubleshooters and select Run next to “Printer.”
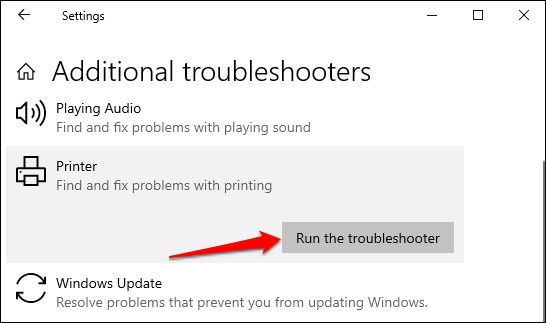
In Windows 10, go to Settings > Update & Security > Troubleshoot and select Additional troubleshooters > Printer > and select Run the troubleshooter .
Wait for the troubleshooter to run the necessary check on the printer, its drivers, and other associated processes.
3. Set the Printer As Default
Windows has a feature that dynamically changes your PC’s default printing device based on your location and other factors. The feature is near-perfect but not failproof. If your PC doesn’t print documents, it might be that an inactive printer is the default printing device.
macOS also sets the last printer connected as your Mac’s default printer. Check your computer settings and ensure the active printer is the default device.
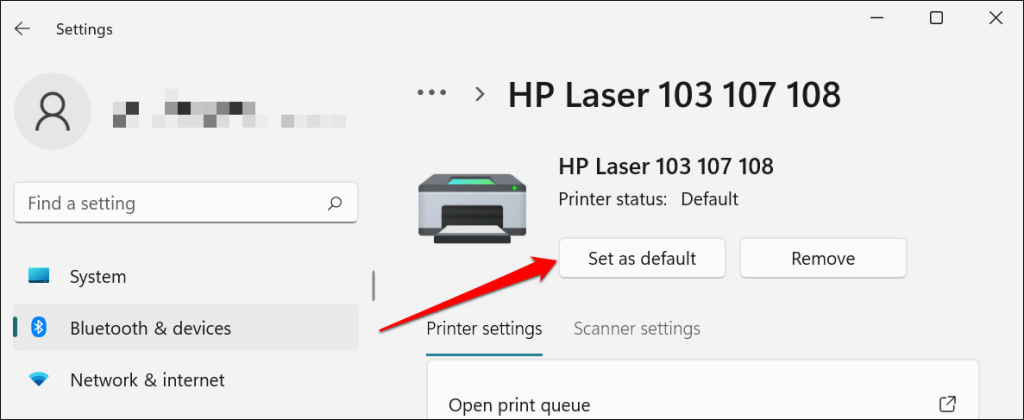
In Windows, go to Settings > Bluetooth & devices > Printers & scanners , select the printer, and select the Set as default button.
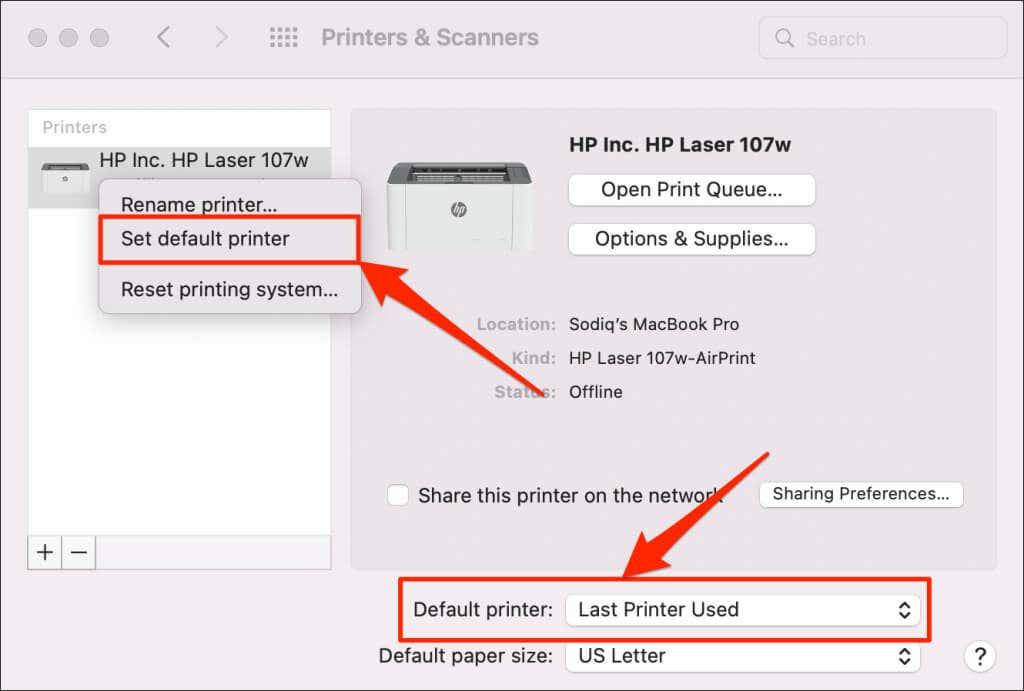
On Mac computers, go to System Preferences > Printers & Scanners on Mac computers , right-click the printer, and select Set default printer . Alternatively, open the Default printer drop-down menu and select the printer as the default.
4. Clear Your Computer’s Print Queue
When you send a document for printing, your computer first sends the “print job” to the print queue. The print job is immediately removed from the print queue when the printer prints the document. It’s usually a seamless process, but there are times when completed print jobs remain in the queue.
If that happens, subsequent print jobs will also get stuck in the queue and prevent your printer from printing files. Clearing your computer’s print queue might resolve the problem.
Clear Print Queue in Windows
- Go to Settings > Bluetooth & scanners > Printers & scanners and select your printer.
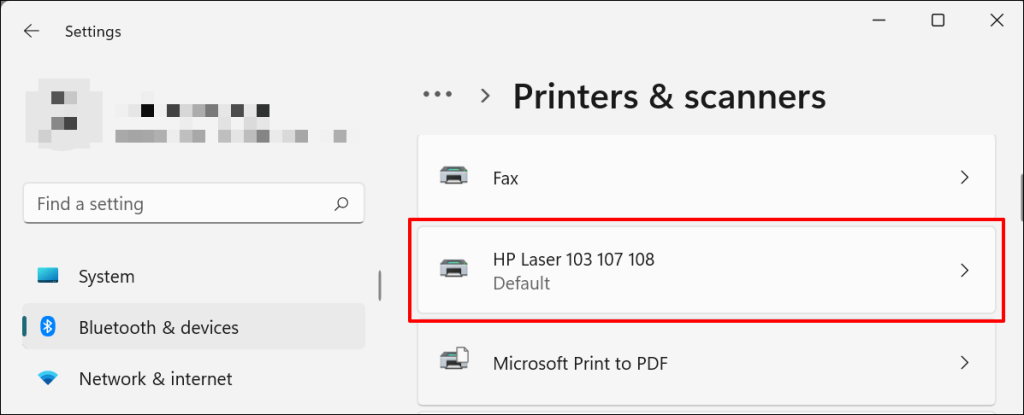
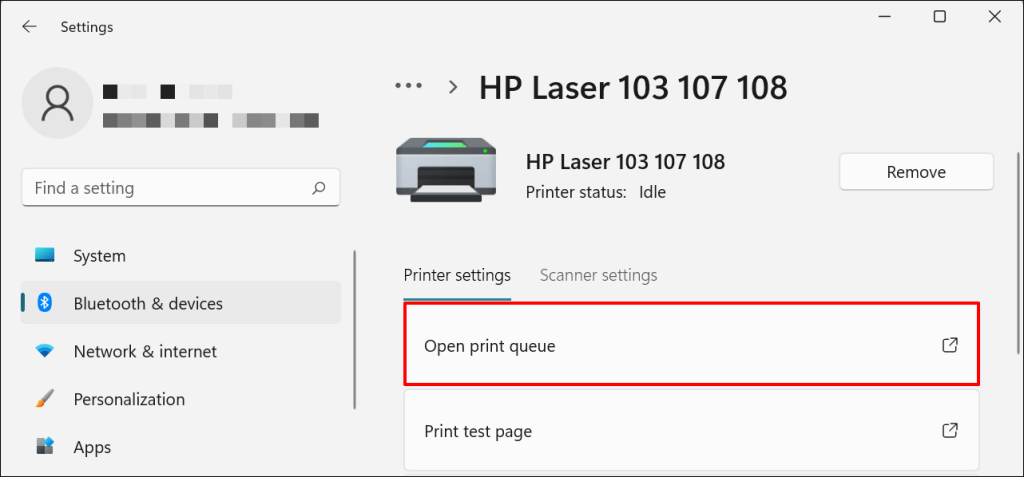
- Select Open print queue .
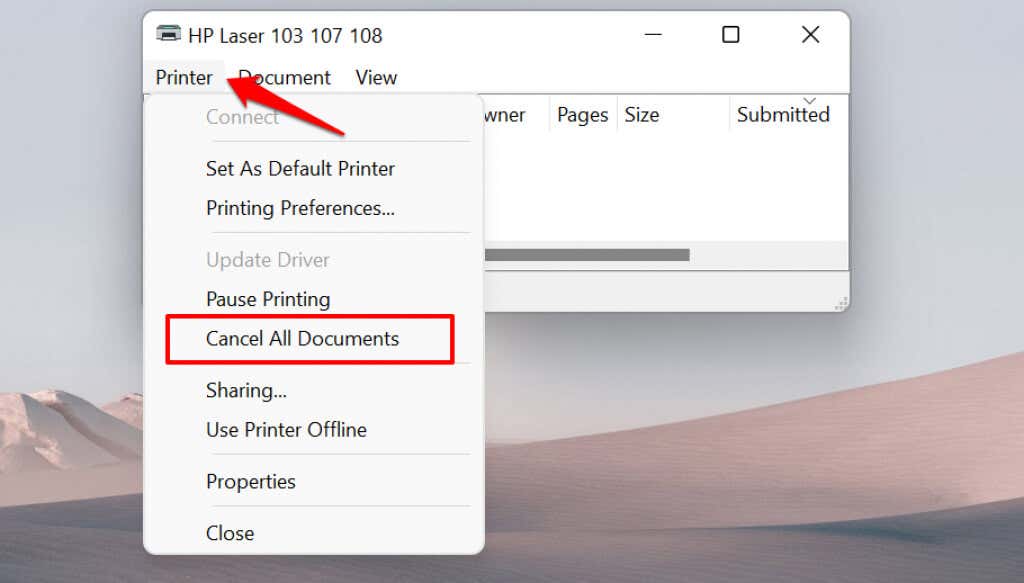
- Select Printer on the menu bar and select Cancel All Documents .
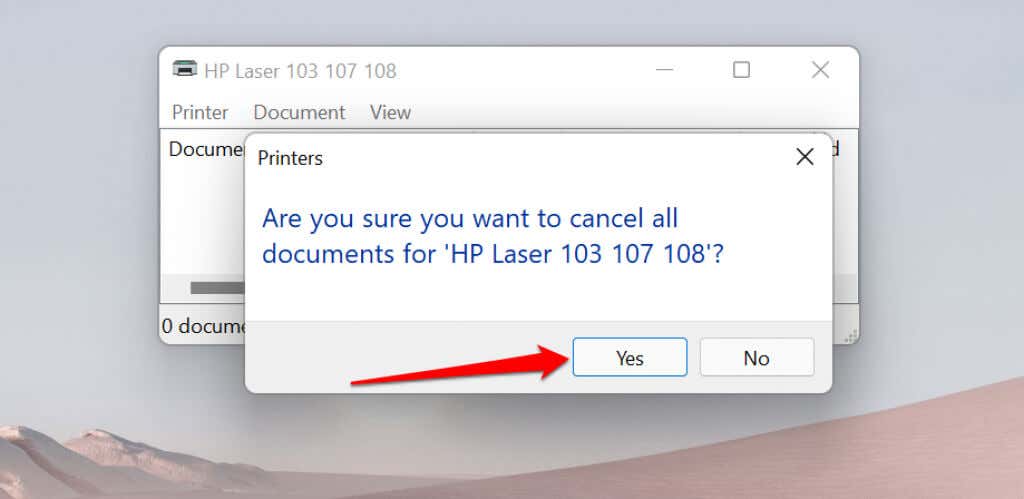
- Select Yes on the confirmation prompt.
[14-why-windows-pc-wont-print-documents]
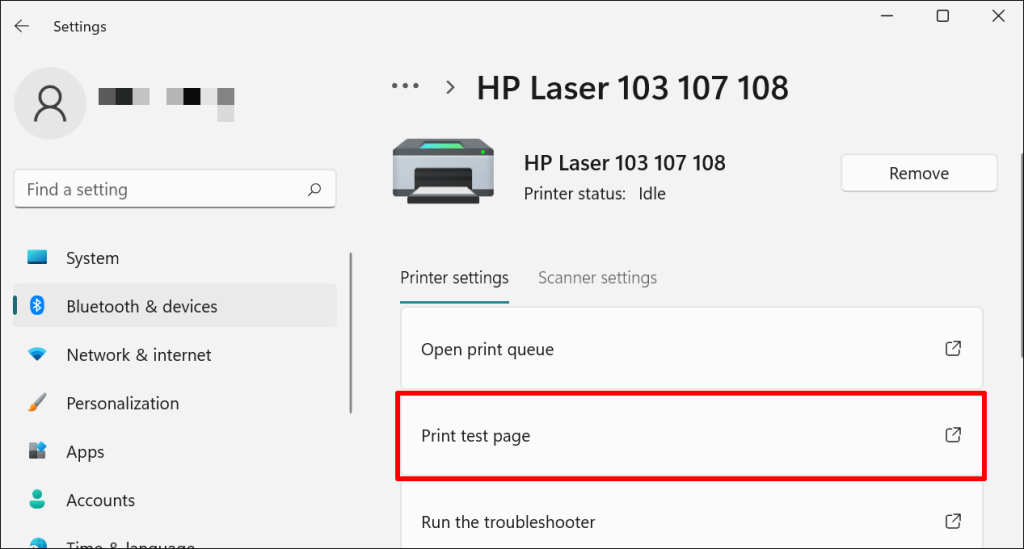
Try printing any document or a test page and check if clearing the queue fixed the problem. Open the printer menu and select Print test page .
If completed documents remain in the print queue, refer to our troubleshooting tutorial on deleting stuck print jobs in Windows .
Clear Print Queue in macOS
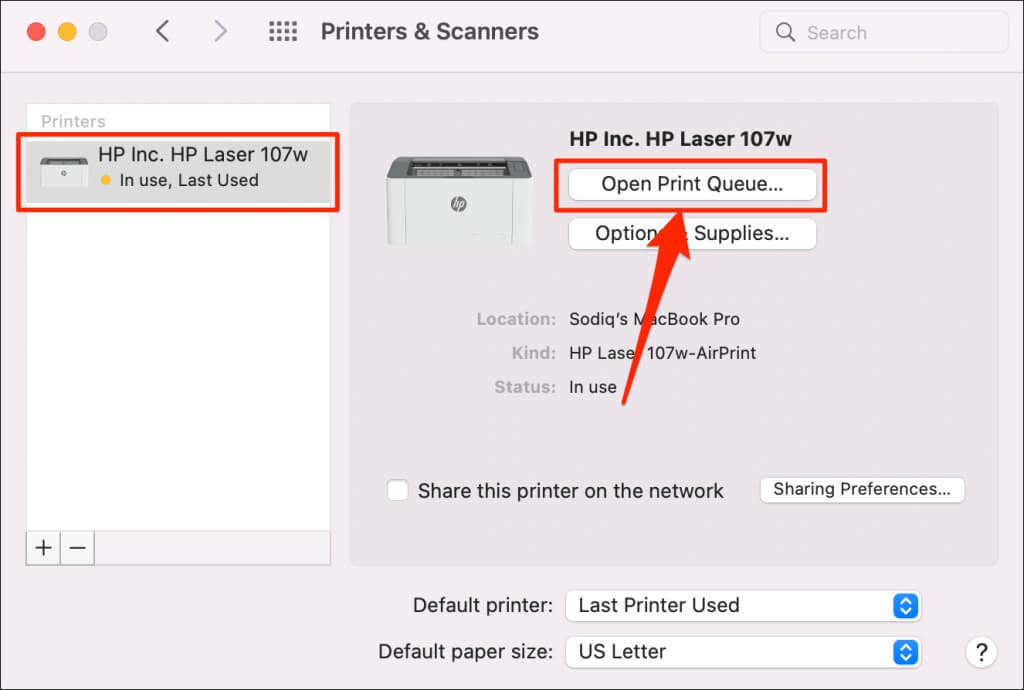
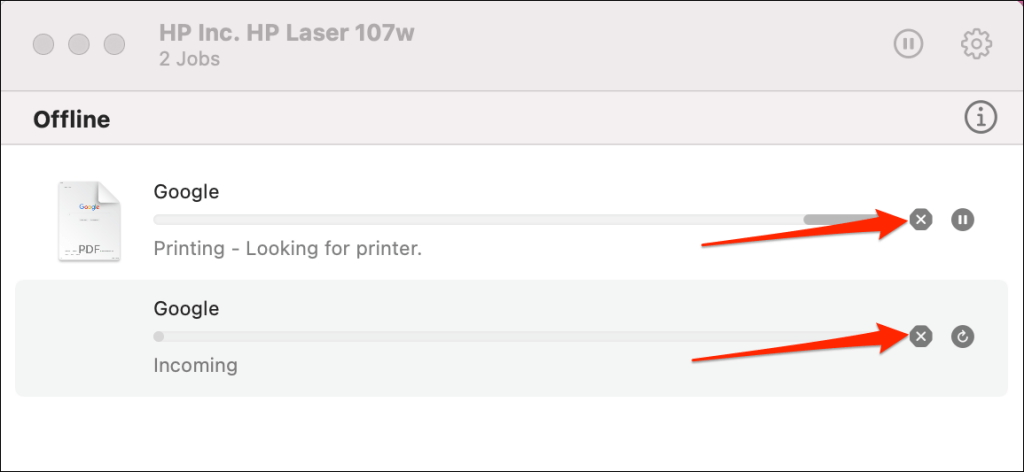
- Go to System Preferences > Printers & scanners , select the printer on the sidebar, and select Open Print Queue .
- Select the x icon next to the pending print jobs to remove them from the queue.
5. Update Printer Driver
Your printer might not receive print jobs from your PC if its driver is corrupt or outdated. Although Windows automatically installs driver updates, some factors (e.g., a metered internet connection) may prevent that from happening. Here’s how to manually install a driver from your computer or the internet.
Check the printer’s manufacturer website and download the latest driver updates for your printer model. Plug the printer into your computer and follow the steps below.
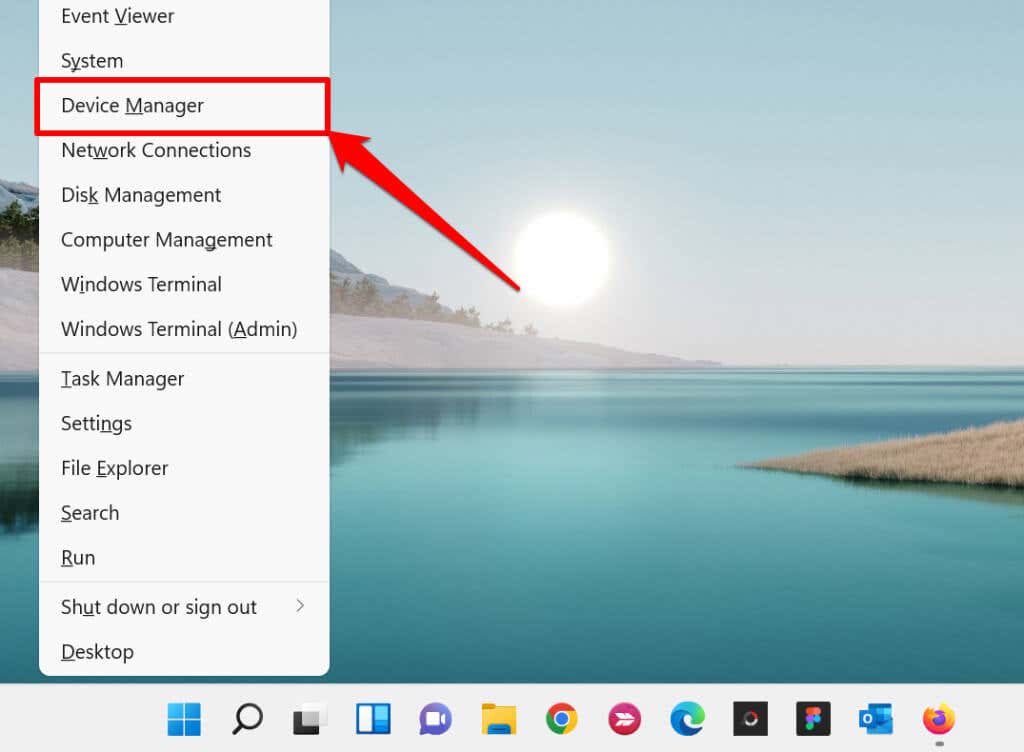
- Right-click the Start Menu or press the Windows key + X to open the Quick Access Menu. Select Device Manager to proceed.
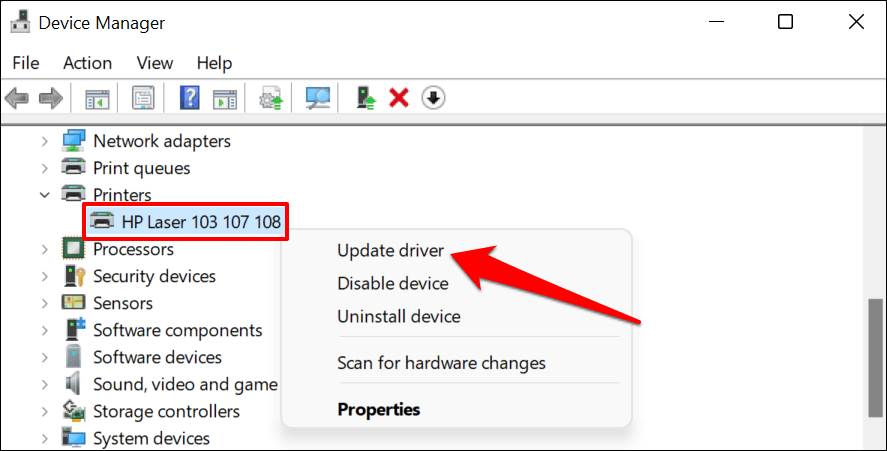
- Expand the “Printers” category, right-click the printer’s driver, and select Update driver .
- Select Search automatically for drivers and wait for Windows to search for the best driver available for the printer. The process requires an internet connection, so ensure your PC is connected to a Wi-Fi or Ethernet network.
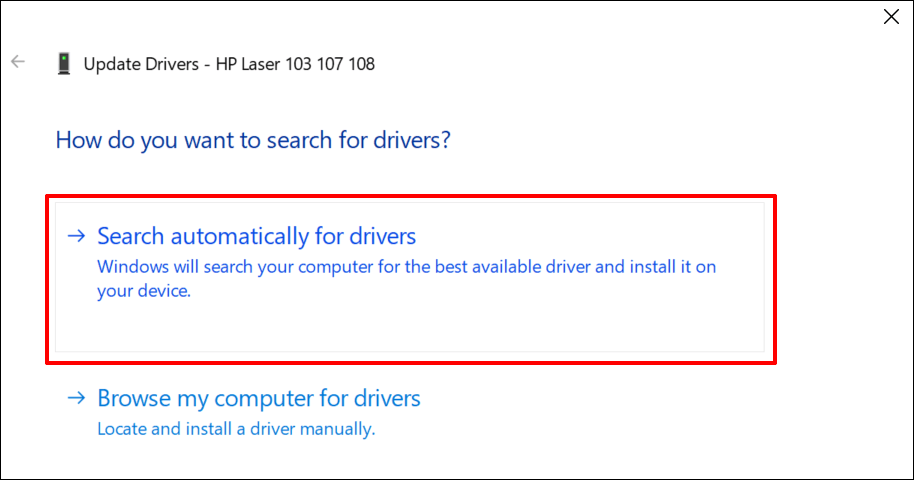
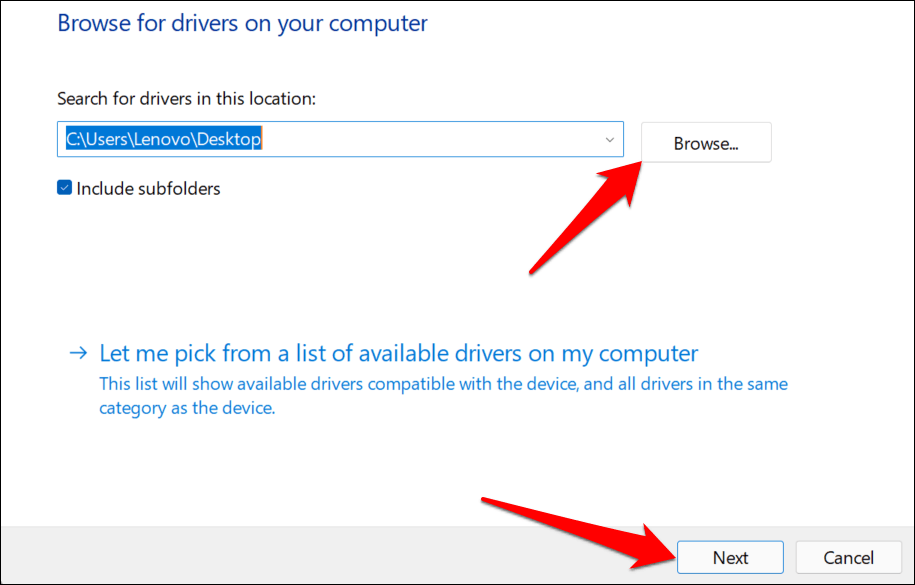
Alternatively, select Browser my computer for drivers to manually install a driver you downloaded from the printer manufacturer’s website. Afterward, choose Browse , navigate to the driver’s location on your PC, and select Next to install the update.
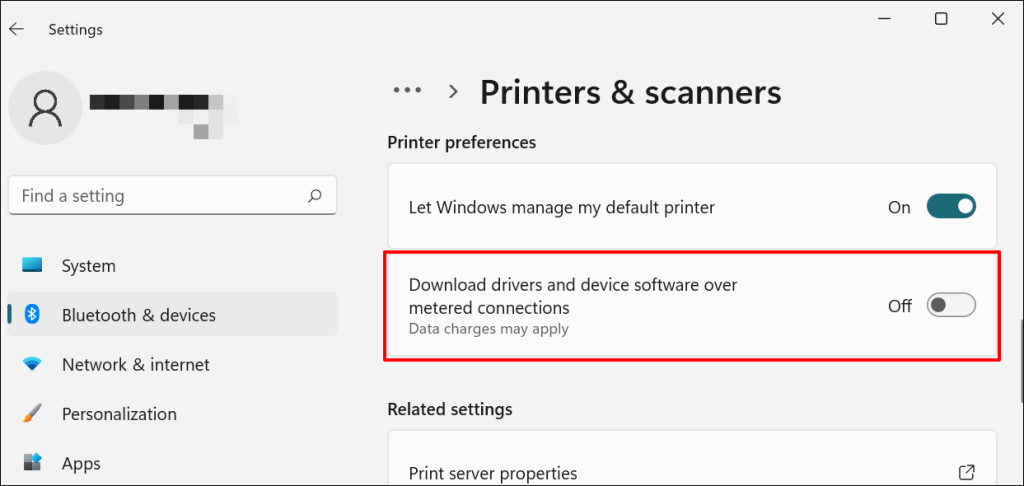
We recommend configuring Windows to automatically download drivers for your printer, especially if you’re using a metered connection.
Go to Settings > Bluetooth & devices > Printers & scanners and toggle on Download drivers and device software over metered connections .
If the Device Manager says the printer’s driver is up-to-date, check the manufacturer’s website for confirmation. You’ll find driver update history in the “Download,” “Software,” or “Drivers” section of the printer manufacturer’s website. Contact the manufacturer if you don’t know how to find, install, or update your printer’s driver update.
6. Reboot Your Devices

Power-cycling your printer and computer can help both devices re-establish a connection. Unplug your printer’s power cord and shut down your computer. Remember to close any open apps or documents so you don’t lose unsaved changes.
Restart both devices, connect your printer to your PC, and check if you can now print documents.
7. Reinstall Printer Driver
Reinstalling a faulty or corrupt driver can resolve issues causing your printer to malfunction. The operation entails deleting or uninstalling the printer driver , restarting your computer, and installing it from scratch. Note that this operation may affect any customizations made on the printer’s settings and preferences on your computer.
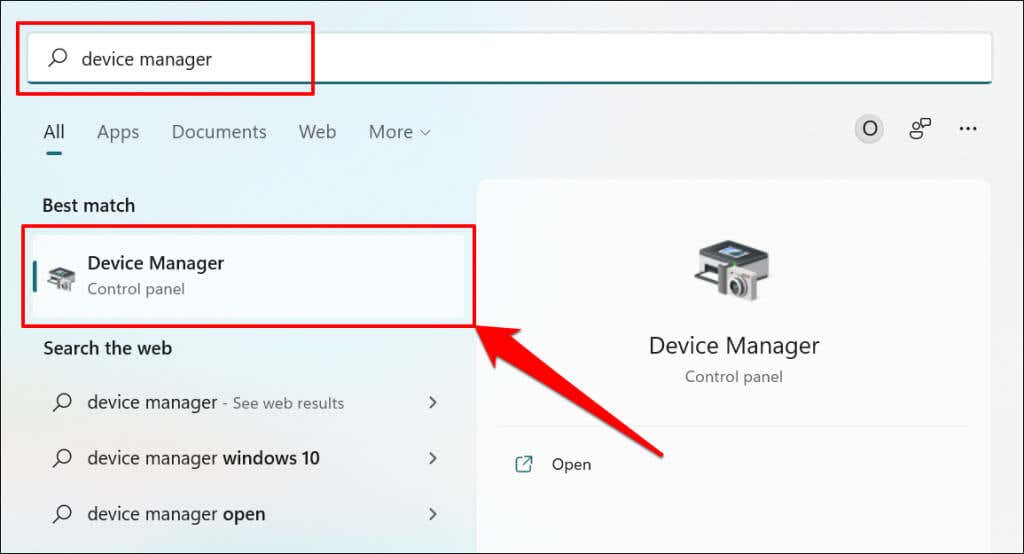
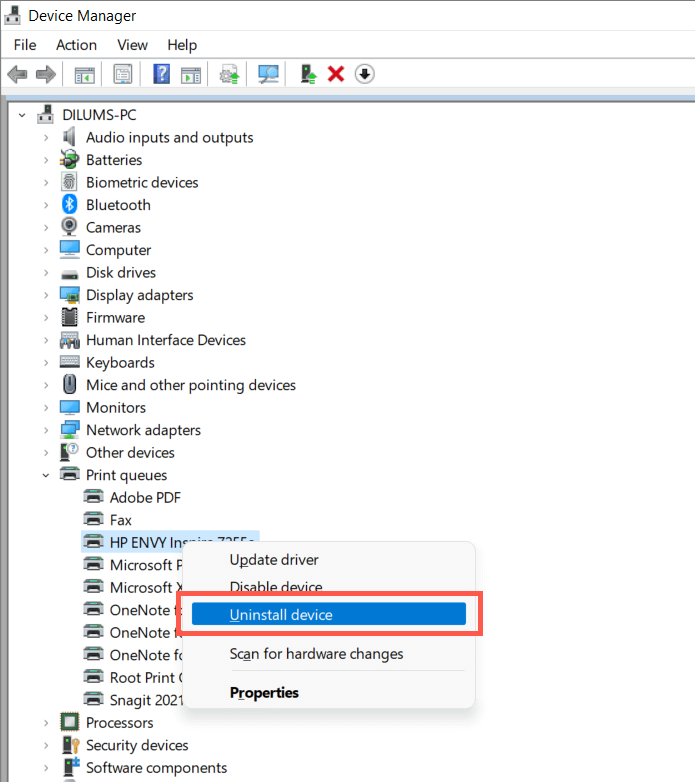
- Type device manager into Windows Search and select Device Manager .
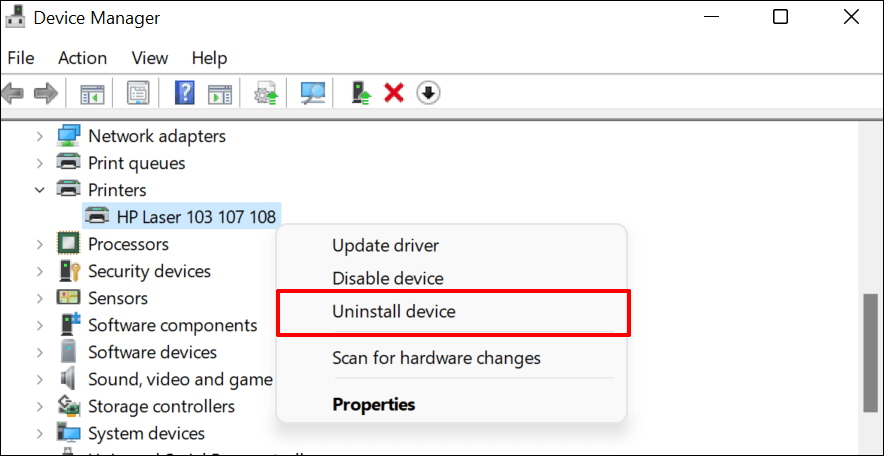
- Expand the “Printer” section, right-click the printer’s driver, select Uninstall device , and select Uninstall on the pop-up.
You should also remove the printer from your PC’s memory.
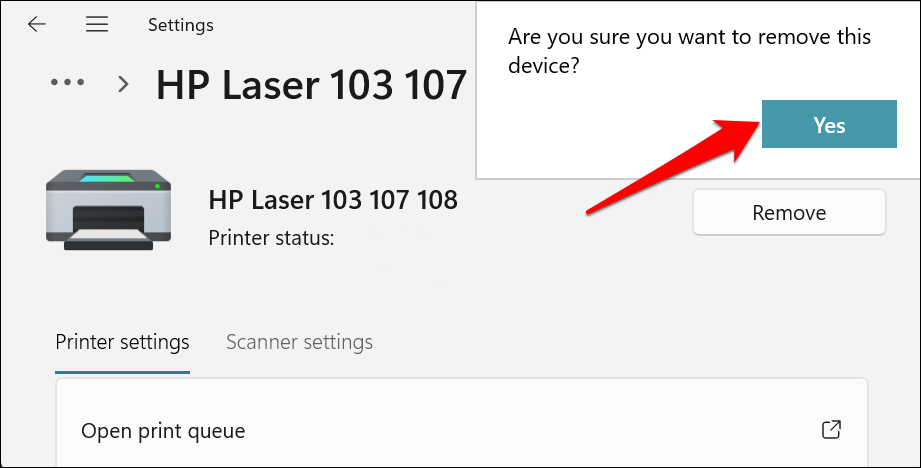
- Go to Settings > Bluetooth & devices > Printers and scanners , select the printer, and select the Remove button.
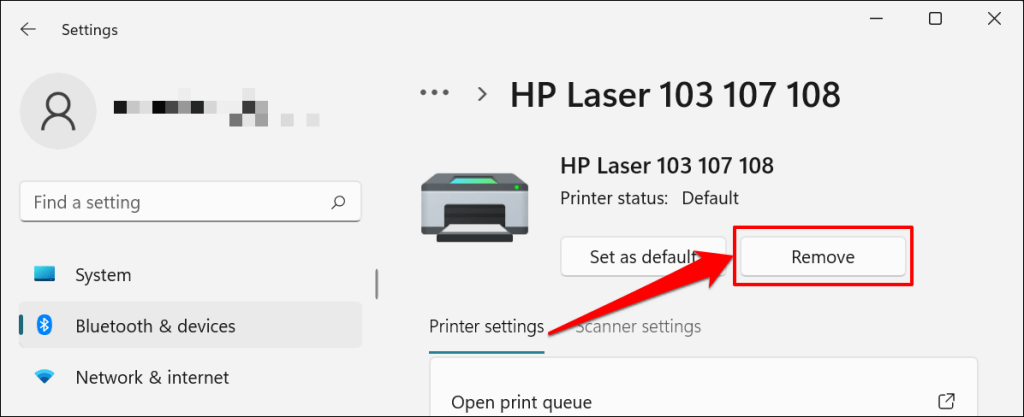
- Select Yes on the confirmation prompt.
Restart Windows and reconnect the printer to your computer. Windows should automatically install the printer’s driver when it connects to your PC.
8. Restart the Printer Spooler
Printer Spooler is the system service that manages printers and print jobs on Windows devices. Temporary system glitches can affect the Printer Spooler’s performance and trigger printing-related problems. Restarting the print spooler service can restore the service to normalcy.
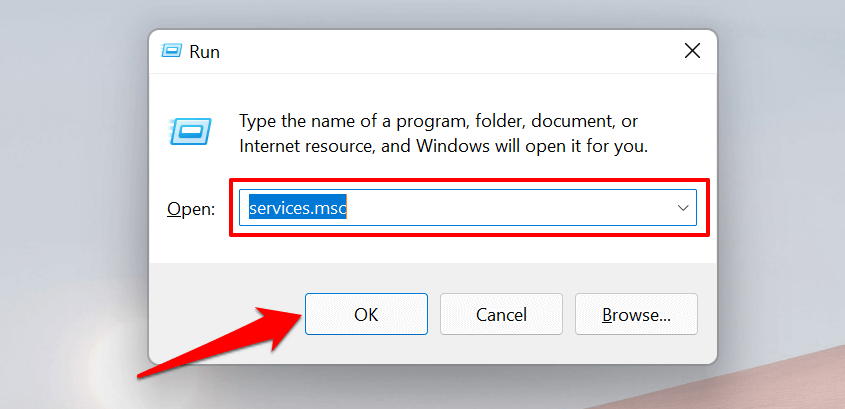
- Open the Windows Run box (press Windows key + R ), type services.msc in the dialog box, and press Enter .
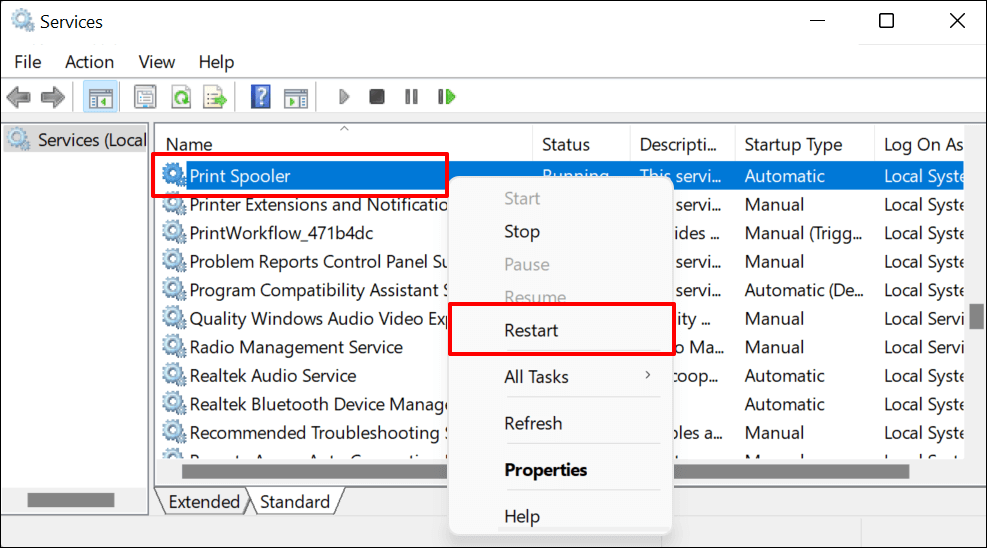
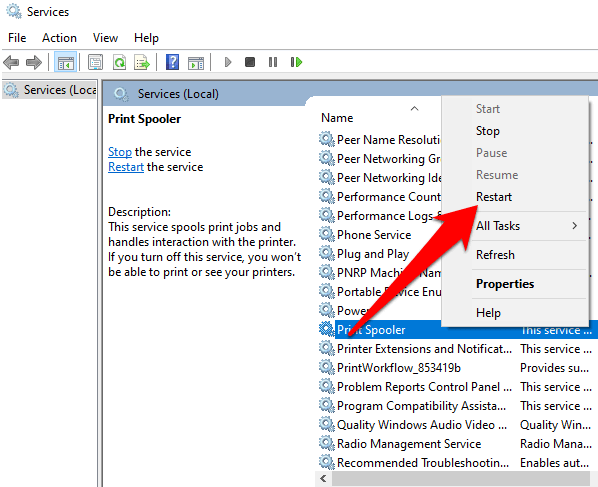
- Right-click Printer Spooler and select Restart .
9. Update Your Computer
Asides from fixing software bugs, Windows Updates also updates outdated or buggy drivers. Head to the Windows Updates menu and install the latest Windows build or security patches available for your computer.
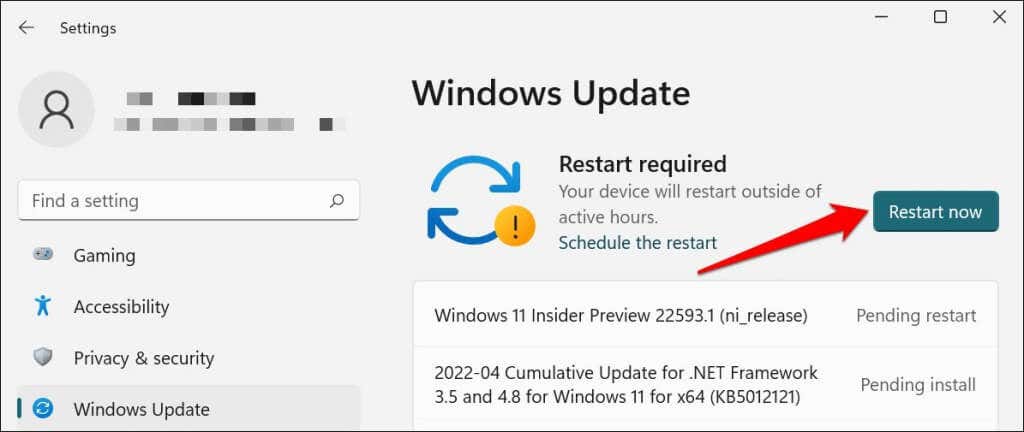
In Windows 11, go to Settings > Windows Update and wait for Windows to check for updates. You may need to restart your computer if Windows has already downloaded the update. Select Restart now to update and reboot your computer.
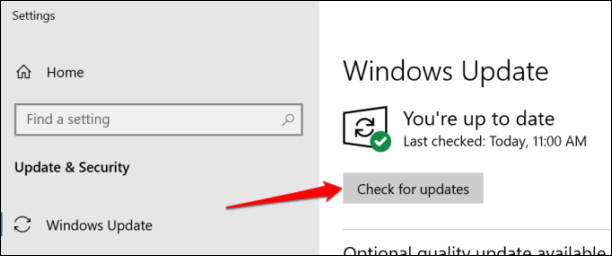
In Windows 10, head to Settings > Updates & Security > Windows Update and select Check for updates . Make sure your computer has an internet connection.
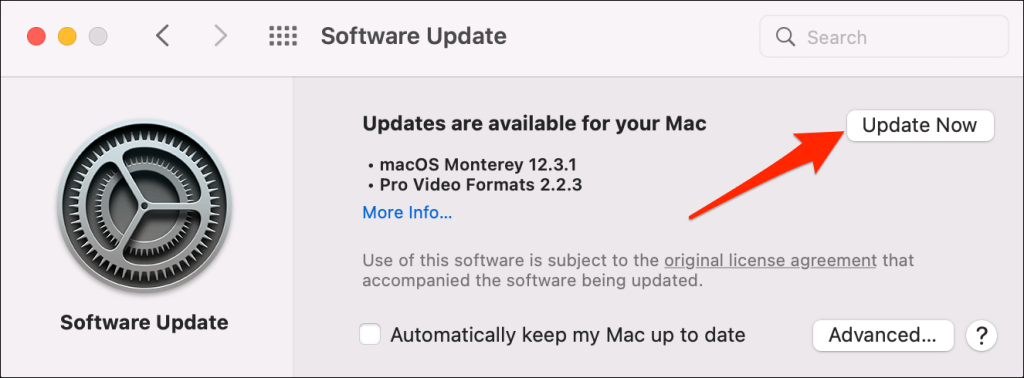
In macOS, go to System Preferences > Software Updates and select Update Now (or Upgrade Now ).
[32-update-mac-computer]
10. Run the Printer’s Utility Software
HP has a Print and Scan Doctor utility (HP Smart for Mac) that diagnoses problems with HP printers. The tool can detect empty ink cartridges, outdated driver software, blocked nozzles, print feed errors, and other printer problems.
Samsung Printer Experience is the utility that manages Samsung printers. The app has loads of troubleshooting guides for printing problems on Samsung printers. The Canon Inkjet Print Utility is also available for Canon inkjet printers.
Download and install your printer’s utility software on your computer and run the tool according to the manufacturer’s instructions.
Pay Attention to Physical Indicators
Printers have status lights or LCD screens that display error codes. These lights point out the root cause of some printing issues. Check the printer’s instruction manual to learn what the indicator lights and error codes mean and their respective solutions. Contact the printer manufacturer if your printer still won’t print after running these troubleshooting measures.
- How to Fix the “Error – Printing” Status Error in Windows
- HP Printer Not Printing Black? 10 Fixes to Try
- How to Fix Missing or Failed Printhead Error on HP Printers
- How to Add a Printer to Your Chromebook
- How to Fix the Printer Error “0x0000011b” on Windows
Sodiq has written thousands of tutorials, guides, and explainers over the past 4 years to help people solve problems with Android, iOS, Mac, and Windows devices. He also enjoys reviewing consumer tech products (smartphones, smart home devices, accessories, etc.) and binge-watching comedy series in his spare time. Read Sodiq’s Full Bio
ÿØÿà JFIF ÿÛ „ ) )/’%’/9339GDG]]} ) )/’%’/9339GDG]]}ÿ Ÿ¼” ÿÄ 3 ÿÚ õ†ŸŸÊ2Š¦–¤J&2š¤È¡Ô©‚!¢|ÏÓ<
Few things are more frustrating than when you want to print a document, and your wireless printer is in an error state, or gives you the silent treatment. Perhaps you’ve tried to connect your WiFi printer to the network in your home, but the problems persist, leaving your printer stubbornly off the grid.
Ideally, a wireless connection should allow you to transfer documents easily from your device to the printer, but it’s not always that simple in reality.
Knowing how to troubleshoot wireless printer issues can relieve some of that frustration. We’re going to cover some fixes that’ll help you work through most of them below.
Troubleshoot Wireless Printer Problems
- Check the basics.
- Set your printer as the default printer.
- Restart all your devices.
- Run the Printing Troubleshooter.
- Check Router settings.
- Update router firmware.
- Disable VPN connections.
- Make printer IP address static.
- Check Firewall Settings.
- Change your SSID.
- Uninstall and reinstall printer driver and software.
- Uninstall and reinstall the printer.
- Clear and reset print spooler.
- Reset your printer.
Check The Basics
It’s possible to overlook some basics so here’s what to check for before moving to advanced steps:
- Make sure the printer is on or that it has power.
- Connect your printer to your computer or other device
- Check the printer’s toner and paper, plus the printer queue. Sometimes a print job with an error may hold up the line, the travel time for files from your device to the printer may take more time, or a larger document may take longer to download and process.
- Check for any warning lights or error messages on the printer.
- Make sure it’s connected to WiFi.
- Use a USB cable to connect and see if it works again.
- Move your printer to where it gets the best WiFi signal without interference. Ideally, it shouldn’t be too far from the router.
- Confirm that your device is also on the right network especially where there’s a WiFi range extender as this creates separate networks, making it harder to connect.
- If you recently updated your browser, security software, operating system or firewalls, it could cause issues connecting to your printer. In this case, reconnect your device to the network, reconfigure security settings to include printers, and/or install updated drivers.
You can also perform a System Restore to go back to the default version or settings and try connecting to your printer again.
Set Your Printer As The Default Printer
It’s possible that you’re trying to connect to a WiFi printer that has set itself as the default. Sometimes a printer may install software that has a “virtual” printer so that when you hit the Print command, the virtual printer saves the file instead of the actual document you’re sending to the physical printer.
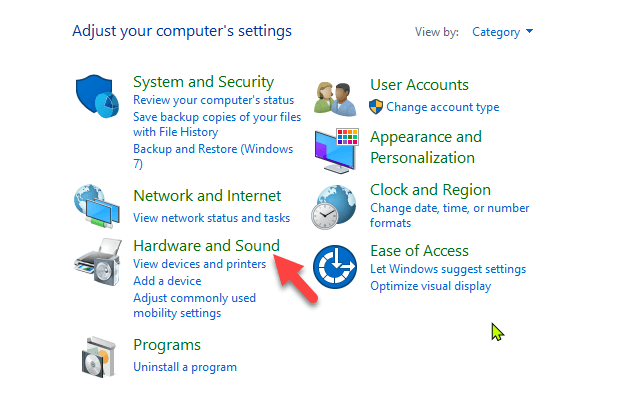
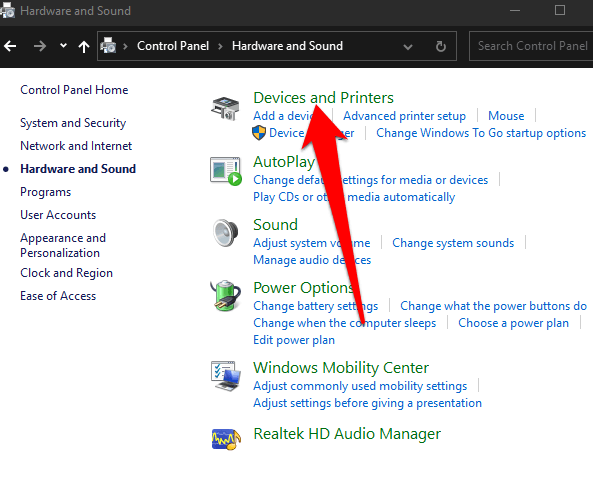
- Click Start > Control Panel > Hardware and Sound .
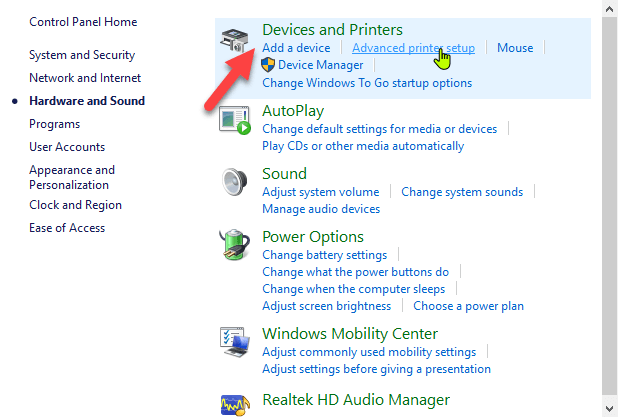
- Click Devices and Printers .
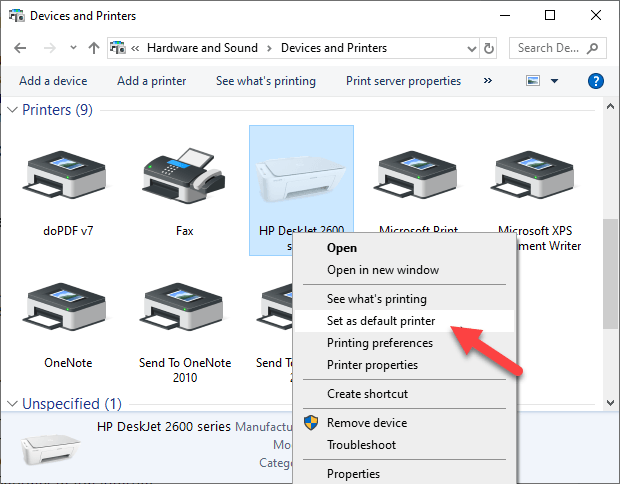
- Right-click your printer and select Set as default printer . Click Yes (or OK) to confirm the action.
Restart All Your Devices
A restart helps fix any software glitches that could cause your wireless printer and connected devices not to work properly together. The wireless printer, router, computer/other device, wireless access point and modem all rely on your home or office network in order to connect to the internet.
However it’s configured, if one device acts up, it may affect all the others. A restart can get the network humming again, after which you can try the printer to see if it works.
Run The Printing Troubleshooter
To do this, open Control Panel > Hardware and Sound > Devices and Printers .
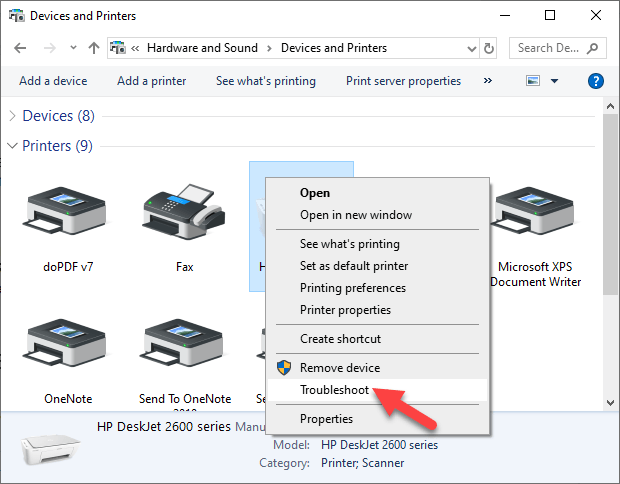
Right click the printer icon and click Troubleshoot . The printing troubleshooter to identify and fix problems connecting to your printer.
- Alternatively, go to the search box on the taskbar and type Printing problem in , and then select Run Troubleshooter to download the printing troubleshooter . Click Open and follow the on-screen instructions.
Check Router Settings
If you replaced your router recently, you may have to reconfigure the computer and printer to reconnect with your network.
The new router may have a different ISP address that needs reconfiguration, and adjustment of router settings, some of which may be unsuitable for your wireless printer.
- To check router settings, open your browser and type its IP address and press Enter. If you’re not sure of the IP address, read our post how to find the IP address of a router. You can try using admin as the username, and password as the password, which are the commonly used default passwords for routers.
- Find the Wireless or Security section and adjust the settings to default for the printer to connect.
A few things you can check in the router settings include:
- MAC address filtering – disable it as it really doesn’t make your network secure.
- Check if your router is in the 2.4GHz frequency band, which most wireless printers easily connect to compared to connecting to the 5GHz only mode.
- Use a WiFi channel that’s least used by other local networks. For printers that aren’t connecting, channels 1, 6, and 11 usually work best, instead of the default “Auto” channel selection setting.
- Disable wireless isolation mode setting and try connecting to the printer again.
- Enable DCHP to allow your printer to acquire an IP address and communicate over the network, and attempt reconnection.
- Check that your router, device or printer has a guest connection, as this isolates them from other devices on a network, and prevents your wireless printer from connecting.
Update Router Firmware
If changing the router settings didn’t help, update its firmware to address bugs or vulnerabilities and connectivity issues.
For example, moving to Windows 10 from a different version could create an interruption to your connection, which a firmware update could solve.
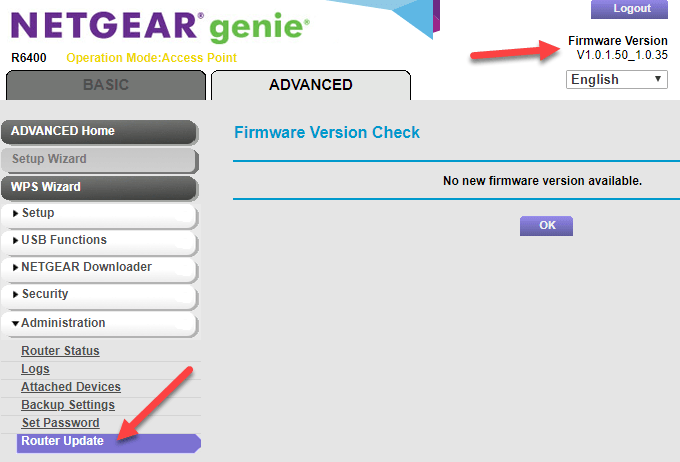
Check your router’s manual or consult the device manufacturer for further instructions as the steps may vary with different routers. Some may also require special instructions to connect to wireless devices, especially those provided by ISPs.
Disable VPN Connections
If you’re using a virtual private network to connect securely to a remote network, it could restrict you from printing through your WiFi printer. This happens for security reasons, but you can disable the VPN connection and try to connect to the home network and resume printing functions.
Make The Printer IP Address Static
IP addresses can fluctuate in a particular range, whether or not your device remains in the same spot. This can be confusing especially where several devices are attempting to connect wirelessly over a given duration.
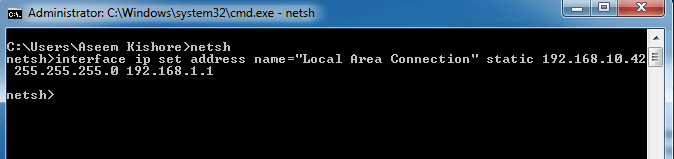
In this case, check your router’s manual for instructions on how to set a static IP address for your printer so that it won’t change with time.
Check Firewall Settings
Your device’s firewall is designed to block any attacks from malware , but it could also block network settings for printing. It could be overprotective of your device depending on how it’s configured, and won’t let it see your printer over the local network.
Firewall settings vary though, in which case you should check the user guide or vendor’s website for support resources.
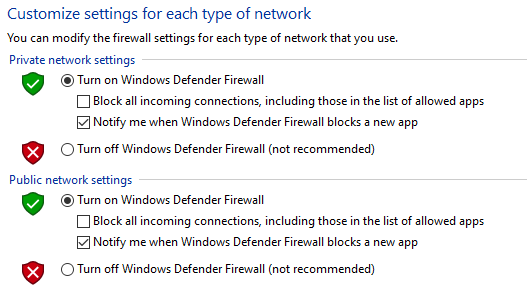
Make sure you keep your software up-to-date, set firewall settings to medium or “Trusted Zone” where your device is connected to a network, and enable it to show all alert messages.
Check that you don’t have multiple firewalls enabled at once as this causes several wireless printer connection issues or you may find your wireless printer not printing.
Change Your SSID
Changing the name of your WiFi network (SSID) may solve connectivity issues. If there are multiple routers with a similar SSID like Home , you can change one of them to make it recognizable by your printer and resolve connectivity errors due to drops in connection or incorrect wireless connection.
Doing this means you have to reconnect a computer system or compatible devices to the right network that the printer is connected to.
Uninstall & Reinstall Printer Driver & Software
This involves reinstalling or reconfiguring your printer’s special network drivers.
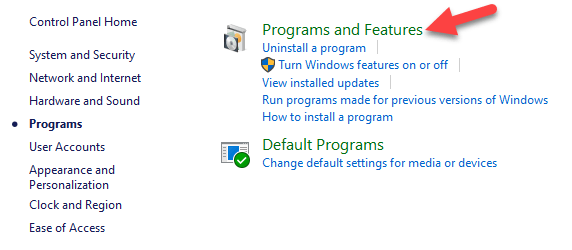
- Open Control Panel > Programs .
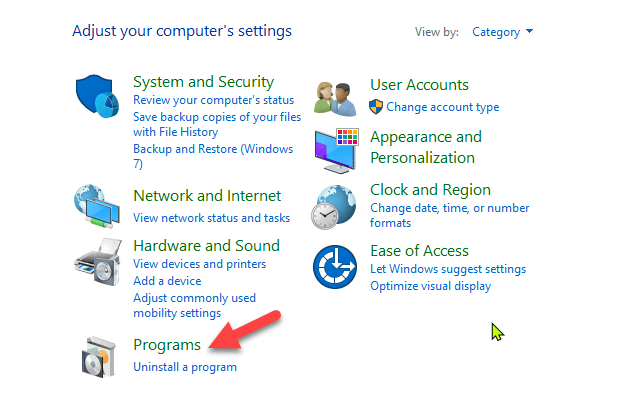
- Click Programs and Features > Uninstall a program .
- Click your printer’s name and then click Yes to confirm the action. Turn on the printer and go to the manufacturer’s site to get specific instructions for downloading and installing the drivers for your model. Once installed, follow the steps to set up the printer connection and try printing again.
You can also reinstall printer drivers using Windows Update, by clicking Start > Settings > Update & Security and click Check for updates . If an updated driver is available, it will download and install and your printer will use it.
Alternatively, use the disc installation software that came with your printer as this may help you install its drivers or check for driver updates.
What If The Printer Driver Doesn’t Install?
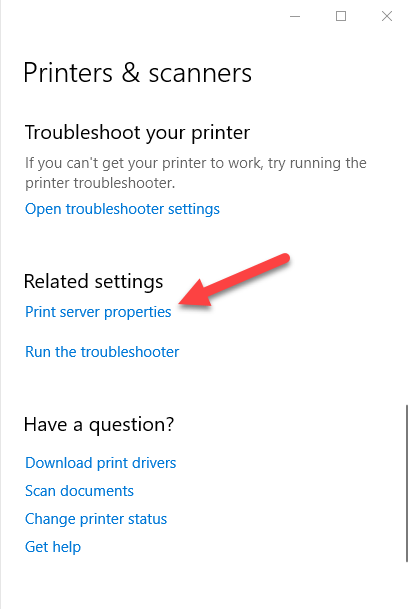
- In this case, click Start > Settings > Devices .

- Click Printers and Scanners and then click Print server properties under Related settings .
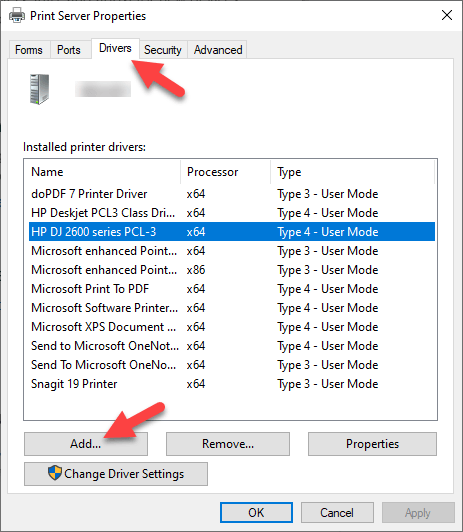
- Go to the Drivers tab and check for your printer. If it’s there, you’re good to go. If not, click Add .
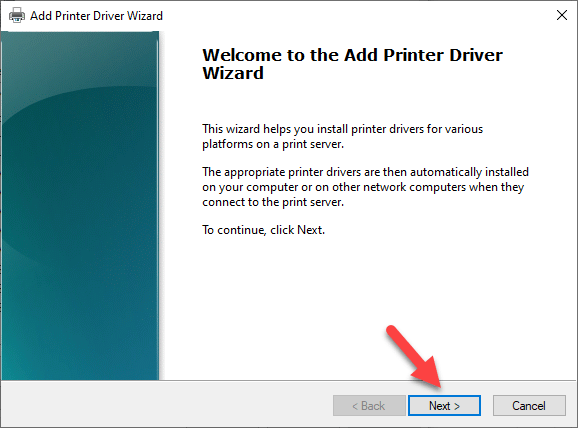
- Click N ext in the Welcome to the Add Printer Driver wizard
- Click on your device’s architecture in the Process Selection box, and click Next .
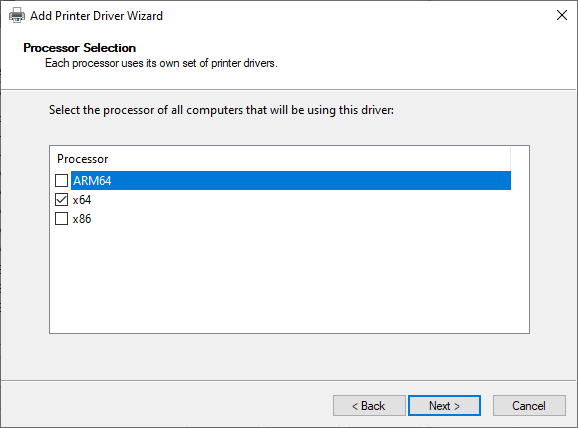
- Under Printer Driver Selection , click your manufacturer, select the printer driver, and then click Next > Finish . Follow the on-screen steps to add your printer’s driver.
Note: If no new drivers are available, contact the manufacturer and ask when they’ll be available. If your printer model is no longer supported, you can check with a printer in the same series for updated drivers as there’s a likelihood they’ll work for yours, with some loss of functionality though.
It’s a long shot, but there’s not much to lose if it’s not working already.
Uninstall & Reinstall The Printer
Try to remove your printer and reinstall it to see if the connection will work for it to print again.
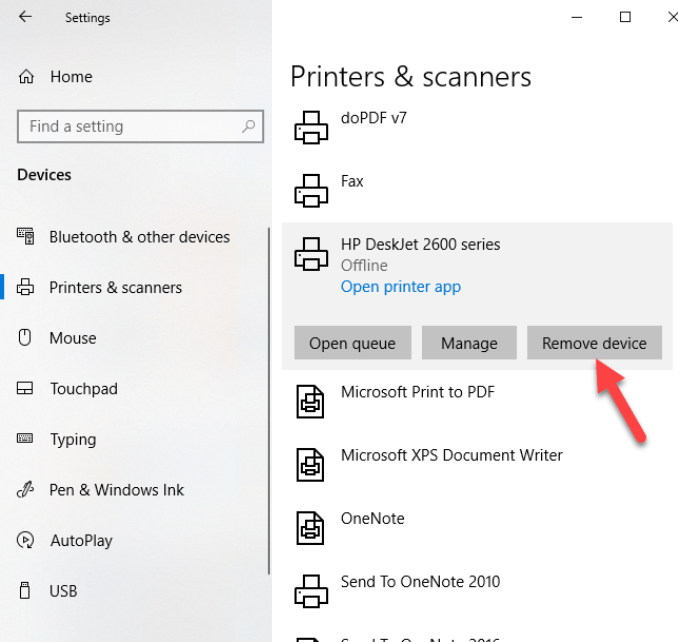
- To remove the printer, click Start > Settings > Devices . Click Printers and Scanners and find your printer, click on it and select Remove device.
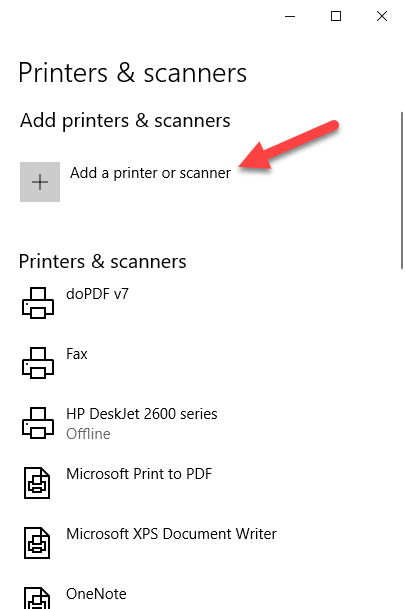
- Reinstall the printer by clicking Start > Settings > Devices > Printers and Scanners . Select Add a printer or scanner .
- Choose your printer from the list of available ones (including Bluetooth or printers connected to another computer and shared on your network) and click Add device .
Note: If you use an extender, wireless access points, or multiple routers with different SSIDs, ensure you’re connected to the same network so your device can find and install your printer. Print a test page to be sure it works properly.
Clear & Reset Print Spooler
The print spooler manages the printing process. If you find your wireless printer not printing, the print spooler could have a problem. In this case, clear the spooler files and restart the spooler service.
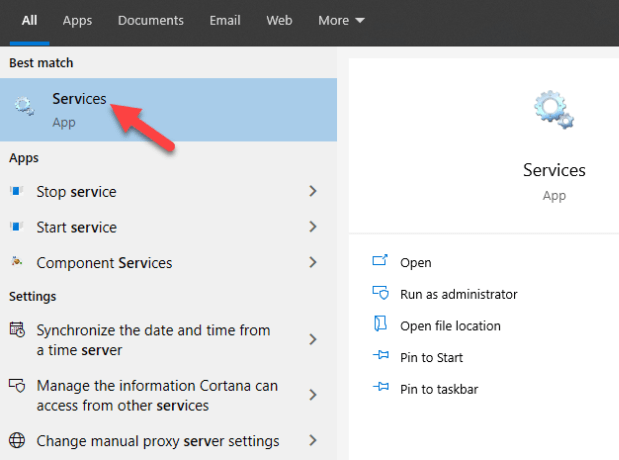
- In the search box, type services and choose Services from the search results.
- Click Standard tab and double-click Print spooler.
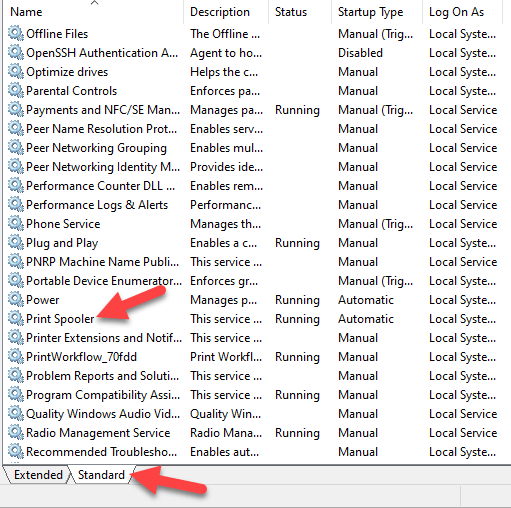
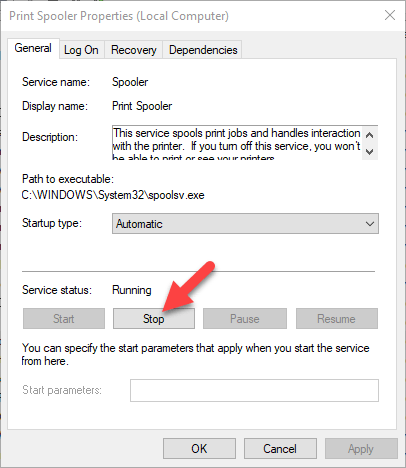
- Click Stop > OK.
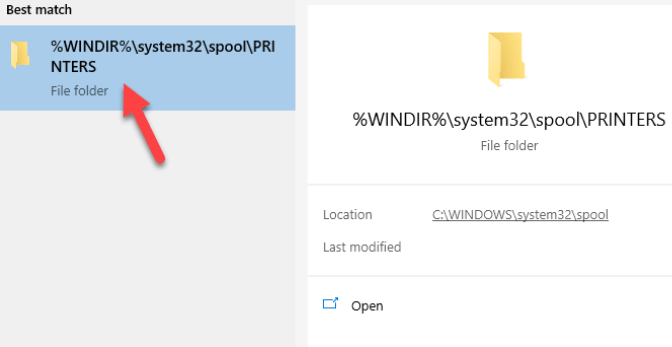
- Type %WINDIR%system32spoolprinters in the search box again, and then select %WINDIR%system32spoolPRINTERS from the search results. Delete all the files in that folder.
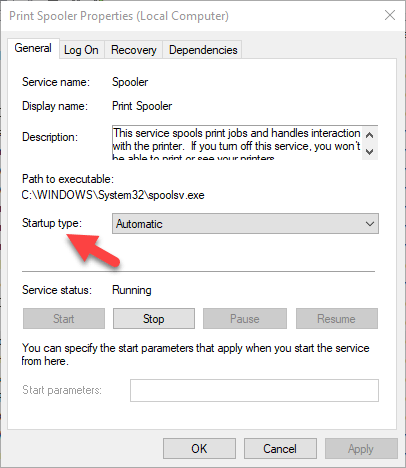
- Type services and select Services . Click Standards tab, and double-click Print Spooler from the list. Click Start and in the Startup type box, select Automatic and click OK .
Reset Your Printer
This is a last resort solution when all other fixes have failed because it clears all your printer settings, including the WiFi login credentials in order to reestablish a connection.
Check your printer manual for directions on how to perform a factory reset as the steps vary by brand and model. The information may also be available online if you don’t have an owner’s manual.
We’ve covered most probable fixes to wireless printer problems, if yours still won’t connect after going through each of these fixes, you can consult the manufacturer, return it to the store, or buy a new printer and start over.
- How to Find the IP Address of Your WiFi Printer on Windows and Mac
- How to Access and Change Your WiFi Router Settings (2025 Edition)
- How to Fix When No Wi-Fi Networks Found on Windows 11 and 10
- How to Fix the “Error – Printing” Status Error in Windows
- Wi-Fi Option Not Showing Up in Windows 11? 11 Fixes To Try
Elsie is a technology writer and editor with a special focus on Windows, Android and iOS. She writes about software, electronics and other tech subjects, her ultimate goal being to help people out with useful solutions to their daily tech issues in a simple, straightforward and unbiased style. She has a BCom degree in Marketing and currently pursuing her Masters in Communications and New Media. Read Elsie’s Full Bio
There are several kinds of printer problems including paper jams or low ink but few are more annoying than when a print job won’t delete.
Often, simply canceling the print job can fix the problem, but there are certain instances that may require you to remove the offending items from the print queue using different solutions.
Whether you’re using a local or network printer, and it fails to delete one or more print jobs, we’ll show you some proven fixes that can help you delete the stuck print job and start over.
Why Your Print Job Won’t Delete in Windows
It’s bad enough when your printer is physically jammed up.
What’s more frustrating is if the document you’re printing gets stuck in the queue preventing further documents from being printed, or the printer continually prints the same job over and over. Whatever the case may be, you’d want to cancel or delete the print job to save on paper and ink.
However, the printing process works differently in Windows. When you send a print job to the print queue, the print files don’t go directly to your printer but arrive in the spooler, which manages all print jobs.

The spooler also lets you change the order of pending print jobs or remove them altogether. If a problem occurs, the print files remain in the queue as none of the files can be printed.
When that happens, the first solution would be to delete the print job to allow other print jobs that accumulated to print. But this won’t work if you can’t delete the print job.
To unglue the queue and get things going again, here are some fixes to try when conventional methods won’t work.
8 Fixes to Delete a Stuck Print Job in Windows
There are different methods you can use to delete a print job besides canceling the print job or restarting your printer and computer. We’ll walk you through the steps you need to take to fix a print job that won’t delete in Windows.
1. Delete a Print Job through Your Printer Settings or Buttons
If a print job won’t delete from your PC, you can use your printer’s buttons or settings to do it. Most printers have a Cancel, Stop or Reset button, which if used in combination can help delete the print job or clear the queue.
You can also remove the paper tray to delay the print job and then delete it to avoid paper wastage. You can also power off your printer, unplug and let it reset fully before turning it back on again to clear the print job.
2. Use Windows Settings to Delete a Print Job
You can also access the print queue via Windows Settings to quickly delete a print job.
- To do this, select Start > Settings > Devices .

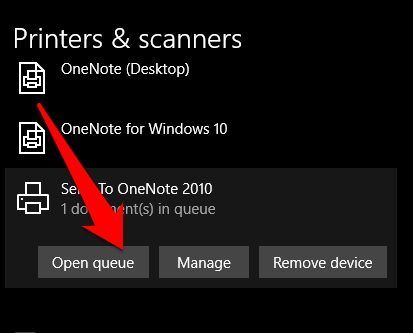
- Select Printers & Scanners on the left hand pane.
- Next, select the printer with the print job you want to delete and then select Open queue .
- You’ll see all the print jobs in the print queue for the printer you selected. Select the document you want to delete and then select Document > Cancel . Alternatively, right-click the print job and select Cancel . Select Yes and the print job will be removed.
Note : If you want to cancel all print jobs in the queue, select Printer > Cancel All Documents .
3. Use Control Panel to Delete a Print Job in Windows
The Control Panel isn’t very visible in Windows 10, but you can access it by selecting Start, enter Control Panel in the search box that appears and select Control Panel from the list.
- To clear or remove a print job that won’t delete from the Control Panel , select Hardware and Sound > Devices and Printers .
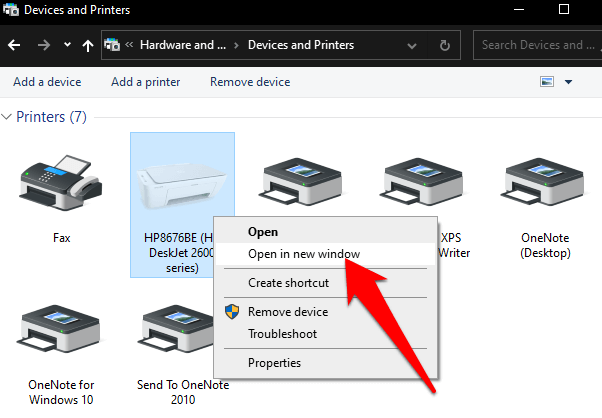
- Select the printer you want to clear or delete a print job from and then select See what’s printing . Alternatively, you can right-click the printer, select Open in a new window and then select See what’s printing .
- Cancel the print job to clear the queue or delete it.
4. Use Command Prompt to Delete a Print Job
Command Prompt can help you stop and start the Print Spooler when you want to delete a print job.
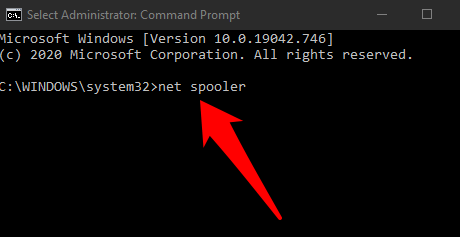
- To do this, select Start and enter CMD in the search box, and then select Run as administrator under the Command Prompt search result.

- In the Command Prompt box, enter this command: net spooler and press Enter .
- Open File Explorer and click the address bar. Type C:WindowsSystem32SpoolPrinters and press Enter .
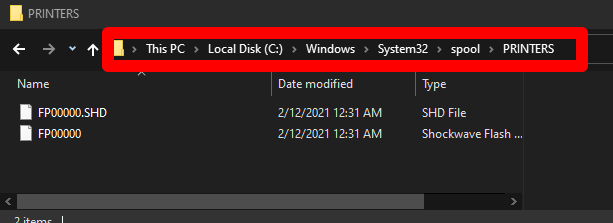
- Highlight the files, right-click on them and select Delete .
- Go back to Command Prompt , type net start spooler and then press Enter to restart the Print Spooler.
5. Use Windows Services to Delete a Print Job
You can also stop and start the Print Spooler in the Services window.
- To do this, right-click Start > Run and type services.msc in the run dialog box. Press Enter .
- Scroll down to find Print Spooler , right-click on it and select Stop .
- With the Services window still open, go to the Printers directory and delete the files in it to remove the print job that won’t delete and any other pending print jobs in the queue.
- Next, open File Explorer , select the address bar and type C:WindowsSystem32SpoolPrinters . Press Enter .
- Highlight and right-click the selected files, and then select Delete . Go back to the Services window and restart the Printer Spooler service to complete the process by right-clicking Print Spooler > Start .
6. Reset the Print Spooler
If all else fails, you can reset the Print Spooler when the print job won’t delete in Windows.
- To do this, right-click Start > Run and enter services.msc in the run dialog box.
- Find Print Spooler , right-click and select Stop .
- Right-click Print Spooler again and select Restart to restart the service.
A dialog box will appear about restarting the service, meaning you’ve successfully reset the print spooler.
7. Reinstall the Print Driver
If you still can’t delete the print job in Windows, you can remove and reinstall the print drivers. Doing this will reset the printing software system.
- To reinstall the print driver, disconnect any cables from your printer, and then go to Control Panel > Hardware and Sound > Devices and Printers in Windows.
- Right-click your printer’s icon and select Remove Device to uninstall the printer software.
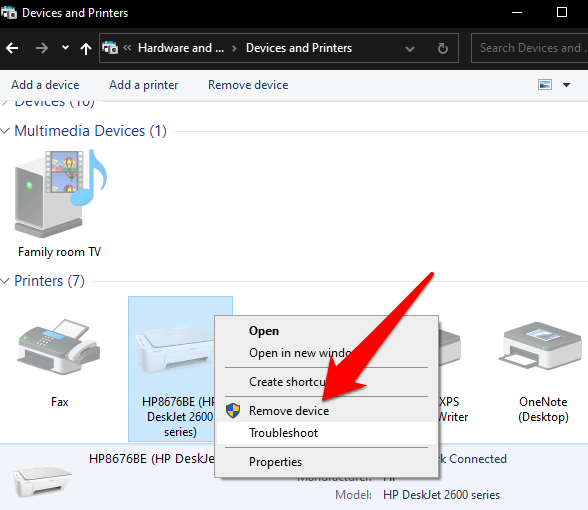
- Restart your computer, go to your device manufacturer’s website and download the printer driver for your printer’s model. Install it based on the instructions on the website. Once done, check if the print job is still there and try deleting it again.
8. Clear and Restart Print Spooler Manually
If you want to delete a print job because it’s affecting the rest of the items in the queue, you can manually clear and restart the print spooler to respool all documents and delete that print job.
- To do this, right-click Start > Run and enter services.msc in the run dialog box.
- Find the Print Spooler service in the Services window, double-click on it and select General tab in the Properties window.
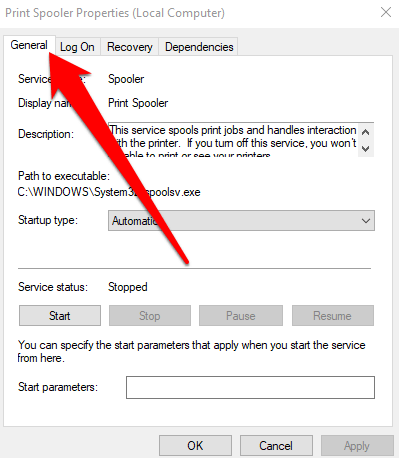
- Next, select the Stop button and then open File Explorer .

- Go to the address bar, type %windir%System32spoolPRINTERS and press Enter .
- Delete all the files and go back to the Services window. Select Start to restart the Print Spooler service and then select OK to close and exit the window.
All the print jobs in your queue will be re-spooled and sent to your printer and you can delete the print job you want.
Other Things to Try When Print Job Won’t Delete in Windows 10
- Check if the printer is offline or paused as this will keep the print jobs in queue until your printer is active again. You can check whether the Pause Printing or Use Printer Offline options are selected in the print queue window. If they are, clear the selection.
- Disable your firewall software temporarily. Your Windows firewall software may interfere with the print job but you can temporarily disable it to clear the print queue and see if the print job is deleted. If it’s not deleted, then the firewall isn’t the problem. However, if the print job is deleted, adjust the firewall settings to allow the print spooler service to access your computer’s system.
- Sign in with a different Windows account. If you’re still struggling with deleting a print job, restart your PC and sign in using a different user account. If you can delete the print job in the new account, check whether the old one is corrupted or has the required permissions to print.
- Scan your PC using System File Checker to determine whether there are any issues with system files and repair them. To do this, open a Command Prompt, enter SFC /scannow and press Enter .
- Confirm that the printer’s IP address in Windows port settings matches your printer’s actual IP address. If it doesn’t match, enter the correct IP address and try to delete the print job again.
Clear Stuck Print Jobs
Regardless of the printer you use, you’re likely to encounter situations where you need to delete a print job. Windows 10 makes it easy for you to do so, but if the print job is stuck in the queue, you may not be able to cancel or delete it altogether further preventing other print jobs from printing.
Try the fixes and tips in this guide and let us know in a comment what worked for you.
- How to Fix the “Error – Printing” Status Error in Windows
- 7 Ways to Fix HP Printers ”Driver Is Unavailable” Error on Windows PC
- How to Fix Your Printer’s “Driver is unavailable” Error on Windows
- 7 Ways to Fix ”Windows Cannot Connect to the Printer”
- Preparing for Windows 10 End of Support: Upgrading to Windows 11
Elsie is a technology writer and editor with a special focus on Windows, Android and iOS. She writes about software, electronics and other tech subjects, her ultimate goal being to help people out with useful solutions to their daily tech issues in a simple, straightforward and unbiased style. She has a BCom degree in Marketing and currently pursuing her Masters in Communications and New Media. Read Elsie’s Full Bio
When your Microsoft Windows PC fails to connect to your printer, you get an error message: ”Windows Cannot Connect to the Printer.” You can’t print your documents or perform printer-related tasks when this happens.
Some common reasons you get this error is that your printer is turned off, you don’t have the correct printer drivers installed, or your PC has a minor glitch. Once you fix these issues, your PC successfully connects to your printer, allowing you to print your documents.
1.Turn On Your Printer
One commonly overlooked reason your PC can’t make a connection with your printer is that your printer is turned off. Check that the printer is plugged in and turned on, and if you’re using a power strip, make sure that’s turned on, too.
2.Use the Windows 10/11 Printer Troubleshooter
Windows includes many troubleshooters to help you find and fix problems. One is a printer troubleshooter that helps identify and resolve any printer-related issues .
This troubleshooter detects and resolves most issues on its own, requiring minimal interaction from you.
- Open Settings by pressing Windows + I at the same time.
- Select Update & Security in Settings.
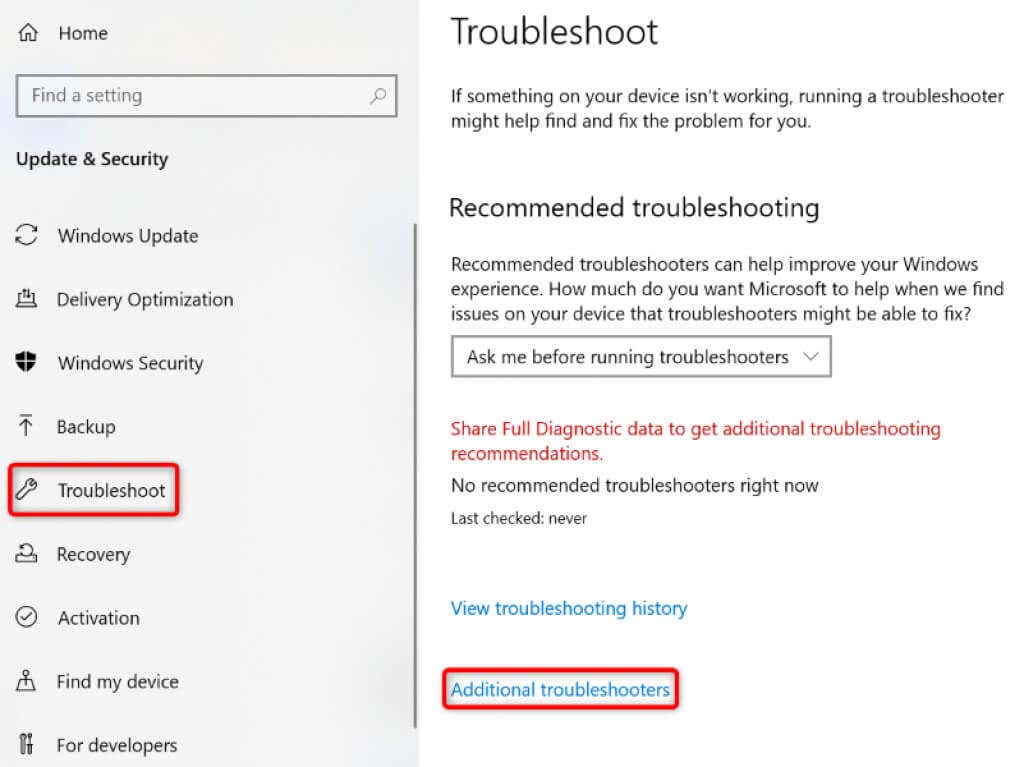
- Choose Troubleshoot in the sidebar on the left.
- Select Additional troubleshooters on the right.
- Select Printer and choose Run the troubleshooter .
- Wait for the troubleshooter to find and fix your printer issues.
3.Restart the Print Spooler Service
Windows’ print spooler service stores your print jobs until your printer is ready to print them. It’s worth stopping and restarting this service when you experience issues like ”Windows Cannot Connect to the Printer.”
It only takes a minute to turn this service off and back on.
- Launch Run by pressing Windows + R at the same time.
- Type the following in the Run box and press Enter : services.msc
- Double-click Print Spooler on the right to open the Properties menu.
- Select Stop to temporarily stop the spooler service.
- Wait for about ten seconds.
- Reactivate the service by selecting Start .
4.Update Your Printer’s Drivers
When you install a printer on your PC, Windows installs the required drivers to allow your printer to communicate with your machine. Over time, these drivers become outdated and cause various issues with your printer.
Your ”Windows Cannot Connect to the Printer” error may result from outdated printer drivers. In this case, you can fix the issue by updating the installed drivers. Windows’ Device Manager automates the process, so you don’t have to find and install the latest drivers manually.
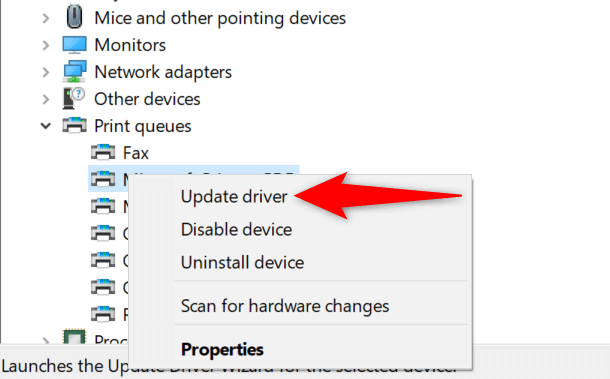
- Open Device Manager by right-clicking the Start menu icon and choosing Device Manager .
- Expand the Print queues section, right-click your printer, and choose Update driver .
- Select Search automatically for drivers to let Windows find the latest printer drivers.
- Wait for Windows to find and install the updated drivers.
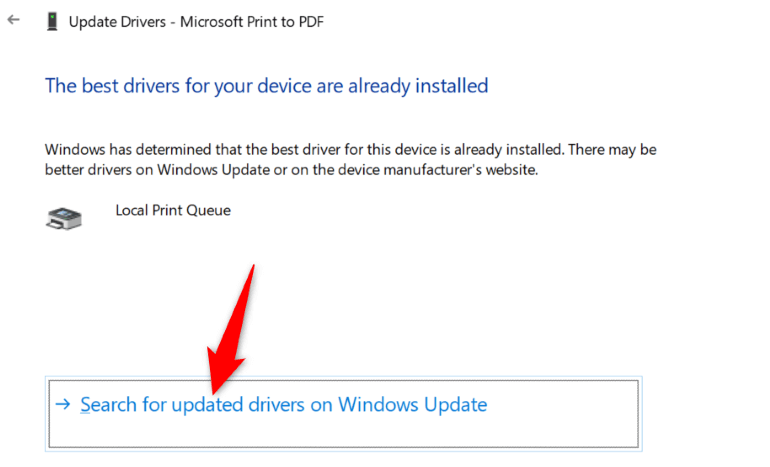
- If newer drivers aren’t available, you’ll see a message saying the best drivers for your device are already installed. In this case, you can still force your system to check for the latest drivers by selecting Search for updated drivers on Windows Update .
5.Remove and Reinstall Your Printer
If you continue to see the ”Windows Cannot Connect to the Printer” error message, your printer may not be properly installed on your PC. This usually happens if you had minor issues when you installed the printer.
You can get around this printer error by removing and reinstalling the printer.
- Access Settings by pressing Windows + I at the same time.
- Select Devices on the Settings window.
- Choose Printers & scanners from the sidebar on the left.
- Select your printer name on the right pane and choose Remove device .
- Select Yes in the prompt to uninstall your printer.
- Unplug and replug your printer into your PC.
- Follow your printer’s driver installation wizard.
6.Make Your Problematic Printer the Default Printer
If you’ve installed multiple printers on your PC, make your faulty printer the default and see if that fixes the ”Windows Cannot Connect to the Printer” issue.
Later, you can make any other printer the default if you want.
- Open Settings by pressing Windows + I .
- Select Devices .
- Choose Printers & scanners on the left.
- Disable the Let Windows manage my default printer option on the right.
- Select your printer on the list and choose Manage .
- Select Set as default to set the selected printer as the default.
7. Fix Windows Issues by Installing Software Updates
When you update your Windows PC, you get various bug fixes that help you resolve problems on your computer. Your ”Windows Cannot Connect to the Printer” error may be a system error, and updating Windows should likely fix that for you.
It’s free and easy to install Windows updates, as explained below.
- Launch Settings by right-clicking the Start button and choosing Settings .
- Select Update & Security .
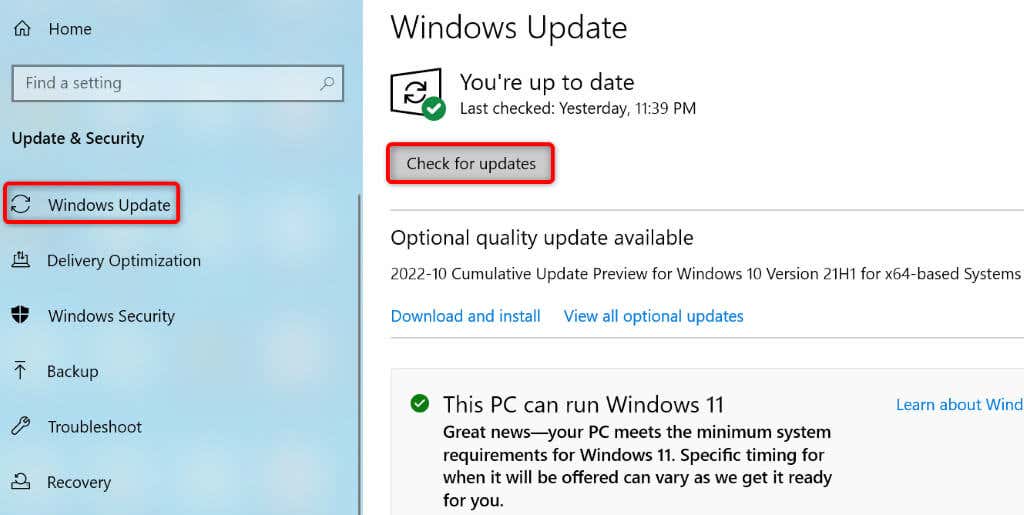
- Choose Windows Update in the sidebar on the left.
- Select Check for updates in the pane on the right.
- Download and install the latest updates.
- Restart your PC when you’ve installed the updates.
The ”Windows Cannot Connect to the Printer” error is usually the result of a technical glitch, which you can fix by following the methods outlined above. Once you’ve applied those fixes, your printer should work with your PC, allowing you to resume your pending print jobs .
- How to Fix the “Error – Printing” Status Error in Windows
- 7 Ways to Fix HP Printers ”Driver Is Unavailable” Error on Windows PC
- How to Fix Your Printer’s “Driver is unavailable” Error on Windows
- Print Job Won’t Delete in Windows? 8+ Ways to Fix
- Preparing for Windows 10 End of Support: Upgrading to Windows 11
Mahesh has been obsessed with technology since he got his first gadget a decade or so ago. Over the last few years, he’s written a number of tech articles on various online publications including but not limited to MakeTechEasier and Android AppStorm. Read Mahesh’s Full Bio
Microsoft Windows’ printer error “0x0000011b” occurs when you try to print something using a network-shared printer. This error usually occurs after installing a faulty Windows update. We’ll show you how to fix that as well as tweak other system settings to resolve your error.
Other reasons you may get the error include an enabled CVE-2021-1678 mitigation option, faulty printer drivers, corrupt Windows system files, and more. You’ll learn how to fix all these items in this guide.
Uninstall the Problematic Windows Update
If you’ve started receiving the “0x0000011b” printer error after installing a Windows update, that update might be faulty. In this case, you can roll back the update (uninstall it) and resolve your issue.
Later, you can check back and install an update that brings your operating system to a newer version without causing issues.
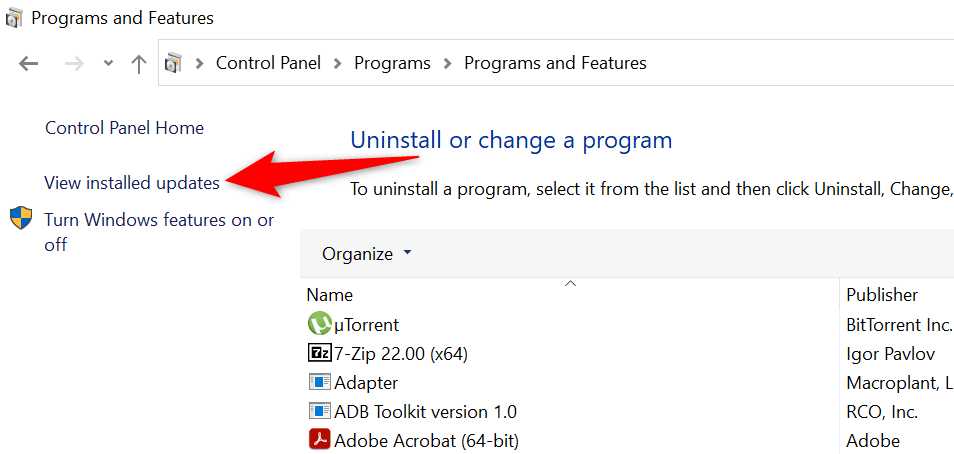
- Launch Control Panel by accessing the Start menu, searching for Control Panel , and selecting the utility in the search results.
- Select Uninstall a program on the Control Panel’s main window.
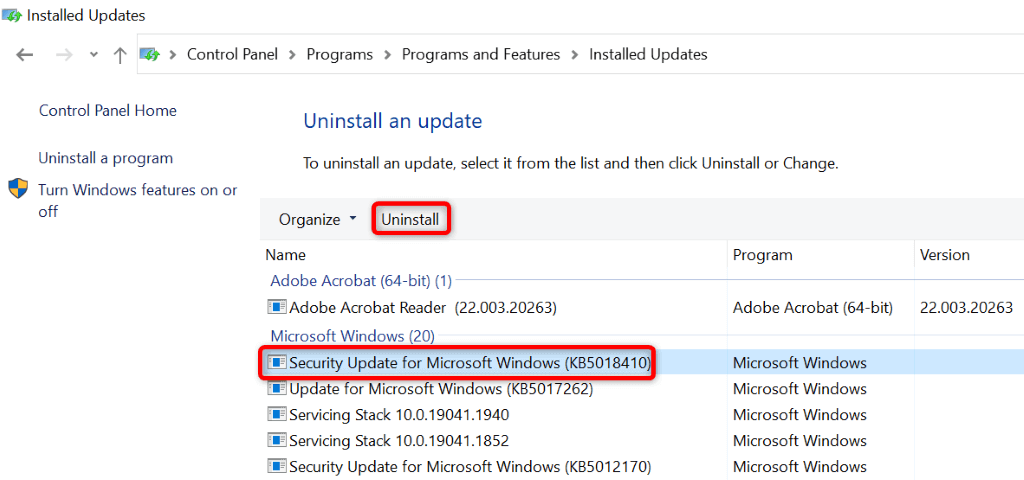
- Choose View installed updates in the left sidebar to view your update history.
- Select the most recent update on the right and choose Uninstall at the top.
- Select Yes in the prompt.
- Restart your PC when the update is removed. You can do that by opening Start , selecting the Power icon, and choosing Restart .
When your PC turns back on, try to print a test page using your network printer and see if that works.
Fix Your Printing Error by Disablingthe CVE-2021-1678 Mitigation
Another way to resolve the printer error “0x0000011b” is by disabling a Windows option called CVE-2021-1678 mitigation. This option is known to cause your printer problem.
You’ll need to modify a registry key using Registry Editor to turn the feature off on your PC.
- Open Run by pressing Windows + R .
- Type the following in the Run dialog box and press Enter : regedit
- Select Yes in the User Account Control prompt.
- Type the following in the registry path field at the top and press Enter : ComputerHKEY_LOCAL_MACHINESYSTEMCurrentControlSetControlPrint
- Right-click anywhere blank on the right pane and choose New > DWORD (32-bit) Value .
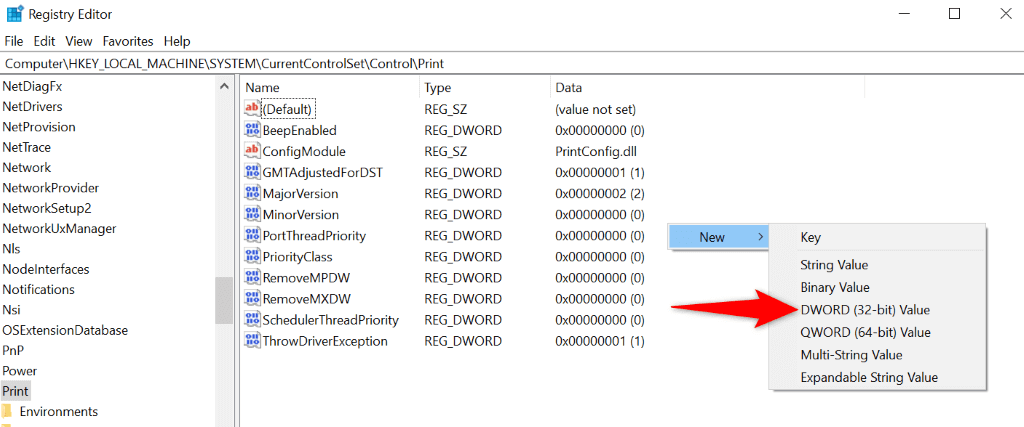
- Use the following as the name for your DWORD: RpcAuthnLevelPrivacyEnabled
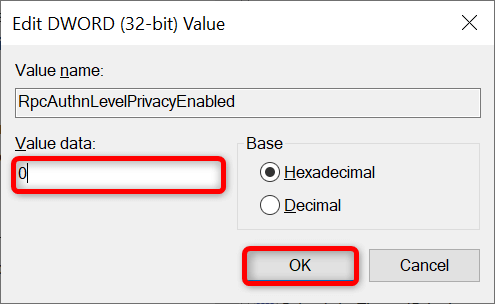
- Double-click the newly-created DWORD, enter 0 in the Value data field, and select OK .
- Close Registry Editor .
- Reboot your Windows PC.
Use the Windows 10/11 Printer Troubleshooter
If your printer error persists and you can’t print your documents, use Windows’ built-in printer troubleshooter and see if that fixes your issue. This troubleshooter detects and resolves your printer issues on its own.
- Open Settings by pressing Windows + I .
- Select Update & Security in Settings.
- Choose Troubleshoot in the sidebar on the left.
- Select Additional troubleshooters on the right.
- Choose Printer and select Run the troubleshooter .

- Allow the troubleshooter to find and fix issues with your printer.
When your printer issue is resolved, try to print a document and see if that works.
Update Your Printer Drivers to Fix the Error 0x0000011b
Most printer errors are the result of corrupt or outdated drivers. You can fix this easily by updating your installed drivers to the latest version. Windows offers a utility called Device Manager to help you automatically find drivers for all your attached devices.
- Open Start , find Device Manager , and select the tool in the search results.
- Expand Print queues , right-click your printer, and choose Update driver .
- Select Search automatically for drivers .
- Let Windows find and install the latest drivers for your printer.
- If Device Manager can’t find newer drivers, try to locate the latest drivers by selecting Search for updated drivers on Windows Update .
- Reboot your PC when your printer drivers are updated.
Now, try to print something using your printer, and you shouldn’t get any errors anymore.
Install Your Pending Windows Updates
Your Windows system’s bugs can cause your printer to malfunction, resulting in various error messages, including “0x0000011b.” You can fix nearly all the system issues by updating Windows to the latest version.
Updating your Windows PC is quick, easy, and free.
- Launch Settings by pressing Windows + I .
- Select Update & Security in Settings.
- Choose Windows Update in the sidebar on the left.
- Select Check for updates on the right.
- Install the available updates.
- Restart your PC.
Fix Windows 11/10’s Corrupt Files
Windows’ corrupt files can cause your system features to go haywire. Your printer error may have resulted from such files. In this case, use your PC’s built-in System File Checker (SFC) tool to find and fix faulty files.
The SFC tool runs on its own for the most part, so you don’t have to manually locate any files and try to fix them. You can use this tool from a Command Prompt window on your PC, as follows.
- Open Start , search for Command Prompt , and select Run as administrator .
- Select Yes in the User Account Control prompt.
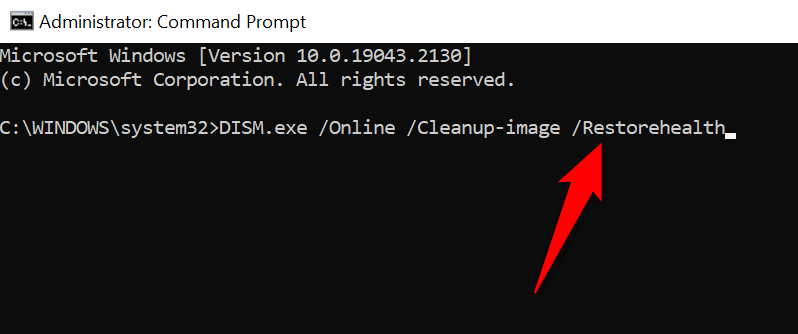
- Type the following in CMD and press Enter : DISM.exe /Online /Cleanup-image /Restorehealth
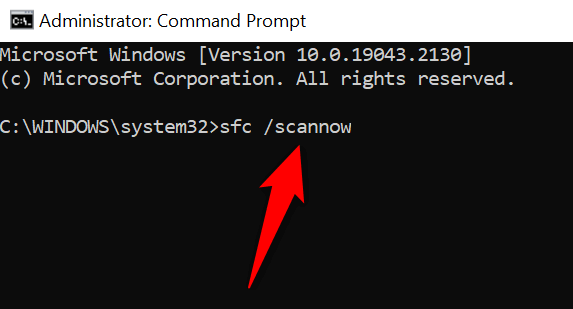
- After executing the above command, run the following command: sfc /scannow
- Restart your PC when you’ve fixed the corrupt files.
Uninstall and Reinstall Your Printer to Resolve the 0x0000011b Error
If all else fails to resolve your “0x0000011b” printer error, remove and reinstall your printer on your system to fix the problem. Doing so deletes all of your printer’s files and sets up the printer from scratch. This fixes nearly all your printer-related issues.
- Open Start , search for Control Panel , and select the tool in the search results.
- Select View devices and printers in the Control Panel.
- Right-click your faulty printer on the list and choose Remove device .
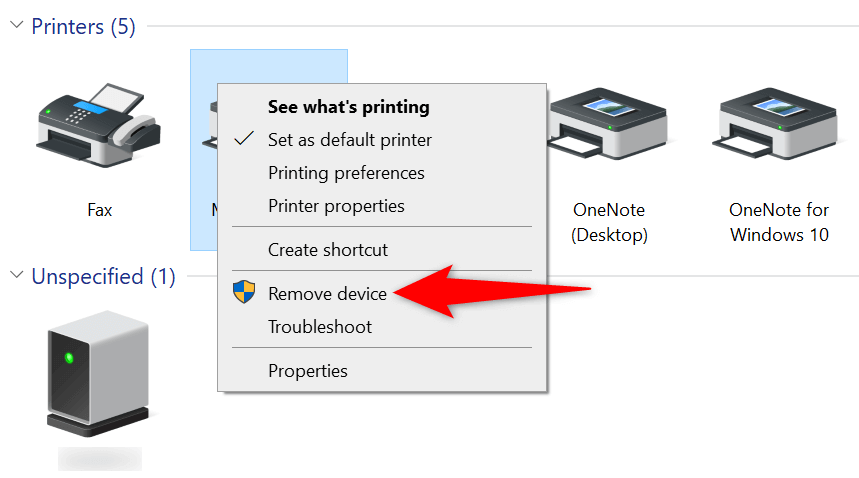
- Select Yes in the prompt to remove the printer.
- Unplug and replug your printer into your computer.
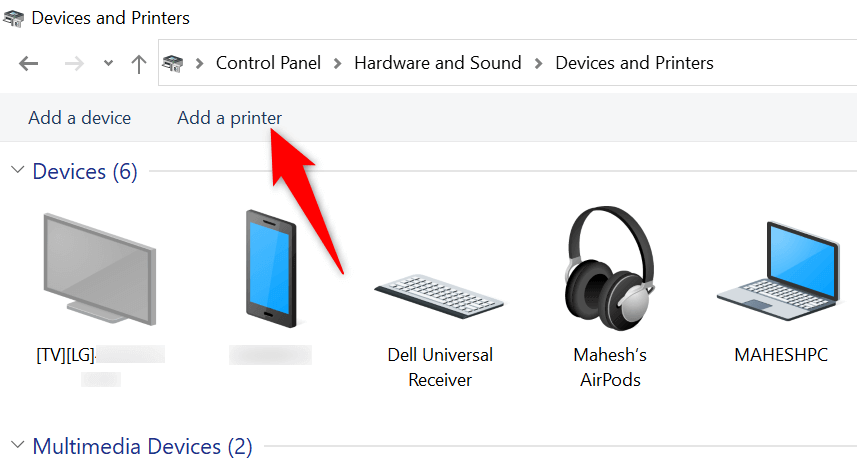
- Access Control Panel > View devices and printers and select Add a printer at the top.
- Finish adding the printer to your PC.
Resolve Your Printer Error to Resume the Pending Print Jobs
It’s frustrating when you want to print something urgently and a printer error shows up. Luckily, you can fix most printer-related issues by tweaking a few items here and there on your Windows system. Once you’ve done that, your printer will communicate with your PC and let you print all your files.
Happy printing!
- How to Fix the “Error – Printing” Status Error in Windows
- 7 Ways to Fix HP Printers ”Driver Is Unavailable” Error on Windows PC
- How to Fix Your Printer’s “Driver is unavailable” Error on Windows
- 7 Ways to Fix ”Windows Cannot Connect to the Printer”
- Print Job Won’t Delete in Windows? 8+ Ways to Fix
Mahesh has been obsessed with technology since he got his first gadget a decade or so ago. Over the last few years, he’s written a number of tech articles on various online publications including but not limited to MakeTechEasier and Android AppStorm. Read Mahesh’s Full Bio
Do you see a “Driver is unavailable” error for your HP printer in the Windows Settings app or Control Panel? This occurs when Windows encounters a corrupt or incompatible HP printer driver. We’ll show you how to fix that.
When Does the “Driver Is Unavailable” Error Happen?
The “Driver is unavailable” error shows up for an HP printer in instances where Windows has trouble loading the relevant printer driver. Various reasons—such as outdated driver software or an incomplete printer setup—often cause that. Work through the fixes below to resolve the HP printer issue in Windows 10 and 11.
1. Run the Printer Troubleshooter
Windows has a built-in Printer troubleshooter that can fix most printer driver issues and other common printer problems . Run it before moving on to the rest of the fixes.
- Press Windows Key + S , type Troubleshoot Settings , and press Enter . On the Settings window that shows up, select Other / Additional troubleshooters .
- Locate the Printer troubleshooter and select Run / Run the troubleshooter .
- Select your HP printer and follow the on-screen instructions to fix issues the Printer troubleshooter detects.
2. Run the HP Print and Scan Doctor App
Next, run the HP Print and Scan Doctor app on your PC. It’s a dedicated troubleshooter by HP that can diagnose and fix issues specific to HP printers. You can download the HP Print and Scan Doctor from the HP website.
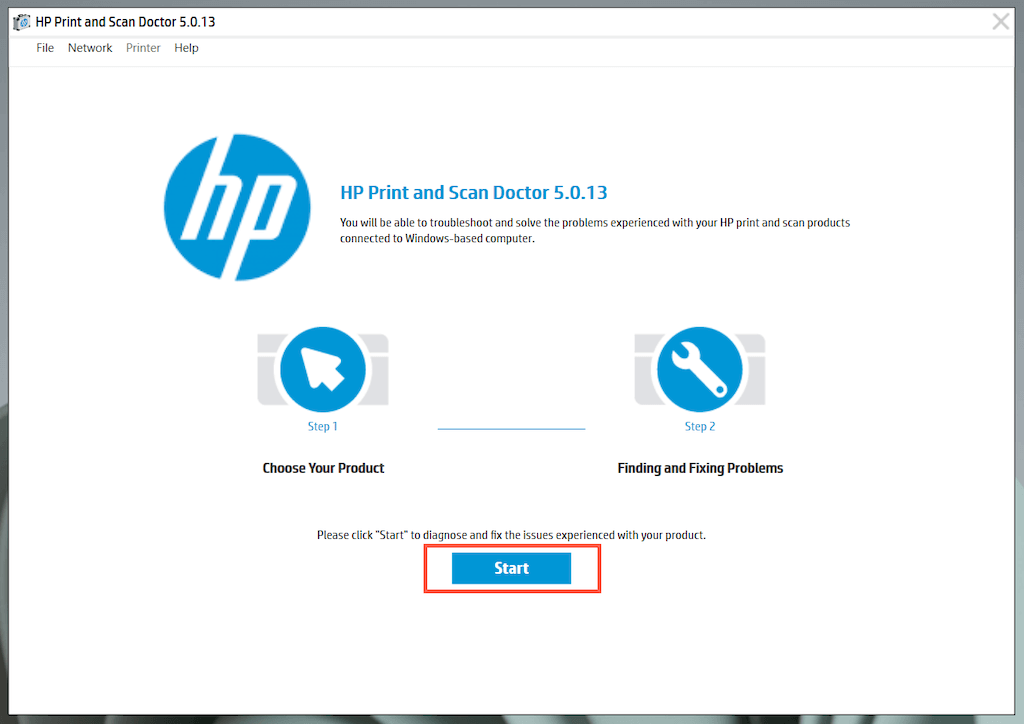
If the HP Print and Scan Doctor detects issues with your HP printer, let the tool automatically fix them for you or follow any suggestions to do that yourself.
3. Update Your HP Printer
Visit HP’s Software and Driver Downloads portal and search for your HP printer model. Then, download and install any recommended support software (e.g., HP Smart or HP Easy Start) that you don’t already have on your computer. Also, install any firmware or device driver updates.
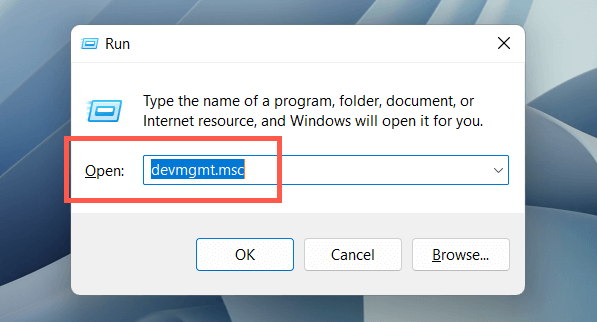
If you have trouble installing device drivers via HP’s driver updater tool, try using the Device Manager in Windows instead. To do that:
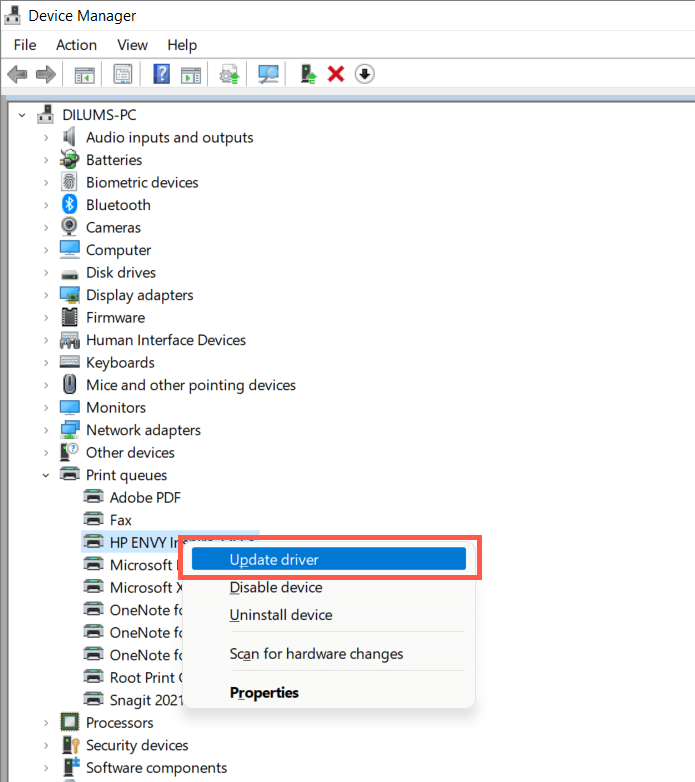
- Press Windows + R to open a Run box. Then, type devmgmt.msc and select OK to open the Device Manager.
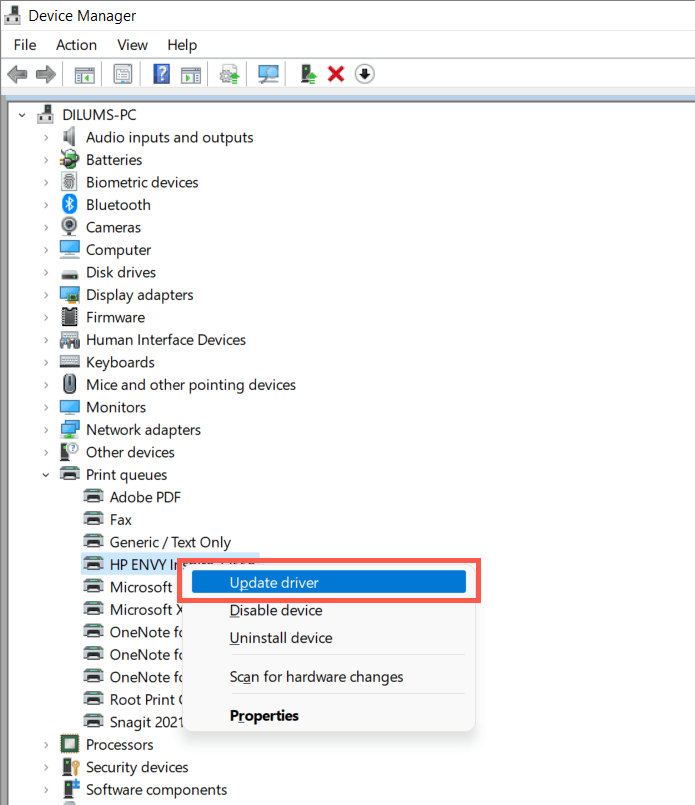
- Expand Print queues , right-click your printer hardware (e.g., HP ENVY ), and select Update driver .
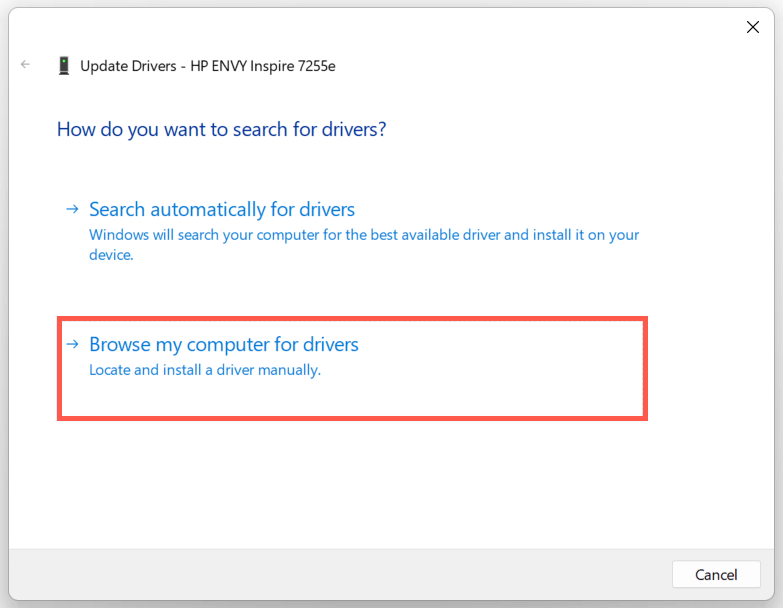
- Select Browse my computer for drivers on the Update Drivers dialog.

- Check the box next to Include subfolders . Then, select Browse and pick the downloaded driver file or folder.
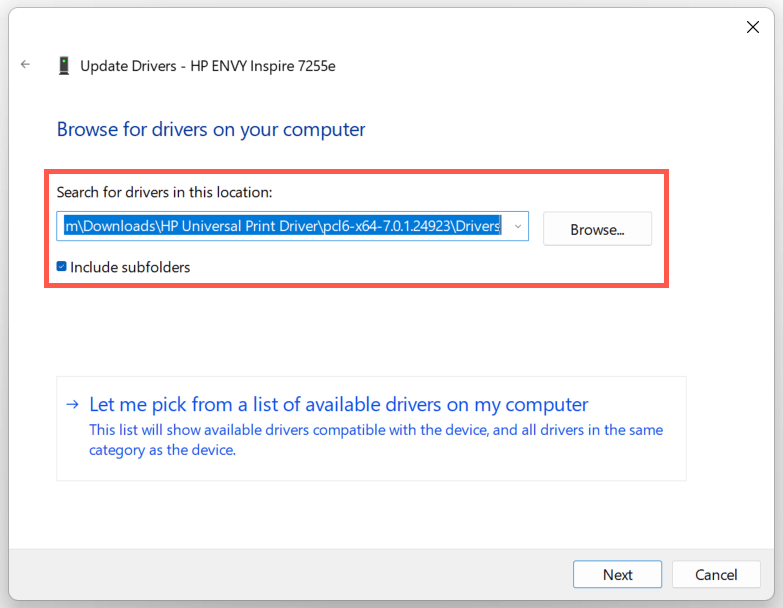
Note : If the driver file is in the ZIP format, Windows may not detect it unless you extract it first.
- Select Next to update the HP printer driver. Once that’s done, select Close to exit the Update Drivers window.
4. Install New Windows Updates
If your PC runs on an early build of Windows 10 or 11, your HP printer driver or support software may encounter compatibility issues unless you update the operating system .
To do that, open the Start menu and select Settings . Then, select Windows Update > Check for updates > Download and install to install available Windows updates.
Also, select Advanced options > Optional updates or View optional updates within the Windows Update pane and install any Microsoft-verified printer updates if available.
5. Remove and Re-install Drivers for HP Printer
If the “Driver is unavailable” error persists, try removing and re-adding the printer to your computer. That also involves deleting and reinstalling the relevant HP drivers and support software.
Open the Settings app and go to Bluetooth & devices > Printers & scanners .
Choose your HP printer and select the Remove button to confirm. Then, select Remove device on the pop-up to confirm.

Open the Device Manager.
Expand Printer queues , right-click your HP printer, and select Uninstall device .
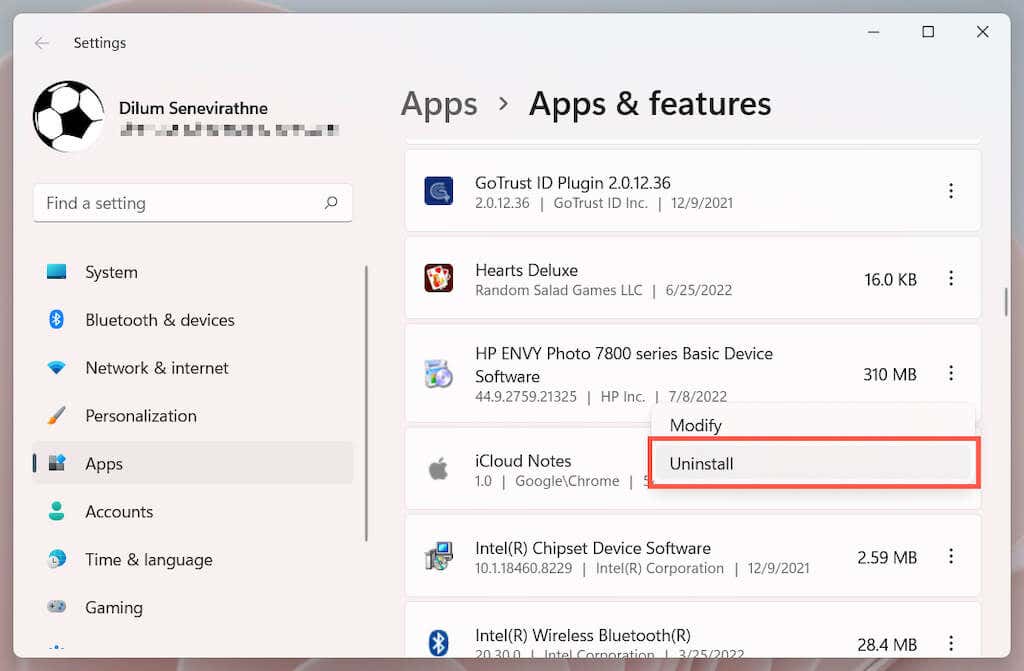
Right-click the Start button and select Apps and Features .
Locate and uninstall any HP drivers or support software.
Restart your computer.
Re-open the Settings app and go to Bluetooth & devices > Printers & scanners .
Select Add device and set up the HP printer from scratch.

- Reinstall the latest drivers and support software for the device. Again, search for the printer model on HP’s Software and Driver Downloads portal to ensure you install everything.
6. Switch to the Generic Printer Driver
Switch to the generic printer driver in Windows. That will likely resolve the “Drive is unavailable” error but at the expense of losing various features specific to your HP printer. Regardless, it’s a good idea to try that if the issue persists.
- Open the Device Manager and select the problematic HP printer under Printer queues . Then, right-click and choose Update driver .
- Select Browse my computer for drivers.
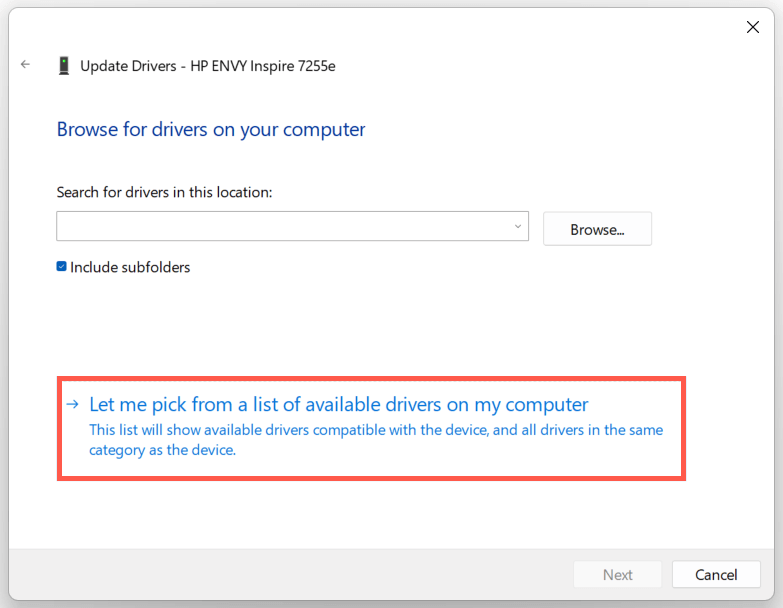
- Select Let me pick from the list of available drivers .
- Check the box next to Show compatible hardware . Then, select Generic software device > Next.
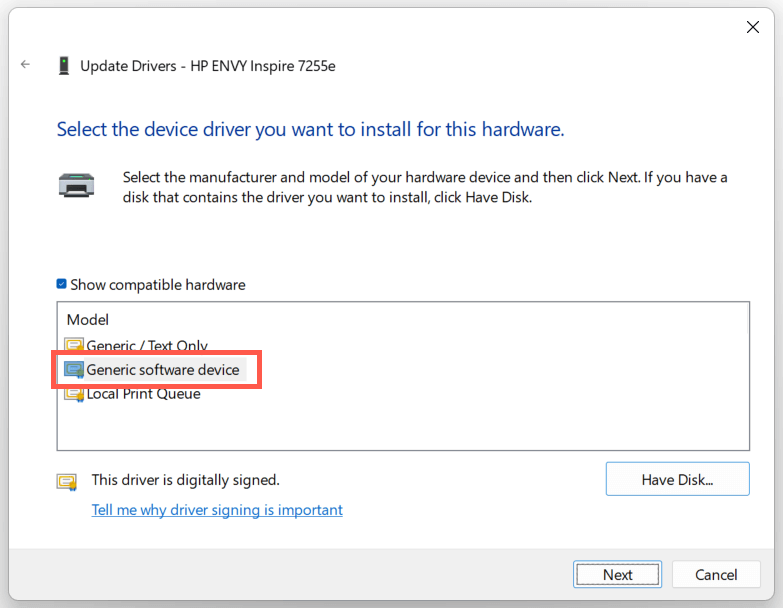
- Select Finish to install the generic printer driver for your PC.
7. Perform an SFC and DISM Scan
System file corruption can be another reason for your HP printer’s “Driver is unavailable” error. Running the SFC and DISM command-line tools usually helps fix that.
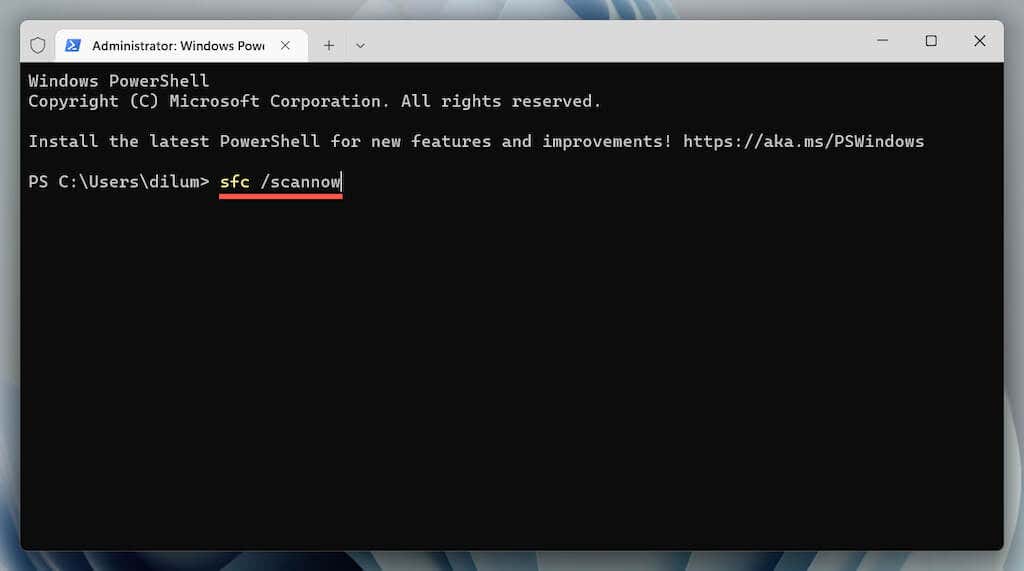
To initiate an SFC (or System File Checker) scan, right-click the Start button and select Windows PowerShell / Terminal (Admin) . Then, type sfc /scannow and press Enter .
Once the System File Checker finishes scanning your computer, launch the DISM (Deployment Image Servicing and Management) tool with the following command:
DISM.exe /Online /Cleanup-Image /Restorehealth
The DISM tool takes a long time to complete and may appear to get stuck. However, keep the Windows PowerShell window open, and it should end eventually.
HP Printer Driver Unavailable Error Fixed
Did you manage to fix your HP printer’s “Driver is unavailable” error on your computer? If you did, try keeping the printer drivers and the operating system up-to-date to minimize the chances of running into the same problem going forward. If not, contact HP Support for model-specific fixes that could help resolve the driver issue.
- How to Fix the “Error – Printing” Status Error in Windows
- How to Fix Your Printer’s “Driver is unavailable” Error on Windows
- 7 Ways to Fix ”Windows Cannot Connect to the Printer”
- Print Job Won’t Delete in Windows? 8+ Ways to Fix
- Preparing for Windows 10 End of Support: Upgrading to Windows 11
Dilum Senevirathne is a freelance tech writer and blogger with three years of experience writing for online technology publications. He specializes in topics related to iOS, iPadOS, macOS, and Google web apps. When he isn’t hammering away at his Magic Keyboard, you can catch him binge-watching productivity hacks on YouTube. Read Dilum’s Full Bio
