Microsoft Excel is one of the best tools available for data collection, analysis, and visualization. However, because of its powerful features, it can take a while to get used to. If you can’t figure out how to get rid of dotted lines in Excel, you’ve come to the right place.
In this Excel tutorial, we’ll explain why you’re seeing dotted lines and how to get rid of them.
Why Do Dotted Lines Appear in Microsoft Excel?
The three most common causes for dotted lines to appear in Microsoft Excel are:
- Page breaks that Excel shows as a dotted line.
- Dotted cell borders.
- Gridlines across the entire worksheet.
Below, we’ll explain how to get rid of these dotted lines.
1. How to Remove Page Break Dotted Lines
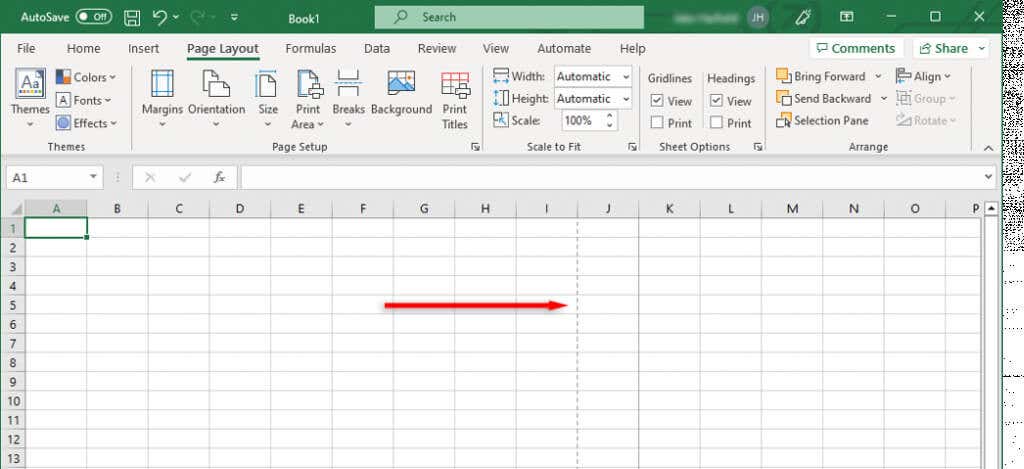
Excel page breaks are important because they tell Excel where pages start and end. They divide your spreadsheet into sections so that you can print it on separate pages. However, when you’re working, the dotted line can be an unnecessary distraction.
In newer versions of Excel, automatic page breaks are shown as dotted lines, while manually added page breaks appear as solid lines. You can remove page breaks in normal view by navigating to the Page Layout tab and selecting Remove page breaks in the Page Setup section. However, this only removes the manual page break previews — it doesn’t remove the automatic breaks.
To remove the dotted line, you can simply close and reopen your Excel worksheet . If you don’t want to close your workbook, do the following to remove page break lines:
- Open your Excel file.
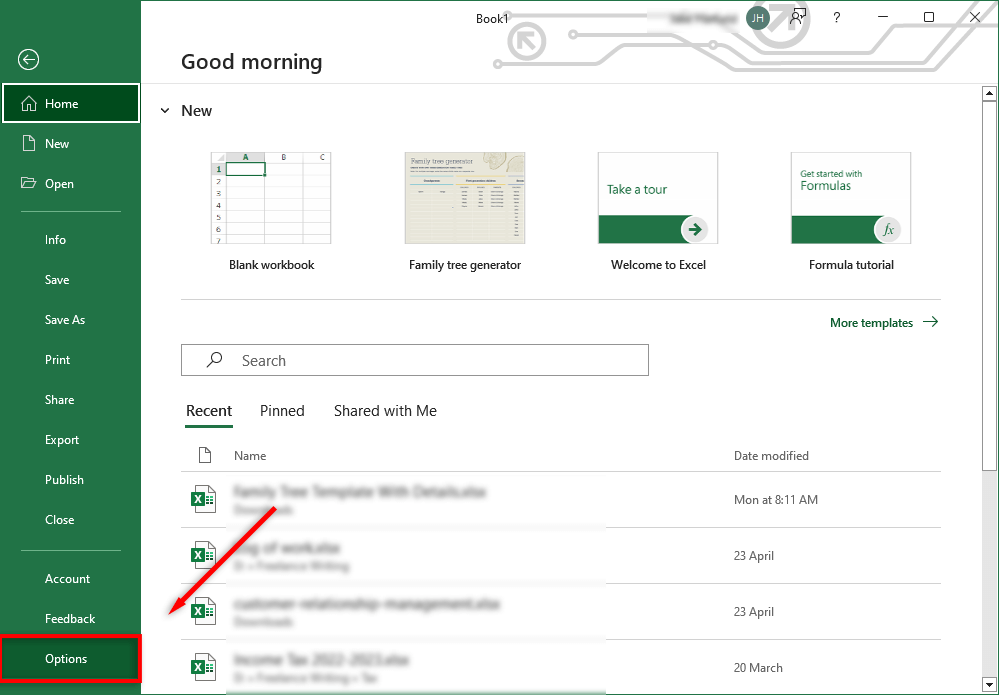
- Select the File tab.
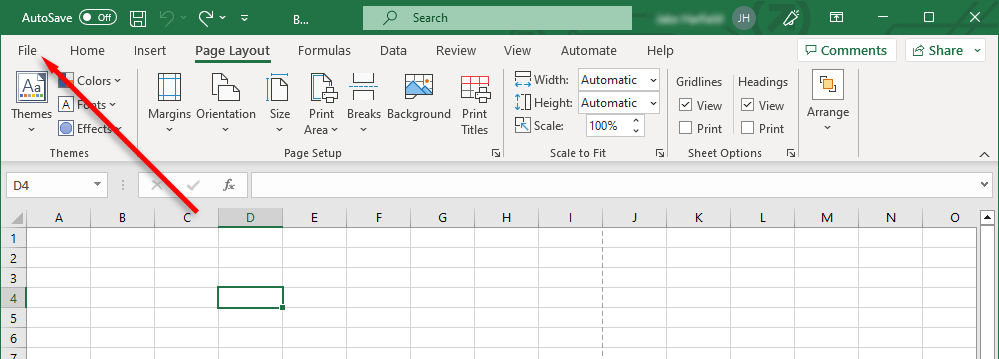
- Select Options .
- In the Excel Options dialog box, select Advanced from the left-hand menu.
- Scroll down to “Display options for this worksheet” and uncheck Show page breaks .
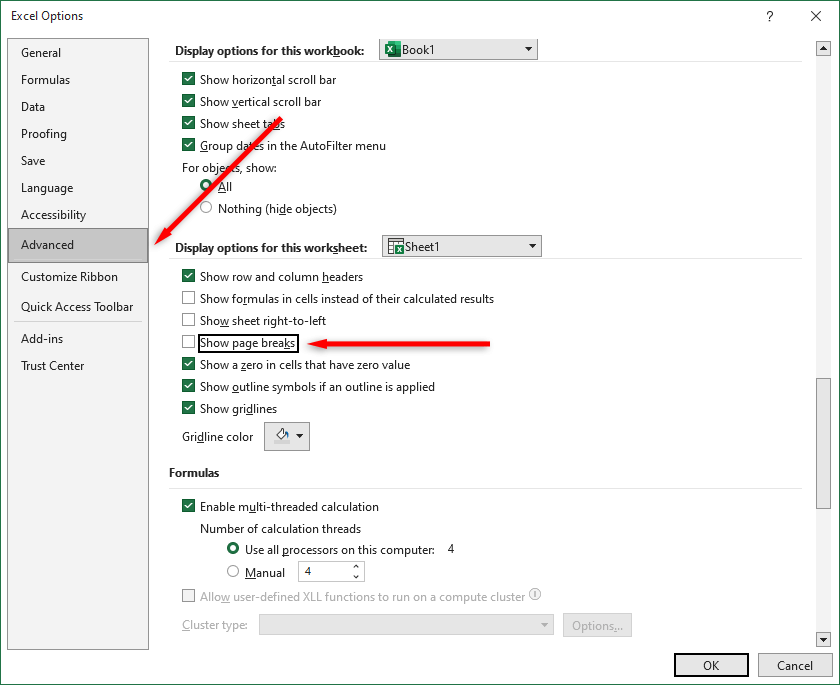
By unchecking this checkbox, you’ll make page breaks invisible in that workbook. Keep in mind that you’ll have to deactivate this setting in every workbook you’re working on.
Note: If you’ve set a print area, these dotted lines will also no longer be shown. Instead, the workbook will display a solid line to outline the print area.
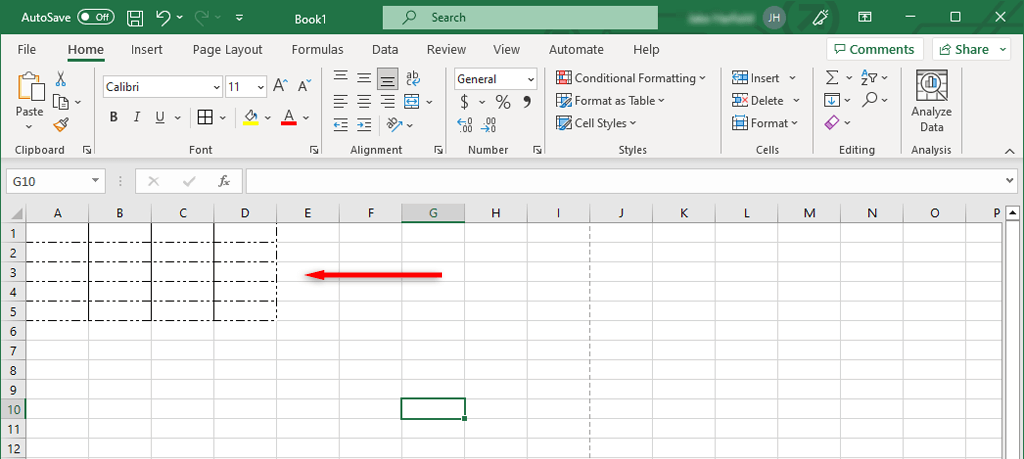
2. How to Remove Dotted Borders
If you’re working on someone else’s workbook, they may have used dotted lines as cell borders. Though this isn’t as common as page breaks, you may still want to change it if you aren’t used to that style of formatting.
To remove dotted line borders:
- Select all of the cells for which you want to remove the dotted lines. To select every cell in the Excel spreadsheet, press Ctrl + A .
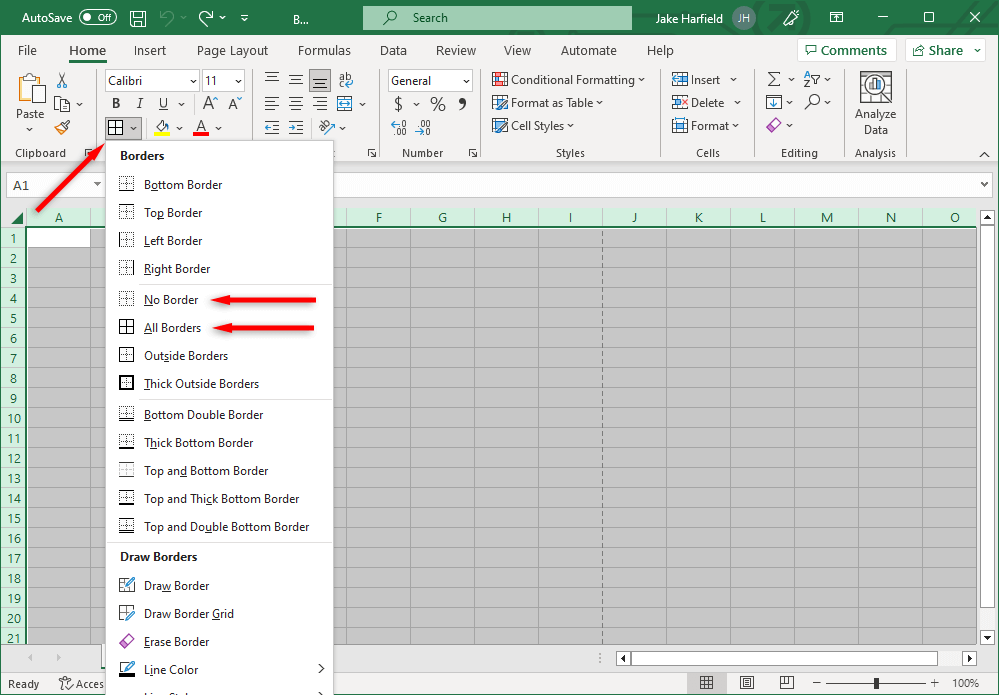
- Select the Home tab .
- In the Font section, select the Border drop-down menu.
- Under the border options, select whichever border you’d prefer for your selected cells. No border will make it harder to tell which cell is which, so you may want to select a solid line option.
3. How to Remove Gridlines
Gridlines are actually not dotted lines. However, they appear to some people like faint dotted lines, and some users prefer to remove them.
To remove gridlines in your Excel sheet:
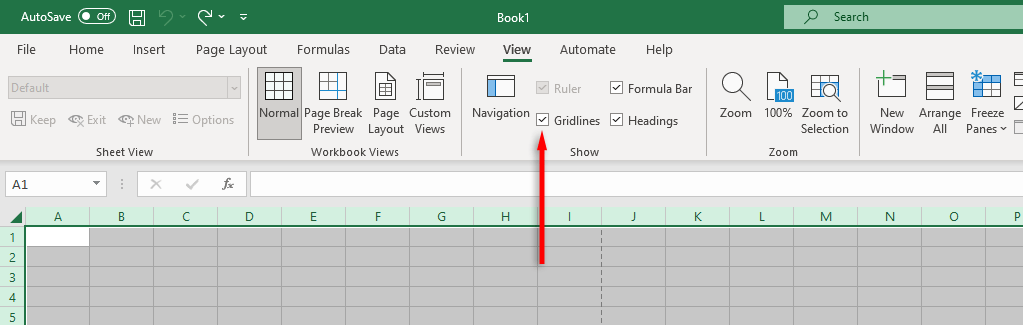
- Select the View tab .
- In the Show section, uncheck the checkbox next to Gridlines .
Tidy Up Your Spreadsheets
Microsoft Office provides users with a powerful suite of apps to get work done, but they’re not without fault. With these Excel tips , you should be able to remove any dotted lines and format your Excel workbook exactly how you’d like it.
Related: If you want lines to show when you print for easier reading, be sure to check out our guide to printing Excel worksheets with gridlines .
- How to Find Circular References in Microsoft Excel
- Name Box in Excel: All You Need to Know
- How to Remove Unwanted Spaces from Excel Spreadsheets
- How to Unhide the First Column or Row in Excel Worksheets
- How to Use the Square Root (SQRT) Function in Excel
Jake Harfield is an Australian freelance writer whose passion is finding out how different technologies work. He has written for several online publications, focusing on explaining what he has learned to help others with their tech problems. He’s an avid hiker and birder, and in his spare time you’ll find him in the Aussie bush listening to the birdsong. Read Jake’s Full Bio
Because they don’t print by default, we’ll show you how to print Excel worksheets with gridlines using both the desktop application and Microsoft Excel on the web.
If you’re printing an Excel spreadsheet with a lot of data, you may want to include the gridlines. These provide you with subtle borders around your cells without having to manually add them, thus making the data easier to read.
Gridlines Versus Cell Borders in Excel
The advantage to using gridlines versus cell borders when you print in Excel is that they appear around your data automatically when you mark the option as described below.
By default, the gridlines encompass only the data in your sheet. This means if you add or remove data later, the gridlines automatically accommodate those changes.
When you apply cell borders to your data for printing instead, those lines do not update automatically. So, if you add or remove data later, you must manually adjust those cell borders before printing.
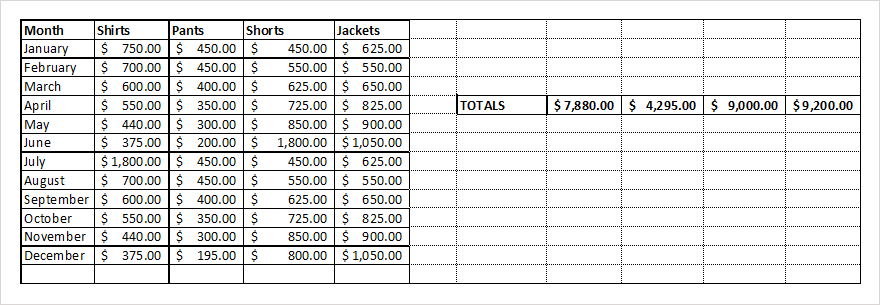
If you do add cell borders to your sheet for another reason and also want to print the gridlines, both display when you print the sheet. The borders you apply simply appear as bolder lines when you print (or in color per your border settings) as shown below.
How to Print Excel With Gridlines on Desktop
You can print gridlines in Excel on Windows and Mac by adjusting the same setting. However, Excel on Windows does provide another way to add gridlines when you’re ready to print.
- Open your Excel workbook on Windows or Mac to the sheet you want to print.
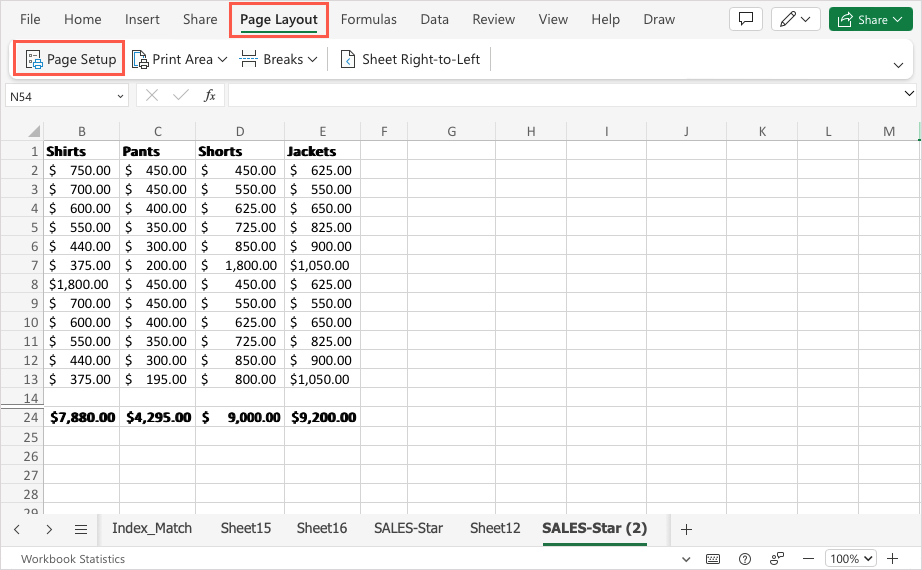
- Go to the Page Layout tab and check the box next to Print in the Gridlines section.

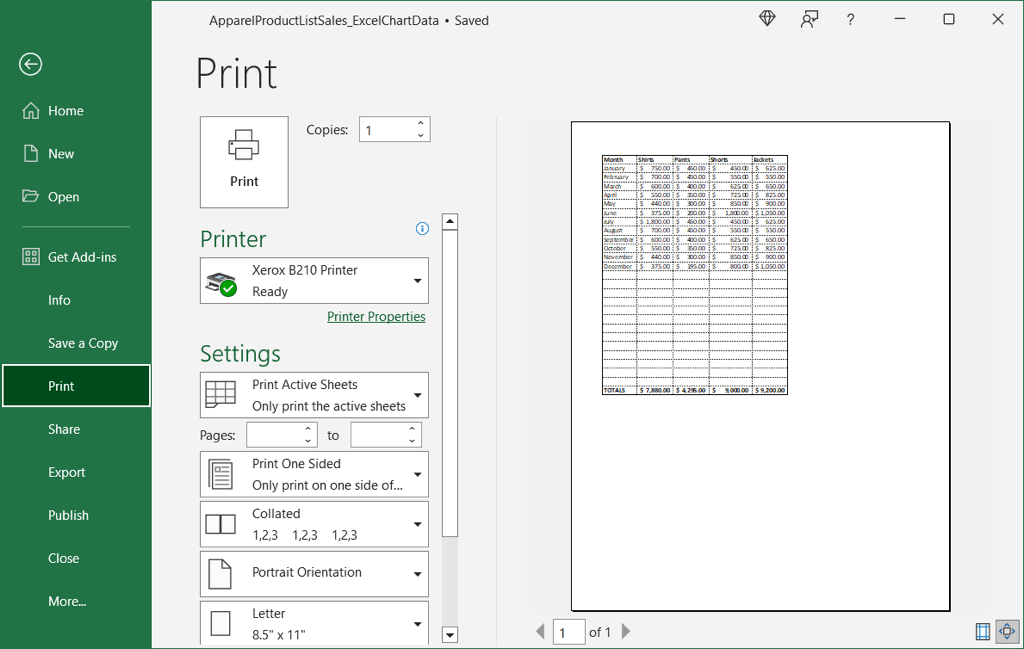
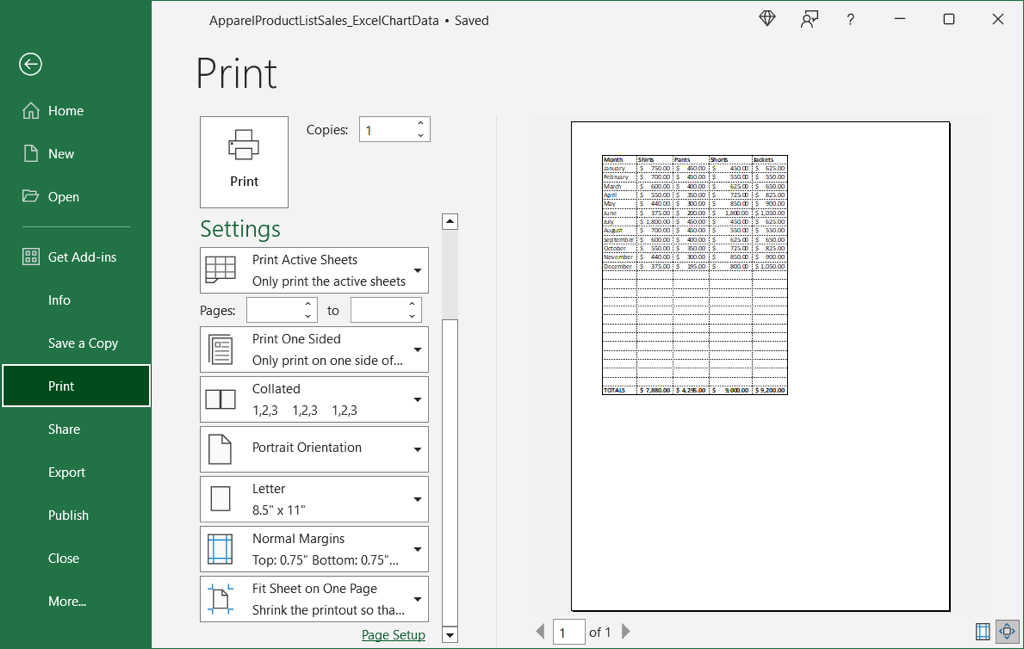
- To see a preview or print the sheet, head to the File tab and pick Print . You’ll see your sheet preview with the gridlines.
If you want to print the entire workbook with gridlines, you’ll need to add them to each individual sheet first by following the above steps.
Display the Gridlines in the Print Preview on Windows
If you forget to mark the Print option for gridlines on the Page Layout tab as described above and are already in the print preview, you can add the lines there if you’re using Excel on Windows.
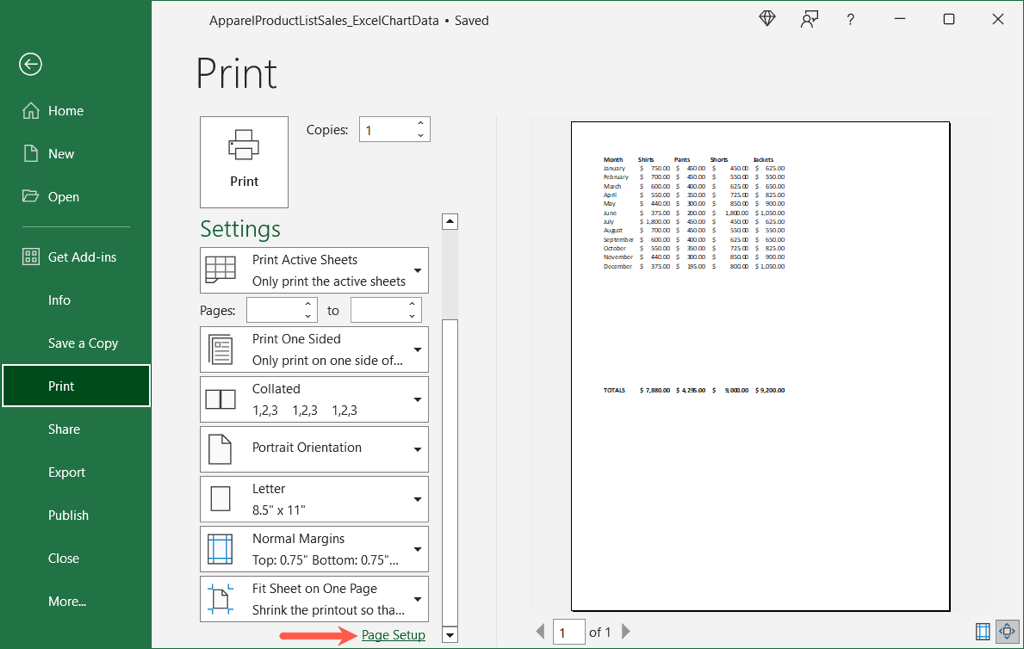
- In the preview, move to the bottom of the print settings and select Page Setup .
- Go to the Sheet tab, check the box for Gridlines in the Print section, and choose OK .
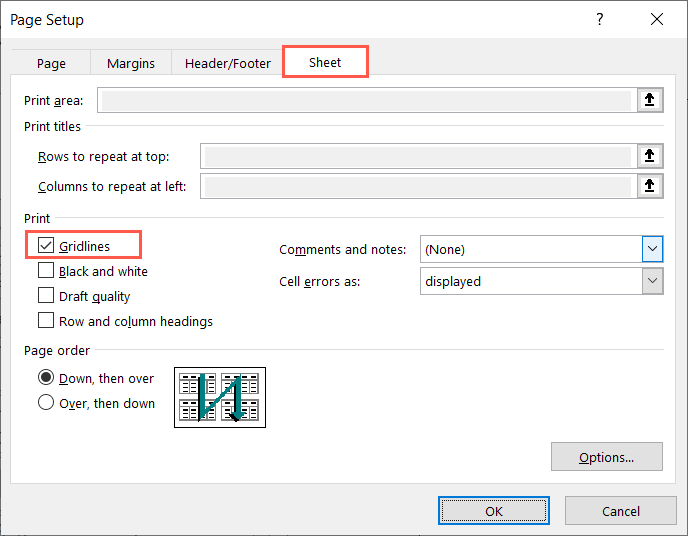
- You’ll then see the gridlines in the print preview for the spreadsheet.
Follow these same steps if you want to print other sheets in the workbook with gridlines.
How to Print Excel With Lines on the Web
If you’re using Excel on the web, you can easily print the gridlines for your worksheet.
- Visit Excel online , sign in with your Microsoft account, and open the workbook with the sheet you want to print.
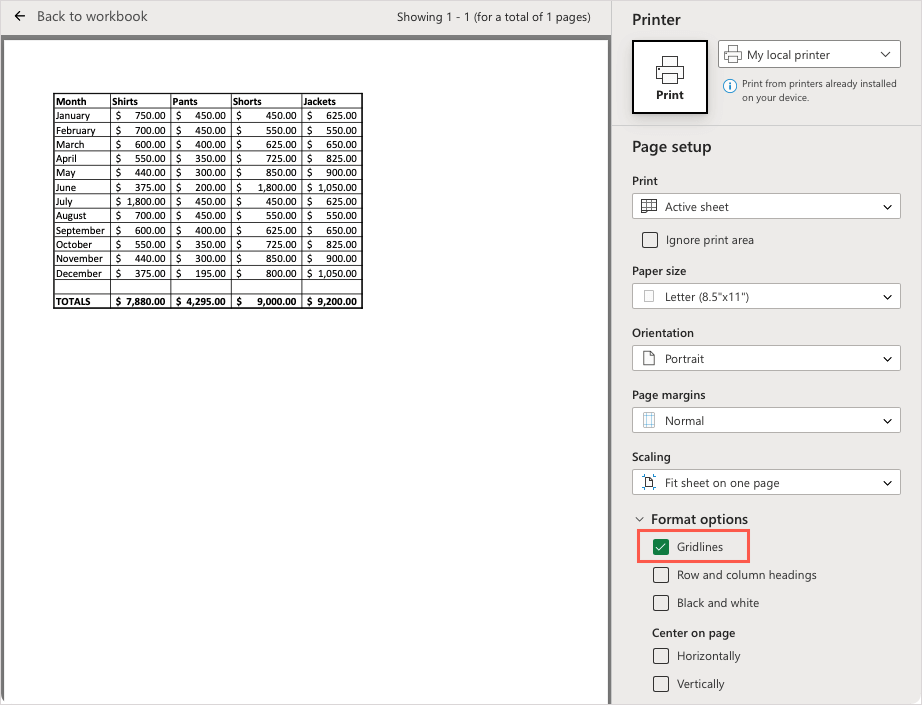
- Go to the Page Layout tab and pick Page Setup . Alternatively, select File > Print and pick Print .
- On the right side, expand Format options and check the box for Gridlines . You’ll then see the lines displayed on your sheet, adjust any other print settings as needed, and print the spreadsheet.
Like in the desktop application, if you want to print the whole workbook with gridlines, you’ll need to add them to each sheet individually using the above steps.
Gridlines for Easy Reading in Excel
Not only can printing your sheet with gridlines in Excel save you time from manually adding cell borders, but gridlines can accommodate any changes you make to your data automatically. Plus, they make your printed data easier to read.
Now that you know how to print in Excel with lines, look at how to get rid of dotted lines in Excel too.
- How to Find Circular References in Microsoft Excel
- Name Box in Excel: All You Need to Know
- How to Remove Unwanted Spaces from Excel Spreadsheets
- How to Unhide the First Column or Row in Excel Worksheets
- How to Use the Square Root (SQRT) Function in Excel
Sandy Writtenhouse is a freelance technology writer and former Project, Department, and Program Manager. She turned her education, job experience, and love of technology into a full-time writing career. With all sorts of gadgets in her home and her hands, she seeks to help others make life easier through technology. Read Sandy’s Full Bio
