If you’re looking to add a personal and professional touch to your next round of letters, there’s no better way than designing your own envelopes. This lets you include branding and other custom elements that make them unique.
Luckily, Microsoft Word lets you create and print your own envelope designs. Here’s how.
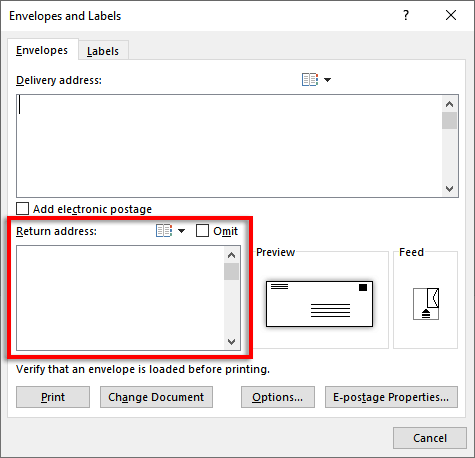
Step 1: Add Delivery and Return Addresses
The first step is to add the relevant addresses to your envelopes. To do so:
- Open Microsoft Word on your PC or Mac.
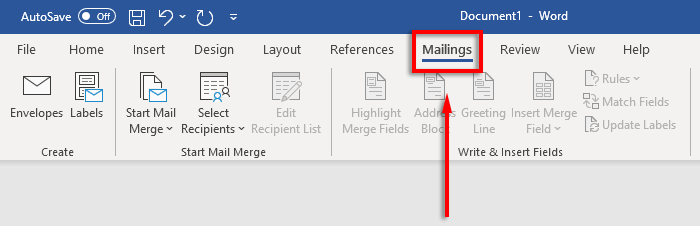
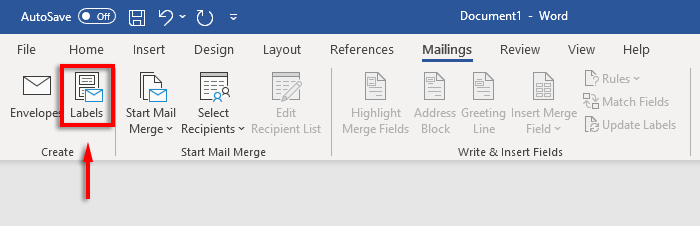
- In the ribbon bar, select the Mailings tab.
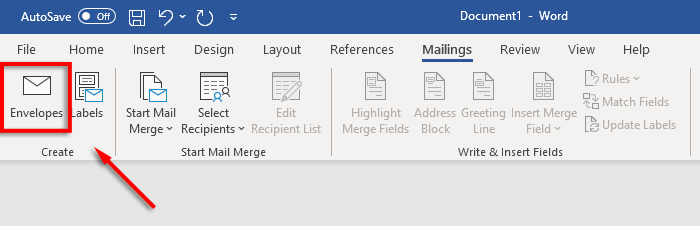
- Click the Envelopes button.
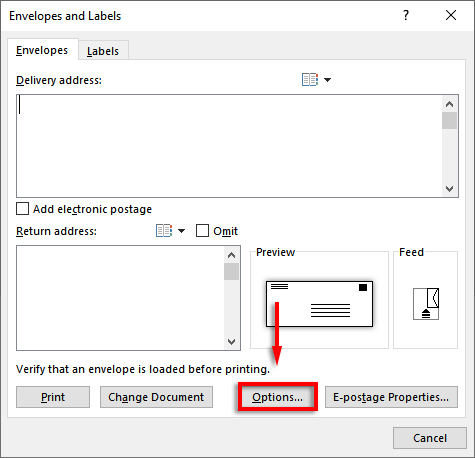
- Type in your recipient’s address into the text box manually. Alternatively, press Contacts to import addresses from your Outlook distribution list.
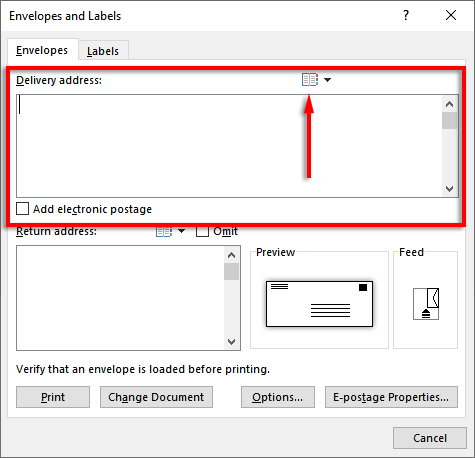
- Type in your return address or click Contacts to import one from Outlook. If you don’t want to display a return address, check the box beside Omit .
Note: If you’d rather use labels to print your delivery and return addresses, Word lets you create and print labels, too. You can add a single address in the labels dialog box under Mailing > Labels . Alternatively, you can use mail merge to create multiple labels and speed up the process.
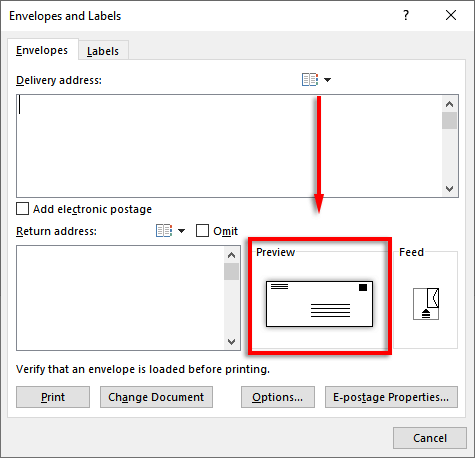
Step 2: Set the Envelope Size and Font
You need to specify what size your envelopes are.
- Click the Preview icon (it looks like an envelope).
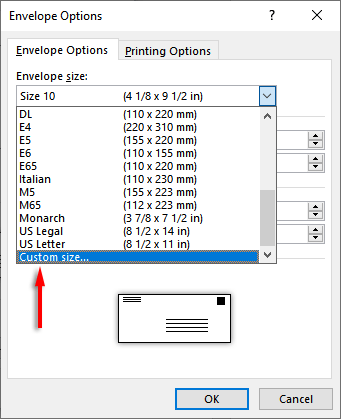
- In the Envelope Options tab, click on the drop-down menu underneath Envelope size .

- Specify the size of your envelopes. Word contains most of the common envelope sizes, but you can set your own size by clicking Custom Size .
- Next, click Font… next to the Delivery address box or Return address to set the font you would like.
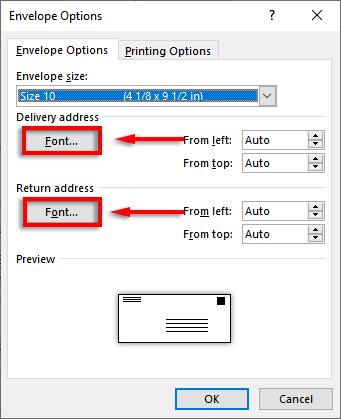
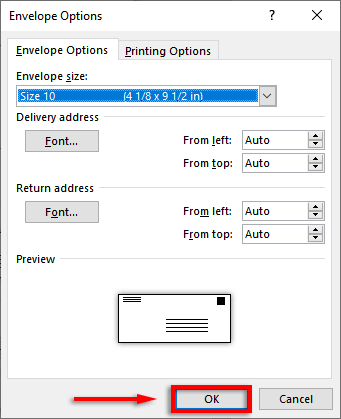
- Press OK .
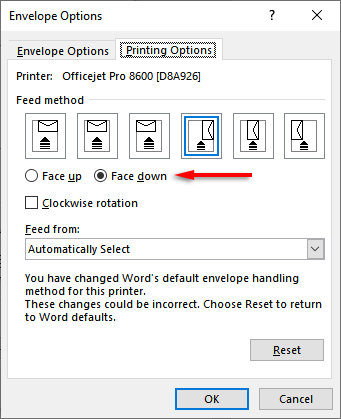
Step 3: Set the Printer Feed
You now need to specify how you will feed the envelope into the printer. To do so:
- In the Feed window, click Options .
- Select the Printing Options tab.

- In the Feed method window, select which way you would prefer to feed your envelope into the printer. We recommend choosing a method where the envelope borders the feed tray edge as it can be difficult to place them perfectly central. If you don’t align your envelope correctly, the delivery and return addresses will be uncentered.
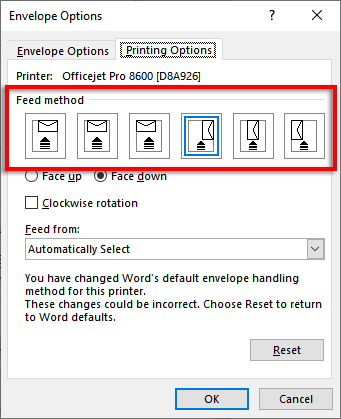
- Click Face up or Face down to define which way up you will load the envelope.
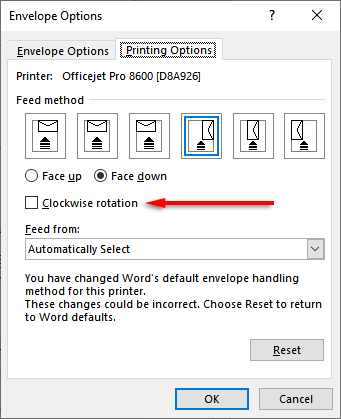
- Click Clockwise rotation to rotate the envelope design to your preference.
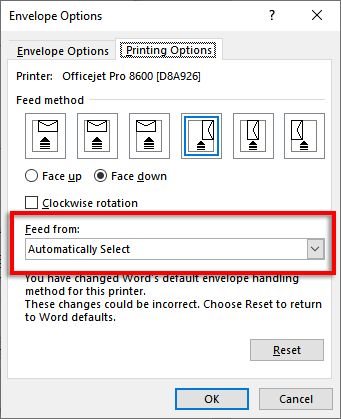
- If you have more than one printer tray, you can select the drop-down menu under Feed from and choose which tray you would like to feed the envelope from.
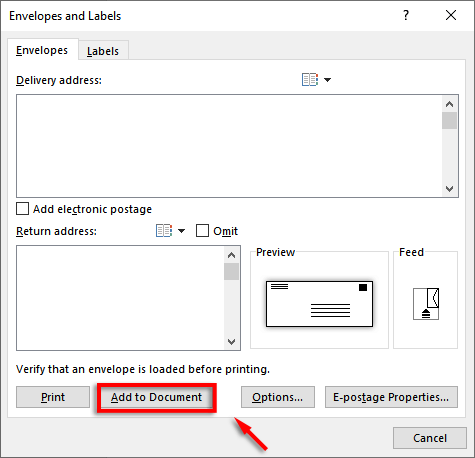
Step 4: Add Design Elements
Before you print envelopes, you can add branding and other elements if you wish. To do so, click Add to document . This will open the envelope as a Word document so that you can customize the layout and add images as required.
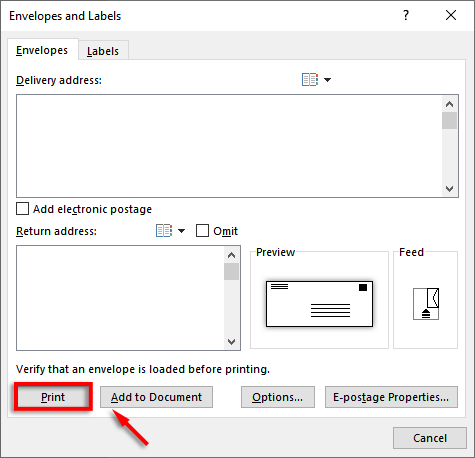
Step 5: Print the Envelope
Now it’s time to print your envelope. To do so:
- Click Envelopes again.
- Make sure your envelopes are loaded correctly and select Print .
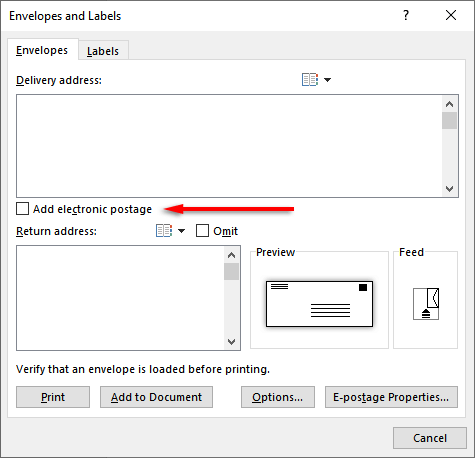
Note: You’re also able to add electronic postage if you have a compatible third-party plug-in. To add e-postage, select the checkbox next to Add electronic postage .
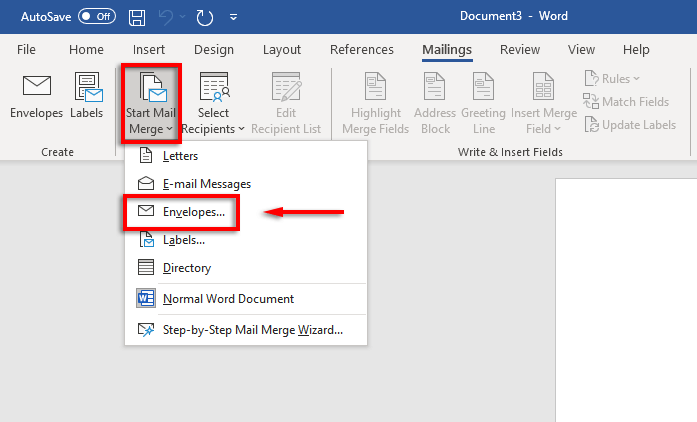
Use Mail Merge to Save Time
If you’re sending a single envelope, setting it up manually is no big deal. However, if you’re sending a stack of letters, it’s going to take ages. Luckily, you can use mail merge to automatically print each address onto the envelope (rather than typing each one separately).
To do so:
- Open Word .
- Click the Mailings tab.
- Select Start Mail Merge > Envelopes .
- Click the Envelope size drop-down box and specify your sizing. Add the Font you’d like for the mailing address, then press OK .

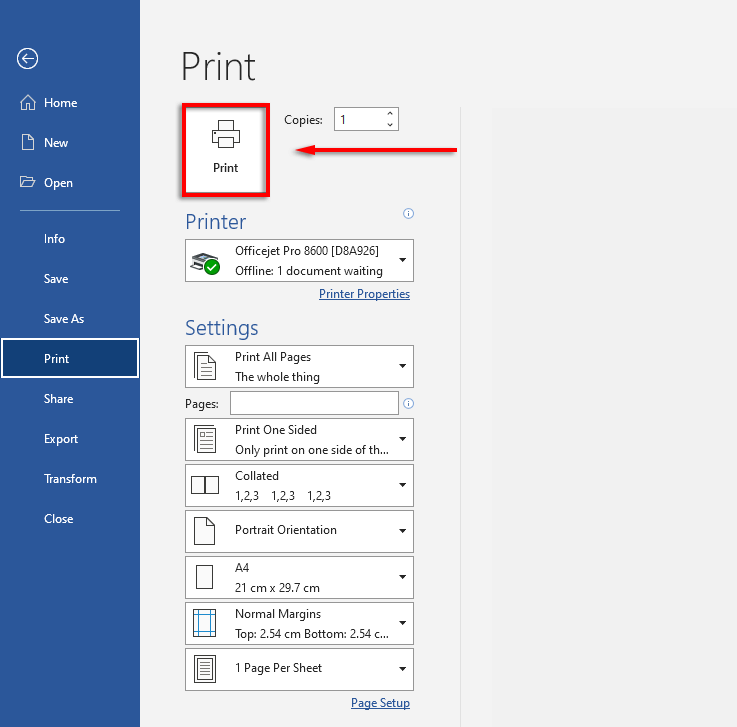
- Click File > Print .
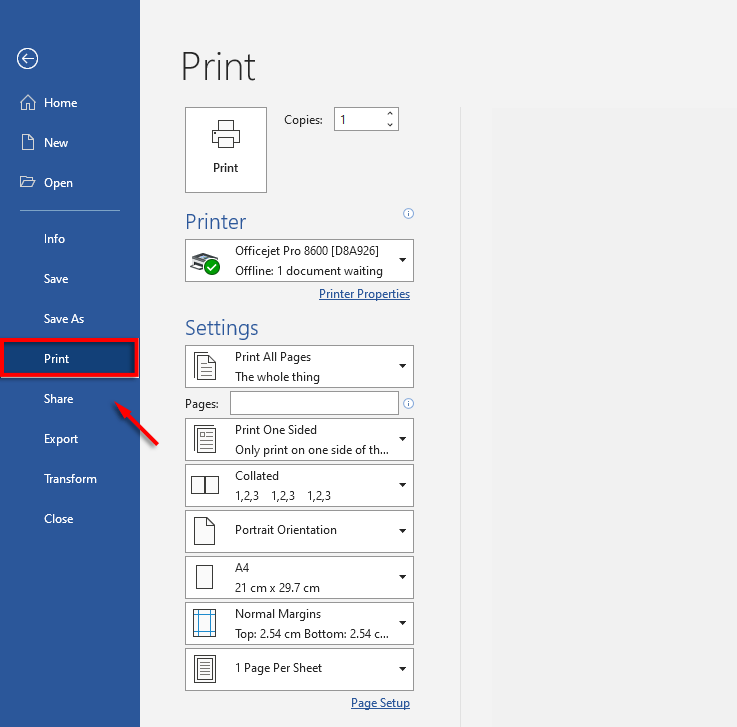
- If the settings are correct, make sure your envelopes are loaded correctly and click Print .
Professional Snail Mail
Traditional mail is still relevant in today’s mostly electronic world, and that’s where the Microsoft Office apps come in handy. Using Microsoft Word, you can easily create envelopes to your specifications. With this tutorial, you should have your next batch of mail ready in no time.
- How to Remove Headers and Footers in Word Documents
- How to Clear Formatting in Word
- How to Remove Unwanted Lines in Word Documents
- How to Select All Text in Word Documents
- How to Insert Arrows in Microsoft Word Documents
Jake Harfield is an Australian freelance writer whose passion is finding out how different technologies work. He has written for several online publications, focusing on explaining what he has learned to help others with their tech problems. He’s an avid hiker and birder, and in his spare time you’ll find him in the Aussie bush listening to the birdsong. Read Jake’s Full Bio
