There are many advantages to rooting a Nexus 5, 5X, 6, 6P, and 7 devices. Some of the benefits of rooting include getting access to exclusive root-only apps, having the ability to flash any customized version of the OS , and even overclock the CPU using a custom kernel.
Root lets you make changes to the very core system of your device making it a truly customizable phone you’ve ever had. There are certain procedures you need to follow to gain root on your devices.

Root a Nexus 5 & Install a Custom Recovery On It
- Download CF-Root for Nexus 5 and extract it to your computer.
- Turn off your phone.
- Press and hold down Volume Down and Power buttons at the same time to reboot into the bootloader mode.
- Double-click on root-windows.bat in the CF-Root folder and it’ll root your device.
- Once your device is rooted, head over to the Google Play Store and download and install TWRP Recovery app on your phone.
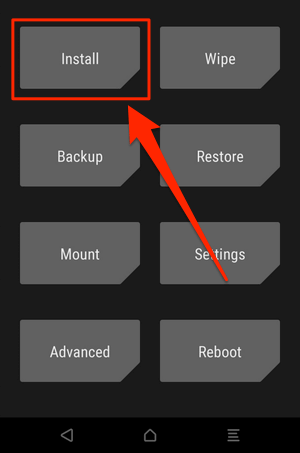
- Tap on TWRP Flash on the main interface.

- Select your device and TWRP file. Then tap on Flash to Recovery .
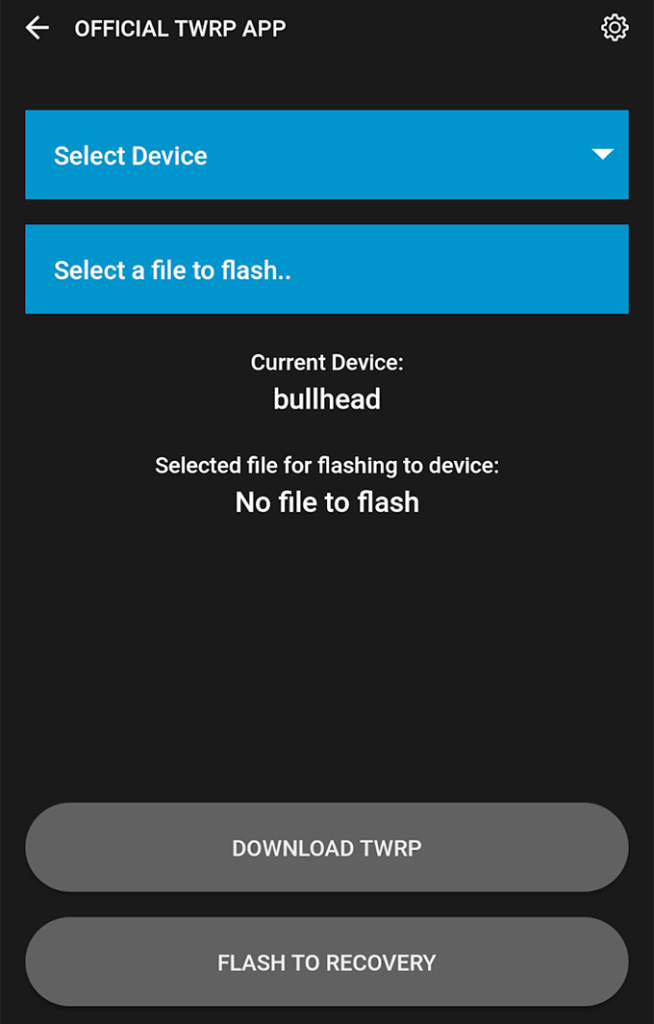
- Reboot your device when the recovery is flashed.
You’re now rooted and have a custom recovery installed on your Nexus 5.
Root a Nexus 5X
Unlock Bootloader:
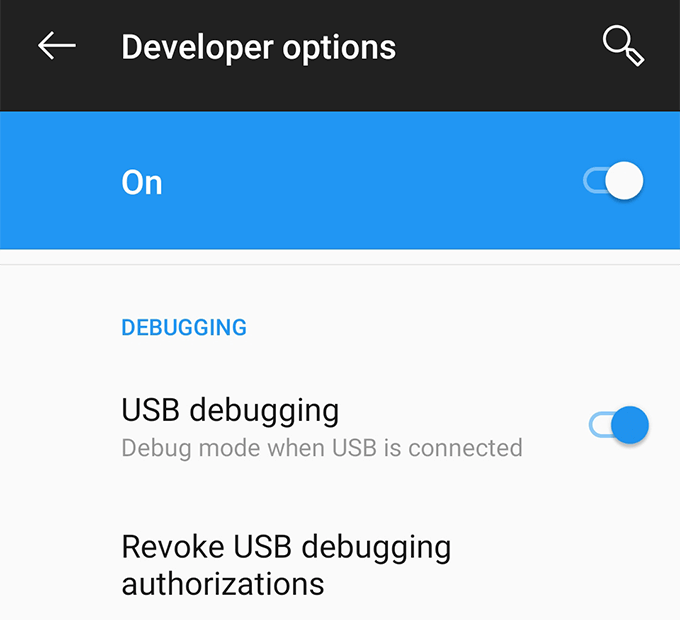
- Go to Settings > Developer options and enable both USB debugging and OEM unlocking .

- Connect your phone to your computer using a USB cable.
- Download Fastboot and extract it to your computer.
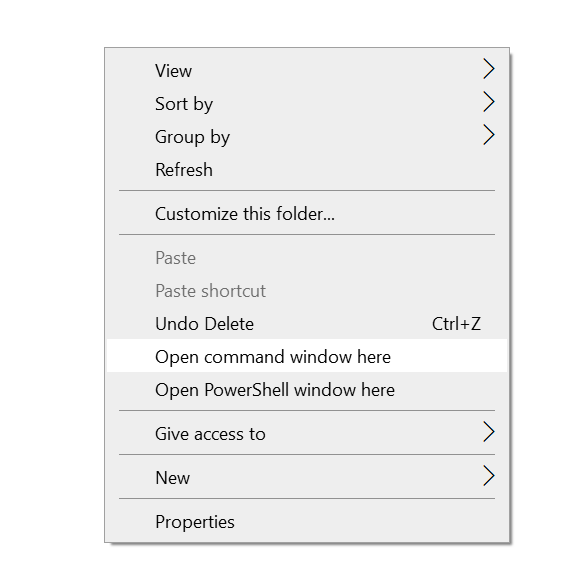
- Open the Fastboot folder, hold down Shift , right-click anywhere blank, and select Open command window here .

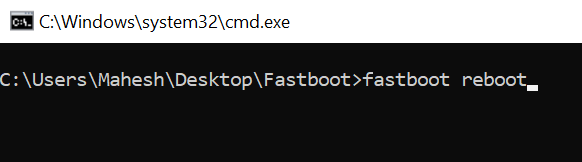
- Run the following commands hitting Enter after each line. adb reboot bootloader fastboot oem unlock

- Then run the following command to reboot your phone. fastboot reboot
Flash TWRP Recovery:
- Download TWRP Recovery IMG file and save it in the Fastboot folder.
- Open Settings > Developer options and enable USB debugging .
- Run the following command in Command Prompt. adb reboot bootloader
- Type the following and hit Enter to flash TWRP recovery. Replace twrp.img with your actual file’s name. fastboot flash recovery twrp.img

- Reboot your phone.
Root a Nexus 5X:
- Download SuperSU and transfer it to your phone.
- Press and hold down Volume Down and Power buttons together. Then select Recovery from the menu on your screen.
- Tap on Install and install the SuperSU file.

- You’re rooted.
Root a Nexus 6
Unlock Bootloader:
- Go to Settings > Developer options and turn on both OEM unlocking and USB debugging .
- Connect your phone to your computer.
- Download Fastboot and extract it.
- Open the Fastboot folder, press and hold down Shift , right-click on any blank space, and select Open command window here .
- Run the following command when Command Prompt launches. adb reboot bootloader
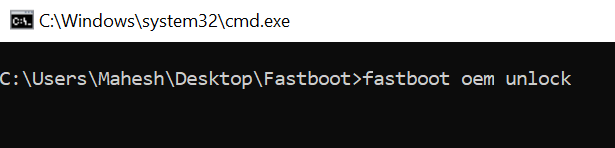
- Use the following command to unlock your bootloader. fastboot oem unlock
- Use the following to reboot your device. fastboot reboot
Root a Nexus 6:
- Download CF-Root for Nexus 6 and extract it to your computer.
- Turn off your phone.
- Press and hold down Volume Down and Power buttons to boot into the bootloader mode.
- Connect the phone to your computer.
- Run the file named root-windows.bat from the CF-Root folder.
- You’re now rooted.
Install a Custom Recovery:
- Download TWRP Recovery and save it in the Fastboot folder.
- Enable USB debugging from Settings > Developer options on your phone.
- Run the following command to boot into the bootloader. adb reboot bootloader
- Use the following command to flash the recovery. Replace twrp.img with the actual file’s name. fastboot flash recovery twrp.img

Root a Nexus 6P
Unlock Bootloader:
- On your phone, go to Settings > Developer options and turn on both OEM unlocking and USB debugging .
- Plug-in your phone to your computer via a USB cable.
- Download and extract Fastboot on your computer.
- Launch the Fastboot folder, press and hold down Shift , right-click anywhere on your screen, and select Open command window here .
- Run the following commands to unlock your bootloader. adb reboot bootloader fastboot flashing unlock

- Use this command to reboot your phone. fastboot reboot

Flash a Custom Recovery:
- Download TWRP Recovery for Nexus 6P and save it to the Fastboot folder.
- Enable USB debugging from Settings > Developer options on your phone.
- Connect your phone to your computer.
- Run the following command in Command Prompt. adb reboot bootloader

- Use the following command to install the recovery. Make sure to replace twrp.img with the original name of your file. fastboot flash recovery twrp.img
Root a Nexus 6P:
- Download SuperSU and move it to your phone.
- Power off your phone.
- Press and hold down Volume Down and Power buttons to reboot into the bootloader mode. Then select Recovery .
- Tap on Install and install the SuperSU file.
- You’re rooted.
Root a Nexus 7 & Install a Custom Recovery On It
- Download CF-Root for Nexus 7 and extract it.
- Turn off your phone.
- Press and hold down Volume Down and Power .
- Plug-in your phone to your computer.
- Run root-windows.bat from the CF-Root folder.
- You’re rooted.
- Download and install TWRP Recovery app.
- Tap on TWRP Flash .
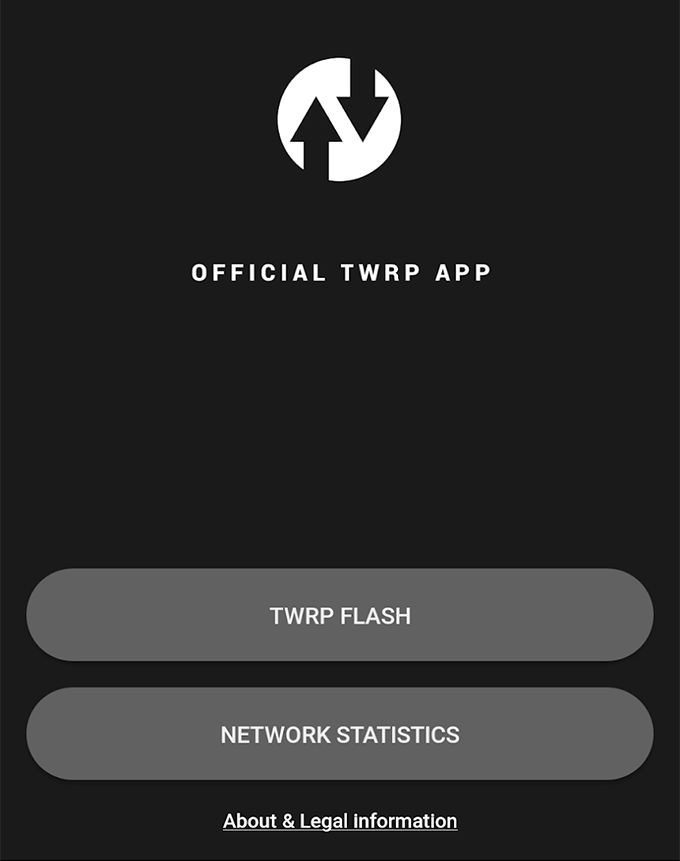
- Select your device and tap on Flash to Recovery .

Unroot a Nexus 5, 5X, 6, 6P, & 7
- Download the factory image for your phone and extract it to your computer.
- Turn off your Nexus device.
- Press and hold down Volume Down and Power buttons to reboot into the bootloader mode.
- Launch a Command Prompt window in the unzipped factory image folder and run the following command: flash-all.bat
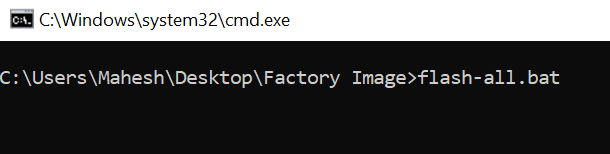
- Wait for it to flash the stock firmware on your phone.
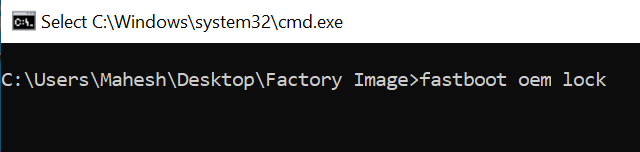
- When the firmware is flashed, run the following command to relock your phone’s bootloader. fastboot oem lock
You’re now back to the unrooted stock firmware for your Nexus phone.
Why Is My Phone Not Allowing Me to Make Calls Android?
Mobile Data Not Working: How to Fix
How to Fix Android “System UI Isn’t Responding” Error
Android Back Camera Not Working? 10 Ways to Fix
How to Use Microsoft Copilot on Android and iPhone
