Chrome OS ships with several features that help Chromebook users multitask more productively. The Split Screen functionality, for example, lets you work with two apps simultaneously in a side-by-side setup. Then there’s Virtual Desktops (also known as Desks), a feature that allows you to create multiple Chromebooks within your Chromebook.
Virtual Desktops help to minimize distraction and clutter by allowing you to organize related apps or activities in a dedicated workstation. For instance, you can create a desktop dedicated to work-related applications (Google Docs, Zoom, etc.) and another for entertainment-related activities (Netflix, Games, etc.) or social media or instant messaging apps.

Currently, you can create up to eight desks on your Chromebooks. If you’re new to using Virtual Desktops, navigating multiple apps, windows, and desks can get confusing or overwhelming. In this guide, we’ll show you some nifty tricks to easily switch between desks on Chromebook.
Refresher: Creating Virtual Desktops on Chromebook
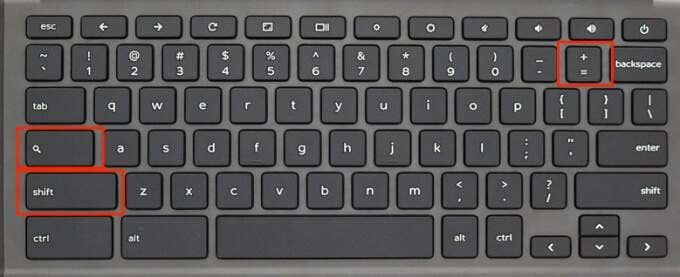
Creating a virtual desktop on Chromebooks is similar to opening a new browser tab or window. It’s super easy and we’re assuming you already know how to do it. But if you don’t, here’s a little refresher: press Shift + Search + Equal sign (=) .
Should you forget the keyboard shortcut, or perhaps your keyboard is faulty, here’s another way to create virtual desktops on Chromebooks:
- Press the Show windows or Overview button on your keyboard.
Alternatively, swipe 3 fingers up (or down) your Chromebook’s touchpad. That’ll also activate the Overview Mode.
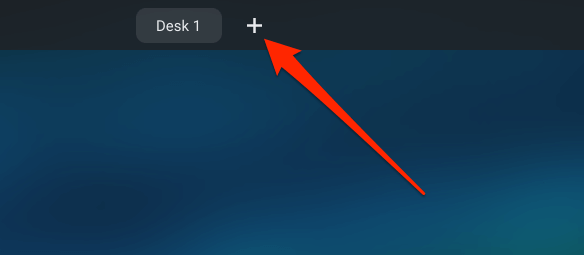
- Click the plus (+) icon next to Desk 1 to create a new virtual desktop.
- You’ll get a prompt to name the new virtual desktop. Type a custom name in the dialog box (Work, Research, Entertainment, or anything descriptive) and press Enter to proceed.

If you don’t enter a custom name, Chrome OS will assign the desktop a default name based on its sequence on the desktop row—e.g. Desk 2, Desk 3, Desk 4, up to Desk 8.
- Finally, click on the desk’s thumbnail to access the virtual desktop.
Switch Between Virtual Desktops
Switching between your desks on Chromebook is just as easy as creating them. We highlight three ways to go about it below.
Method 1: From the Overview Menu
Press the Show windows key and click the desktop you want to switch to. You can also use the arrow keys on your keyboard to select a desk’s thumbnail and press Enter to access the virtual desktop.

To switch between desks in tablet mode on Chromebook, swipe up from the bottom of your Chromebook’s screen, release your finger when the active windows appear on the screen, then tap the desktop’s thumbnail.
Method 2: Using Touchpad Gesture
Swipe 4 fingers to the left on your Chromebook’s touchpad to switch to the nearest desk on the right. Conversely, swipe 4 fingers to the right to activate the desk on the left.
Method 3: Using Keyboard Shortcuts
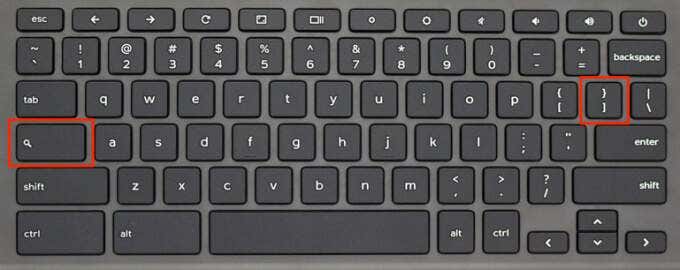
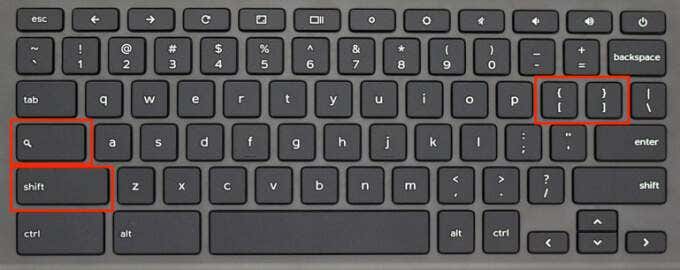
Chrome OS has several productivity-enhancing keyboard shortcuts , some of which allow you to easily switch between desks on Chromebook. To switch to a desk on the right-hand side of the desktop row, press the Search (🔎) + Right Squared Bracket ( ] ) keys.
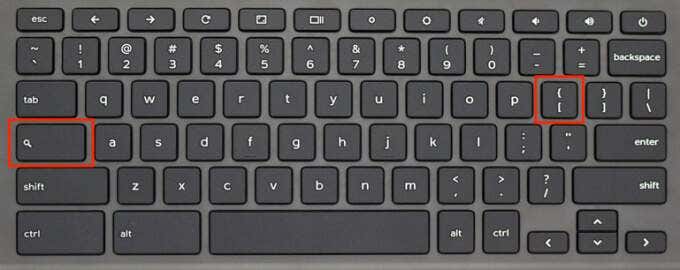
If you have multiple desks opened, keep pressing these keys until you land on your preferred desk. To move back to a desk (on the left), use the Search (🔎) + Left Squared Bracket ( ] ) shortcut.
Move or Rearrange Virtual Desktops on Chromebook
You can change the sequence of your virtual desktops. That allows you to neatly organize multiple desks for easy accessibility. Say you have 8 virtual desktops opened, you can move work-related desks to the right while casual or entertainment-related desks stay on the left.
In Overview Mode, tap and hold a desk, then drag it to your preferred position.
Moving Apps or Windows Between Virtual Desktops
There are two ways to move applications from one desktop to another on Chrome OS. You could drag the app to the destination desktop, or use keyboard shortcuts.
Press the Show windows or Overview key and drag the app/window to your preferred virtual desktop.

To move an app between desktops using keyboard shortcuts, open the app and press Shift + Search + Left Squared Bracket ( [ ). That will move the app/window to the desk on the left. To move an app to a desktop on the right, press Shift + Search + Right Squared Bracket ( ] ).
View All Windows in a Virtual Desktop
Although you can view all active apps/windows in Overview mode, there’s a nifty (and maybe better) alternative. Press Alt + Tab and you’ll see the windows opened across all desks. To view active tabs in the current desktop, hold Alt + Tab and then select Current desk .
Closing Virtual Desktops on Chromebook
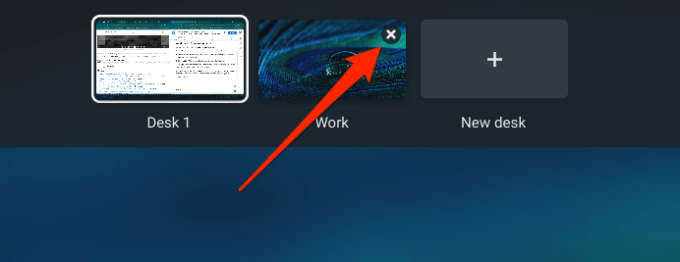
To close a desktop, hover the cursor on the desk’s thumbnail and click the x icon at the top corner.
A quicker way to do this is using the Shift + Search + Minus (-) keyboard shortcut. That’ll instantly close the current desktop.
Rename Your Virtual Desktops
Want to give your desktop a different descriptive label? Press the Overview button, click the desk’s name (the mouse cursor should change to text cursor), and type a new name.

What’s More: Virtual Desktops Are Persistent
Chrome OS doesn’t delete or reset your Virtual Desktops when you reboot your Chromebook. Everything stays intact—desk name, arrangement, and position. However, shutting down your Chromebook will close all applications and windows within every desk.
Troubleshoot Virtual Desktop Problems on Chromebook
Virtual Desktops are very stable on Chromebooks. However, if you encounter any problem while creating, using, or switching between desks, restart your Chromebook and try again.
If the issue persists, ensure your Chromebook is up-to-date; go to Settings > About Chrome OS > Check for updates to update Chrome OS to the latest version. Drop a comment below if you have any questions or need help regarding Chromebook’s Virtual Desktops.
- Top 4 Ways to Fix Chromebook White Screen Issues
- Chromebook Keeps Turning Off? 9 Fixes to Try
- How to Install and Use VirtualBox on Your Chromebook
- How to Install and Run Windows Apps on Your Chromebook
- How to Play Videos on Chromebooks (And the Best Video Players to Use)
Sodiq has written thousands of tutorials, guides, and explainers over the past 4 years to help people solve problems with Android, iOS, Mac, and Windows devices. He also enjoys reviewing consumer tech products (smartphones, smart home devices, accessories, etc.) and binge-watching comedy series in his spare time. Read Sodiq’s Full Bio
