Do you take screenshots regularly? If so, you know that sometimes you want to take a screenshot of your whole screen, but other times you only need to capture part of your screen.
Fortunately, there are many ways to take a partial screenshot, whether you’re using a PC, Mac, or Chromebook, or even if you’re playing a game on Steam. Here’s how to take partial screenshots on Windows computers.
1. Snipping Tool
The Snipping Tool has been installed on Windows PCs since the days of Windows Vista. It’s so helpful and popular that it has remained part of the OS ever since. You can use the Snipping Tool to take full and partial screenshots.
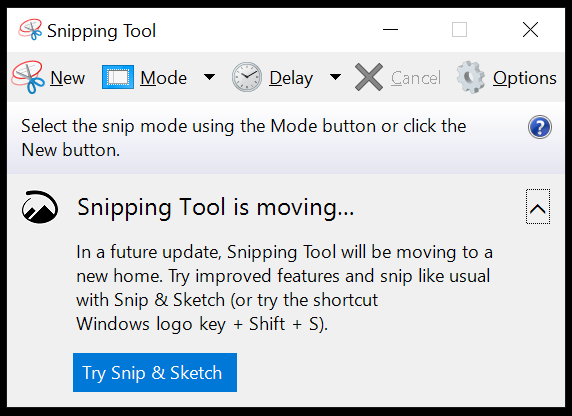
Launch the Snipping Tool by searching for it by name in the search field on the Windows taskbar or look for it in Start Menu > Programs > Windows Accessories. If you only want to capture part of the screen, use the rectangular snip or the free-form snip, which you can find in the Mode menu. The Snipping Tool also offers a delay if you need a few seconds to set up the right conditions for your screenshot.
Once you’ve captured the screenshot, you’ll have access to various tools.

Select the Save icon to save the image as a PNG file. Select the Copy to place the image on the clipboard. The Send icon contains options to insert the screencap in the body of a new email or as an attachment. Use the Pen , Highlighter, and Eraser tools to the Paint 3D app on your computer for editing.
2. Snip & Sketch Tool orWindows+Shift+S
Ultimately, Microsoft wants people who use Windows 10 to abandon the Snipping Tool and use Snip & Sketch instead. Most recent versions of Windows come with Snip & Sketch installed. Select the Start button and begin typing “ Snip & Sketch .”
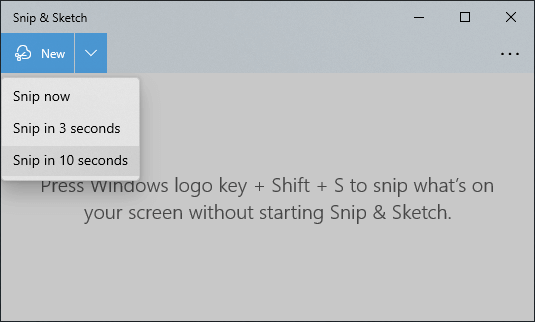
Launching the Snip & Sketch app will give you access to the delayed snip feature, which you can find in the New button’s dropdown menu. Once you select New , your screen will look grayed out, and you’ll see a small Snip & Sketch toolbar at the top of the screen. Select rectangular snip, free-form snip, window snip, or full-screen snip.

Once you use Snip & Sketch’s convenient keyboard shortcut, you might never use another method again. Simply press Windows + Shift + S . The Windows key is the one with the Windows logo on it.
Select which kind of snip you want to take. If you select the rectangular snip tool, your cursor will change to a crosshair, so your selection can be ultra-precise.
No matter which type of snip you take, the image is copied to the clipboard. To view, save, or edit the snip, you’ll need to paste it into another application with Edit > Paste or press Ctrl + V .
3. PrintScreen Key
Pressing the PrintScreen key is the most old-school way to take a screenshot, but you can’t use it to take a partial screenshot. The best you can do is use the PrintScreen button to copy the entire screen to the clipboard and then crop the image with an image editing app like Paint or Photoshop .
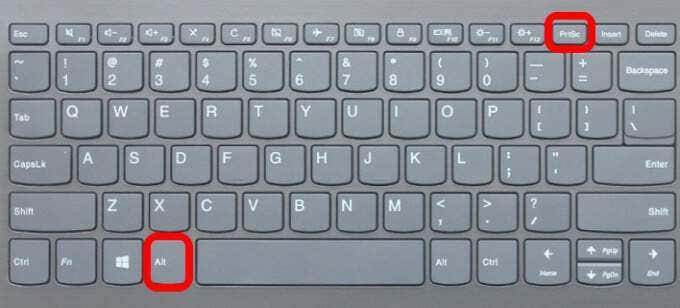
If you press Alt + PrintScreen , it will capture only the active window and not the whole screen. There won’t be any indication that anything has happened, and, again, you’ll need to paste the image into another app to view or edit it.
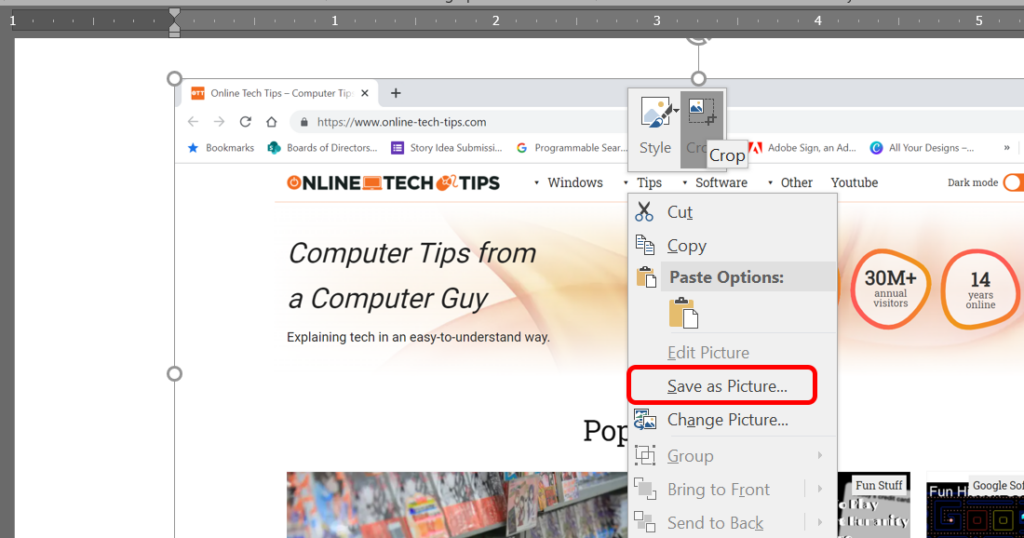
Besides using an image editing app to view and save your screenshot, another option is to paste into Microsoft Word and use Word’s picture editing tools to crop the image. Then right-click the image and select Save as picture .

Depending on what kind of keyboard you have, the PrintScreen key might be labeled in several ways—Prt sc, Prtsc, PrintScreen, or PrtScn are the most common.
However, perhaps the most useful way you can use your PrintScreen button is to set it to open the Snip & Sketch tool.
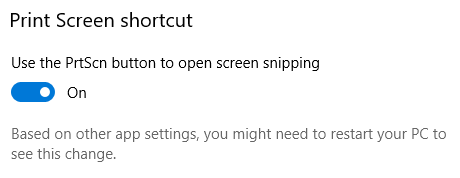
Do that by visiting Settings > Ease of Access > Keyboard . Under Print Screen shortcut , toggle Use the PrtScn button to open screen snipping to the On position.
Note: Some apps like OneDrive, Dropbox, and image capturing programs like the ones mentioned below, can take over the PrintScreen key. It can be difficult to figure out which app is using the PrintScreen hotkey . Those are the most common, so check them first if you’re having trouble.
4.EaseUS RecExperts App
EaseUS RecExperts is a screen recorder app. It offers tons of features, including recording from your webcam. To take a partial screen capture, select the Region screenshot tool. Your screen will dim, and you can drag the crosshair cursor to capture the screen area you want to copy. Next, select the Screenshot icon or press the F11 key on your keyboard to take the screenshot.
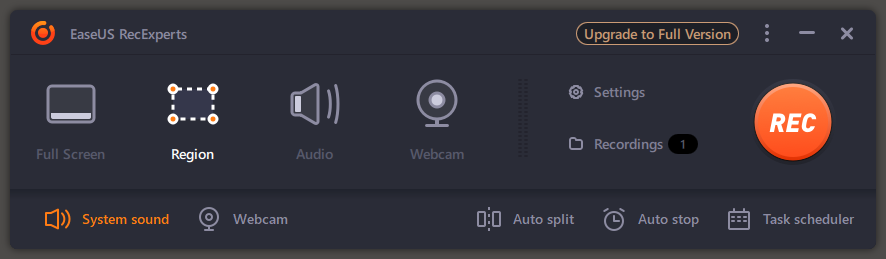
Screenshots created with EaseUS RecExperts are saved in a screenshots folder in Videos > EaseUS RecExperts .
5.LightShot App
LightShot is another third-party, free app that helps you take a fast screenshot of a selected area. Once you’ve installed it, press your keyboard’s PrintScreen button.
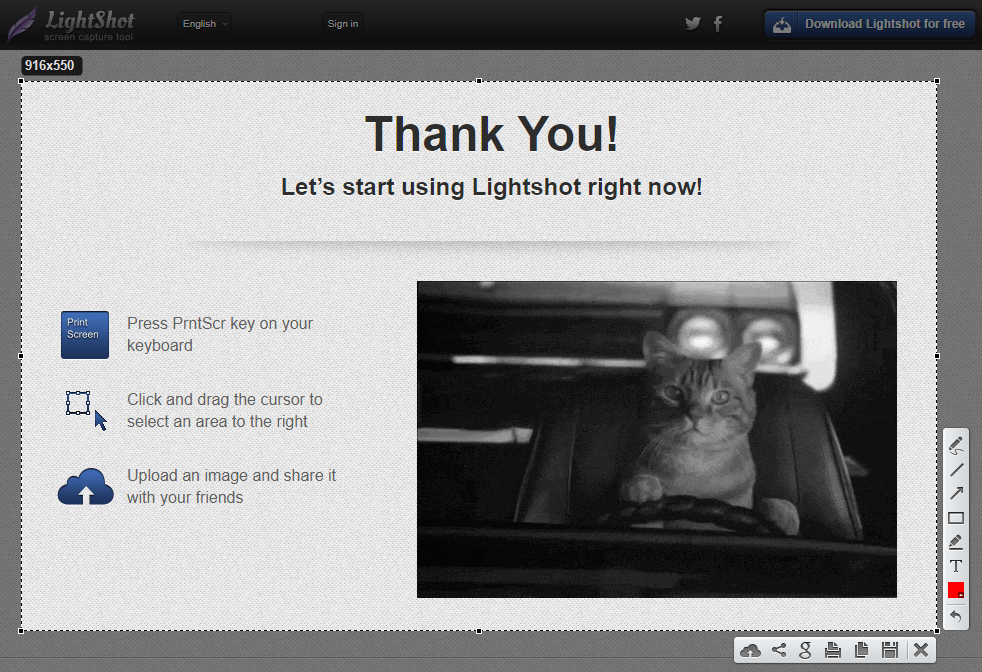
Click and drag to select an area, and LightShot will give you a few annotation tools and ways to save or share your screenshot quickly.
6.WinSnap App
Download the WinSnap app from Ntwind Software if you want your screenshots to have rounded corners or shadows, reflections, highlights, outlines, watermarks, or color effects.

WinSnap also offers a pixelate tool to help you remove sensitive information from your screenshots. This app is packed with features—even the user interface comes in various styles. Purchase a lifetime single-user license for $29.95. A license will allow you to install WinSnap on all of your computers for your personal use.
- Preparing for Windows 10 End of Support: Upgrading to Windows 11
- How to Fix a “This file does not have an app associated with it” Error on Windows
- How to Fix an Update Error 0x800705b4 on Windows
- How to Resolve “A JavaScript error occured in the main process” Error on Windows
- How to Fix the Network Discovery Is Turned Off Error on Windows
Maggie Marystone is a freelance technology writer, human rights worker, and storyteller based in Chicago. Read Maggie’s Full Bio
The Print Screen button can easily capture your screen in Windows 10 . PrtScr is one of the most well recognized keys on a keyboard and it’s a function that everyone knows how to use. It’s the simplest way to take a screenshot as it captures the entire screen, which can be helpful at times.
However, the tips below can help when Print Screen is not working on your Windows PC or Mac. Macs don’t have a Print Screen button, but the built-in screenshot shortcuts might not work and we’ll help you fix that issue if you’re experiencing it.

What to Do When Print Screen is Not Working
Try some of the quick fixes below and see if they help before moving to other solutions in this guide.
Quick Fixes
- Check the clipboard on your computer to see if the screenshot has been saved there. Press Windows logo key + V to access the clipboard.
- Update your operating system .
- Use the on-screen keyboard to access the virtual PrtScn button and capture your screen. Select Start > AllPrograms > Accessories > Ease of Access > On-Screen Keyboard .
- Hold down the F Lock or F Mode keys to disable them to see if that gets the Print Screen key working again.
- Disable any third party screenshot programs like, Snagit, on your system.
- Check out our guide on how to capture full page screenshots in Chrome & Firefox if the Print Screen button is not working for those browsers.
- Make sure the key itself is functioning properly. You can do this using an online key tester . If broken, you may need to replace the keyboard. It may also be worth investing in a mechanical keyboard , which are known to be more durable and last longer.

How to Fix Print Screen Not Working in Windows 10
You can troubleshoot the Print Screen not working problem on your Windows PC using the following solutions.
Use a Hotkey Combination
Windows 10 has lots of helpful keyboard shortcuts for taking screenshots. Use the hotkey combinations below to see if you can capture these alternative screenshots.
- Press Alt + PrtScn to capture the currently selected window.
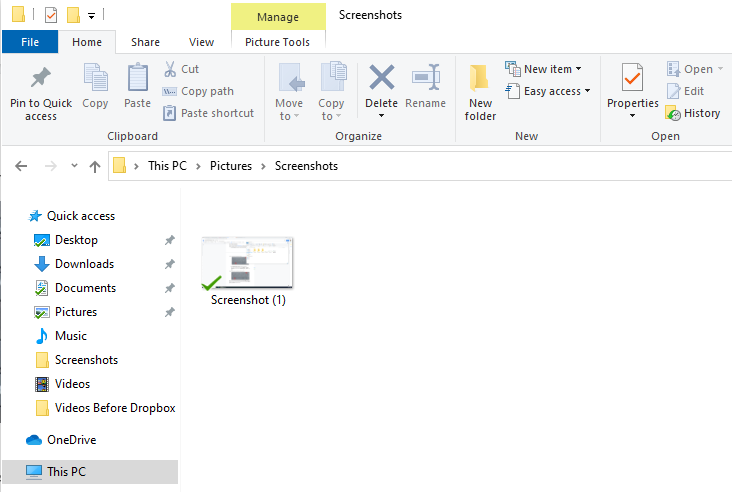
- Press Windows logo key + PrtScn to capture the screenshot. In this case, the screenshot will be saved to File Explorer > Pictures > Screenshots .
You can also use Fn + Windows logo key + PrtScn on your laptop.
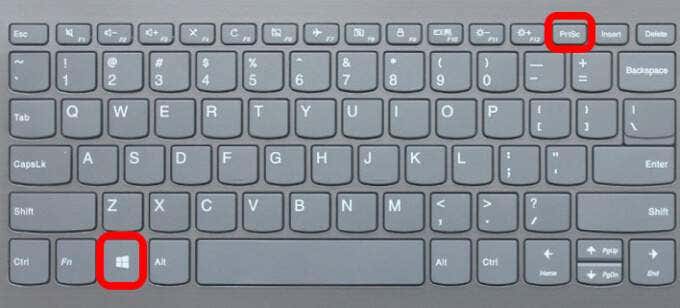
- If your PC uses the HID keyboard driver, use the Fn + PrtScn combination to capture your screen. If your device doesn’t have the PrtSc key, use Fn + Windows logo key + Space Bar to capture the screen.
These keyboard shortcuts will save this image to the Windows clipboard. Open a photo app, like MS Paint, and paste the image if you want to save it as a file.
Update Keyboard Driver
If the keyboard driver is outdated, corrupted or incorrect, it may cause the Print Screen function not to work properly and may need an update.
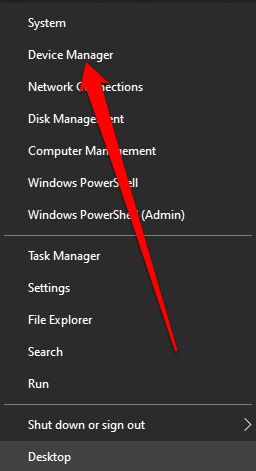
- Right-click Start > Device Manager .
- Select the Keyboards section to expand it, right-click your keyboard and select Update driver .
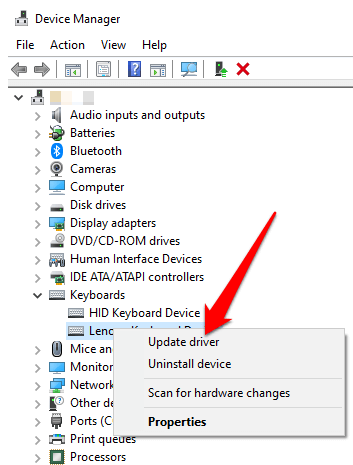
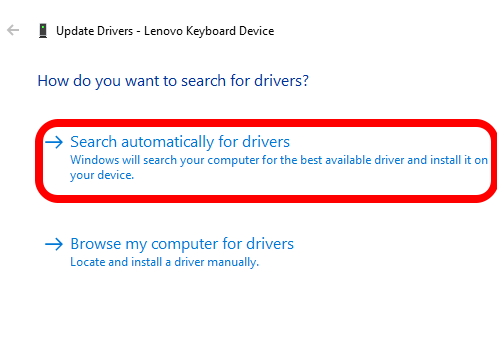
- Next, select Search automatically for updated driver software to install the latest keyboard driver.
- Restart your computer and see if the Print Screen function works.
Note : You can also go to your keyboard manufacturer’s official website, look for the latest driver, download and install it.
Use Game Bar
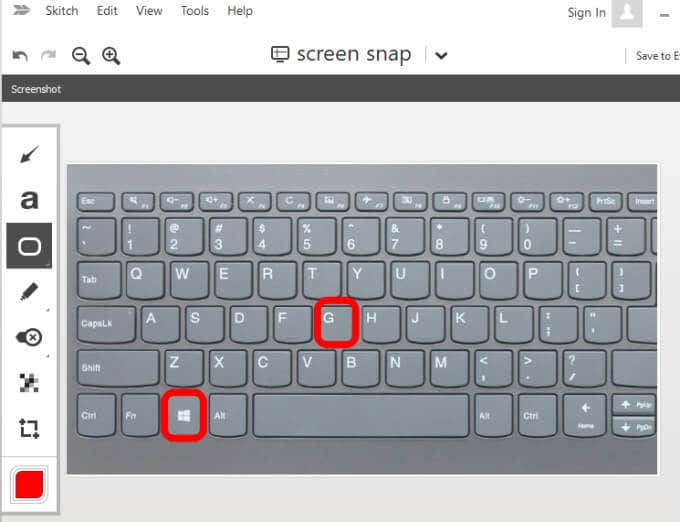
If you’re still not able to use the Print Screen function, you can use Game Bar to take a screenshot. Game Bar is a built-in feature in Windows 10 that allows you to record your screen and capture screenshots while playing PC games.
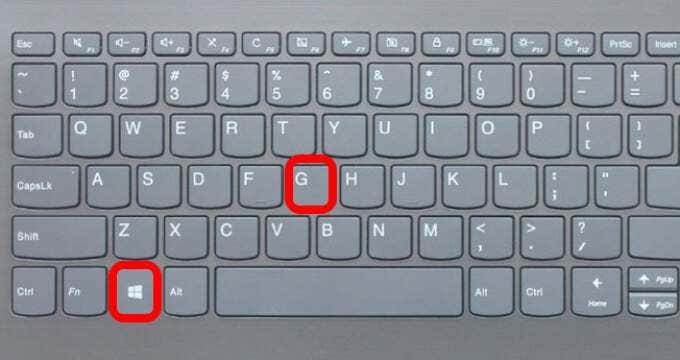
- Press Windows logo key + G to open Game Bar and capture everything on your screen.
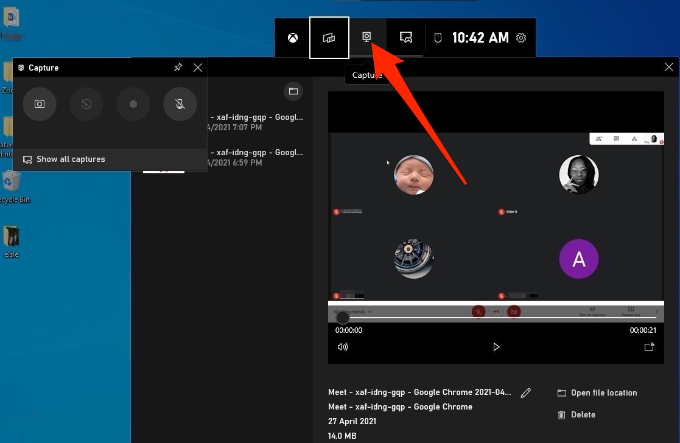
- In the Game Bar screen, select the Screen Capture icon.
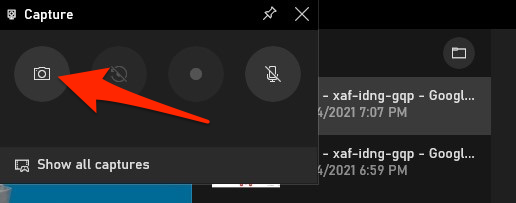
- Next, select the camera icon to take a screenshot.
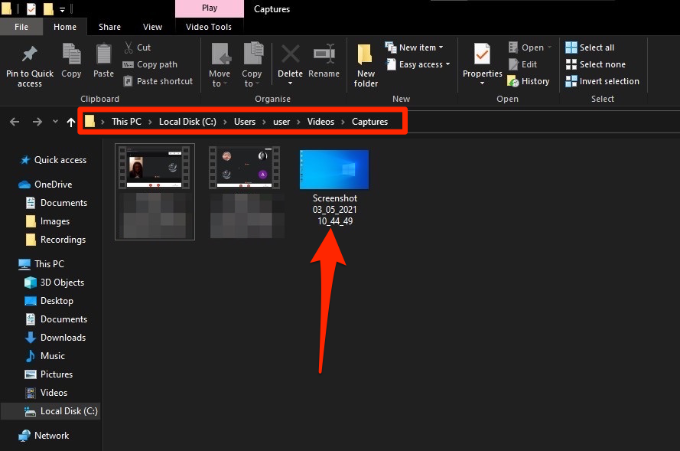
Your screenshot will be saved in the Captures folder. Go to This PC > Local Disk (C:) > Users > User > Videos > Captures .
Edit the Windows Registry
The Windows Registry stores information like user profiles, apps installed on your PC and others, which are needed to configure the system. You can edit the registry to fix the Print Screen button not working problem on your computer.
Note : Follow these steps carefully because any slight mistake could affect your computer adversely. Before you begin, create a System Restore point or back up your computer including your media files.
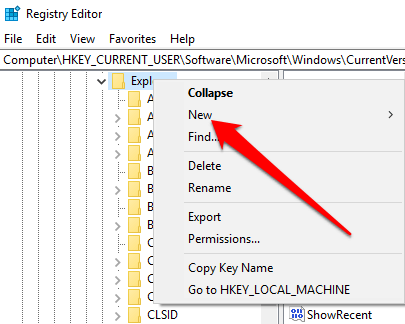
- Right-click Start > Run , type regedit in the Run box and press Enter or select OK .
- Navigate to this registry key: HKEY_CURRENT_USER\Software\Microsoft\Windows\CurrentVersion\Explorer .

- Right-click Explorer, select New > DWORD and then rename it ScreenShotIndex .
- Double-click DWORD , set the Value data to 1 and then select OK .

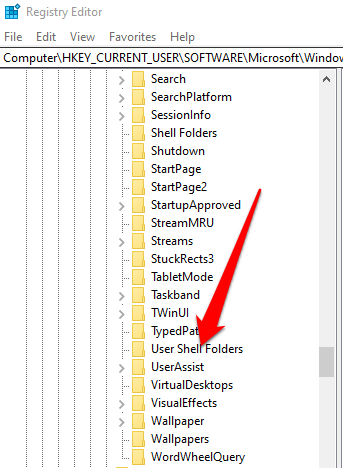
- Navigate to HKEY_CURRENT_USER\Software\Microsoft\Windows\CurrentVersion\Explorer\User Shell Folders .
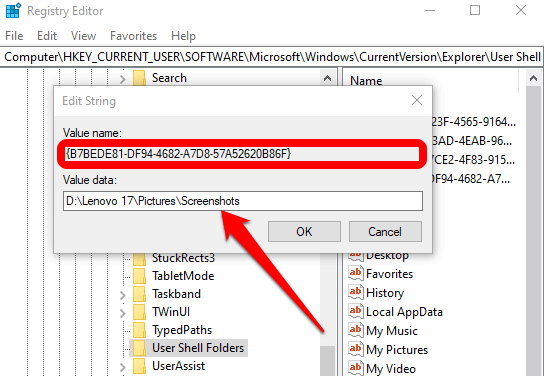
- Check whether the {B7BEDE81-DF94-4682-A7D8-57A52620B86F} string’s Value data reads %USERPROFILE%\Pictures\Screenshots .
- Exit the Registry Editor and restart your computer.
- Click PrtScn or Windows logo key + Fn + PrtSc keys. You can check for the screenshot in File Explorer > Pictures > Screenshots folder.
How to Fix Print Screen Not Working on a Mac
While your Mac may not have the PrtScn button, the built-in screenshot feature may stop working and you may not know how to fix it. Here are a few things to try.

- Confirm that your screenshots are available in the correct location i.e. your desktop, as this will determine whether the screenshot function works or not.
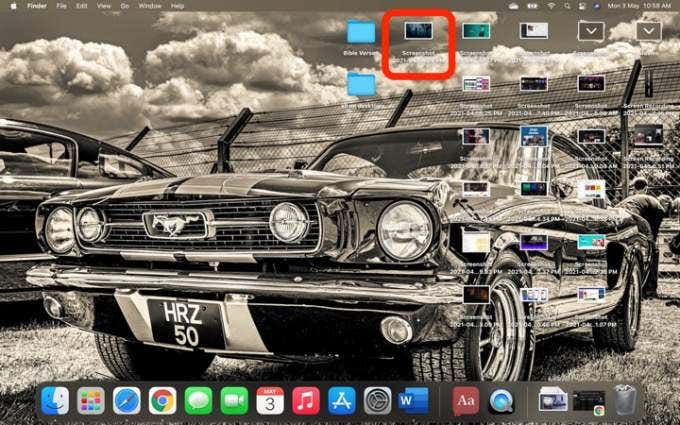
- Use the Preview app or Screenshot app (macOS Mojave or later versions) to take screenshots.
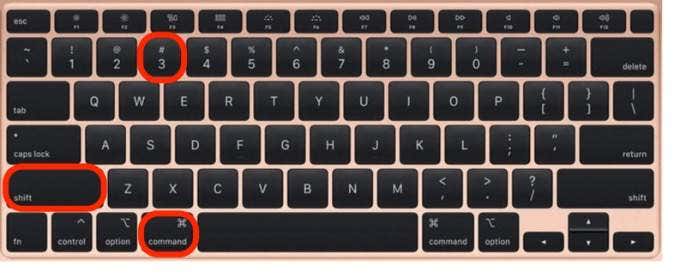
- Restart the Mac and take screenshots using Shift + Command + 3 to capture the whole screen or Shift + Command + 4 to capture a portion of the screen.
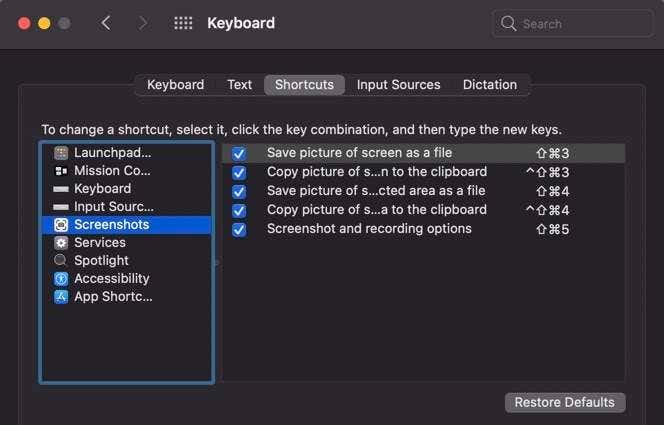
- Check whether the screenshots keyboard shortcuts are enabled, or they’ve been reassigned to other actions. Go to Menu > System Preferences > Keyboard > Shortcuts .
- Use Grab to take a screenshot. Select Go > Applications > Utilities > Grab to open it and then select Capture to take a screenshot. In macOS Mojave and later, Grab has been replaced with a new tool. You can access it by pressing Command + Shift + 5 .
- Reset the NVRAM to resolve issues with functionality and core Mac apps.
Other Alternatives
Listed below are some alternatives to the Print Screen button:
- Use the built in Use Snip & Sketch for Windows .
- Use tools like Snagit or Skitch , which take great screenshots on Windows and Mac computers.
- Preparing for Windows 10 End of Support: Upgrading to Windows 11
- How to Fix a “This file does not have an app associated with it” Error on Windows
- How to Fix an Update Error 0x800705b4 on Windows
- How to Resolve “A JavaScript error occured in the main process” Error on Windows
- How to Fix the Network Discovery Is Turned Off Error on Windows
Elsie is a technology writer and editor with a special focus on Windows, Android and iOS. She writes about software, electronics and other tech subjects, her ultimate goal being to help people out with useful solutions to their daily tech issues in a simple, straightforward and unbiased style. She has a BCom degree in Marketing and currently pursuing her Masters in Communications and New Media. Read Elsie’s Full Bio
