Many Windows computers come with Bluetooth connectivity, which you can use to connect most of your devices like smartphones, speakers, headphones, printers, earbuds, and more.
If yours doesn’t have Bluetooth, you can always use a Bluetooth adapter. It’s an inexpensive way of getting Bluetooth connectivity for your devices and it’s easy to install.

However, Bluetooth tends to drain your device’s battery life when it’s in use, and leaving it on comes with some security risks. Read our piece on What Is Bluetooth & What Is It Commonly Used For for more Bluetooth limitations.
If you want to use Bluetooth for wireless audio, to transfer some files or use your wireless mouse, keyboard or other peripheral, here’s a step-by-step guide on how to turn on Bluetooth on Windows 10.
Turn on Bluetooth on Windows 10
There are three methods you can use to turn on bluetooth on Windows 10
- Use Windows Settings
- Turn on Bluetooth from Action Center
- Use Swift Pair
We’ll go through these one at a time.
1. Use Windows Settings
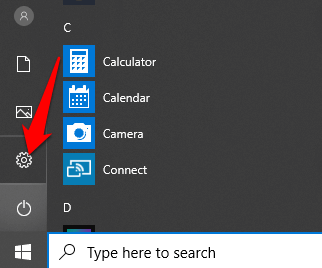
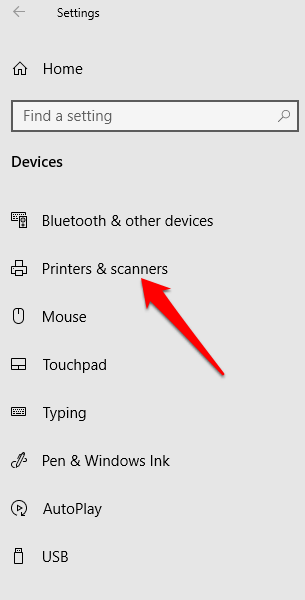
The first step before using your Bluetooth device is to configure the Bluetooth settings in Windows 10. To do this, go to the Settings app in Windows 10 by clicking on the Start button, and then click on the Settings icon.
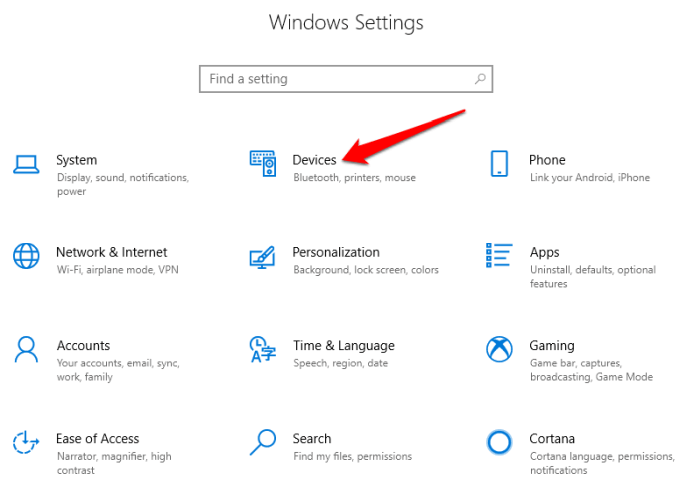
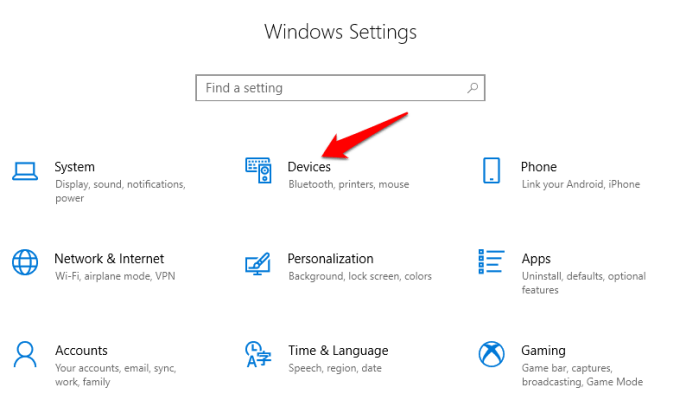
Next, click Devices .
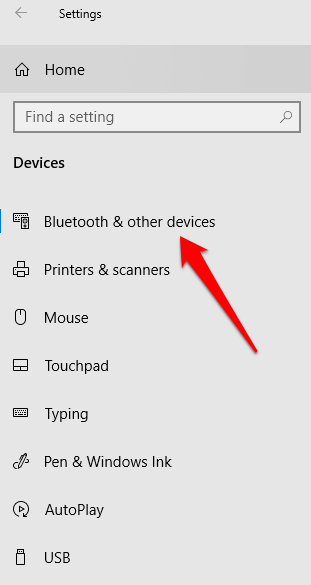
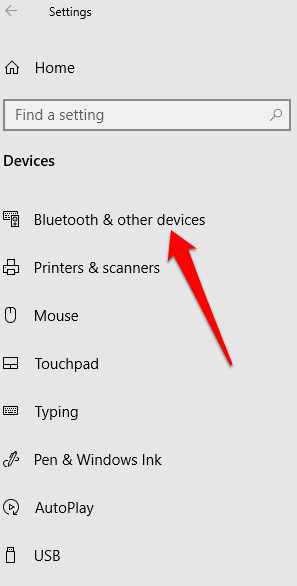
Click Bluetooth & Other Devices .
Note: If the Bluetooth toggle isn’t available on the Bluetooth & Other devices settings, your Windows computer probably doesn’t have the Bluetooth feature, or the related hardware isn’t recognized.
Click More Bluetooth options under the Related Settings section for more Bluetooth settings. .
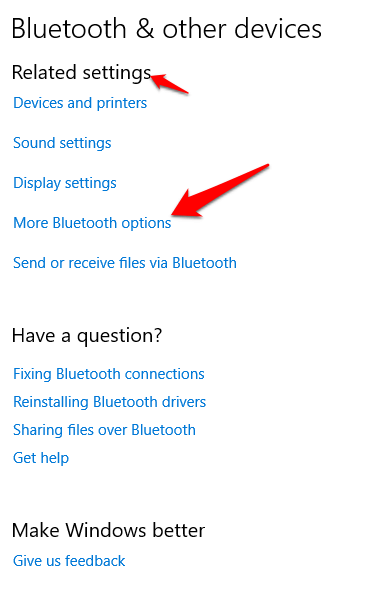
You can expand the window to see the options on the right menu
2. Turn on Bluetooth in Action Center
The Action Center in Windows 10 allows you to access quick settings and actionable app notifications.
You can find the Action Center icon on your taskbar at the lower right side of your screen.
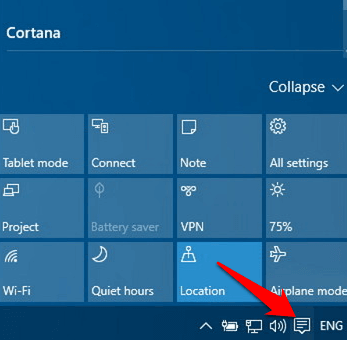
When you click on it, you’ll see the quick settings and app notification icons. Click All Settings .
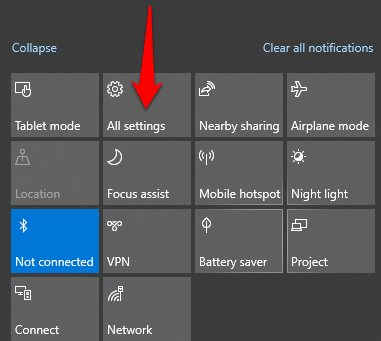
Next, click Devices .
Click Bluetooth and other devices on the left hand side.
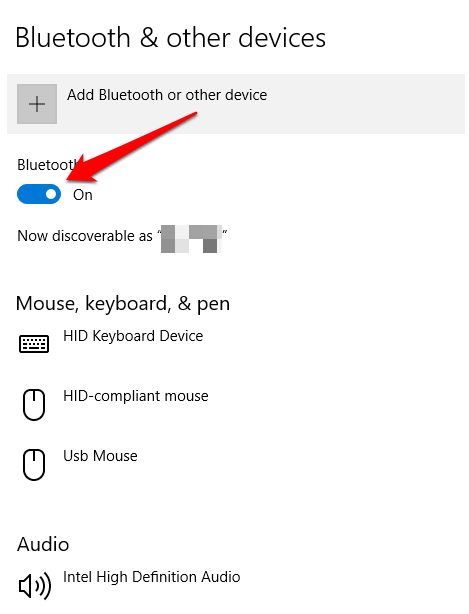
Toggle the Bluetooth slider to On.
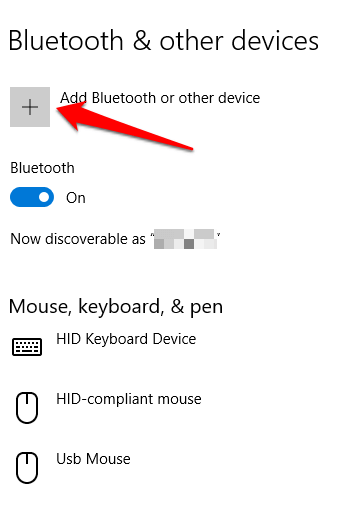
Click Add Bluetooth or other device .
Click Bluetooth . Windows will begin searching for available Bluetooth devices.
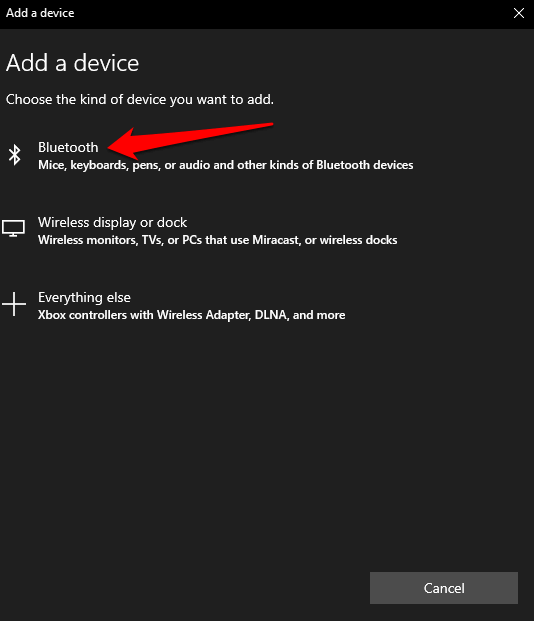
If your other device has Bluetooth on, or it’s in pairing mode, you’ll see its name appear on the list of available devices. From here, you can click or tap on the device you want to pair with and once connected, it’ll be part of your list of connected peripherals.
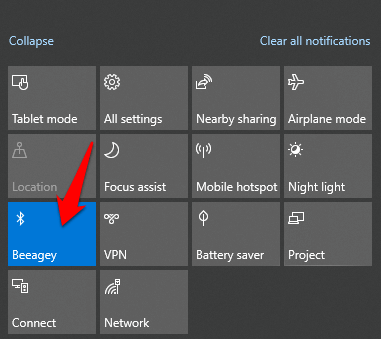
Alternatively, click on the Bluetooth button in Action Center to toggle it on or off. If it’s not connected, you’ll see the Bluetooth icon with the label “Not Connected”. If it’s grayed out, then Bluetooth is off. If you click on it, the button turns blue indicating that Bluetooth is turned on (the Bluetooth icon will also appear on your taskbar).
Note : Your paired Bluetooth device should automatically connect whenever it’s within range or turned on.
If you’re experiencing difficulties connecting Bluetooth or it just won’t work on your computer or device, check out the troubleshooting tips to use when Bluetooth doesn’t work on your computer or smartphone .
How to Connect a Bluetooth Device to Your Windows PC
You can connect many kinds of Bluetooth devices to your computer such as phones, printers, speakers, mice and keyboards among others. Your computer needs to have Bluetooth for this to work, but if it doesn’t, try using a USB Bluetooth adapter to get Bluetooth.
We’ll look at a few of the common devices you can connect to your computer running Windows 10 via Bluetooth.
Printer/Scanner
Depending on the type of printer or scanner you’re using, turn on its Bluetooth setting and make it discoverable.
On your Windows computer, use the steps above to turn on Bluetooth (via Settings or Action Center).
Next, go to Settings and click Devices . Click Printers & Scanners on the left pane.
Click Add a printer or scanner . Windows will search for nearby printers or scanners.
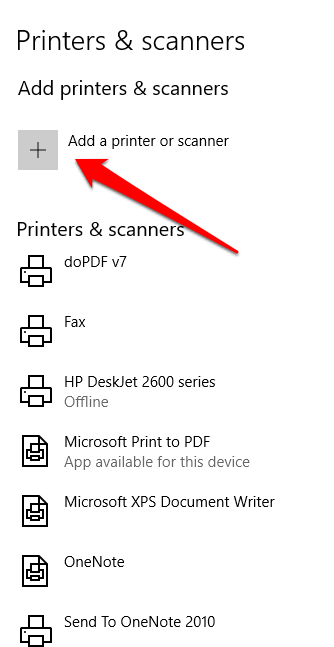
Click on the printer or scanner you want to use and then click Add device .
Note : If you have issues installing your printer or scanner, see our guide on how to troubleshoot common printer problems in Windows 10 or how to add a wireless or network printer in Windows 10 . If your scanner is acting up, try one of our best scanner apps to scan and manage your documents .
Audio devices
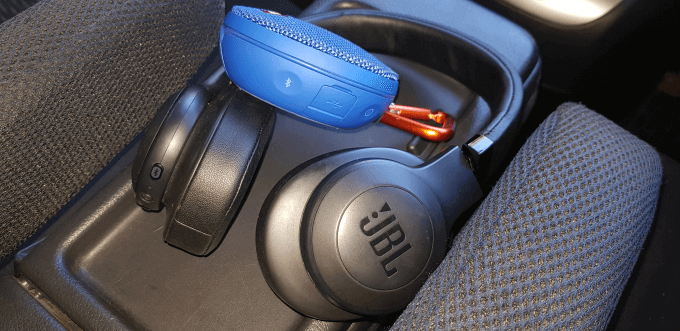
If you want to connect a pair of headphones, a speaker or other audio device to your Windows PC, turn on the device and make it discoverable (the method for this depends on the device you’re using).
Most wireless speakers have a Bluetooth button next to the other controls while headphones have a Bluetooth button on the earcup. You can check the device manufacturer’s website or the manual that came in the package to find out where it is.
Turn on Bluetooth on your Windows 10 computer, and then go to Settings > Devices and click Bluetooth & Other devices . Turn on Bluetooth . Alternatively, use the Bluetooth button in the Action Center.
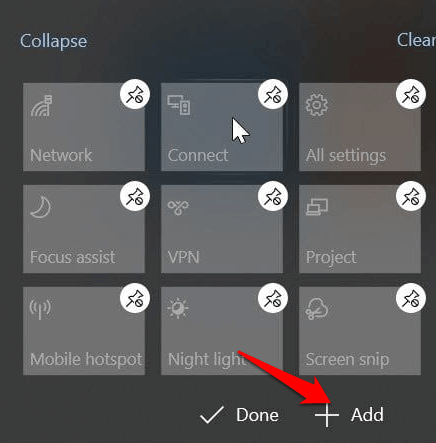
Note : If you don’t see the Bluetooth button in Action Center, click Start > Settings > System .

Click Notifications & Actions , and then go to Quick Actions > Edit your Quick Actions .
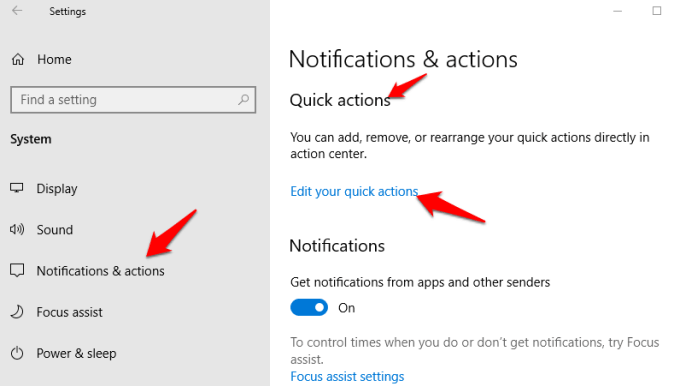
Click +Add and select Bluetooth to include it on the Quick settings in the Action Center.
Click Connect while in Action center, and click on the device you want to pair with your computer. You’ll see the discoverable device on the list of available devices from the Bluetooth & other devices page.
Your devices will be paired and connected, and you can enjoy your music, podcasts or movies and other media via your Bluetooth audio device.
Related: Learn what to do if Bluetooth keeps disconnecting in Windows .
Mouse, Keyboard or Other Peripherals

If you want to use a wireless mouse or keyboard when working or gaming, turn on the device to make it discoverable and then turn on Bluetooth on your Windows PC.
Select the device from the list of available Bluetooth devices, and wait until it pairs with your computer and they’re both connected.
Use Swift Pair
Swift Pair is a service in Windows 10 that allows you to pair supported Bluetooth devices with your PC, thereby reducing the steps needed to pair devices. If the device also supports Swift Pair, you’ll get a notification whenever it’s within range or nearby to make it discoverable.
To use Swift Pair, turn on the device and make it discoverable (this method depends on the device you’re pairing. You can visit the manufacturer’s website or use the manual for more information).
Go to Settings > Devices > Bluetooth & Other devices and click the Show notifications to connect using Swift Pair box.
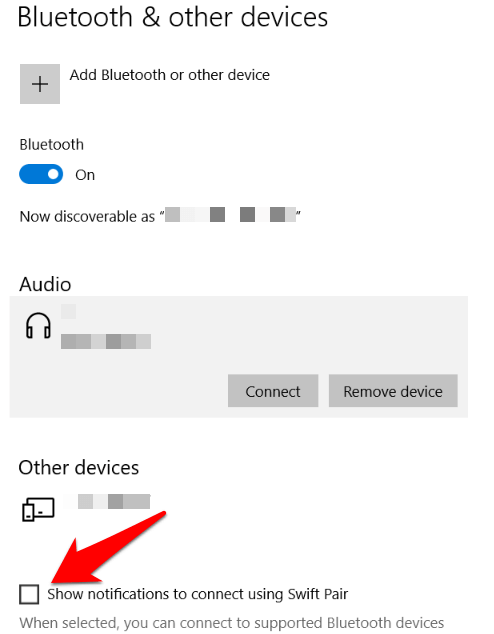
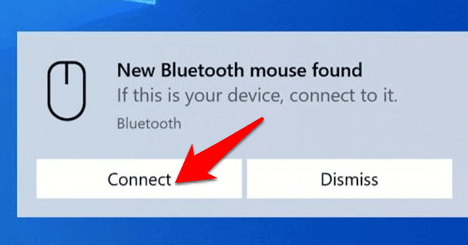
Select Yes (if it’s your first time using Swift Pair) to get notifications and use the service. Click Connect when the “New Bluetooth device was found” notification appears. Once connected, click Close .
Enjoy Wireless Freedom
We hope you now know how to turn on Bluetooth in Windows 10 and pair all your Bluetooth devices with your computer. You can now send and receive files from a Bluetooth device to your PC , listen to podcasts, music and other audio files, and much more.
- Preparing for Windows 10 End of Support: Upgrading to Windows 11
- How to Fix a “This file does not have an app associated with it” Error on Windows
- How to Fix an Update Error 0x800705b4 on Windows
- How to Resolve “A JavaScript error occured in the main process” Error on Windows
- How to Fix the Network Discovery Is Turned Off Error on Windows
Elsie is a technology writer and editor with a special focus on Windows, Android and iOS. She writes about software, electronics and other tech subjects, her ultimate goal being to help people out with useful solutions to their daily tech issues in a simple, straightforward and unbiased style. She has a BCom degree in Marketing and currently pursuing her Masters in Communications and New Media. Read Elsie’s Full Bio
Printers experience several forms of malfunctions, some of which are easy to fix. Fixing printer issues can be a headache—especially on Windows devices—because there’s a wide range of things that could be wrong.
The problem could stem from your PC, the printer, or the connection between both devices. This tutorial highlights ten likely troubleshooting measures for printers that won’t print.
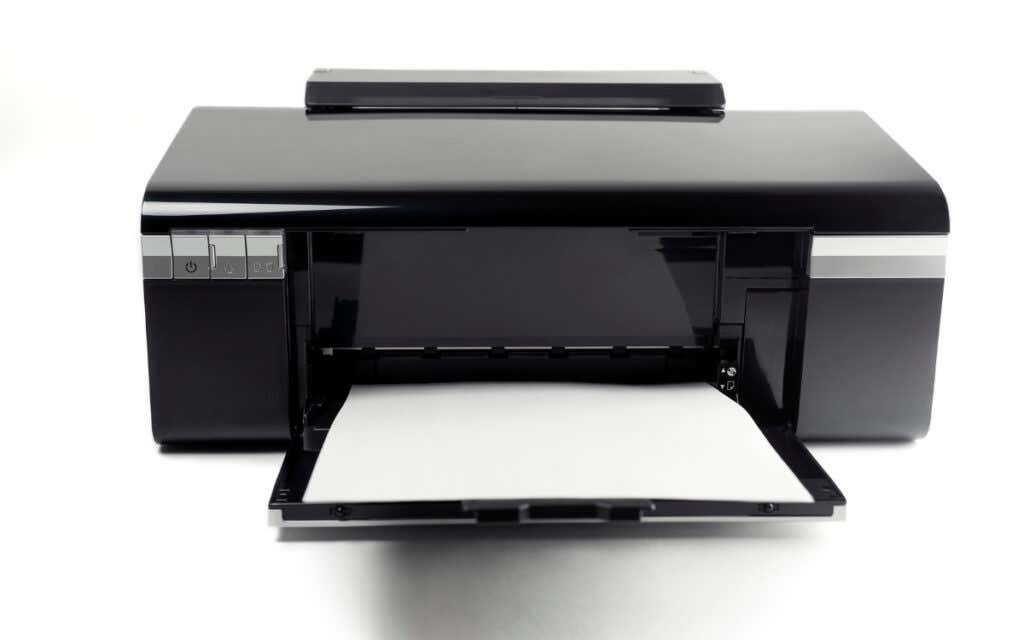
1. Check Paper Tray and Printer Connection
Many printer models won’t print if there’s a loose USB connection or if they’re out of ink or paper. Verify your printer’s ink levels, clean the printhead, fill the paper tray, and avoid using substandard paper. Low-quality paper can cause “Ghost Paper Jams” and other issues that stop your printer from printing documents.
For printers using a wired connection, ensure both cable ends are plugged firmly into your printer and computer. Go through the printer’s manual for instructions on connecting the device to your Windows or Mac computer.
Wireless printers won’t print documents if connected to the wrong Wi-Fi network. Make sure your printer and computer are on the same wireless network. Likewise, check your router settings, disable VPN connections, and make the printer’s IP address static. Refer to our tutorial on troubleshooting Wi-Fi (wireless) printers for more fixes.
2. Run the Printer Troubleshooter
Windows has a suite of troubleshooting tools that diagnoses and resolves hardware and software problems. We recommend running the Printer Troubleshooter before trying other more complex measures.
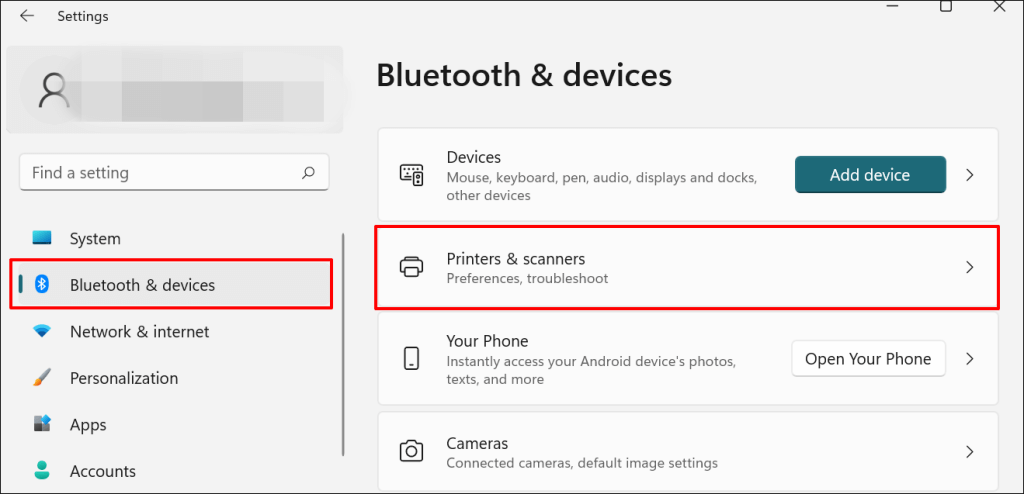
- Go to Settings > Bluetooth & devices > and select Printers & scanners .
In Windows 10, go to Settings > Devices > Printers & scanners .
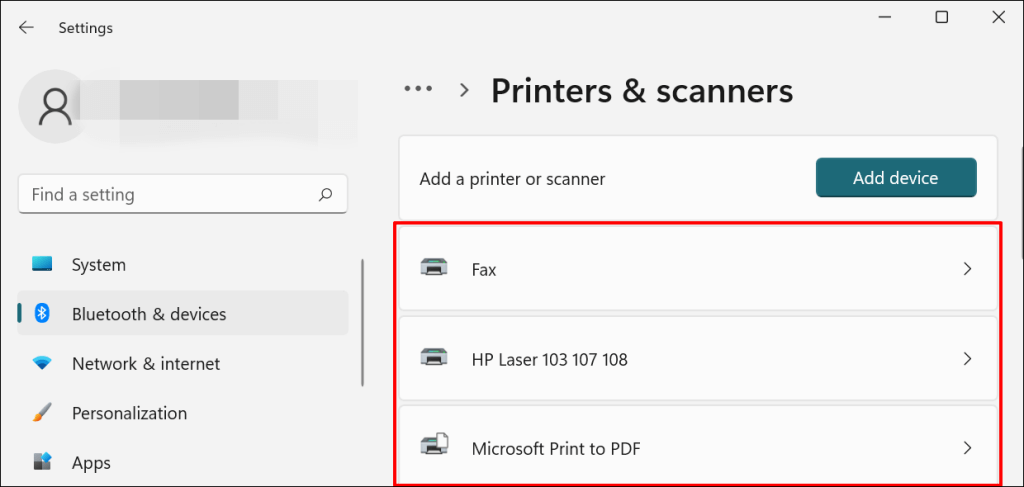
- Select the problem printer from the list of connected devices.
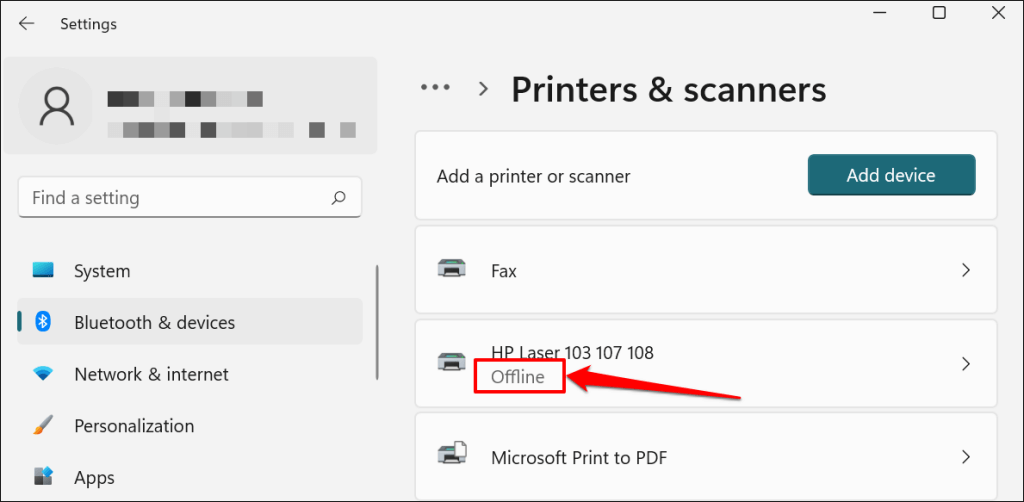
Note: If your printer status reads “Offline,” refer to our troubleshooting tutorial on getting an offline printer back online . Proceed to the next step if your printer is online.
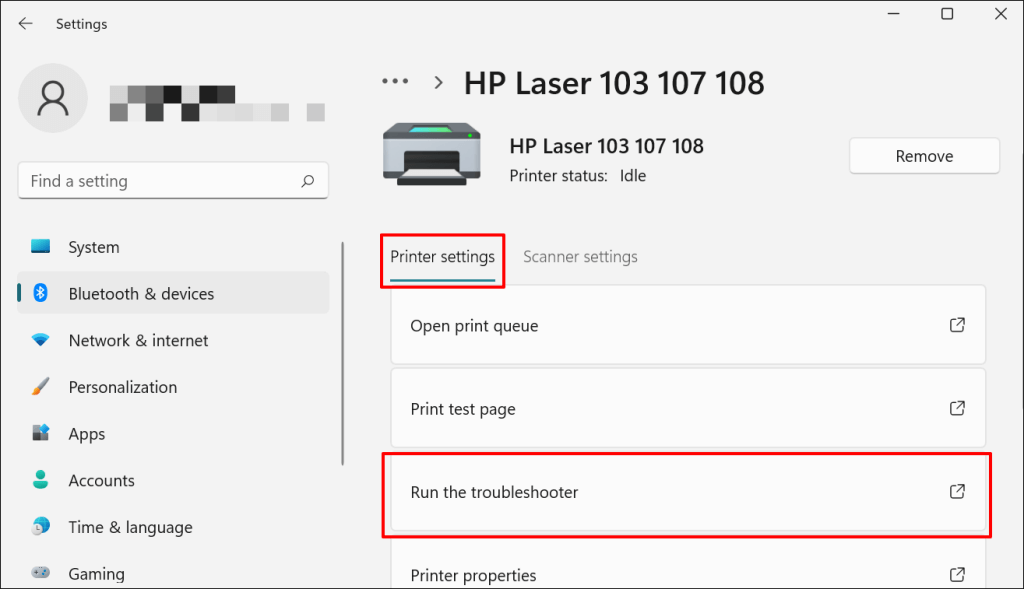
- Select Run the troubleshooter in the “Printer settings” tab.
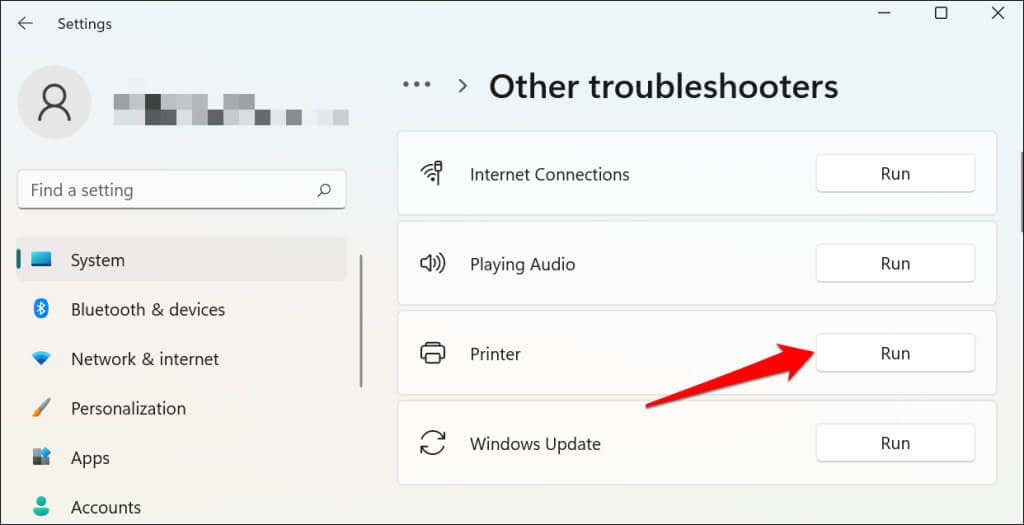
There’s another way to access the printer troubleshooter in Windows 11. Go to Settings > System > Troubleshoot > Other troubleshooters and select Run next to “Printer.”
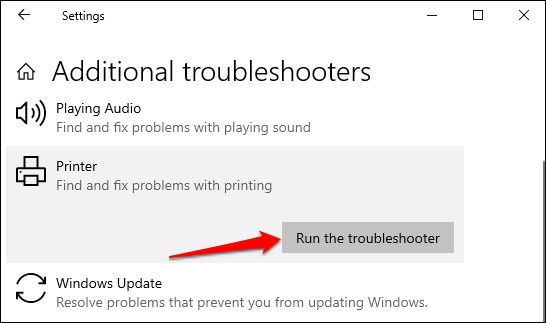
In Windows 10, go to Settings > Update & Security > Troubleshoot and select Additional troubleshooters > Printer > and select Run the troubleshooter .
Wait for the troubleshooter to run the necessary check on the printer, its drivers, and other associated processes.
3. Set the Printer As Default
Windows has a feature that dynamically changes your PC’s default printing device based on your location and other factors. The feature is near-perfect but not failproof. If your PC doesn’t print documents, it might be that an inactive printer is the default printing device.
macOS also sets the last printer connected as your Mac’s default printer. Check your computer settings and ensure the active printer is the default device.
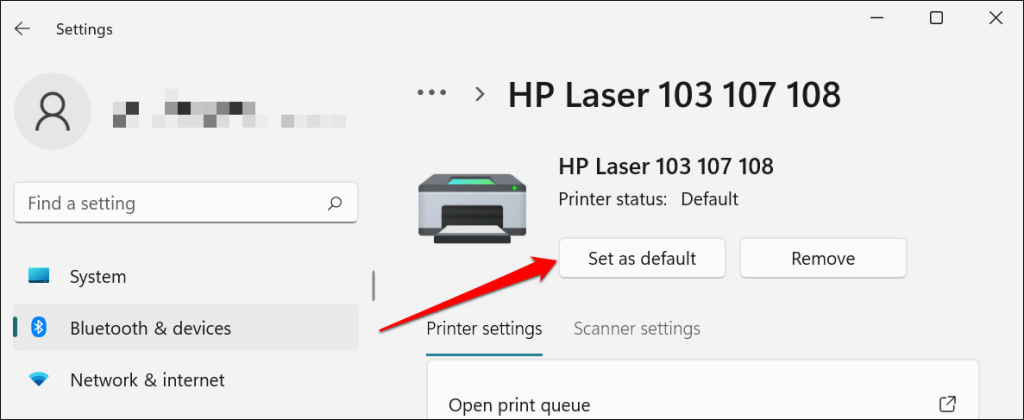
In Windows, go to Settings > Bluetooth & devices > Printers & scanners , select the printer, and select the Set as default button.
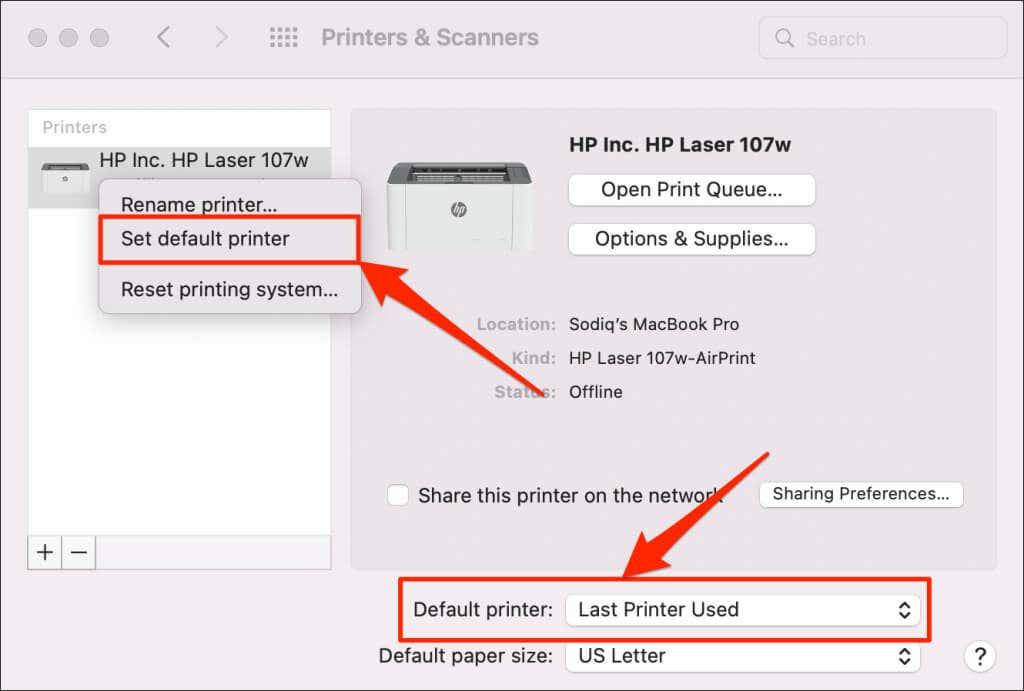
On Mac computers, go to System Preferences > Printers & Scanners on Mac computers , right-click the printer, and select Set default printer . Alternatively, open the Default printer drop-down menu and select the printer as the default.
4. Clear Your Computer’s Print Queue
When you send a document for printing, your computer first sends the “print job” to the print queue. The print job is immediately removed from the print queue when the printer prints the document. It’s usually a seamless process, but there are times when completed print jobs remain in the queue.
If that happens, subsequent print jobs will also get stuck in the queue and prevent your printer from printing files. Clearing your computer’s print queue might resolve the problem.
Clear Print Queue in Windows
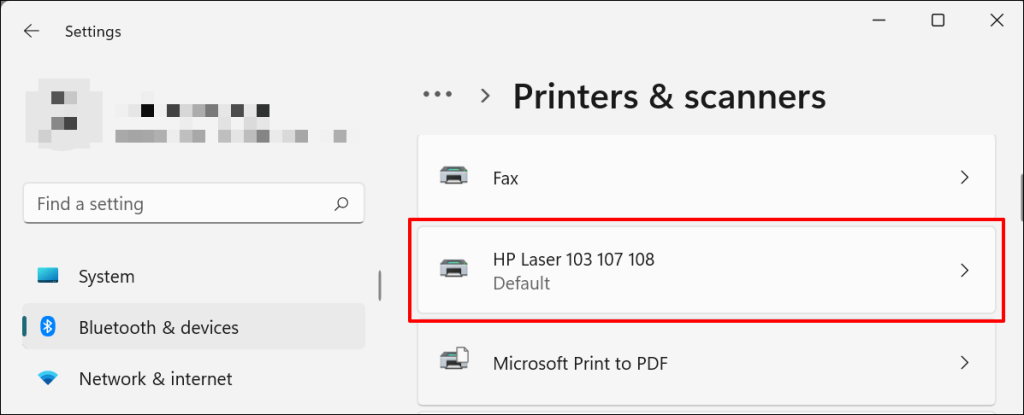
- Go to Settings > Bluetooth & scanners > Printers & scanners and select your printer.
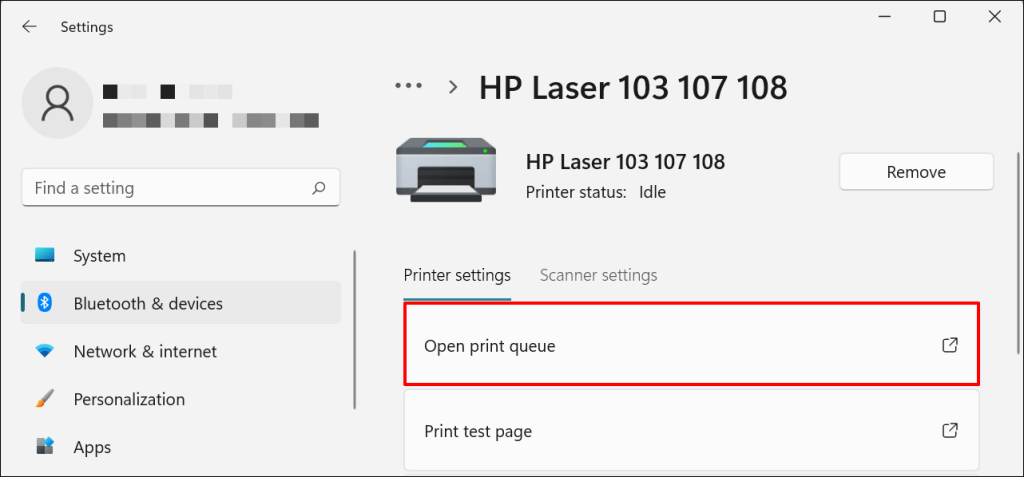
- Select Open print queue .
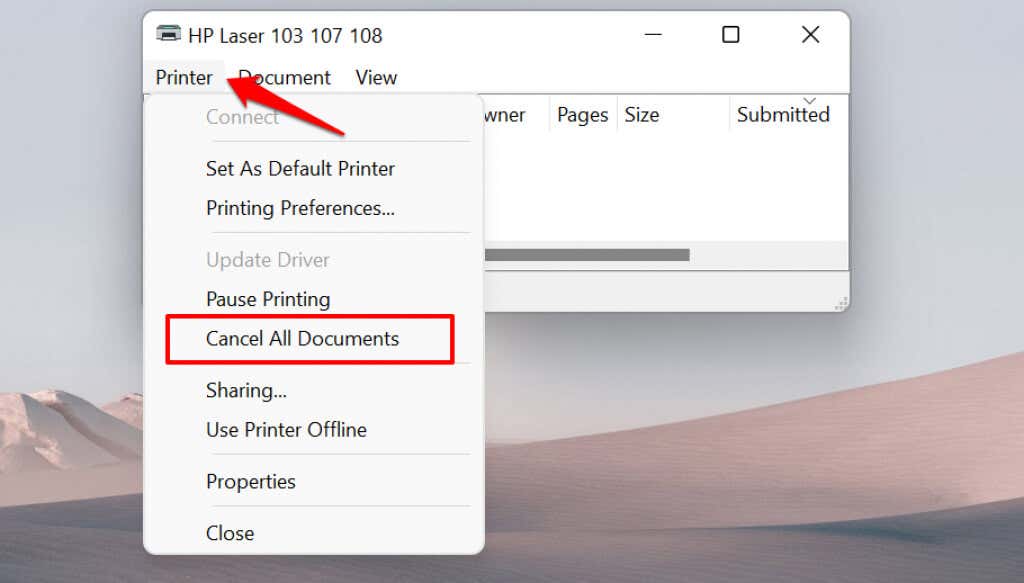
- Select Printer on the menu bar and select Cancel All Documents .
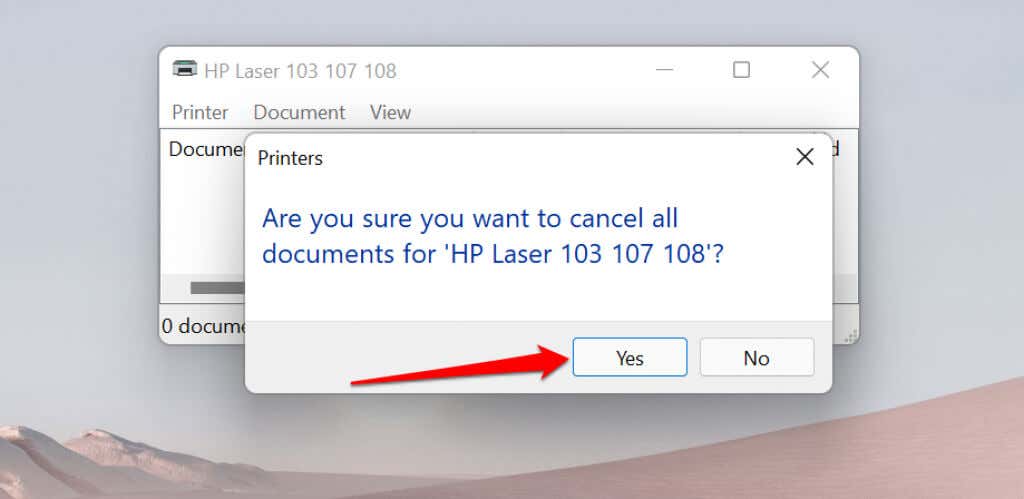
- Select Yes on the confirmation prompt.
[14-why-windows-pc-wont-print-documents]
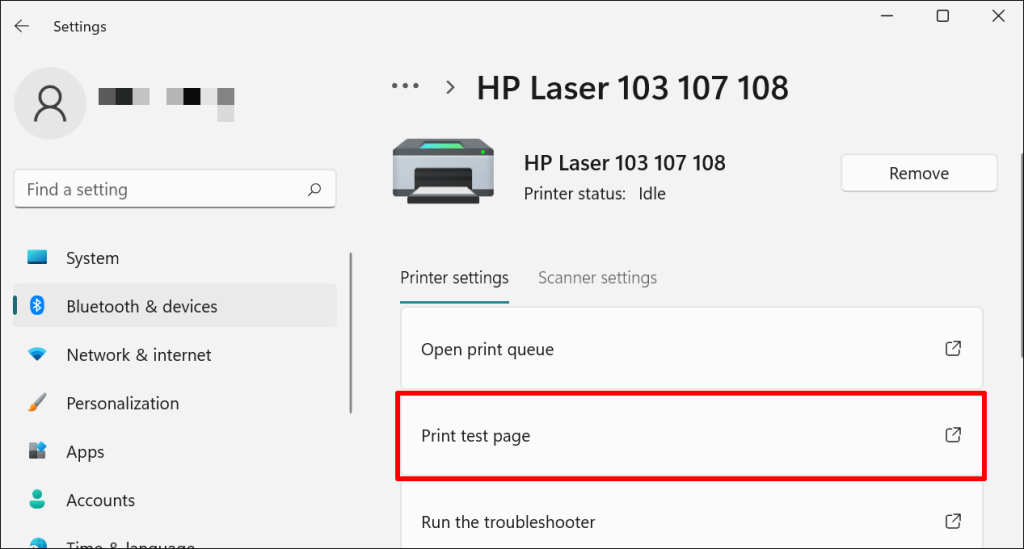
Try printing any document or a test page and check if clearing the queue fixed the problem. Open the printer menu and select Print test page .
If completed documents remain in the print queue, refer to our troubleshooting tutorial on deleting stuck print jobs in Windows .
Clear Print Queue in macOS
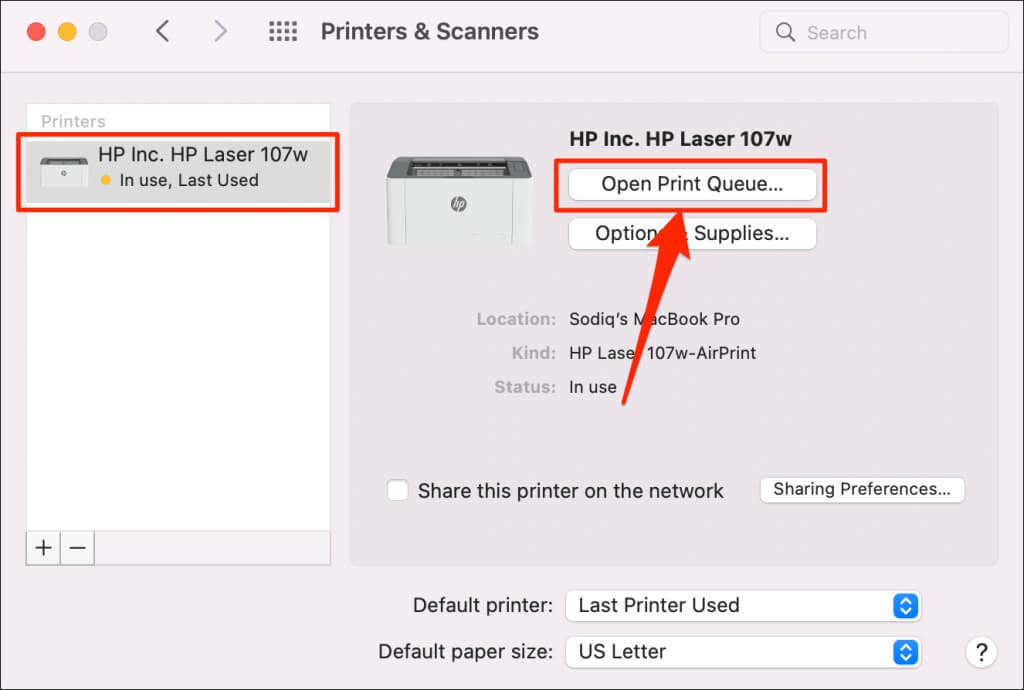
- Go to System Preferences > Printers & scanners , select the printer on the sidebar, and select Open Print Queue .
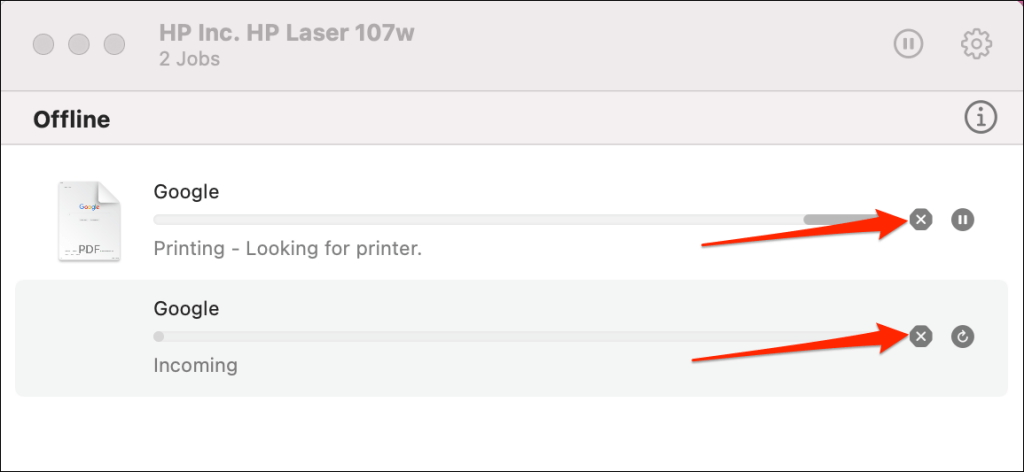
- Select the x icon next to the pending print jobs to remove them from the queue.
5. Update Printer Driver
Your printer might not receive print jobs from your PC if its driver is corrupt or outdated. Although Windows automatically installs driver updates, some factors (e.g., a metered internet connection) may prevent that from happening. Here’s how to manually install a driver from your computer or the internet.
Check the printer’s manufacturer website and download the latest driver updates for your printer model. Plug the printer into your computer and follow the steps below.
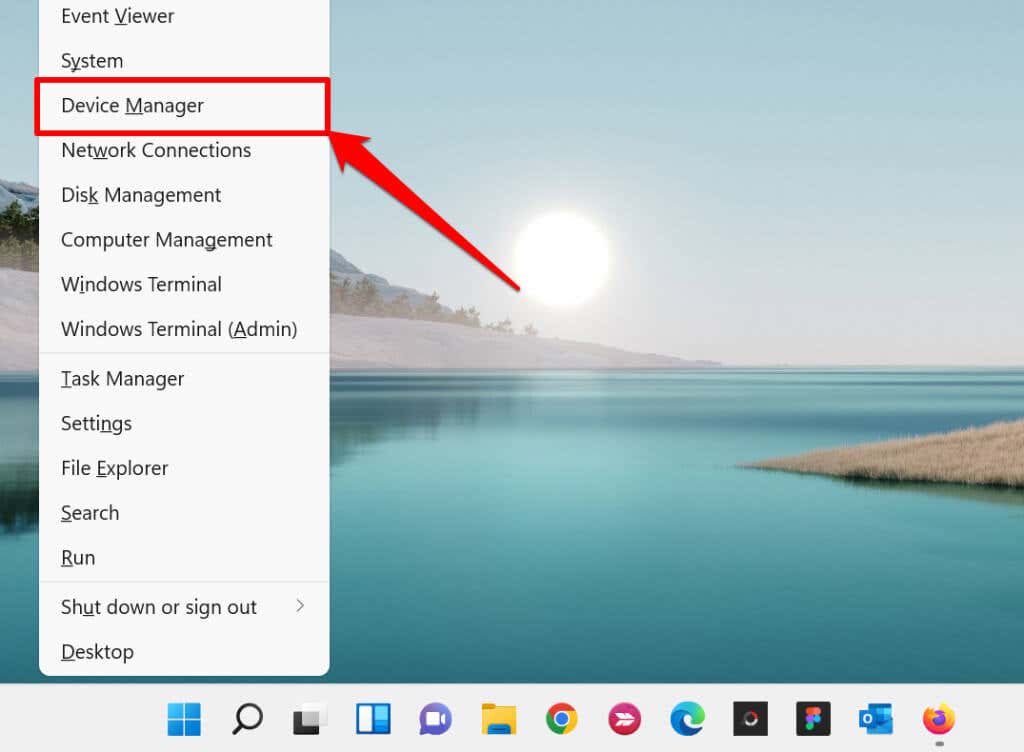
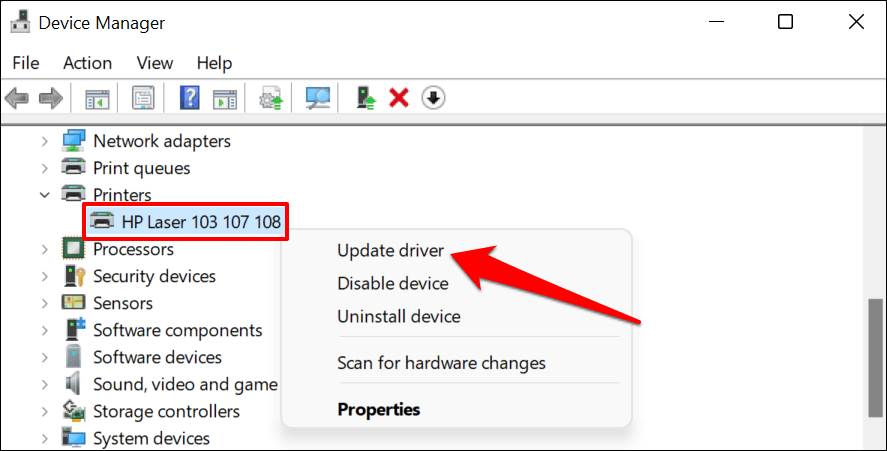
- Right-click the Start Menu or press the Windows key + X to open the Quick Access Menu. Select Device Manager to proceed.
- Expand the “Printers” category, right-click the printer’s driver, and select Update driver .
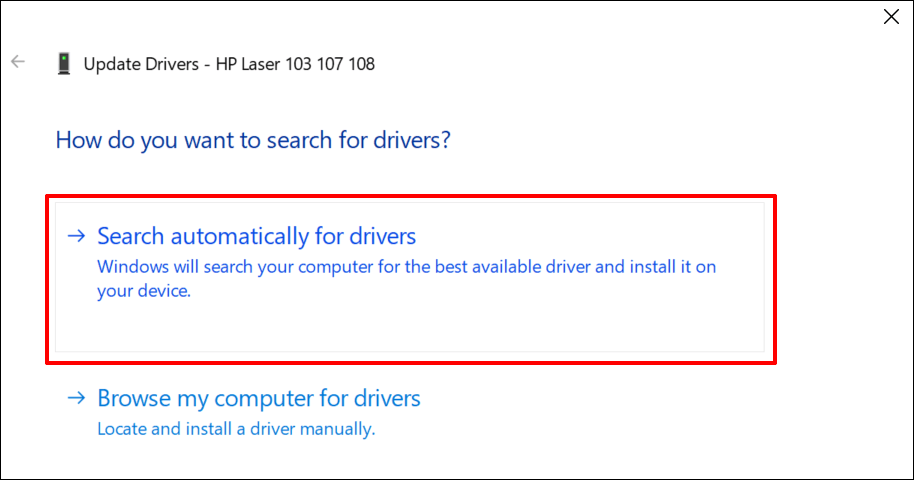
- Select Search automatically for drivers and wait for Windows to search for the best driver available for the printer. The process requires an internet connection, so ensure your PC is connected to a Wi-Fi or Ethernet network.
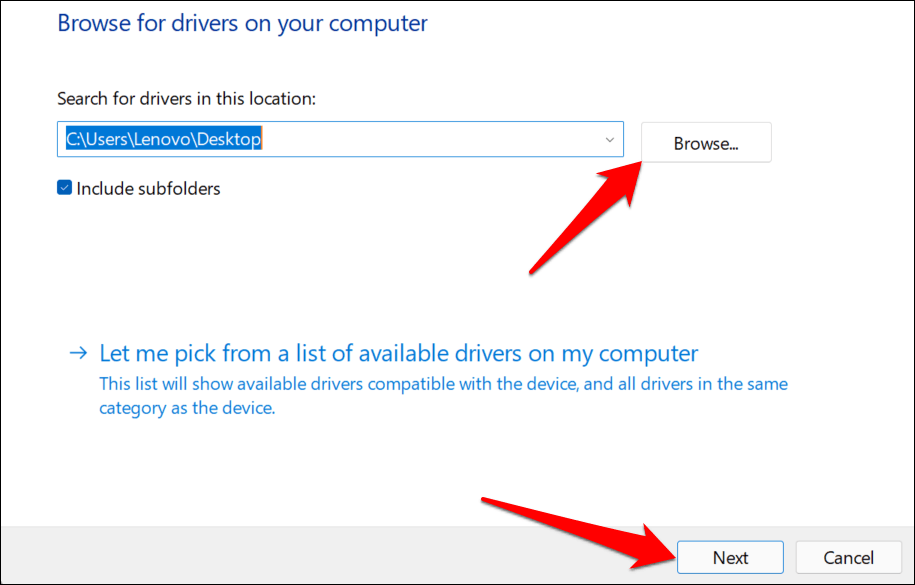
Alternatively, select Browser my computer for drivers to manually install a driver you downloaded from the printer manufacturer’s website. Afterward, choose Browse , navigate to the driver’s location on your PC, and select Next to install the update.
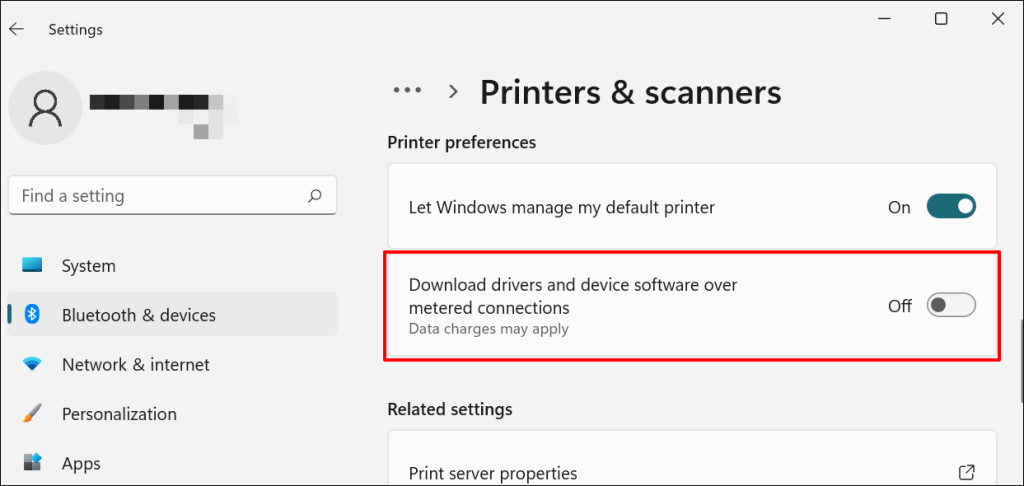
We recommend configuring Windows to automatically download drivers for your printer, especially if you’re using a metered connection.
Go to Settings > Bluetooth & devices > Printers & scanners and toggle on Download drivers and device software over metered connections .
If the Device Manager says the printer’s driver is up-to-date, check the manufacturer’s website for confirmation. You’ll find driver update history in the “Download,” “Software,” or “Drivers” section of the printer manufacturer’s website. Contact the manufacturer if you don’t know how to find, install, or update your printer’s driver update.
6. Reboot Your Devices

Power-cycling your printer and computer can help both devices re-establish a connection. Unplug your printer’s power cord and shut down your computer. Remember to close any open apps or documents so you don’t lose unsaved changes.
Restart both devices, connect your printer to your PC, and check if you can now print documents.
7. Reinstall Printer Driver
Reinstalling a faulty or corrupt driver can resolve issues causing your printer to malfunction. The operation entails deleting or uninstalling the printer driver , restarting your computer, and installing it from scratch. Note that this operation may affect any customizations made on the printer’s settings and preferences on your computer.
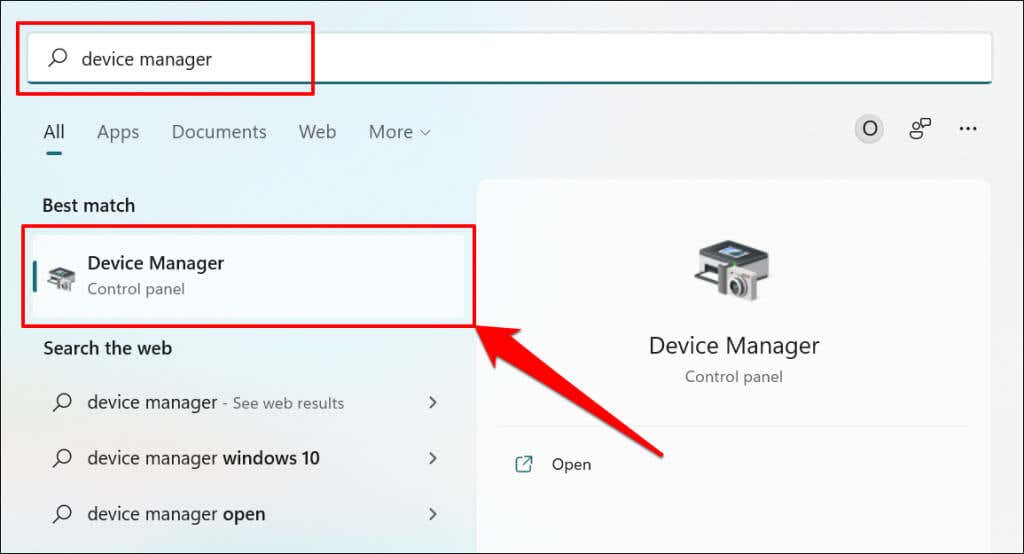
- Type device manager into Windows Search and select Device Manager .
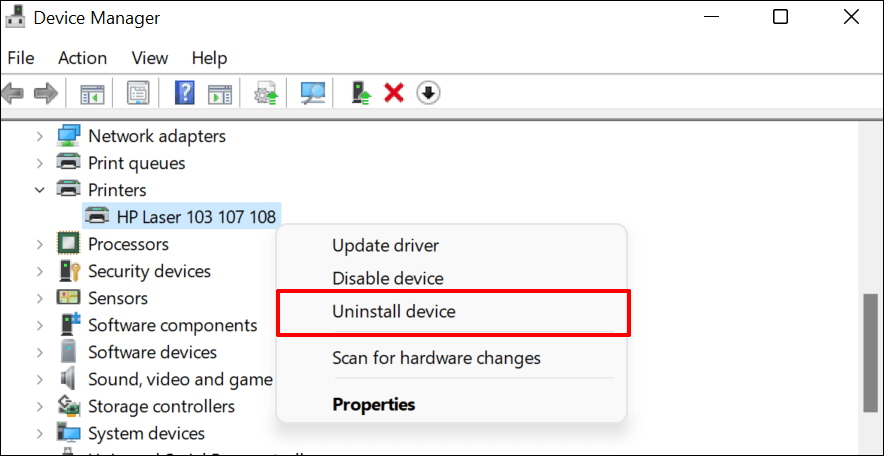
- Expand the “Printer” section, right-click the printer’s driver, select Uninstall device , and select Uninstall on the pop-up.
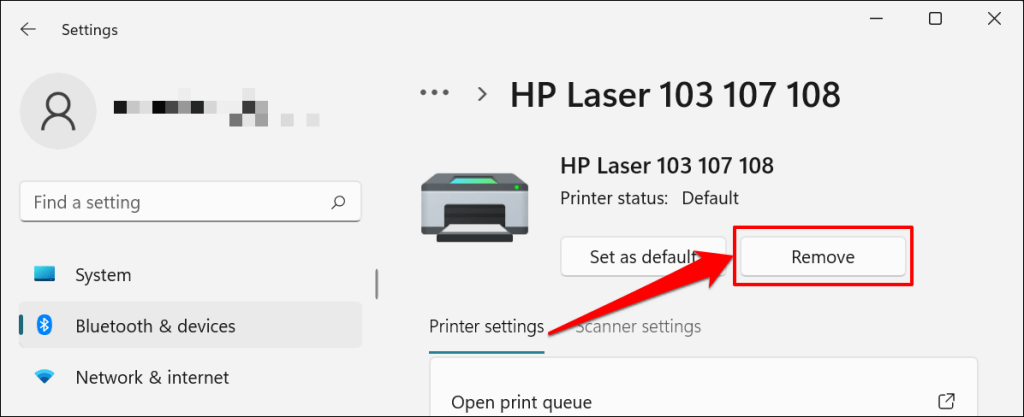
You should also remove the printer from your PC’s memory.
- Go to Settings > Bluetooth & devices > Printers and scanners , select the printer, and select the Remove button.
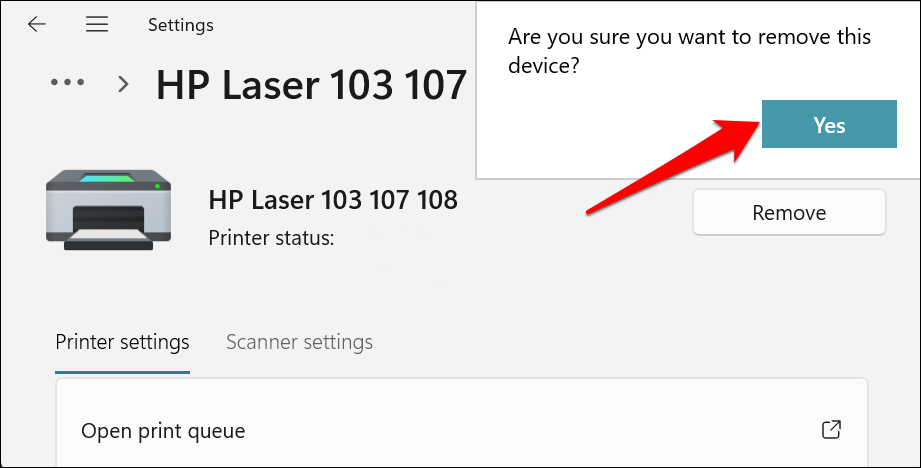
- Select Yes on the confirmation prompt.
Restart Windows and reconnect the printer to your computer. Windows should automatically install the printer’s driver when it connects to your PC.
8. Restart the Printer Spooler
Printer Spooler is the system service that manages printers and print jobs on Windows devices. Temporary system glitches can affect the Printer Spooler’s performance and trigger printing-related problems. Restarting the print spooler service can restore the service to normalcy.
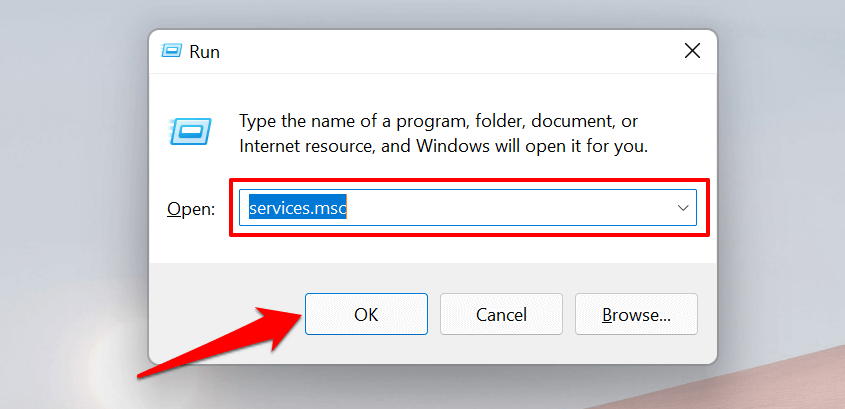
- Open the Windows Run box (press Windows key + R ), type services.msc in the dialog box, and press Enter .
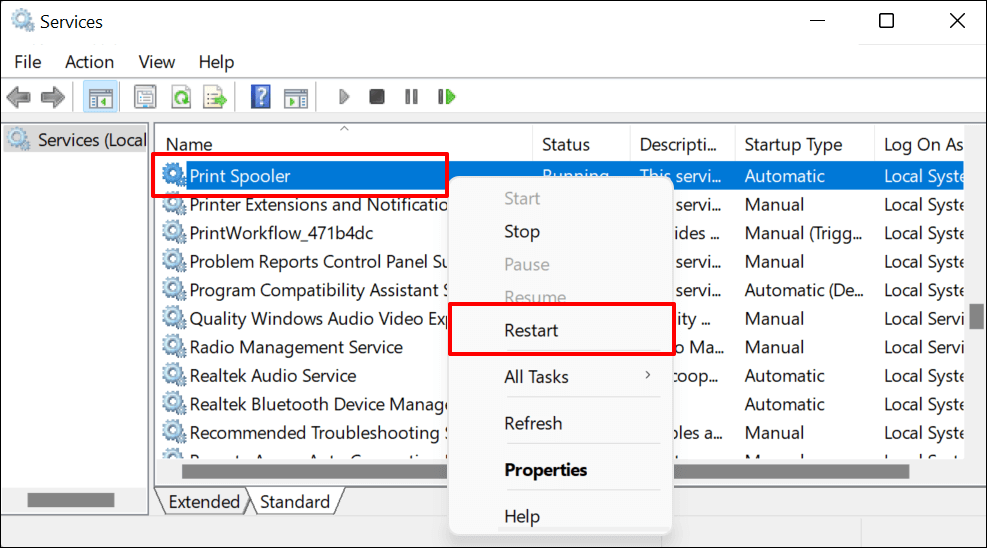
- Right-click Printer Spooler and select Restart .
9. Update Your Computer
Asides from fixing software bugs, Windows Updates also updates outdated or buggy drivers. Head to the Windows Updates menu and install the latest Windows build or security patches available for your computer.
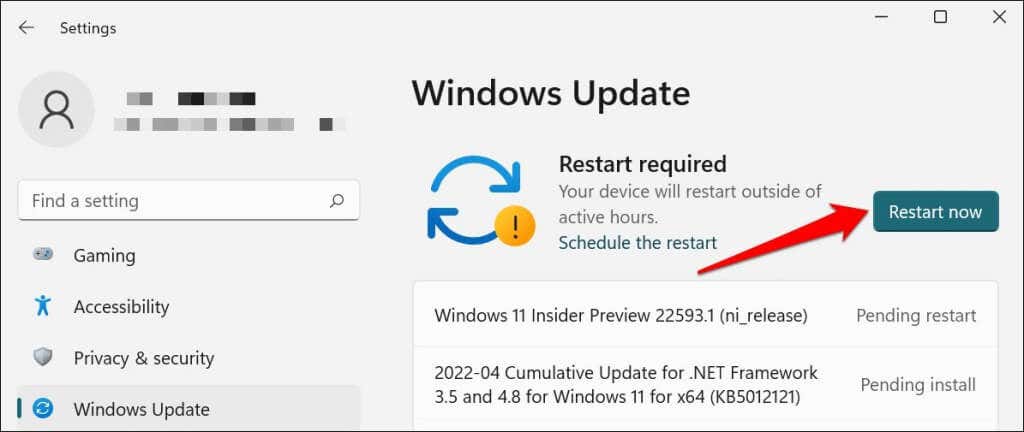
In Windows 11, go to Settings > Windows Update and wait for Windows to check for updates. You may need to restart your computer if Windows has already downloaded the update. Select Restart now to update and reboot your computer.
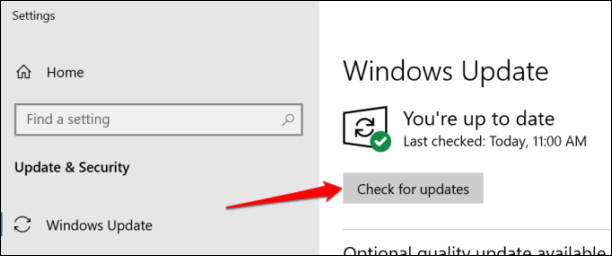
In Windows 10, head to Settings > Updates & Security > Windows Update and select Check for updates . Make sure your computer has an internet connection.
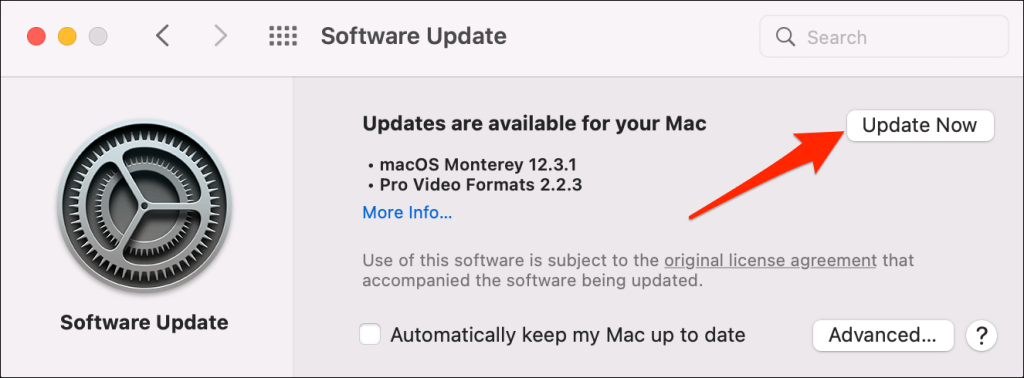
In macOS, go to System Preferences > Software Updates and select Update Now (or Upgrade Now ).
[32-update-mac-computer]
10. Run the Printer’s Utility Software
HP has a Print and Scan Doctor utility (HP Smart for Mac) that diagnoses problems with HP printers. The tool can detect empty ink cartridges, outdated driver software, blocked nozzles, print feed errors, and other printer problems.
Samsung Printer Experience is the utility that manages Samsung printers. The app has loads of troubleshooting guides for printing problems on Samsung printers. The Canon Inkjet Print Utility is also available for Canon inkjet printers.
Download and install your printer’s utility software on your computer and run the tool according to the manufacturer’s instructions.
Pay Attention to Physical Indicators
Printers have status lights or LCD screens that display error codes. These lights point out the root cause of some printing issues. Check the printer’s instruction manual to learn what the indicator lights and error codes mean and their respective solutions. Contact the printer manufacturer if your printer still won’t print after running these troubleshooting measures.
- How to Fix the “Error – Printing” Status Error in Windows
- HP Printer Not Printing Black? 10 Fixes to Try
- How to Fix Missing or Failed Printhead Error on HP Printers
- How to Add a Printer to Your Chromebook
- How to Fix the Printer Error “0x0000011b” on Windows
Sodiq has written thousands of tutorials, guides, and explainers over the past 4 years to help people solve problems with Android, iOS, Mac, and Windows devices. He also enjoys reviewing consumer tech products (smartphones, smart home devices, accessories, etc.) and binge-watching comedy series in his spare time. Read Sodiq’s Full Bio
Times change and so does Windows. If you’ve recently moved from a Windows Server 2012 and Windows 7 or 8 environments into Windows Server 2019 and Windows 10 , things are a little different.
The old ways to connect to a network printer are still there. They may look a little different, too. So we’ll show you how to connect to a network printer in Windows 10 or Server 2019. Our favorite way is the last method.
Use Add Printers & Scanners
The new Windows Settings world works the same as in the Control Panel , but it looks different enough to cause confusion for some. Note that if this is at work and you’re not an administrator, the printer must be on the network and the driver already installed. If it’s not installed, you’ll get a prompt to enter the administrator account name and password.
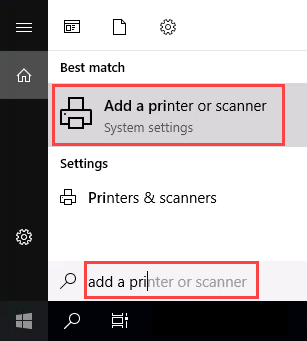
- In the Start menu, type add printers . When the result Add a printer or scanner shows, select it.
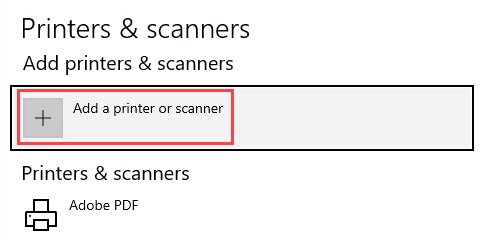
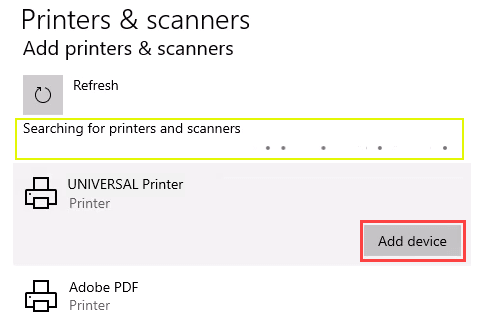
- When the Printers & scanners window opens, select Add a printer or scanner . It will start searching for available printers.
- It may look like it’s still searching, even though all the printers available are showing. Find the printer needed, select it, and then the Add device button will show. Select it.
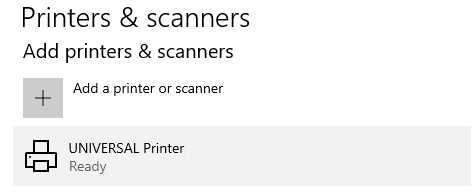
- The printer will install. There’ll be a progress bar and when it’s done, it’ll say Ready .
Connect to a Network Printer Through a Network Share
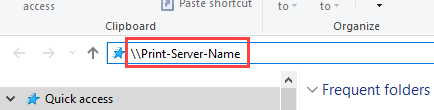
Here’s a way to install a printer that’s different from what you may be used to. It requires that the printer is shared and on the network. Unless you’re the administrator, the driver needs to be installed on your local machine or server. You need to know the path to the share as well. It will look something like Print-Server-Name , where Print-Server-name is the name of the server.
- Open File Explorer . In the location bar, enter the printer share path and then press the enter key. File Explorer will find the share.
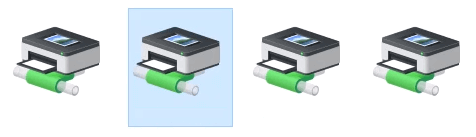
All the shared printers will show.
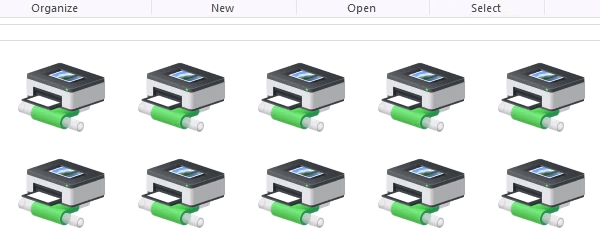
- There are two options: Install a single printer Install several printers at one time
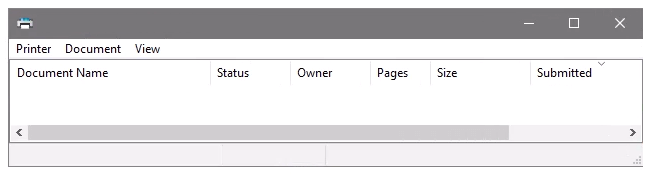
To install a single printer, double-click on it.
When the installation finishes, you’ll see the newly installed printer’s print queue window.
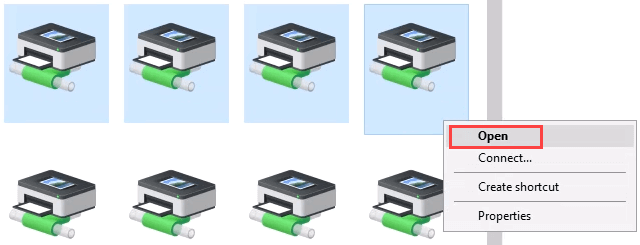
- To install several printers at once, select printers by clicking and dragging a rectangle around them, or hold down the Ctrl key while selecting printers individually. Either right-click and select Open or simply press the Enter key.
Connect to Network Printer via Control Panel
The good old control panel is still there. If you’ve used it before, you know what to do. If not, it’s almost the same as adding a printer through Settings.
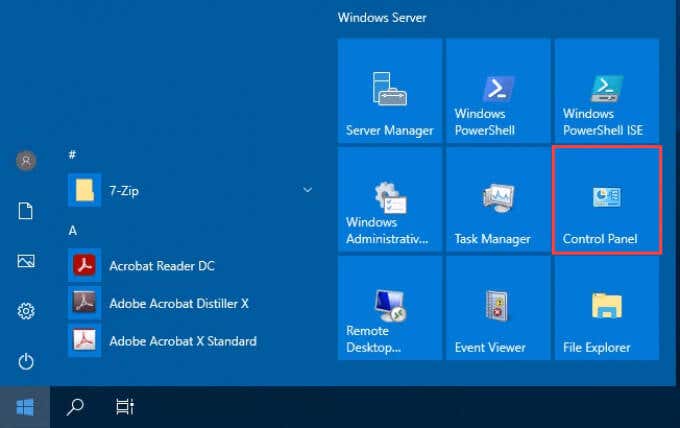
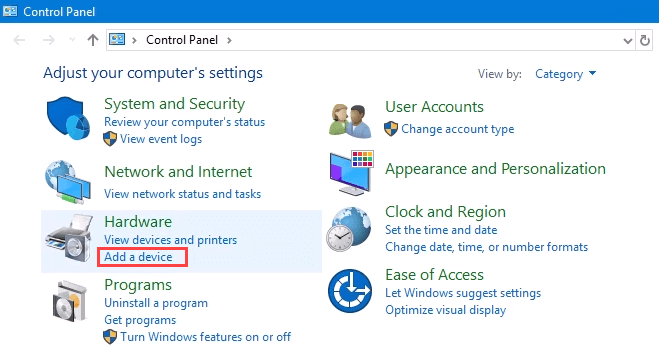
- Open the Start menu and select Control Panel . If it’s not there, start typing control and it will show.
- Select Add a device in the Hardware category.
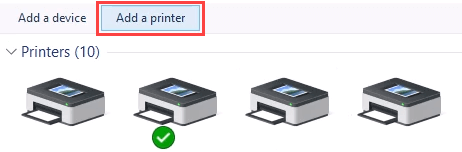
- Select Add a printer .
- It will show a selection of printers. Select the one needed and then select Next .
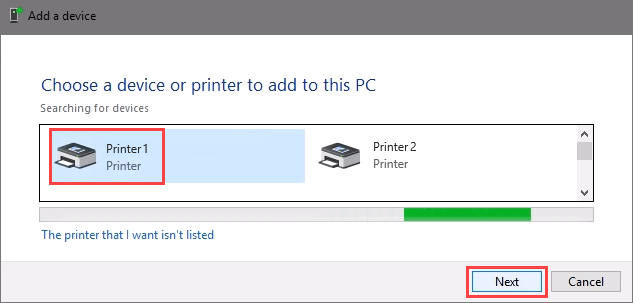
The printer will start installing. It may take a few seconds or minutes.

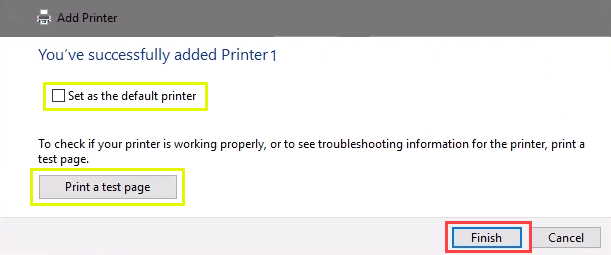
- Once the success window opens, there are options to Set as the default printer and Print a test page . Set the printer as default if needed. It’s always a good idea to print a test page. To exit, select Finish .
Connect to Network Printer via IP Address
The printer you want to install might not be easily visible, but if you have the IP address for it you can use that to connect with the printer. Administrator rights may be required. The first part is the same as adding a printer through the Control Panel until you get to the step to choose the printer. Let’s pick it up from there.
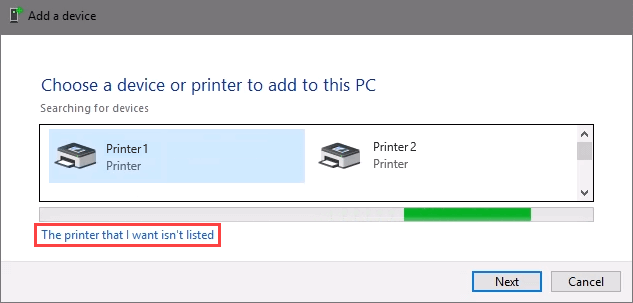
- At the Add a device window, select The printer that I want isn’t listed .
- If administrator rights are required, select Add a local or network printer as an administrator .
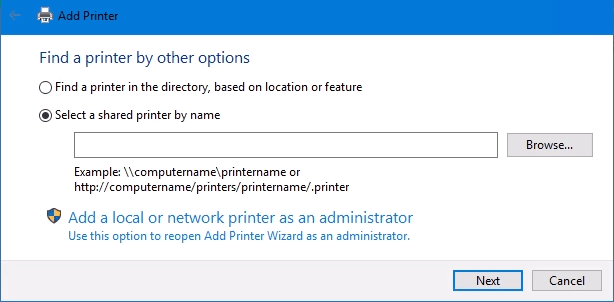
Otherwise, the window below will show. Select Add a printer using TCP/IP address or hostname then select Next .
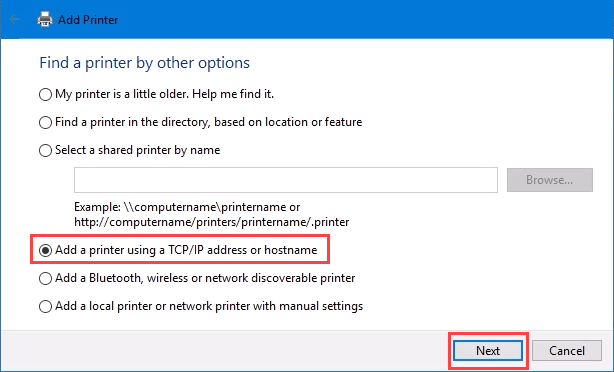
- For Device type: there are several choices. Web Services Device and Web Services Secure Print Device are used for special cases. If you don’t know what those mean, you probably don’t need them. Autodetect may make the wrong choice as well. Select TCP/IP Device .
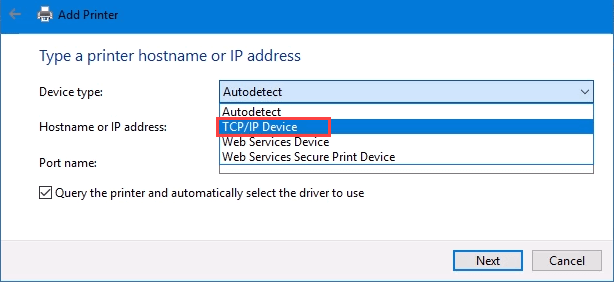
Enter the IP address in the Hostname or IP address: field. Notice how the Port name: field auto-populates with whatever is entered. The port name can be left as is or changed. In most cases, Query the printer and automatically select the driver to use remains checked.
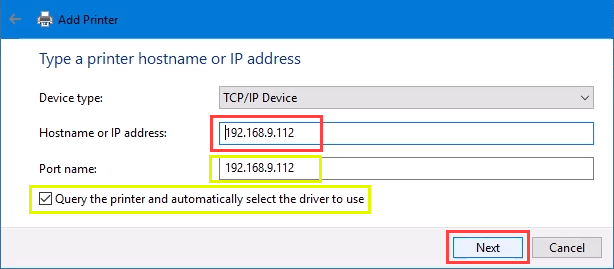
Sometimes an organization will use a universal printer driver to keep things simpler and use less storage. It also keeps the registry small and login times faster. The HP Universal Print Driver works well for HP and many other printers. Select Next .
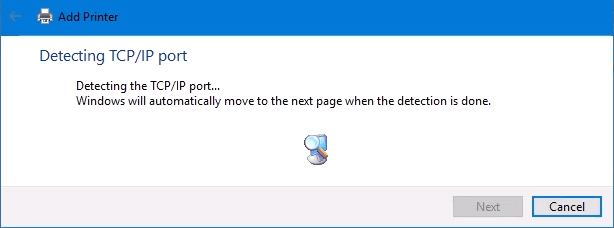
It detects the TCP/IP port to see if it exists.
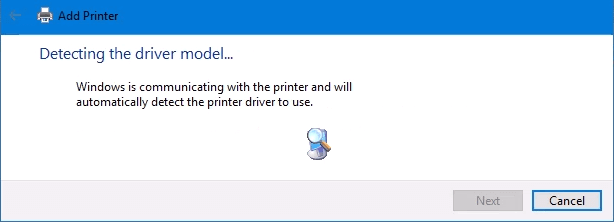
Then it detects the driver model needed.
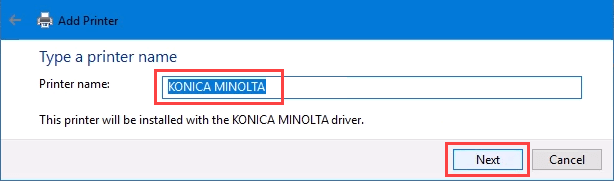
- Normally, Windows will find a driver already installed, offer the option to replace the driver, or ask to install a driver. If it’s on the network already, it probably installed the driver already. Select Use the driver that is currently installed and select Next .

- It will auto-select a name for the printer. That can change as needed. Select Next .
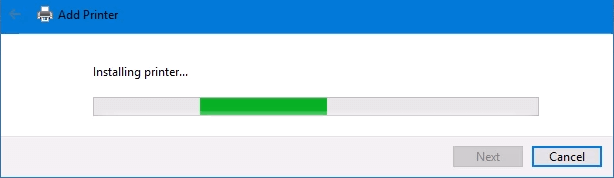
The real installation begins.
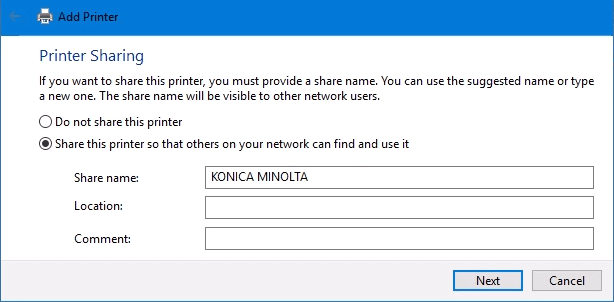
- If sharing the printer, add a location so others can see where the printer is located.
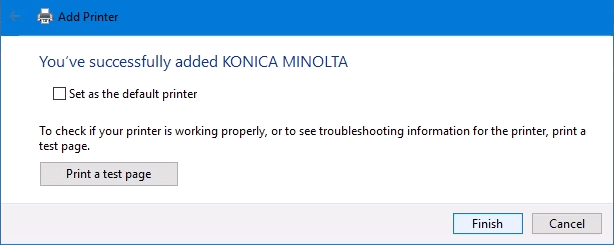
It successfully installed the printer. Set it as the default or not as needed. As always, it’s a good idea to Print a test page . Select Finish closes out the window.
Connect to a Network Printer via PowerShell
Finally, the last, and possibly best, way to connect network printers is with PowerShell . Why is this best? If you’re a System Administrator and have dozens of printers to connect, or if you need to make sure the printer is connected every time the server starts or someone logs in, a PowerShell script is best. It’s fast, done once, and easy to call many times.
You will need to know:
- Printer IP address
- Printer driver name
- What to name the printer
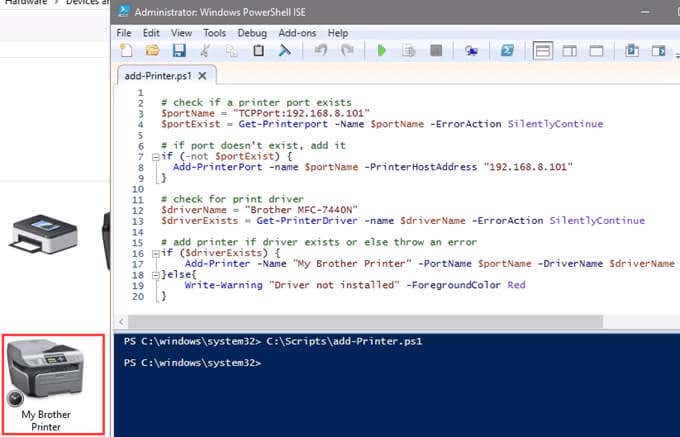
Following is a sample script. Make it into a looping script to install several printers at a time, or make it a function to call from other processes.
check if a printer port exists
$portName = “TCPPort:192.168.8.101”
$portExist = Get-Printerport -Name $portName -ErrorAction SilentlyContinue
if port doesn’t exist, add it
if (-not $portExists) { Add-PrinterPort -name $portName -PrinterHostAddress “192.168.8.101” }
check for print driver
$driverName = “Brother MFC-7440N”
$driverExists = Get-PrinterDriver -name $driverName -ErrorAction SilentlyContinue
add printer if driver exists or else throw an error
if ($driverExists) { Add-Printer -Name “My Brother Printer” -PortName $portName -DriverName $driverName } else { Write-Warning “Driver not installed” -ForegroundColor Red }
When the script is run, it takes maybe 3 seconds. Then you’ll see the printer installed.
Any Other Ways to Connect to a Network Printer?
We’ve given you several ways to connect to a network printer or several printers. One of them will be the best way for you. There is at least one other way, and that’s by the Command Prompt.
- Preparing for Windows 10 End of Support: Upgrading to Windows 11
- How to Fix a “This file does not have an app associated with it” Error on Windows
- How to Fix an Update Error 0x800705b4 on Windows
- How to Resolve “A JavaScript error occured in the main process” Error on Windows
- How to Fix the Network Discovery Is Turned Off Error on Windows
Guy has been published online and in print newspapers, nominated for writing awards, and cited in scholarly papers due to his ability to speak tech to anyone, but still prefers analog watches. Read Guy’s Full Bio
