Virtual Reality (VR) has come a long way from the first Oculus Rift developer kits in 2016 and even further from the primitive VR of the early 90s. While not perfect, modern VR has solved the truly serious problems that prevented VR from being great.
If you own a first-generation device like the original HTC Vive or Oculus Rift , you still have an incredible device on your hands that provides fantastic VR experiences. However, if you’re in the market for a new headset today, you have many interesting choices, which brings us to the Oculus Quest .
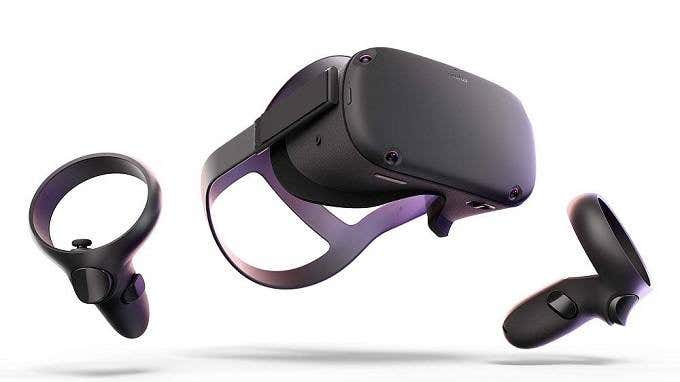
The Quest is a standalone VR headset. This means that you don’t need to connect it to a computer or attach a smartphone to it. That makes it an affordable entry into the premium VR world, but recently Oculus also enabled Quest devices to act as Oculus Rift devices, connected to a computer by USB 3 .
This completely changes how compelling the Quest is since it’s the one headset that seems to do it all, while costing the same as the tethered Oculus Rift S model. Is the Quest really a jack of all trades?
We also did a full review of the Oculus Quest, which you can view here on our YouTube channel:
The Specifications
Before we get to hands-on impressions and observations in this Oculus Quest review, it’s worth going over some of the key specifications so that you know what you’re getting.
First off, the Quest has two OLED (Organic Light-emitting Diode) panels at a resolution of 1440x1600px per eye. Compare that to the original Rift, which has a “mere” 1080x1200px per eye. On top of this, the lenses in the Quest are significantly more advanced, with better focus and clarity than we saw with their initial product release in the premium, tethered VR space.
Apart from resolution, the display panels support a refresh rate of 72Hz, which sounds like an on-paper downgrade compared to the 90Hz and up displays in other high-end VR headsets. However, these are low-latency, low-persistence which subjectively outperform the faster panels in first-generation modern VR headsets.
Getting accurate field-of-view figures proved challenging, but third-party estimates we’ve read suggest that the Quest offers at least 90 degrees of horizontal view. Which is at least as good as the Rift.
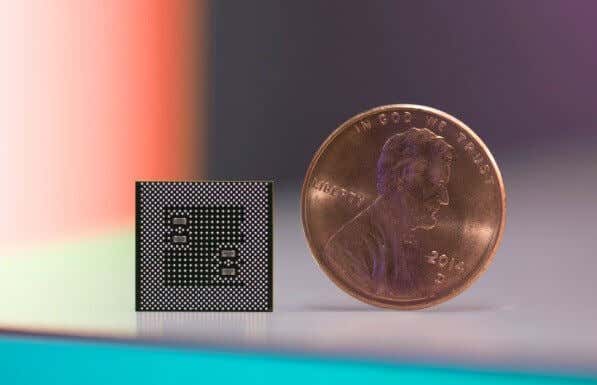
Since this is a standalone VR headset, it also has a full onboard computer. The core of the Quest is the Snapdragon 835. This was the flagship system-on-a-chip seen in phones like the Samsung Galaxy S8, which means it’s getting on in years. However, the Quest doesn’t have the same thermal constraints as a razor-thin phone.
It’s also actively cooled, which means higher clock speeds and no throttling. The 835 is paired with 4GB of RAM and either 64GB or 128GB of storage space. We’re reviewing the 64GB model, but other than storage size there is no difference between the two models.
What’s In The Box?
If you want to see exactly what’s in the box, then you can watch our unboxing video here ! If you’d rather just read it and use your imagination, that’s OK too.
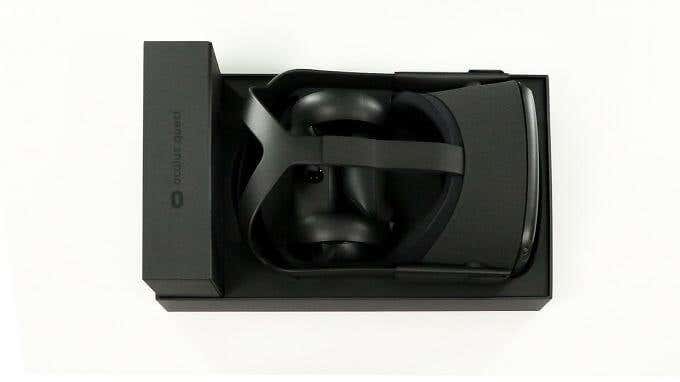
There aren’t too many pieces inside the box and, as usual for Oculus, the packaging is of high quality. You can easily use the molded box as a place to store your Quest when not in use. Cleverly, the USB-C charging port on the main headset units can be accessed while the Quest rests in its box.
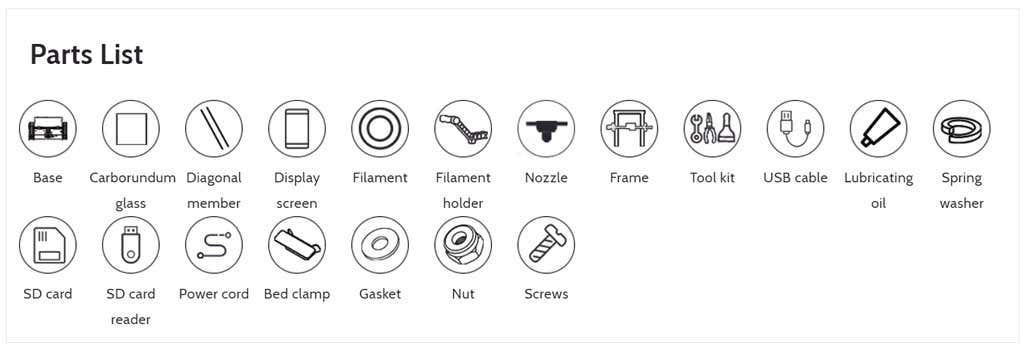
As for the box contents, this is what you’ll find once you slide the lid off:
- The Oculus Quest headset.
- Two Oculus Touch controllers.
- A long USB-C cable for charging and data.
- A spacer for glasses.
- A USB-C charger.
- Two AA batteries for the controllers.
- Documentation.
The Setup
Setting up the Quest was pretty straightforward. Out of the box, our unit had about 50% charge, but it’s a good idea to have it charging no matter what’s in the tank since your internet connection influences how long it takes to get everything up and running.
Do yourself a favor and write your WiFi password down or memorize it, since one of the first things you’ll have to do after turning the unit on and following the startup instructions is to connect to the net. Once connected, you’ll either have to create an Oculus account, use your FaceBook account or log in with an existing Oculus account if you own one of their other headsets.
Comfort
An important part of any VR headset is certainly how comfortable it is to wear. Results in this department are mixed when it comes to the Quest. The design of the headset is very similar to other Oculus headsets. Rather than using a halo-style headband as the PSVR and Windows Mixed Reality headsets do, it’s a three-strap velcro solution.

Overall we found the headset tolerable in the short- to medium-term, but it definitely puts pressure on one’s face. This is made worse by the fact that tightening or loosening the headset is the only way to tune focal length, since the Quest doesn’t have a mechanical adjustment to vary the distance from your eye to the lens.
Using the right technique, you can get the perfect focus without overdoing the tightness on your face, but it’s a minor hassle when you want to play. Speaking of focus, we had no need to use the glasses spacer even with a normal pair of rimless glasses, but fitting the spacer can also help increase focal length. Which could be useful to certain individuals.
Overall comfort levels were tolerable, but looking into a third-party halo headband modification might be worth considering.
The Software Library
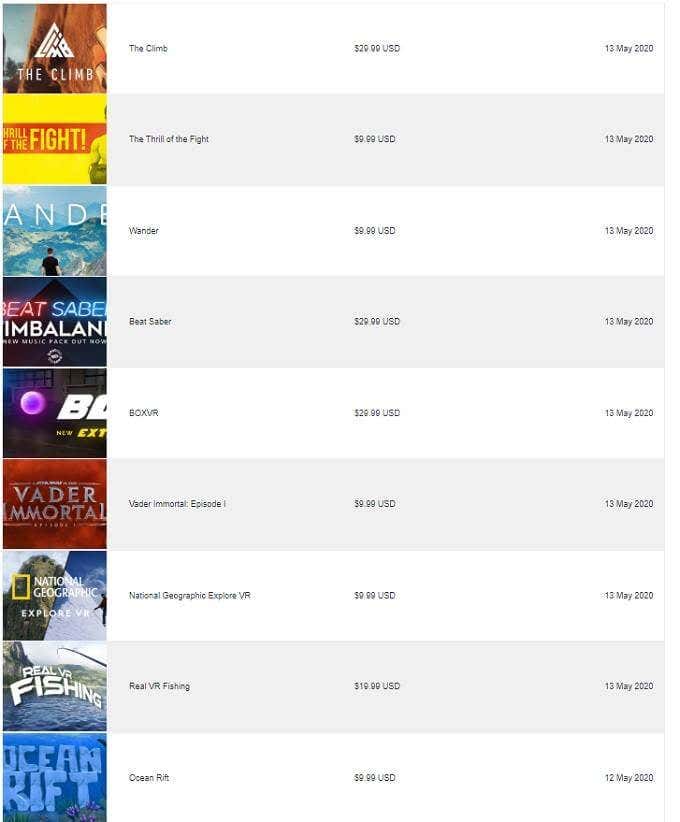
We bought just short of $200 worth of software and also tried several of the free demos included in the Quest Store. You can see the list of apps along with their prices below.
While there are a variety of great titles on offer, one gets the sense that there’s limited development attention being given to the Quest as a platform right now. Nonetheless, new games, experiences, and utility apps are released regularly and highlighted. The store also seems to run special offers on a regular basis. Many popular Oculus Rift PC titles now have Quest versions and in many cases, you’ll get both versions for one price.
Pricing in the store seems reasonable as well. The most expensive games we saw cost around $30. About half the price of a premium console game. Whether these games are worth it for the price is up to you. Games like BoxVR or Beatsaber have infinite longevity. Then again, narrative experiences like Vader Immortal are relatively short. However, thanks to Oculus Link, the Quest now has a much larger selection of titles you can play. As long as you have the computer to drive it.
The Big Party Trick: Oculus Link
Now we get to one of the big deciding factors in this Oculus Quest review, at least for us. Oculus Link promises to turn the Quest into a Rift, which means access to all Rift and SteamVR titles. That’s a massive library and represents some of the very best visuals VR has to offer.
You do need a moderately powerful gaming PC and a high-quality USB 3 Type A to C cable or a USB 3.1 Type C to C cable. Recently, Oculus has certified USB 2.0 cables, such as the one included for charging, as compatible with Oculus Link.

You can read our full hands-on review of the Link Beta here , but the short version is that during the hours we spent with the feature before writing this review, there were no issues at all. High-end titles such as Half Life Alyx worked perfectly, switching between Oculus Link and Quest mode was as simple as clicking a button and even SteamVR and Epic Game Store titles simply detected the Quest and its Touch controllers as a Rift.
As far as we could tell, it works just as well as the Rift we’ve used in the past and, in fact, is better thanks to improved optics, tracking and screens.
VR Performance & Verdict
Despite having lower refresh-rate screens than the Rift, the Quest feels snappy without any issues that affect immersion. The wireless, room-scale VR is a revelation and the Guardian system worked flawlessly in our testing.
Of course, a headset like the Valve Index offers wireless VR with PC graphics and better overall hardware, but the Quest is in a class of its own when it comes to versatility, performance and price. Thanks to Link, this is now the VR headset that most people should look at first: One headset to rule them all, and best in class as a standalone system.
- WhatGeek x 3inuS Kebohub EE01 Mechanical Keyboard Review
- Mobile Pixels Duex Max Portable Monitor Review
- Trifo Lucy: The AI Robot Vacuum and Mop
- Review of Anycubic Kobra Max 3D Printer
- The OBSBOT Tiny 4K: an Impressive Webcam for PC & Mac
Sydney Butler is a social scientist and technology fanatic who tries to understand how people and technology coexist. He has two decades of experience as a freelance computer technician and more than a decade as a technologies researcher and instructor. Sydney has been a professional technology writer for more than five years and covers topics such as VR, Gaming, Cyber security and Transhumanism. Read Sydney’s Full Bio
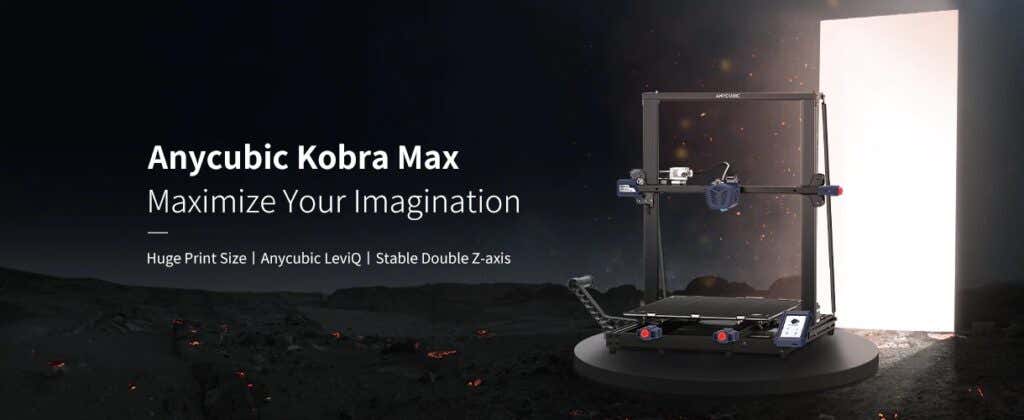
3D printer manufacturer, Anycubic, recently released two new printers—the Anycubic Kobra and its bigger, badder uncle, the Anycubic Kobra Max. We were interested in testing both products in our hunt for the best entry-level 3D printers. We’re looking for ease-of-use and affordability, as well as build and print quality.
We’ve published a number of 3D printer reviews from Anycubic—for both FDM printers like the Anycubic Vyper that print with spools of filament and SLA resin 3D printers like the Anycubic Photon Mono X 6K that use a liquid resin as its raw material—and we can say that the Kobra Max has quickly become one of our favorites.
Features of the Anycubic Kobra Max 3D Printer
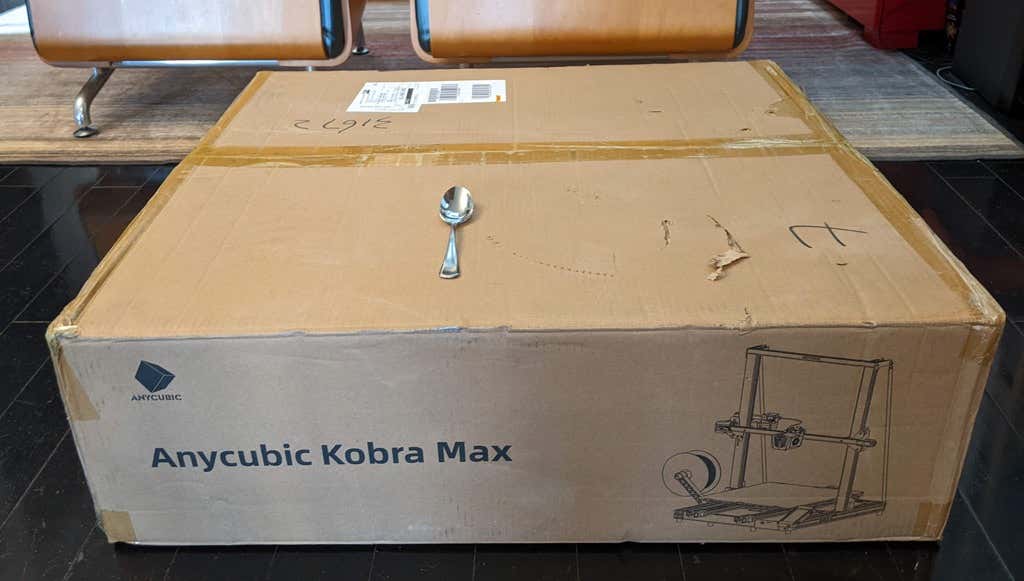
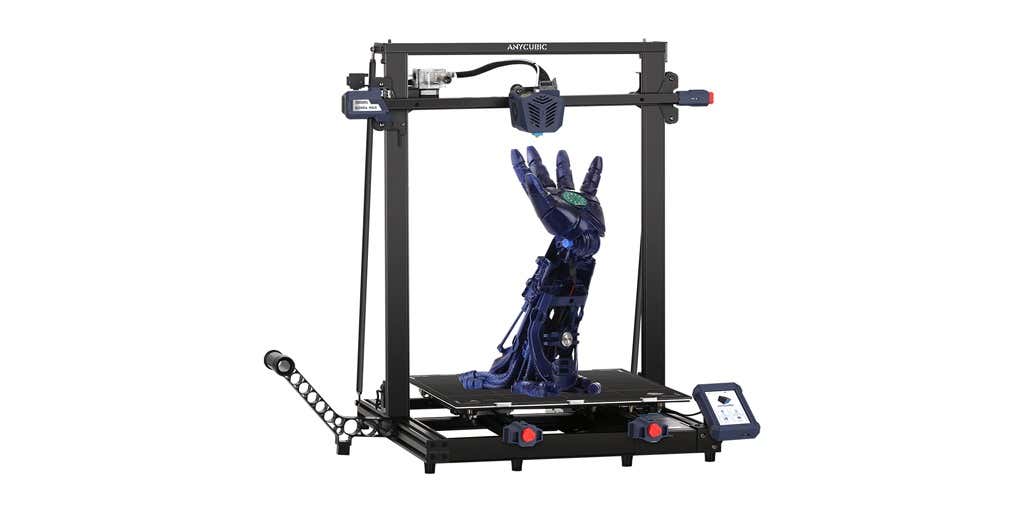
The most obvious feature of this printer is its size. It is absolutely massive. That means you can print huge items in a single piece. Think of a full helmet or an entire ukulele—these are things you couldn’t print in one piece on a normal-sized 3D printer. Truly, the word “Max” doesn’t sufficiently capture just how big this printer is. Good luck fitting the packaging into your trash or recycling bins!
We were skeptical that a Cartesian printer of this size (which relies on a moveable print bed) would perform well since it has a lot of weight to move around. Admittedly, it’s not the speediest printer out there because of those design tradeoffs, but it works great.
The Kobra Max has an impressive list of technical specifications:
- Leveling: Automatic, 25 points leveling using the Anycubic Leviq technology
- Panel area: 7.95 in² / 51.3 cm²
- Filament run-out detection: support
- Printing material: PLA / ABS / PETG & TPU
- Nozzle size: ø 0.4 mm (replaceable)
- Nozzle temperature: ≤ 500 °F / 260 °C
- Hot bed temperature: ≤ 194 °F / 90 °C
- Average speed: 3.1 – 3.9 in./s (80mm/s – 100m/s)
- Control panel: 4.3 inch LCD touch screen
- Z-axis: double threaded rod
- Print size: 17.7 x 15.7 x 15.7 in. / 45 x 40 x 40 cm (HWD)
- Build volume: 19.02 gal. / 72.0 L
- Machine dimensions: 72 x 71.5 x 66.5cm
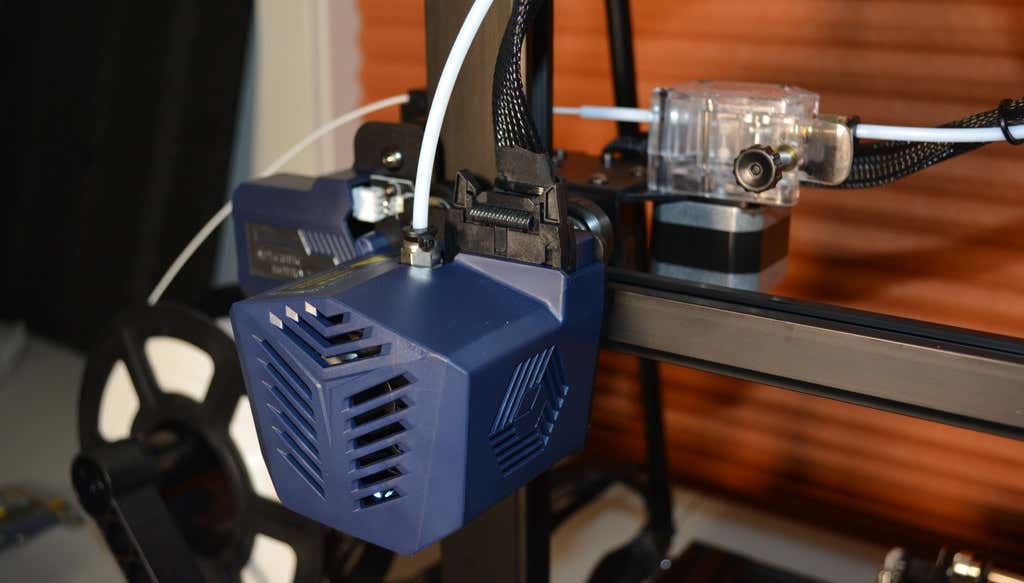
As far as we can tell, the extruder is identical to the extruder and print head on the Anycubic Vyper. Furthermore, the Kobra Max has the same automatic bed-leveling system as the Vyper. The system uses a pressure sensor instead of an inductive sensor.
The bed-leveling sensor is right on the nozzle itself, ensuring that it can probe every printable part of the bed. And since the sensor is pressure-based, you could replace the glass bed with any other material and the bed-leveling system will still work. (Inductive sensors require metal to work, so you won’t find them on printers with glass beds.)
Since the Kobra Max’s printing platform is a rigid glass sheet, you can’t remove and flex it to pop your prints off. We prefer removable spring steel build plates, but glass is still a nice printing surface. If your printer doesn’t have a removable bed, glass is ideal because you can use metal scrapers to remove your prints without worrying about scratching the surface.
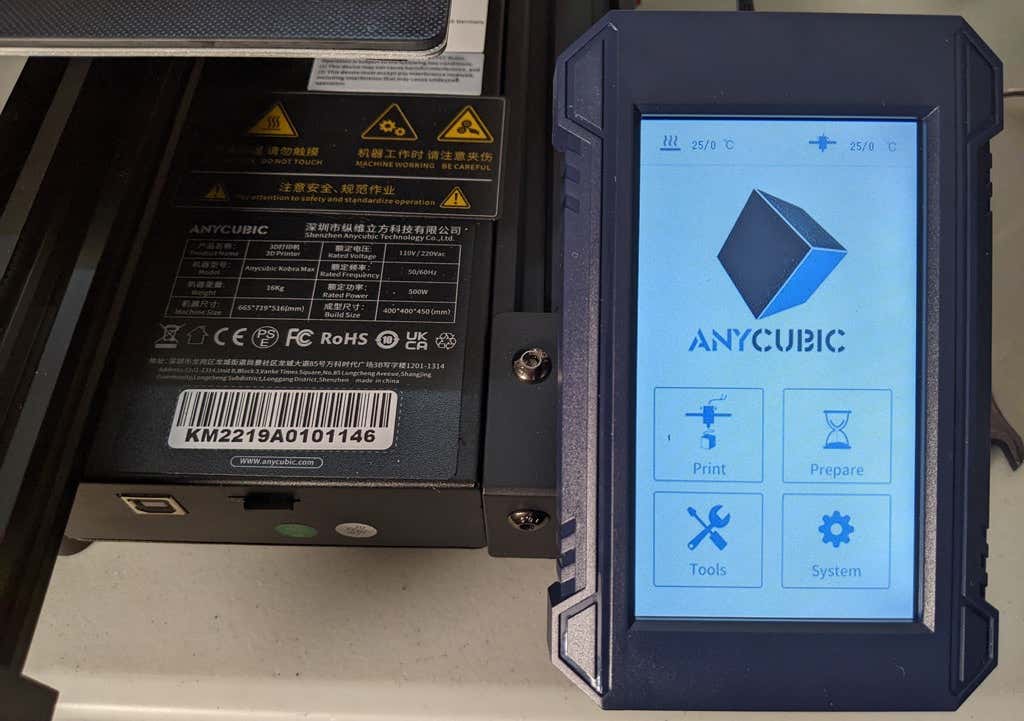
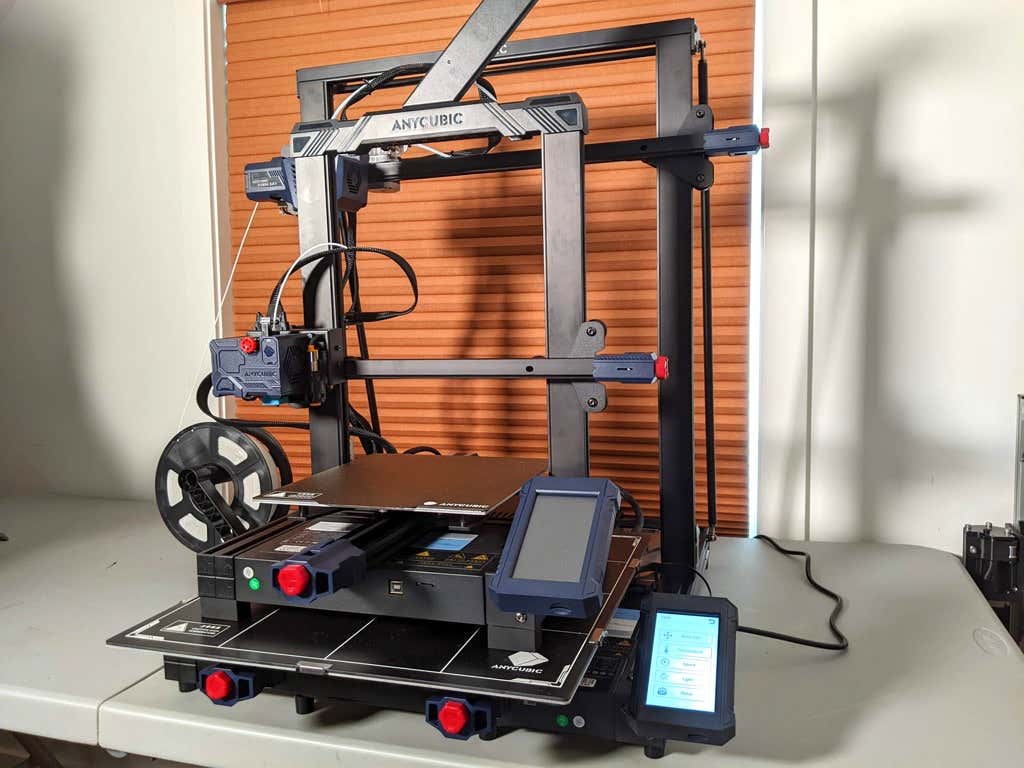
The LCD touchscreen is identical to the screens used on many other Anycubic printers. As usual, it’s responsive and easy to use.
A note about filament types: the Kobra Max will print with PLA, PETG, TPU, and ABS. However, if you really want to print with ABS and get the best possible results, the printer should be inside an enclosure. Given its size, it may be challenging to build a suitable enclosure for the Kobra Max.
Assembling the Kobra Max 3D Printer
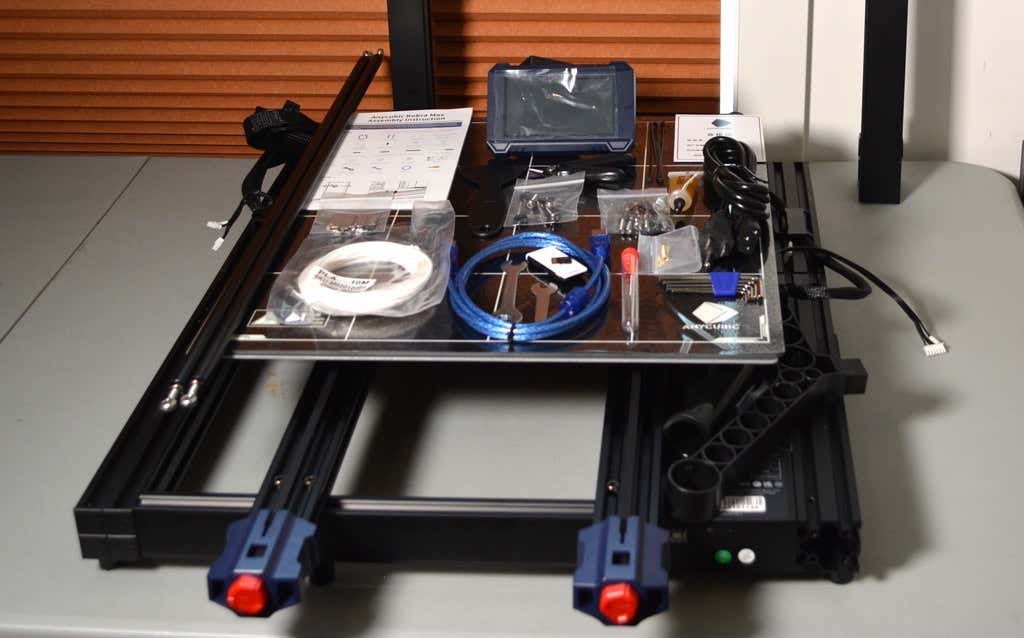
When assembling the new Kobra Max, make sure you have sufficient working space. Since the bed moves forward and backward, you need more space than you’d think. We put it on a 30” folding table, and when it’s printing, it needs about 36 inches, front to back.
Assembly of the Kobra Max is no more difficult than assembling the Kobra or Vyper. The only additional items are the diagonal braces which add stiffness to the frame, reducing mechanical vibration.
It took two people about 15 minutes to assemble. Double-check that you’ve cut all the zip ties used to stabilize the printer during shipping. There are a lot of them.
Calibration
The auto-bed-leveling system is easy to use. Anycubic recommends that you check the x- and the y-axes to make sure they don’t wobble. If they do, you can adjust the eccentric nuts until the wobbling stops. There was no wobble on our printer, so we didn’t have to do anything.
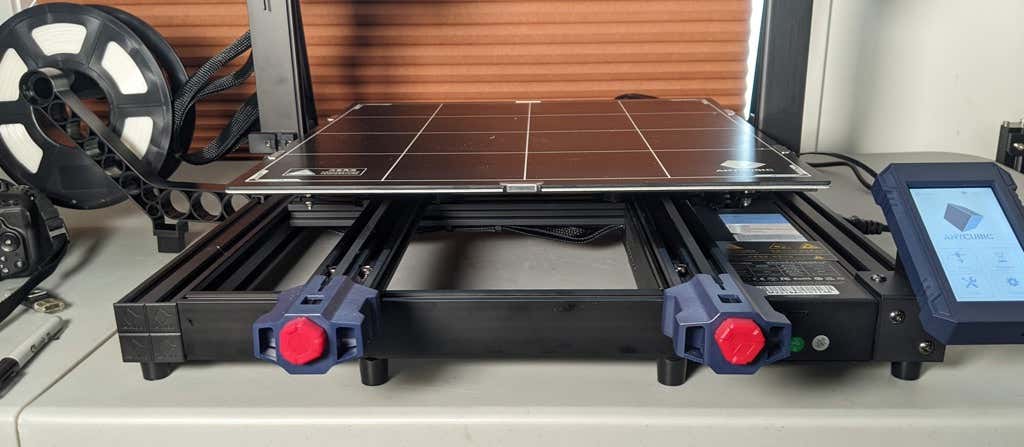
Additionally, the x- and y-axes have belt tensioners. We needed to slightly tighten the x-axis on ours. The tensioners are easy to use and are features a lot of other printers lack. Who wants to take apart the extruder assembly just to tighten the belts? Not us, and probably not you.
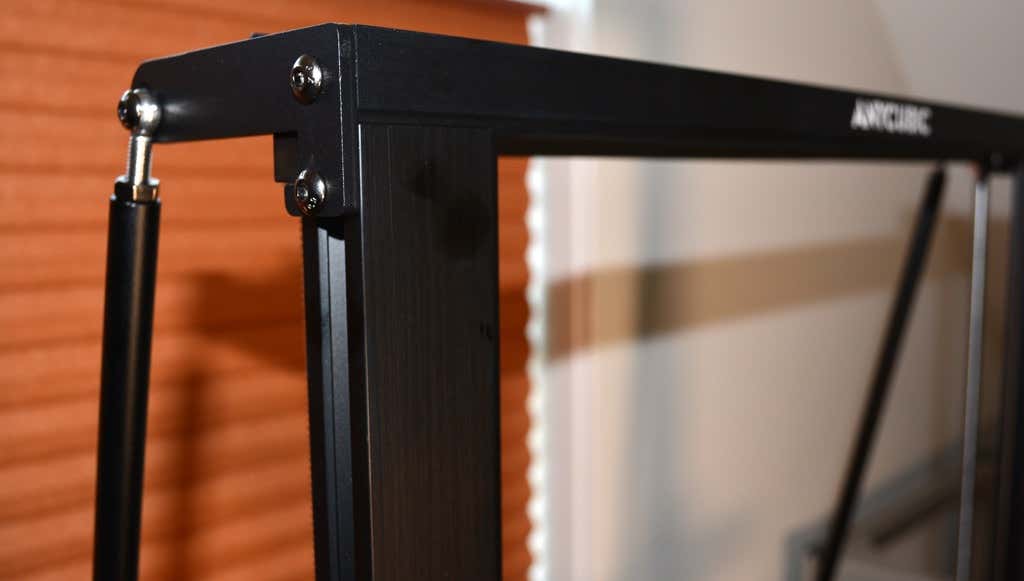
Build Quality of the Kobra Max
Due to the addition of the diagonal braces, the frame is really stiff. The dual z-axis screws are an improvement over the smaller Kobra. They virtually eliminated sagging of the x-axis assembly.
The spool holder sits on the base of the printer, reducing wobbling when printing tall items. It’s better than having the spool on the top like on the Kobra.
This printer is built with aluminum extrusions with aesthetically-pleasing plastic covers for the hotend and the tenionsers. It’s got an optical z endstop. The x and y endstops are mechanical. The whole thing feels solid.
First Print
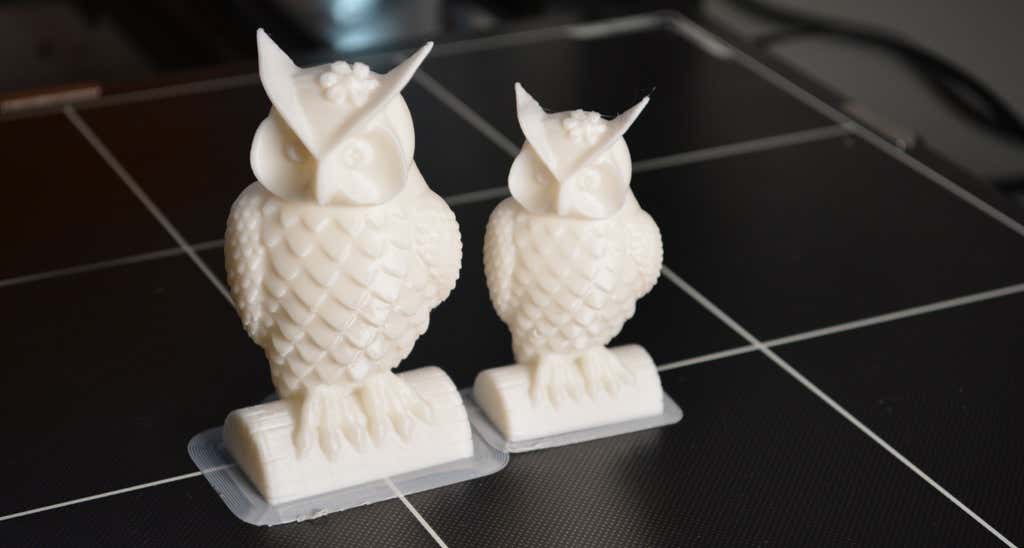
For the first print, we used the test file provided by Anycubic. Appropriately, the owl is about twice the print volume of the owl test print that comes with the smaller Kobra. Given the bowden setup (which makes sense for a printer this size), we were surprised that the ears on the owl turned out so well.
The ears look better than they did on the owl printed on the Kobra which has a direct drive extruder system. We suspect that’s due to the slower print speed. Many times, retractions on bowden extruders will create artifacts, but we didn’t notice any blobs or stringing. It approaches the quality you’d expect from a direct-drive.
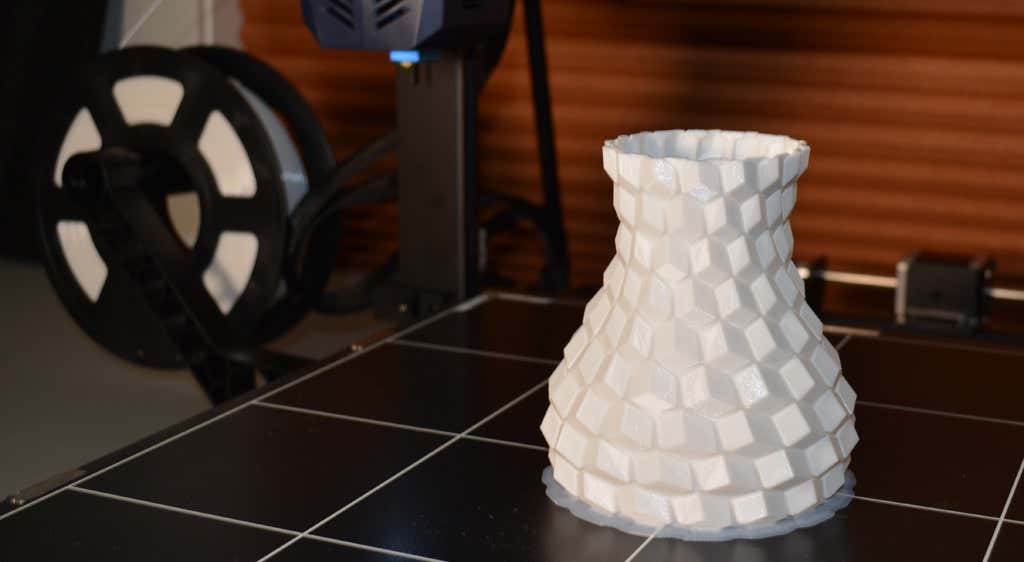
Next, we printed a vase with a large, flat base with a 0.2mm layer height. Removing prints from the glass bed is certainly not as easy as removing prints from smaller, flexible beds, but it’s not a deal-breaker either. We didn’t have any adhesion problems. The prints didn’t release when the glass bed cooled, which is what we expected and hoped for.
Curious what the power requirements would be for a printer this size, we were worried we wouldn’t be able to run multiple printers on the same circuit. We measured the power usage while the Kobra Max was printing, and, as expected, power usage is highest while the printer is warming up. Ours topped out at 473 watts. While printing, it was a more manageable 200-300 watts. We thought it would be more than that. You could probably run three of these printers on a 20 amp circuit.
Cut to the Chase
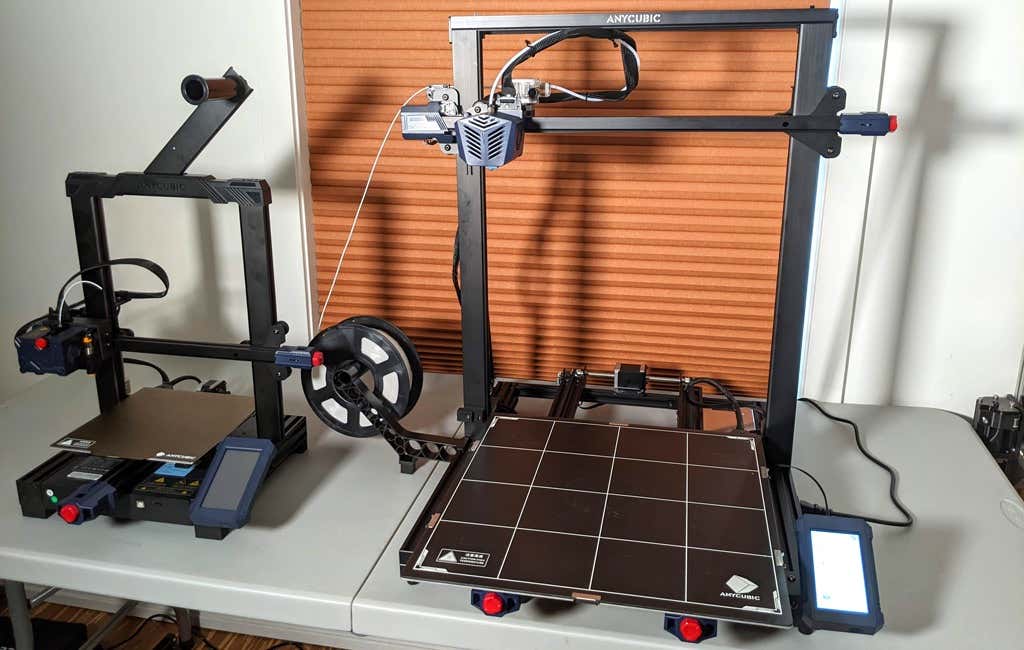
To drive home just how big the Kobra Max is, we put the Kobra on the bed of the Kobra Max. Insane. (We do not recommend you try this.)
A small printer is limiting, so if you find yourself printing large objects in small pieces and assembling them, consider buying a Kobra Max. If you’re new to 3D printing, keep in mind that it takes a long time to print big objects—potentially days and days. Typically, we’d recommend a smaller printer to beginners, but at the price point of $569.00 if you purchase on the Anycubic site, it’s worth considering as an entry-level printer.
One downside is that smaller prints will take a little longer than they would on a smaller, faster printer. That’s just physics. Bigger printers have more inertia to overcome and take longer to move. For example, the print time for our vase was thirteen hours. On our Prusa MK 2.5 with similar settings, it would have taken about twelve hours—not a huge difference.
*Special thanks to FormerLurker for help in reviewing AnyCubic’s Kobra Max 3D printer.
- WhatGeek x 3inuS Kebohub EE01 Mechanical Keyboard Review
- Mobile Pixels Duex Max Portable Monitor Review
- Trifo Lucy: The AI Robot Vacuum and Mop
- The OBSBOT Tiny 4K: an Impressive Webcam for PC & Mac
- Review of Anycubic’s Kobra 3D Printer
Maggie Marystone is a freelance technology writer, human rights worker, and storyteller based in Chicago. Read Maggie’s Full Bio
