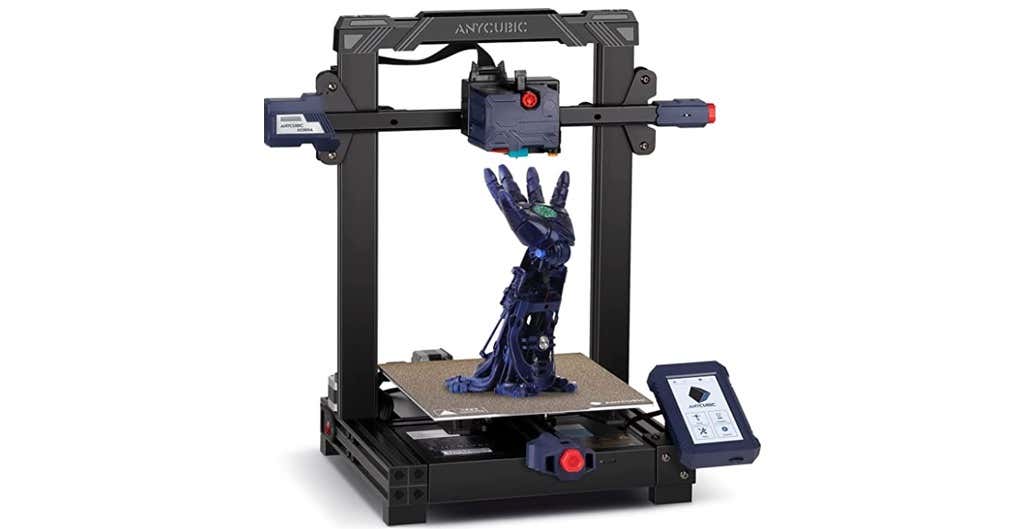
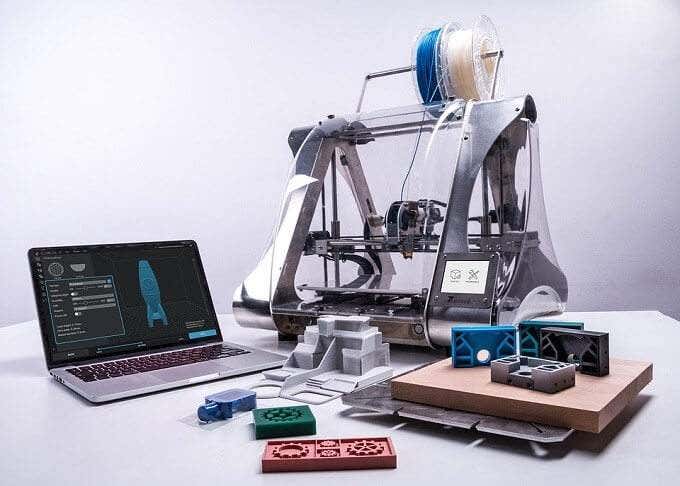
In this 3D printer review, we’ll let you know what you get when you buy an Anycubic Kobra, what it’s like to build it, and our first impressions about its quality and usability.
Features of the Kobra by Anycubic
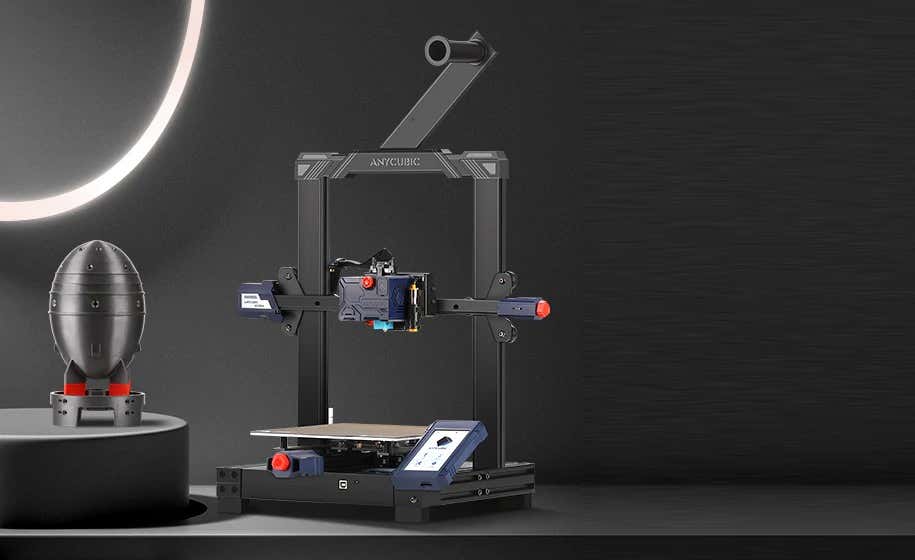
The Kobra by Anycubic is an FDM 3D printer. FDM stands for fused deposition modeling . The print material for FDM printers is plastic filament. If you’re considering buying your first 3D printer, you could also consider a resin printer like the Anycubic Photon Mono X , the larger Photon Mono X 6K , or the Photon M3.
The Kobra’s features include:
- Build volume of 9.8 x 8.7 x 8.7 in. (250 x 220 x 220 mm)
- Machine dimensions of 19.1 x 19.1 x 16.9 in. (486 x 486 x 430 mm)
- Uses 1.75mm PLA, ABS / PETG & TPU filaments
- Ø 0.4 mm replaceable nozzle
- A heated, textured, removable, and flexible build platform made of PEI spring steel
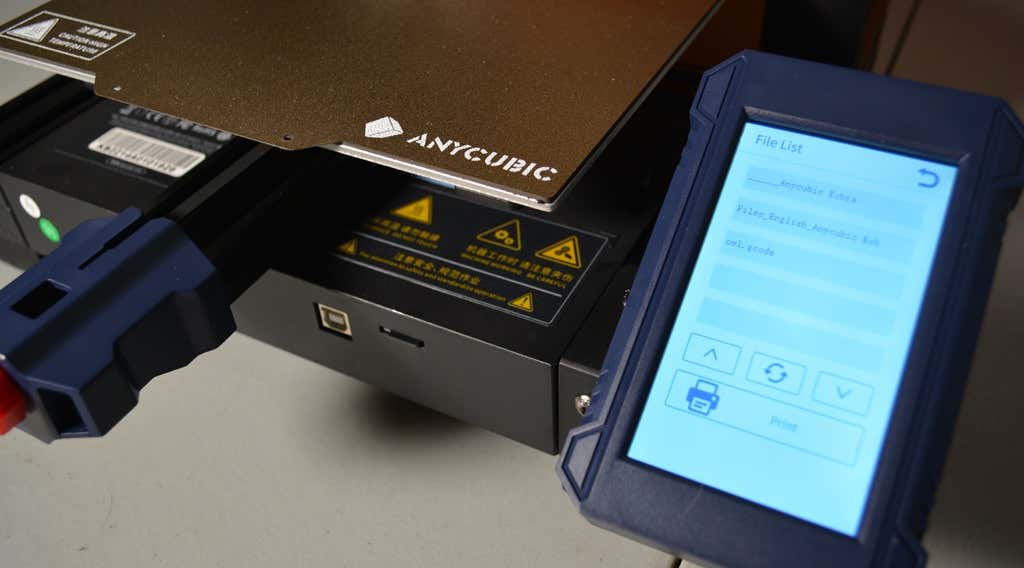
- Ports for USB and microSD card
- 4.3″ color touchscreen LCD
- 25-point auto bed leveling with an inductive sensor using Anycubic’s LeviQ technology
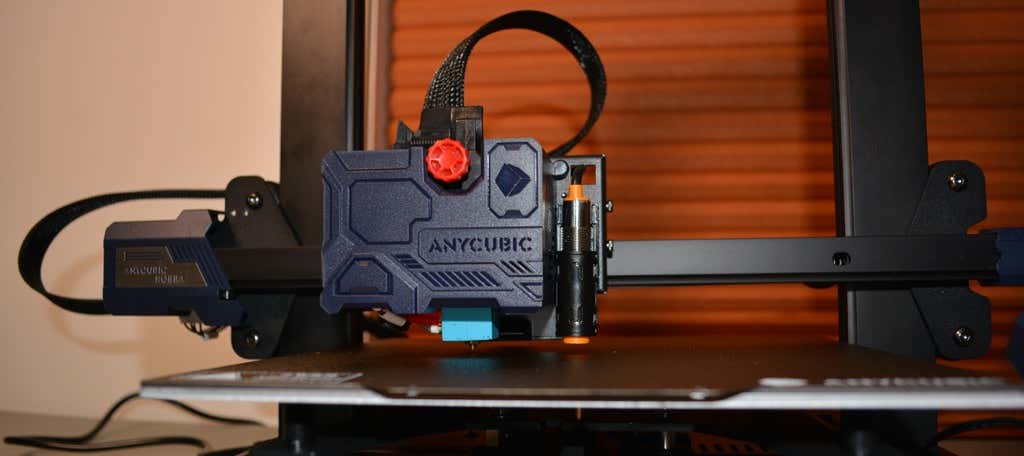
The Kobra has a direct-drive extruder, which is relatively uncommon among printers at this price point. In general, filament printers have either a direct-drive extruder or a bowden extruder. Bowden extruders push the filament into the nozzle from a distance, guided through a teflon tube, whereas direct drive extruders are mounted right above the hot end, greatly reducing the slack inside the tube because it’s so much closer to the nozzle.
The Kobra has an inductive probing sensor for automatic bed leveling. It’s a proximity sensor that can detect nearby metals. It’s not quite as accurate as something like the BL Touch but it’s dramatically cheaper and can give you excellent results. Prusa uses these on printers that are twice as expensive, like the Prusa MK3.
The heated bed has a spring steel sheet that attaches to a magnetic top on the bed, making it incredibly easy to remove your prints. Just remove the spring steel sheet and crack it like an ice tray. In our test print, the print even released itself from the bed as it cooled. Moreover, the bed leaves a nice texture on the underside of the print.
The LCD touchscreen is quite similar to the screens on some of Anycubic’s other printers, like the Anycubic Vyper . It’s intuitive, responsive, and easy to read.
The print volume is quite similar to the Vyper’s, as well, and the print beds are identical. Lastly, the Kobra has optional filament run-out detection. You can turn that feature on or off via the touchscreen panel.
Assembling the Anycubic Kobra 3D Printer
The Kobra comes partially assembled—another reason it’s a good option for beginners to 3D printing. You’ll learn how the printer’s mechanics work as you assemble it, and it won’t take very long since many of the parts are already put together for you.
It took us about fifteen minutes to assemble the Kobra. The instructions were fairly clear, although the photos in the assembly manual could have been larger. There’s not a whole lot to mess up. The cable management is where you want to be the most careful.
The stepper motors are already mounted. They just needed to be plugged in using the provided wiring.
Calibration
Anycubic recommends checking the tension of the belts and ensuring the build plate and x-axis don’t wobble. We didn’t need to make any adjustments to the eccentric nuts which control how tightly the rollers grip on the aluminum extrusions. You don’t want them too tight, and you definitely don’t want them too loose. If you do need to adjust them, it’s fairly simple. You just turn the eccentric nut until the wobbling stops—and no tighter.
If you do need to adjust the belt tension, it’s straightforward. There’s a screw tensioner for each belt. A couple turns of those screws, and you’re done.
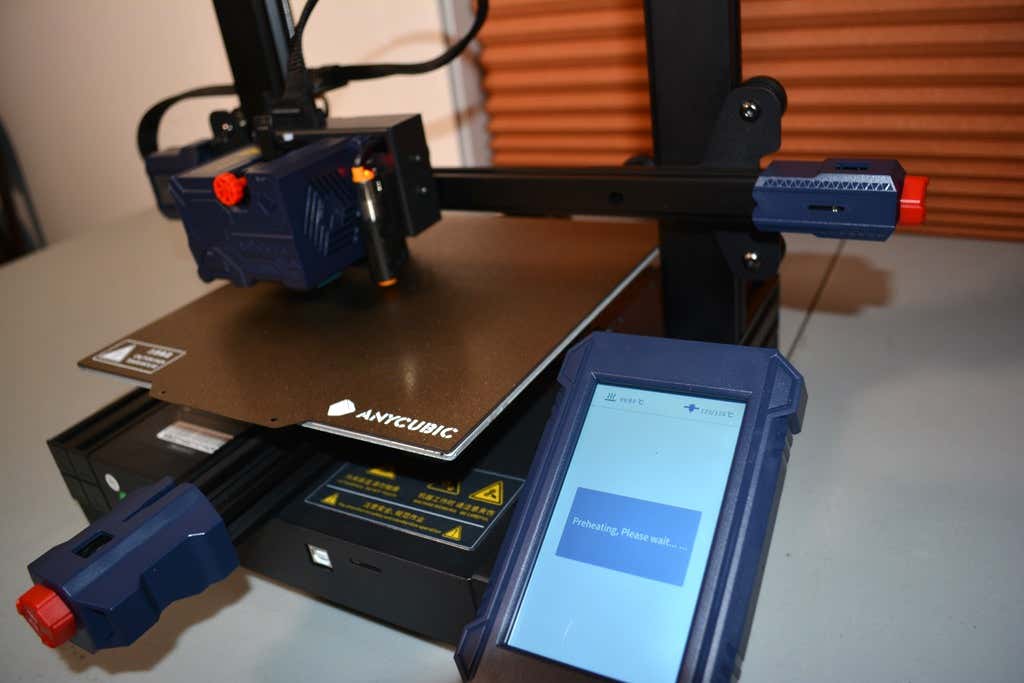
After performing the automatic bed-leveling, we calibrated the z offset. To do that, you put a piece of paper under the nozzle and adjust the offset until it ever-so-slightly grips the paper. You’ll need to fine-tune this as the first layer is being printed. We had to raise the z offset 0.1mm. Your results will vary.
Build Quality of the Anycubic Kobra
The only thing we didn’t like about the build quality is that the z-axis only has one lead screw. Despite that, the x-axis seemed pretty stable. We didn’t notice any sagging.
The cooling fan is a bit noisy, but we probably wouldn’t have noticed if the printer weren’t so quiet.
The filament spool is positioned at the top of the printer. We would have preferred it at the bottom since any extra weight at the top of the direct-drive extruder could make the printer shake. On the other hand, there was no evidence of that happening during our prints.
First Print
For our first test print, we used the test file included on the SD card and printed with Anycubic PLA filament. We didn’t try printing with ABS filament because, in our experience, that requires an enclosure to have any hope of getting the quality you expect from PLA.
We had no problems with bed adhesion on our first print. The print partially released when the bed cooled, which was nice.
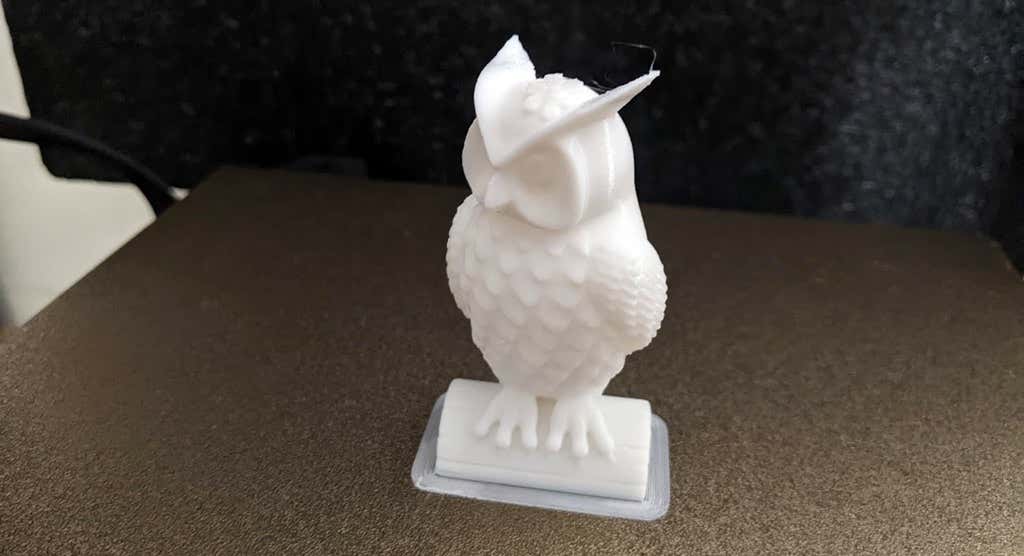
As you can see, we got a good print on our first attempt. There was minimal stringing (really, almost none at all). The only large defect was caused by a piece of plastic we failed to remove from the nozzle. We were particularly impressed by the print quality of the ears at the top of the owl—printers often struggle with thin parts that are at a steep angle and are separated, requiring the nozzle to lift and move.
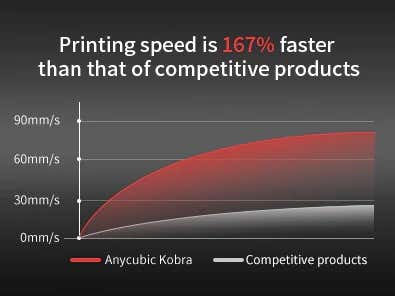
Anycubic says the Kobra’s printing speed is 167% faster than competitors. While the print speed isn’t the fastest we’ve ever seen, we expected that. It’s a trade-off for having a direct-drive extruder instead of a bowden. In our opinion, the responsiveness of a direct-drive extruder is an acceptable tradeoff for the slightly slower print speeds.
Cut to the Chase
Virtually every entry-level 3D printer gets compared to the Ender 3. In this case, the Kobra out-performs the Ender 3 in these areas:
- Less stringing because of the direct-drive extruder
- Comes with a magnetic bed for easy print removal
- No x-axis sagging
- Vastly superior touchscreen
With the Kobra, you’ll get high-quality prints for under $300. If you’re interested in a similar printer with a much larger build volume, keep an eye out for our upcoming review of the Anycubic Kobra Max, a monster FDM 3D printer we simply loved.
*Special thanks to FormerLurker for help in reviewing Anycubic’s Kobra 3D printer.
- WhatGeek x 3inuS Kebohub EE01 Mechanical Keyboard Review
- Mobile Pixels Duex Max Portable Monitor Review
- Trifo Lucy: The AI Robot Vacuum and Mop
- Review of Anycubic Kobra Max 3D Printer
- The OBSBOT Tiny 4K: an Impressive Webcam for PC & Mac
Maggie Marystone is a freelance technology writer, human rights worker, and storyteller based in Chicago. Read Maggie’s Full Bio
3D printing has become a much more mainstream technology, with printing machines available at just about every price point. Most people who want a 3D printer can probably find a model they can afford. Despite this, 3D printing is still so new that few people know how it works.
This is why now is a good time to answer the question “How does 3D printing work?”. There’s a very good chance you’ll have to use one eventually!
Additive vs Subtractive 3D Printing
There are two broad categories of 3D printing. The 3D printers that you can buy yourself are almost all “additive” machines. In other words, they build 3D objects by adding material (usually in layers) until the object is complete. The 3D printers people think of when they hear “3D printer” is almost always of the additive variety.
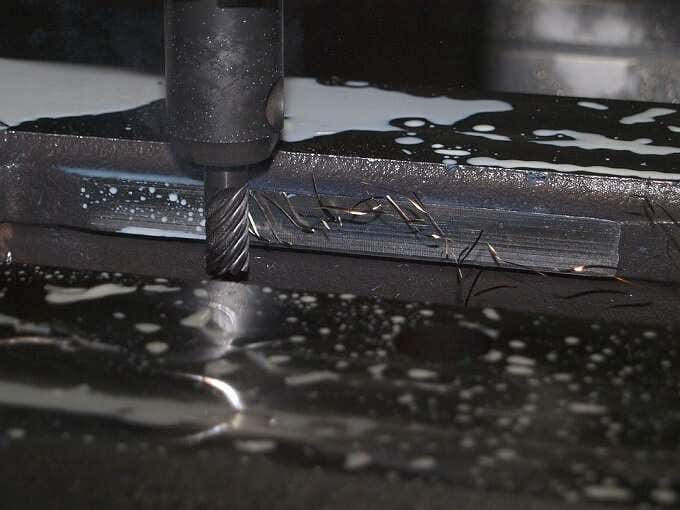
Subtractive 3D printing is very different. Here you start with a fixed amount of material and then remove material until only the finished object is left. A sculptor making a statue out of marble is using a subtractive method. Subtractive machines are usually found in large workshops and industrial settings. CNC milling (computer numerical control) systems are probably the best-known example.
We’ll only be concentrating on additive machines from here on out, since they’re relevant to the average consumer. Just know that subtractive machines belong to the same extended family of 3D printers as the one you might put on a desk.
Fused Deposition Modelling, Stereolithography and Selective Laser Sintering
The three main methods of additive 3D printing are FDM (fused deposition modelling), stereolithography (SLA) and selective laser sintering (SLS).
The da Vinci FDM Printer
FDM is the most common consumer-grade system. With these types of printers a filament of material is passed through a hot print head. The print head is precisely positioned in 3D-space and deposits a layer of material according to exact programmed instructions. There are different approaches to FDM, but we’ll get to that in a moment.
The Nobel SLA Printer
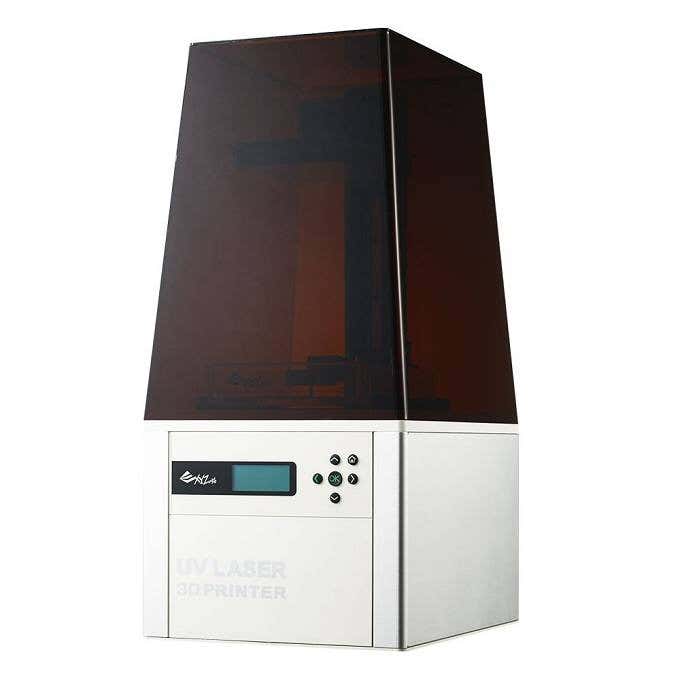
Stereolithography is much less common in consumer systems. These printers use lasers to cure a liquid resin into a solid plastic material. Usually, the object is “pulled” from a vat of resin, forming layer by layer as it rises from the material. In recent years SLA printers have become more compact and affordable. So it’s a real alternative to FDM printers, depending on what type of final model you settle on.
Selective laser sintering (SLS) uses a powerful laser to fuse a polymer powder. The actual powder acts as a support structure for the print, so this type of printing doesn’t need special scaffolding. SLS is not a type of FDM you’ll find on the desktop. It’s still an industrial technology for now.
Cartesian & Delta Robot Printers
A Delta Robot Printer
The most common type of FDM printer is the cartesian 3D printer. The name refers to cartesian coordinates. That’s the XYZ coordinates we all learned in school. The print head can be moved to any XYZ coordinate within the print volume space. The math is simple, the printers are pretty affordable and print quality is precise.
However, depending on how granular the XYZ coordinates are, curved surfaces might not be as smooth as they could be, requiring some manual finishing work.
Delta robot printers take a different approach. The print head is mounted to three arms that run on three rails. By varying the height of each arm, the print head can swing. This design allows for the print head to swing in true curves and also allows for tall objects to be printed within the print volume.
Basically, the longer the rails are, the taller the model can be. Rather than XYZ coordinates, delta robot printers use trigonometry to calculate print head position. The end result is that they can’t reach quite the same print resolution as cartesian printers.
To really understand the delta robot concept, you need to see it in action. Have a look at this video by Johann Rocholl and you’ll quickly get the concept.
Notice the articulation on the arms and how freely and smoothly the print head can move.
3D Printer Materials
3D printers use a variety of materials, but there are two plastics that are by far the most common in consumer-grade applications: ABS and PLA.
ABS (Acrylonitrile Butadiene Styrene) is exactly the same plastic that LEGO bricks are made of. This plastic is susceptible to warping when cooling down and needs a printer with a heated print bed. It’s quite impact resistant, but not particularly strong. It’s suitable for making prototype parts and even final parts that aren’t load-bearing.
PLA (Polylactic Acid) has a low melting point, doesn’t warp much, is easy to work with and has fewer failed prints. It’s also far too brittle for any practical use, but it is brilliant for creating smooth, detailed models that are only meant to be looked at.
The good news is that most consumer 3D printers will work with both of these inexpensive materials. So you can change them out as your needs require.
Nylon filament is another option and there are even printers that use wood or metal as a material. Next-generation printers can also handle more than one filament at a time, allowing for mixed material or multi-color prints.
The Typical 3D Printing Process
If you’ve never made a 3D print yourself, you’re probably curious about how it actually works from a user perspective. While using a 3D printer isn’t as easy as knocking out 2D prints on a laser or inkjet printer, it’s not nearly as difficult as you might think.
After setting up the printer according to the manual, with calibration and levelling done correctly, you first need a model to print.
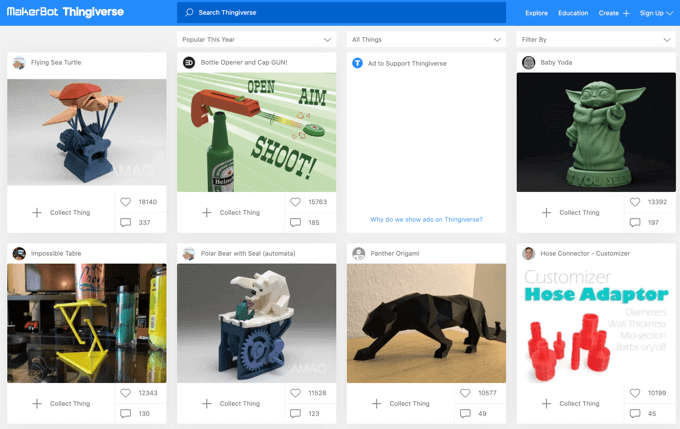
You can make your own model, using something like Zbrush or AutoCAD , but most people are likely to download a model from an online site. The first stop should definitely be Thingiverse , which is quite possibly the most famous collection of user-submitted models. However, there are many alternatives.
After getting a model in a compatible format, you’ll open it up in the software that came with your printer. They all look and work differently, but the basic concept is the same. You may also want to first treat a 3D model with Meshmixer , which ensures that a 3D model is solid and suitable for printing.
In the 3D printer software, you’ll pick the size and quality of the model and the software will convert it into “slices” representing each print layer. It will also calculate the “scaffolding” that has to be printed to support the model while it’s being made. This stuff can be broken off when the print is done.
With all that prep work behind you, the print can begin. Depending on the quality settings, you might be in for a long wait! High quality prints vary from a few hours to a few days. Thankfully, some 3D printers let you monitor the progress of your print remotely via an app.
Once the print is done, you’ll remove it from the bed and then break it free of the scaffolding. In many cases you’ll have to finish the model using sandpaper and special cutting tools to remove imperfections. Some people even paint their models! The only real limit is your creativity.
If you’re itching to buy a 3D printer, these are our best picks and if you’re on a budget, these are more pocket friendly options.
- 10 Troubleshooting Tips for 3D Resin Prints Gone Awry
- How to Access and Change Your WiFi Router Settings (2025 Edition)
- HDMI Cable Types and Specifications Explained
- How to Fix the “Error – Printing” Status Error in Windows
- HP Printer Not Printing Black? 10 Fixes to Try
Sydney Butler is a social scientist and technology fanatic who tries to understand how people and technology coexist. He has two decades of experience as a freelance computer technician and more than a decade as a technologies researcher and instructor. Sydney has been a professional technology writer for more than five years and covers topics such as VR, Gaming, Cyber security and Transhumanism. Read Sydney’s Full Bio
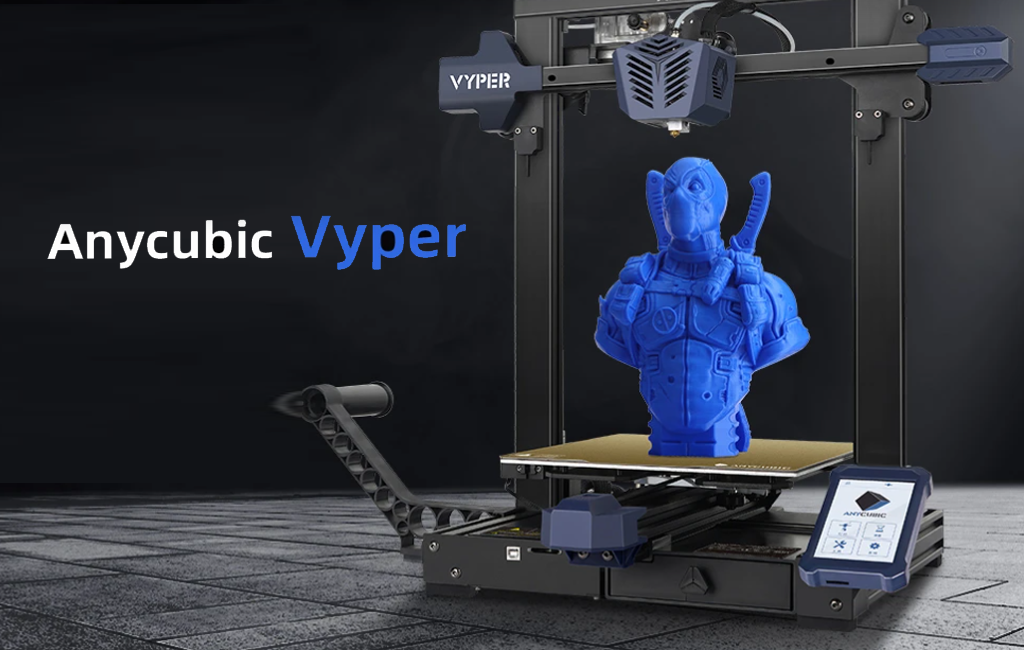
We’re back with another review of a 3D printer from AnyCubic. Last time we reviewed the Mono X, one of AnyCubic’s MSLA printers . This time we tried the AnyCubic Vyper , a mid-range FDM 3D printer that will set you back between $359 and $431 depending on which variant you order.
All in all, the Vyper is a great entry-level filament printer that will have you printing objects right away, without a lot of setup time or trial and error.
Features of the AnyCubic Vyper 3D Printer
AnyCubic’s Vyper 3D printer comes with a rich feature set. The Vyper is comparable to other 3D filament printers in its class and doesn’t cost as much as many of its competitors.
- Large build volume – 9.6 x 9.6 x 10.2 inches (245mm x 245mm x 260mm)
- Automatic bed-leveling via strain gauge sensor
- Dual parts cooling fan, plus hotend fan
- TMC2209 silent stepper driver for ultra quiet and accurate printing
- Built-in belt tensioners for ease of maintenance
- 4.3” color touchscreen
- 32-bit processor
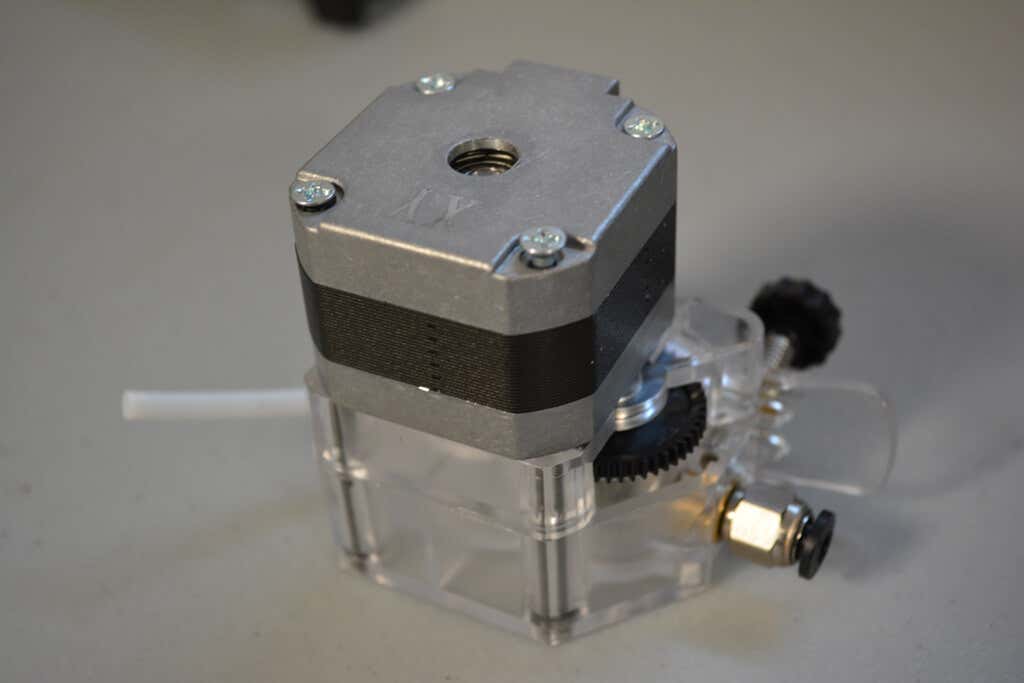
- Dual gear extruder driver
- Dual screw Z axis
- Spring steel bed for easy part removal
- LED light next to the nozzle

We could go on at length about each feature, but suffice it to say, it’s got a lot of nice features, most notably the spring steel sheet and automatic bed-leveling.
Assembling the Vyper 3D Printer
It took less than 30 minutes to unpack and build the machine before our first part started printing. And five minutes of that was spent looking for tools we thought were missing but were actually included in a really nice built-in storage drawer we completely missed at first glance.

The Z-axis and the XY axis were completely assembled, requiring only that we connect them to each other using the included bolts. Next, we mounted the touchscreen with a few bolts and connected all the clearly-marked electrical cables. It was almost impossible to do it wrong.
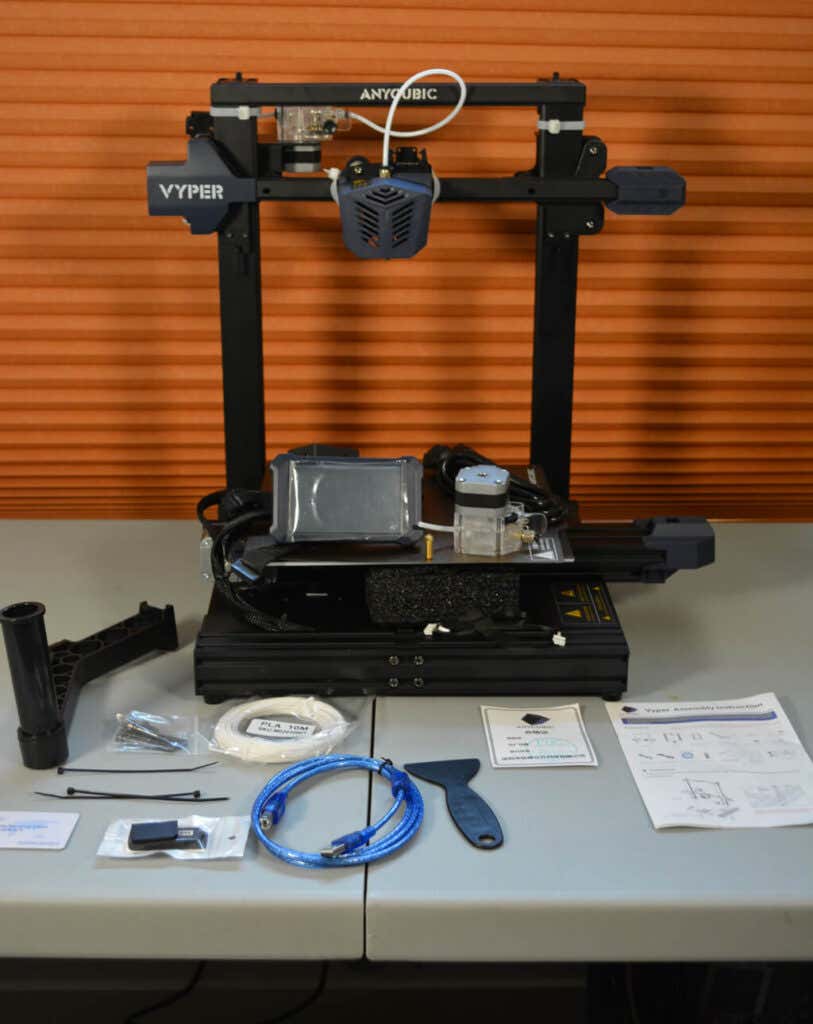
Finally, there were several zip ties used to hold the parts down during transportation. We cut those off, per the instructions. That was it.
Build Quality of the Vyper
The Vyper uses 20/20 extrusions and molded plastic covers. All the parts looked professional and well-made, not janky like MK3 parts can be. The cable connectors for the wires are user-friendly and well-placed. The touchscreen is second-to-none, and the part drawer is a really nice touch.

Out of the box, the Y-axis needed a tiny adjustment (the instructions mention this possibility). We were impressed by the hotend and the more than adequate part-cooling. The Vyper uses a dual fan, which means you can run your printer faster and still cool your layers. The attention to detail really makes it feel like a printer that costs a lot more than it does.
Calibration
The first step is to level the print bed. AnyCubic advertises the Vyper as “auto-leveling,” and it definitely is. The Vyper uses a method called strain gauge leveling that measures the force applied to the nozzle to determine when it’s made contact with the bed. This has a couple of advantages over other automatic bed-leveling methods.
First, there’s no need to adjust the height of your leveling probe or apply an offset. Second, having the leveling sensor built directly into the nozzle means your probe can reach every bit of the build plate.
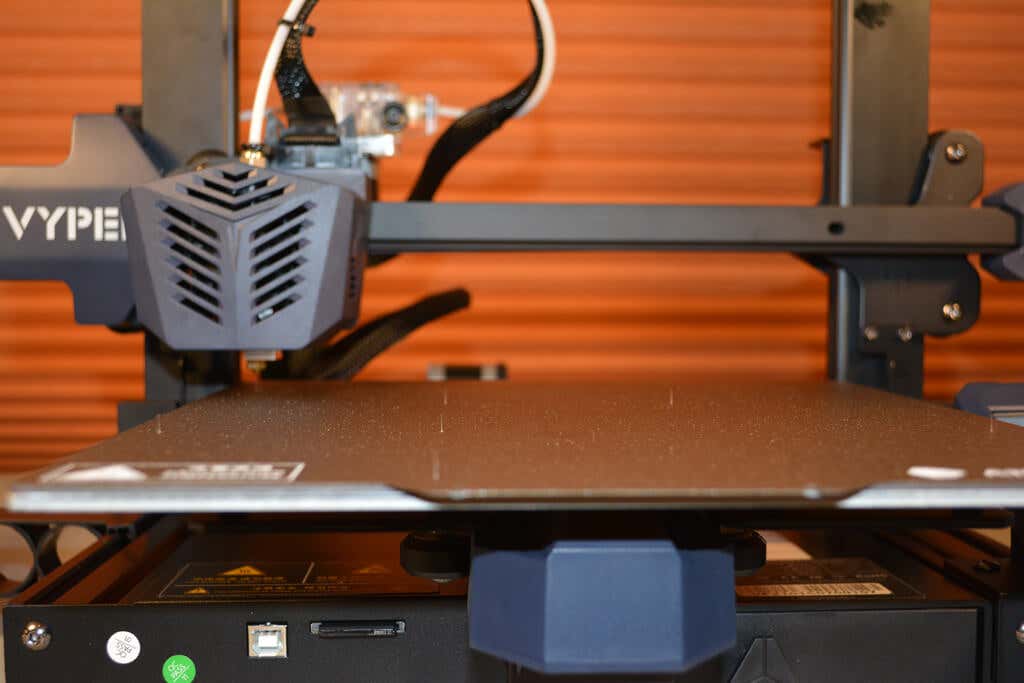
Bed leveling was easy to find in the touchscreen control menu, and the touchscreen itself felt extremely responsive. It’s probably the best touchscreen we’ve used on a 3D printer. Leveling the bed was fairly a fairly quick endeavor except for the time it took the Z-axis to drop all the way down. That seemed very slow, but all in all, the process was a quick one. The slowness of the Z-axis is probably a trade-off for better accuracy. And, since you don’t need to level the bed before every print, it’s not a big deal.
The Vyper uses a 4×4 grid system to perform bed leveling and stores it into EEPROM for all subsequent prints or until you re-level it.
First Print
Other than a little bit of oozing on the top of the model, owl.gcode, the test print looked very good. We suspect that particular print could be improved quite a bit by adjusting the Cura settings and reslicing it, but it looked better than anticipated, especially for a first print.
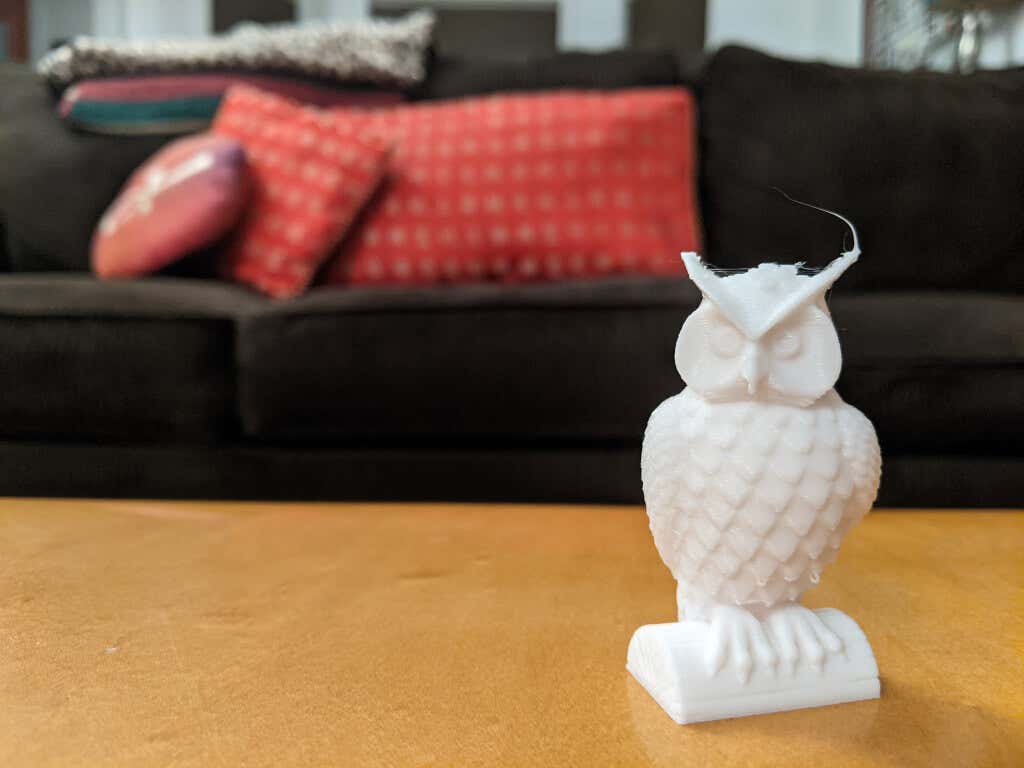
After letting the print bed cool and removing the steel sheet, the print dropped off with almost no effort. The magnetic spring steel bed is a must-have feature if you’re shopping for a 3d printer. The textured surface left a nice finish on the bottom of the test print. The test print completed just under 90 minutes–impressively fast.
Other than the fan, the Vyper is almost silent. Having lived in a house with many 3D printers, we can attest that this is the quietest one we’ve ever used.
Cut to the Chase
For the money, this printer is a steal. It’s easy to set up, easy enough for a beginner to start printing in half an hour. It’s reliable enough to print batches. In fact, we didn’t have any failures at all.
If we were going to buy a printer for someone who had never used a 3D printer before, the AnyCubic Vyper would be a strong contender. It’s much easier to use than an Ender 3 because of the automatic bed leveling and the high-quality parts.
The Vyper requires very few adjustments, which means that the end-user can start printing right away. The Vyper also works great with OctoPrint, so you can get access to all those great OctoPrint plug-ins .
The Vyper might be a great candidate for a print farm or school 3D printing lab since they’re so inexpensive and easy to set up and because of the low failure rate.
All in all, the Vyper is a great 3D printer, well worth the money.
- WhatGeek x 3inuS Kebohub EE01 Mechanical Keyboard Review
- Mobile Pixels Duex Max Portable Monitor Review
- Trifo Lucy: The AI Robot Vacuum and Mop
- Review of Anycubic Kobra Max 3D Printer
- The OBSBOT Tiny 4K: an Impressive Webcam for PC & Mac
Maggie Marystone is a freelance technology writer, human rights worker, and storyteller based in Chicago. Read Maggie’s Full Bio
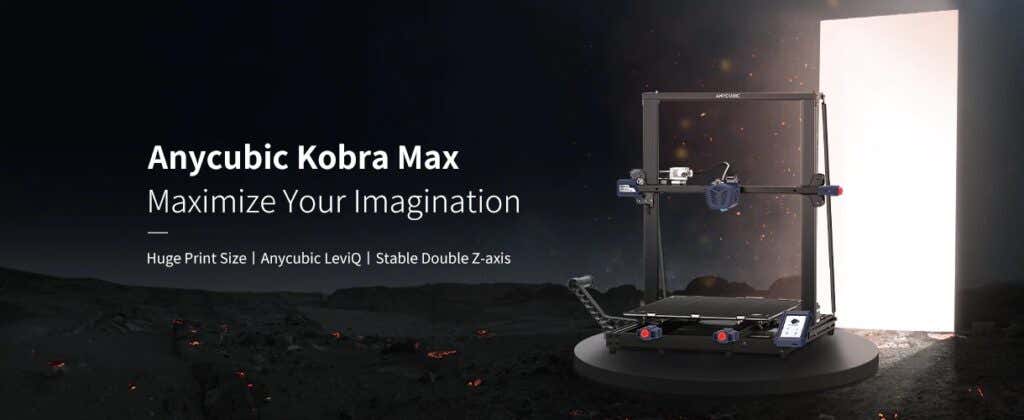
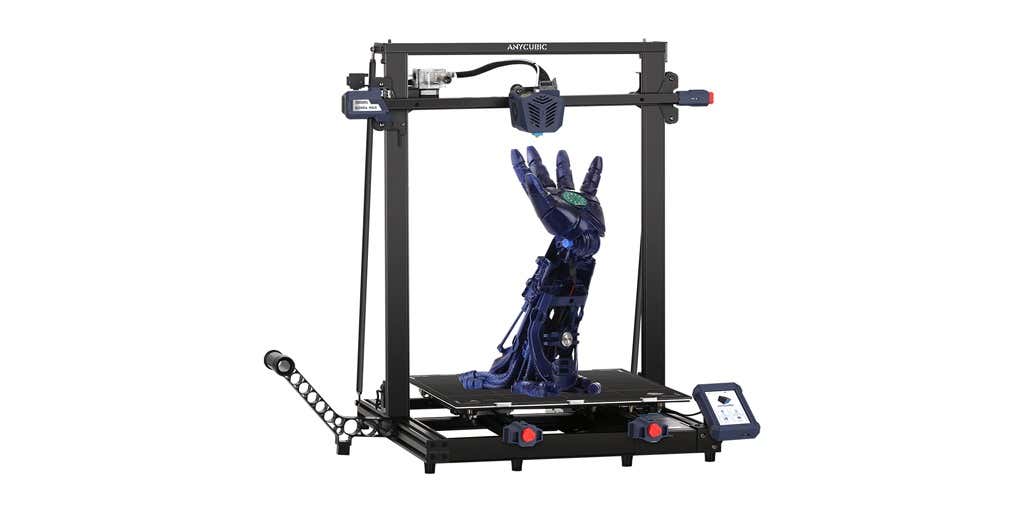
3D printer manufacturer, Anycubic, recently released two new printers—the Anycubic Kobra and its bigger, badder uncle, the Anycubic Kobra Max. We were interested in testing both products in our hunt for the best entry-level 3D printers. We’re looking for ease-of-use and affordability, as well as build and print quality.
We’ve published a number of 3D printer reviews from Anycubic—for both FDM printers like the Anycubic Vyper that print with spools of filament and SLA resin 3D printers like the Anycubic Photon Mono X 6K that use a liquid resin as its raw material—and we can say that the Kobra Max has quickly become one of our favorites.
Features of the Anycubic Kobra Max 3D Printer
The most obvious feature of this printer is its size. It is absolutely massive. That means you can print huge items in a single piece. Think of a full helmet or an entire ukulele—these are things you couldn’t print in one piece on a normal-sized 3D printer. Truly, the word “Max” doesn’t sufficiently capture just how big this printer is. Good luck fitting the packaging into your trash or recycling bins!
We were skeptical that a Cartesian printer of this size (which relies on a moveable print bed) would perform well since it has a lot of weight to move around. Admittedly, it’s not the speediest printer out there because of those design tradeoffs, but it works great.
The Kobra Max has an impressive list of technical specifications:
- Leveling: Automatic, 25 points leveling using the Anycubic Leviq technology
- Panel area: 7.95 in² / 51.3 cm²
- Filament run-out detection: support
- Printing material: PLA / ABS / PETG & TPU
- Nozzle size: ø 0.4 mm (replaceable)
- Nozzle temperature: ≤ 500 °F / 260 °C
- Hot bed temperature: ≤ 194 °F / 90 °C
- Average speed: 3.1 – 3.9 in./s (80mm/s – 100m/s)
- Control panel: 4.3 inch LCD touch screen
- Z-axis: double threaded rod
- Print size: 17.7 x 15.7 x 15.7 in. / 45 x 40 x 40 cm (HWD)
- Build volume: 19.02 gal. / 72.0 L
- Machine dimensions: 72 x 71.5 x 66.5cm
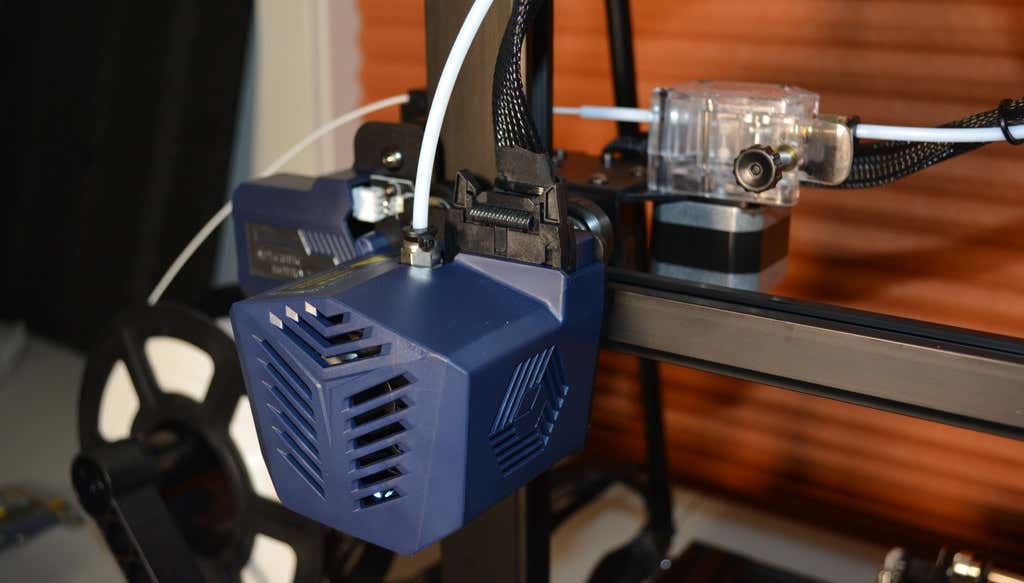
As far as we can tell, the extruder is identical to the extruder and print head on the Anycubic Vyper. Furthermore, the Kobra Max has the same automatic bed-leveling system as the Vyper. The system uses a pressure sensor instead of an inductive sensor.
The bed-leveling sensor is right on the nozzle itself, ensuring that it can probe every printable part of the bed. And since the sensor is pressure-based, you could replace the glass bed with any other material and the bed-leveling system will still work. (Inductive sensors require metal to work, so you won’t find them on printers with glass beds.)
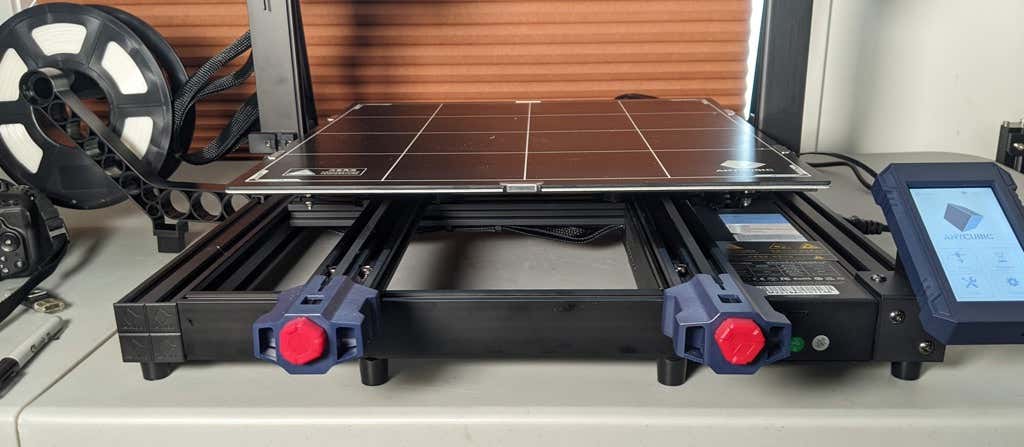
Since the Kobra Max’s printing platform is a rigid glass sheet, you can’t remove and flex it to pop your prints off. We prefer removable spring steel build plates, but glass is still a nice printing surface. If your printer doesn’t have a removable bed, glass is ideal because you can use metal scrapers to remove your prints without worrying about scratching the surface.
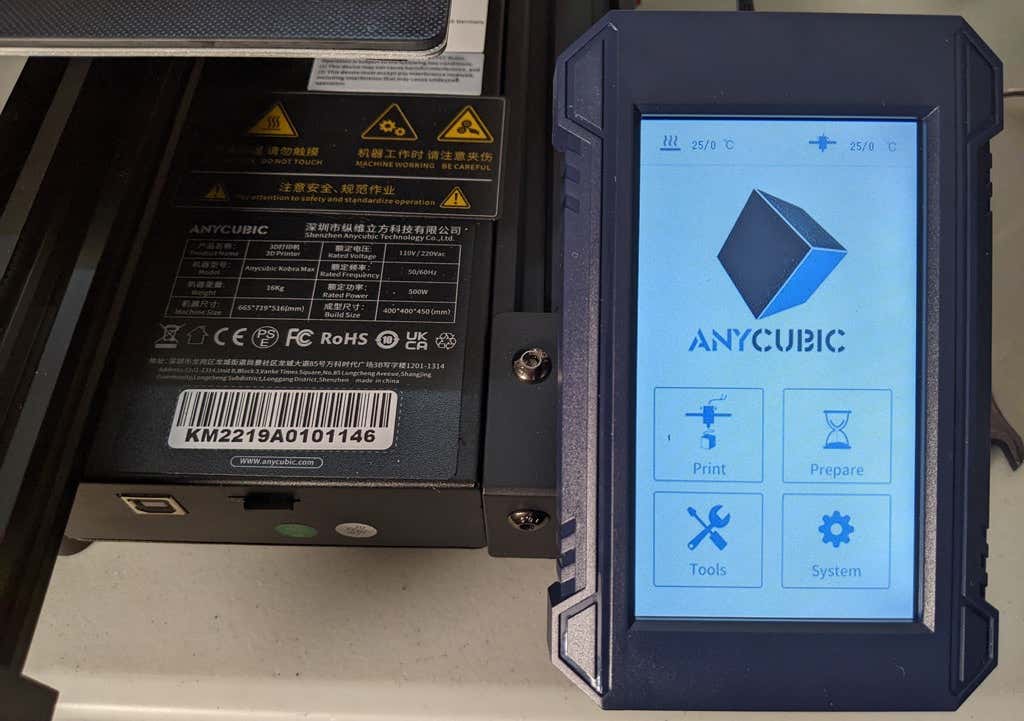
The LCD touchscreen is identical to the screens used on many other Anycubic printers. As usual, it’s responsive and easy to use.
A note about filament types: the Kobra Max will print with PLA, PETG, TPU, and ABS. However, if you really want to print with ABS and get the best possible results, the printer should be inside an enclosure. Given its size, it may be challenging to build a suitable enclosure for the Kobra Max.
Assembling the Kobra Max 3D Printer
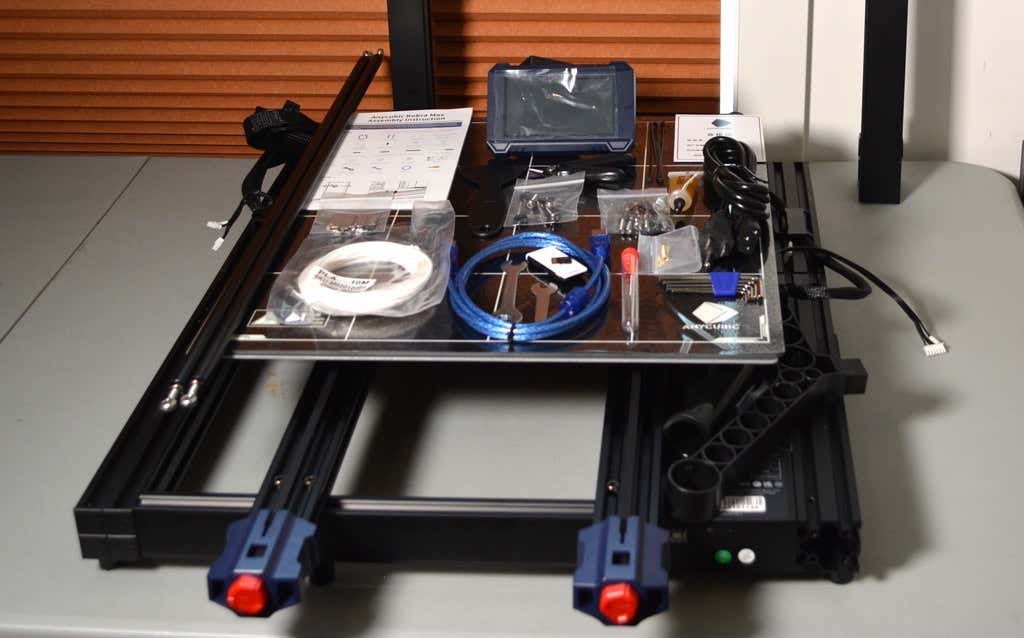
When assembling the new Kobra Max, make sure you have sufficient working space. Since the bed moves forward and backward, you need more space than you’d think. We put it on a 30” folding table, and when it’s printing, it needs about 36 inches, front to back.
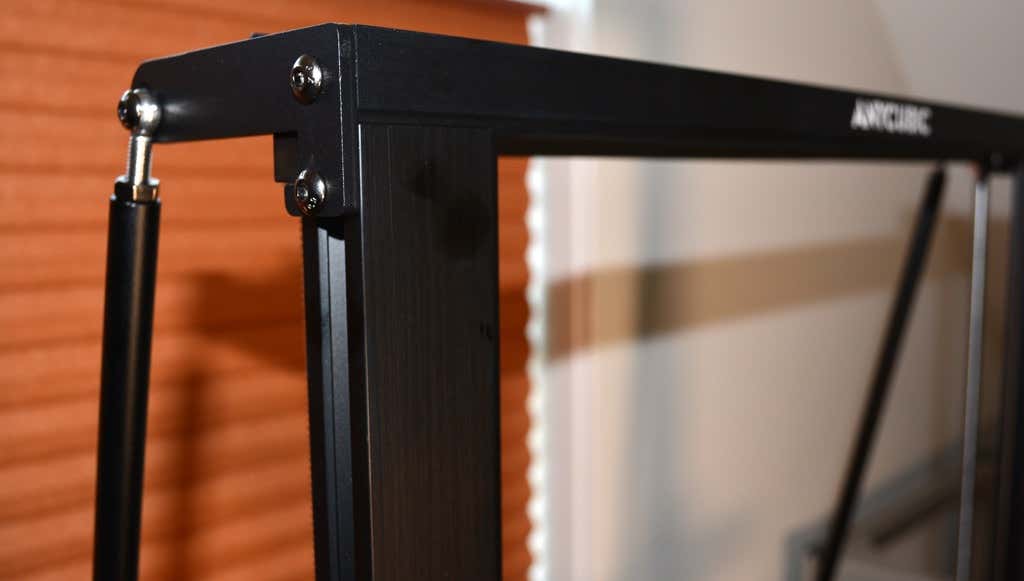
Assembly of the Kobra Max is no more difficult than assembling the Kobra or Vyper. The only additional items are the diagonal braces which add stiffness to the frame, reducing mechanical vibration.
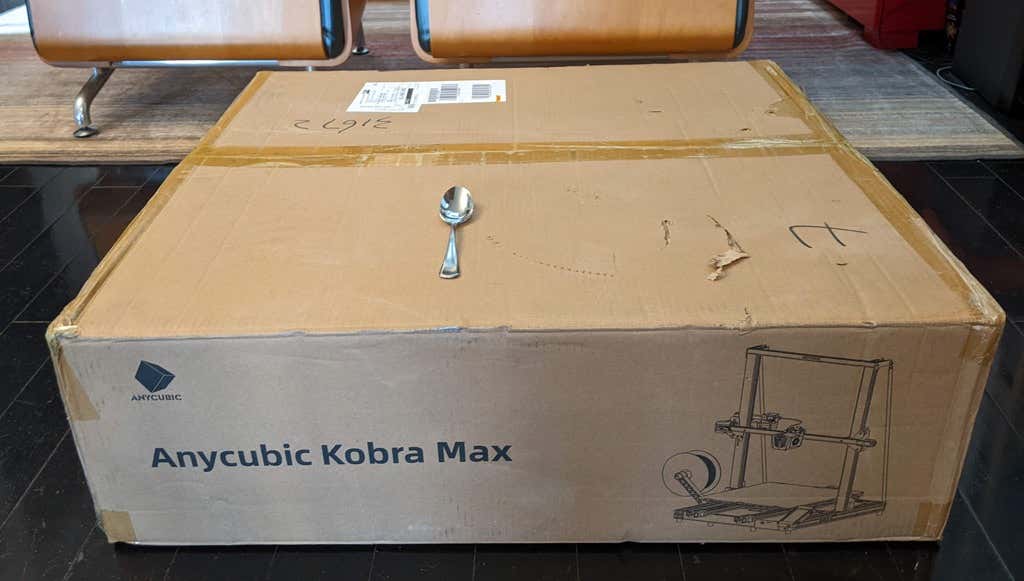
It took two people about 15 minutes to assemble. Double-check that you’ve cut all the zip ties used to stabilize the printer during shipping. There are a lot of them.
Calibration
The auto-bed-leveling system is easy to use. Anycubic recommends that you check the x- and the y-axes to make sure they don’t wobble. If they do, you can adjust the eccentric nuts until the wobbling stops. There was no wobble on our printer, so we didn’t have to do anything.
Additionally, the x- and y-axes have belt tensioners. We needed to slightly tighten the x-axis on ours. The tensioners are easy to use and are features a lot of other printers lack. Who wants to take apart the extruder assembly just to tighten the belts? Not us, and probably not you.
Build Quality of the Kobra Max
Due to the addition of the diagonal braces, the frame is really stiff. The dual z-axis screws are an improvement over the smaller Kobra. They virtually eliminated sagging of the x-axis assembly.
The spool holder sits on the base of the printer, reducing wobbling when printing tall items. It’s better than having the spool on the top like on the Kobra.
This printer is built with aluminum extrusions with aesthetically-pleasing plastic covers for the hotend and the tenionsers. It’s got an optical z endstop. The x and y endstops are mechanical. The whole thing feels solid.
First Print
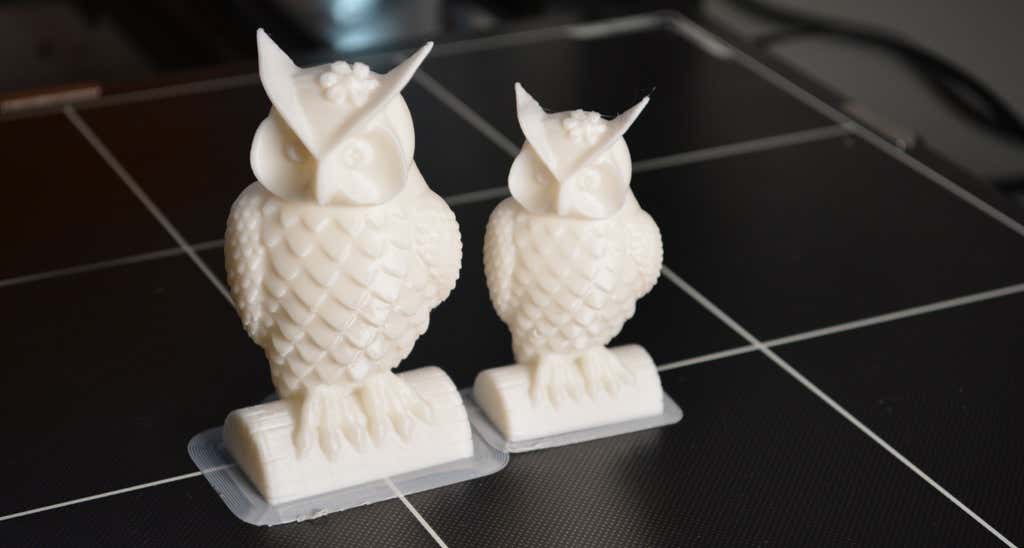
For the first print, we used the test file provided by Anycubic. Appropriately, the owl is about twice the print volume of the owl test print that comes with the smaller Kobra. Given the bowden setup (which makes sense for a printer this size), we were surprised that the ears on the owl turned out so well.
The ears look better than they did on the owl printed on the Kobra which has a direct drive extruder system. We suspect that’s due to the slower print speed. Many times, retractions on bowden extruders will create artifacts, but we didn’t notice any blobs or stringing. It approaches the quality you’d expect from a direct-drive.
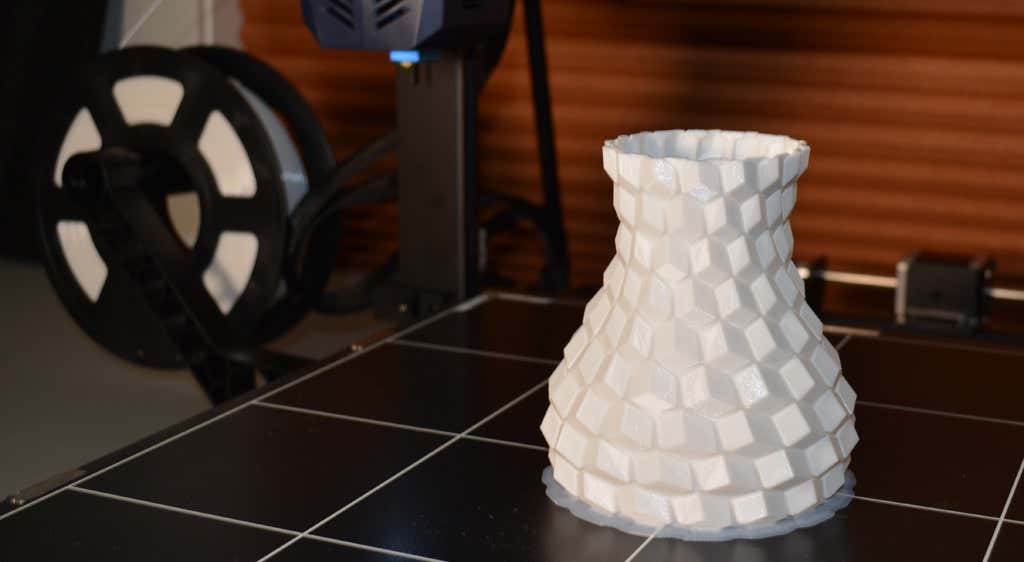
Next, we printed a vase with a large, flat base with a 0.2mm layer height. Removing prints from the glass bed is certainly not as easy as removing prints from smaller, flexible beds, but it’s not a deal-breaker either. We didn’t have any adhesion problems. The prints didn’t release when the glass bed cooled, which is what we expected and hoped for.
Curious what the power requirements would be for a printer this size, we were worried we wouldn’t be able to run multiple printers on the same circuit. We measured the power usage while the Kobra Max was printing, and, as expected, power usage is highest while the printer is warming up. Ours topped out at 473 watts. While printing, it was a more manageable 200-300 watts. We thought it would be more than that. You could probably run three of these printers on a 20 amp circuit.
Cut to the Chase
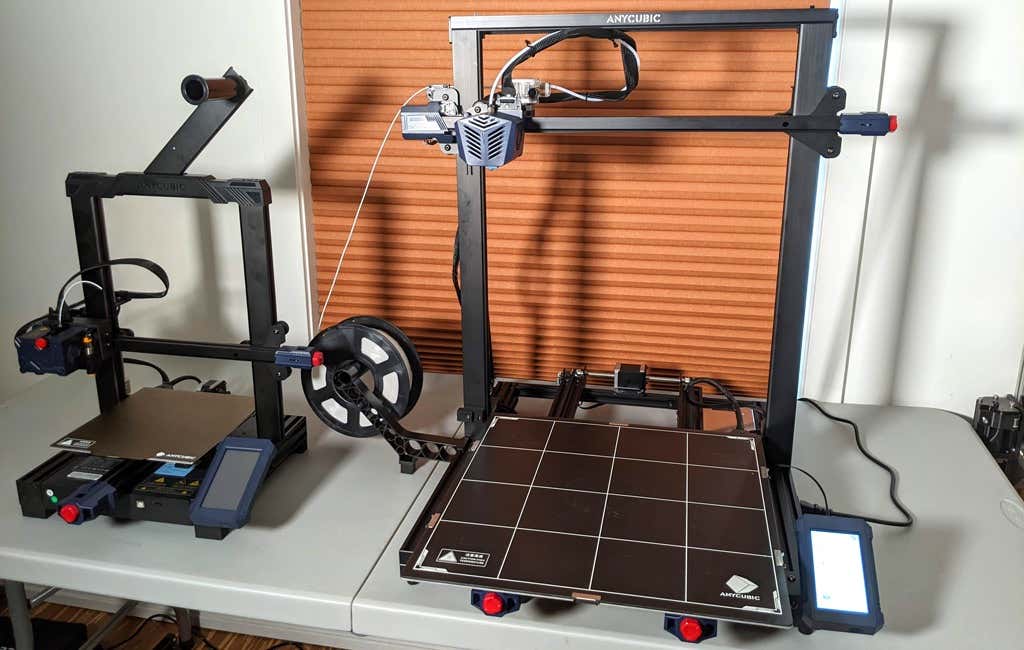
To drive home just how big the Kobra Max is, we put the Kobra on the bed of the Kobra Max. Insane. (We do not recommend you try this.)
A small printer is limiting, so if you find yourself printing large objects in small pieces and assembling them, consider buying a Kobra Max. If you’re new to 3D printing, keep in mind that it takes a long time to print big objects—potentially days and days. Typically, we’d recommend a smaller printer to beginners, but at the price point of $569.00 if you purchase on the Anycubic site, it’s worth considering as an entry-level printer.
One downside is that smaller prints will take a little longer than they would on a smaller, faster printer. That’s just physics. Bigger printers have more inertia to overcome and take longer to move. For example, the print time for our vase was thirteen hours. On our Prusa MK 2.5 with similar settings, it would have taken about twelve hours—not a huge difference.
*Special thanks to FormerLurker for help in reviewing AnyCubic’s Kobra Max 3D printer.
- WhatGeek x 3inuS Kebohub EE01 Mechanical Keyboard Review
- Mobile Pixels Duex Max Portable Monitor Review
- Trifo Lucy: The AI Robot Vacuum and Mop
- The OBSBOT Tiny 4K: an Impressive Webcam for PC & Mac
- Review of Anycubic’s Kobra 3D Printer
Maggie Marystone is a freelance technology writer, human rights worker, and storyteller based in Chicago. Read Maggie’s Full Bio
