In this 3D printer review, we’ll let you know what you get when you buy an Aquila S2, what it’s like to build it, and our first impressions about its quality and usability.
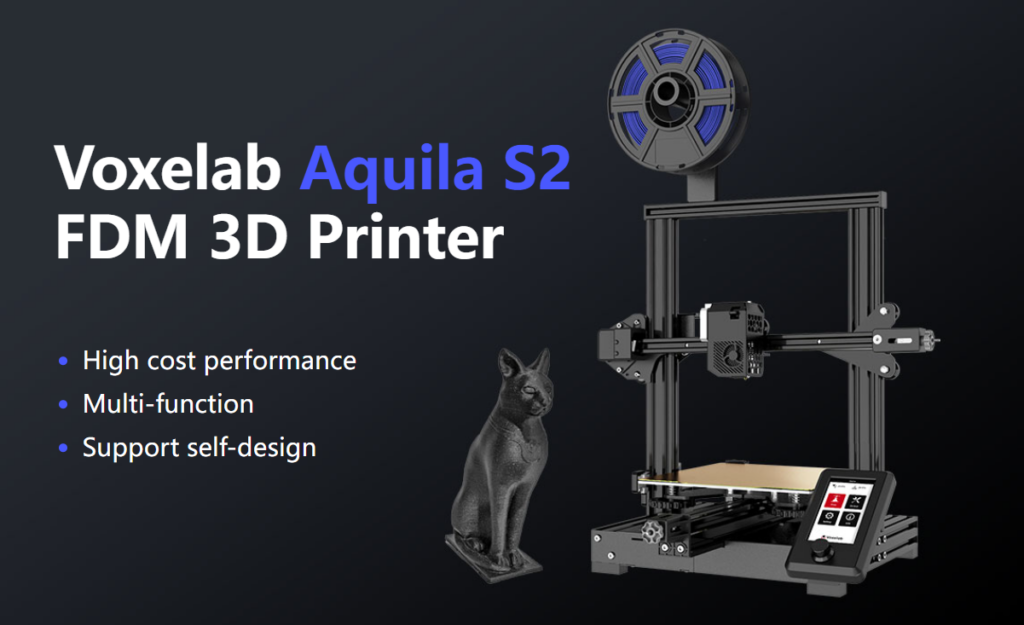
Features of the Voxelab Aquila S2 by Flashforge
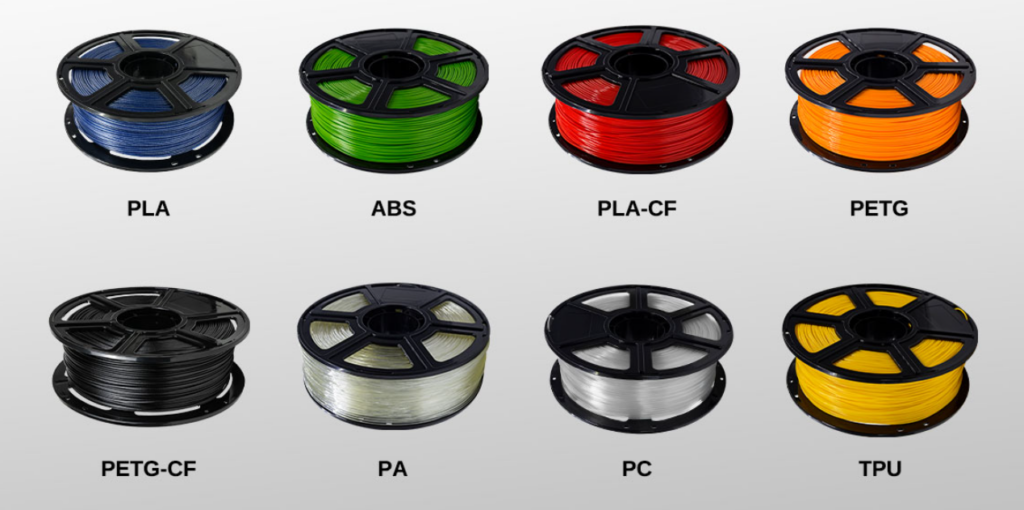
The Voxelab Aquila S2 is an FDM filament printer that will print with PLA filament as well as PETG, PETG-CF, TPU, and ABS filaments and more. FDM is an additive process, making these some of the most versatile and easy-to-use 3D printers, especially compared to resin printers , which are amazing , but are more difficult to use and can be quite messy.
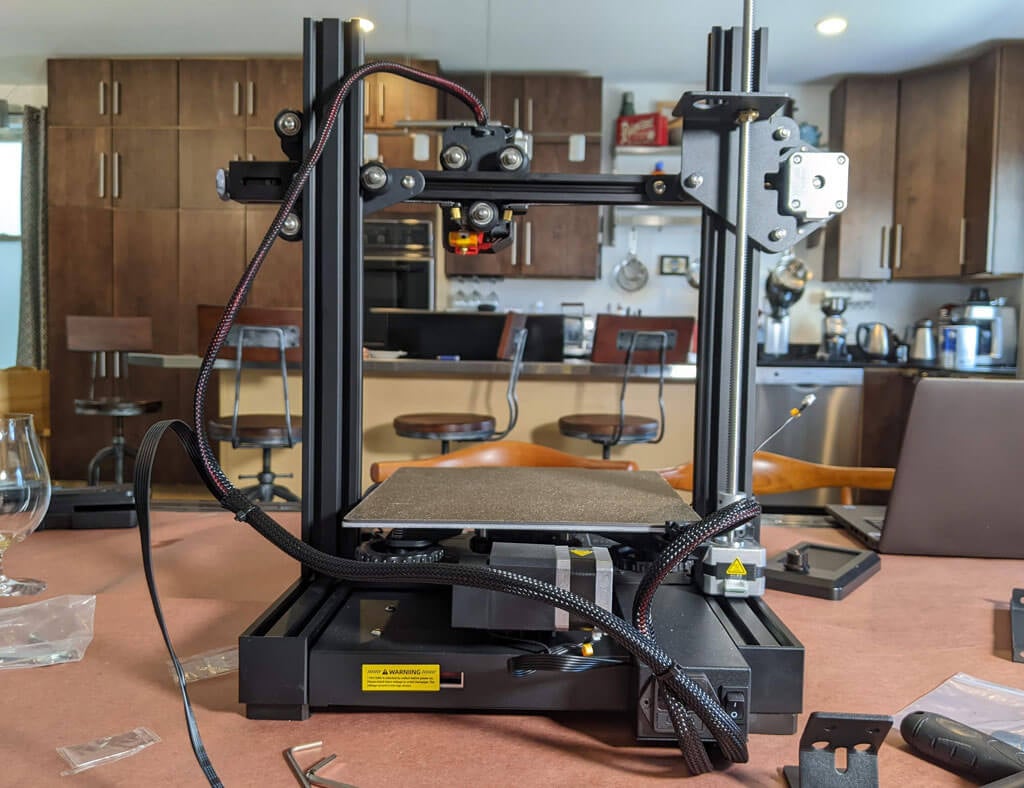
The build volume is a generous 8.7 x 8.7 x 9.4 inches (220mm x 220mm x 240mm), quite similar to the print volume of the Creality Ender 3 V2. Earlier models came with glass beds coated in Carborundum, which is also similar to the Ender. Ours came with a magnetic print bed, which we loved.
We’ll discuss the magnetic bed more below, but suffice it to say, it’s one of the best features of this printer or any printer.
The Aquila is very quiet. The fan is the loudest part. Additionally, it has a hot end with an unusually high temperature for an entry-level printer—up to 300 degrees Celsius, allowing you to use all common filament types.
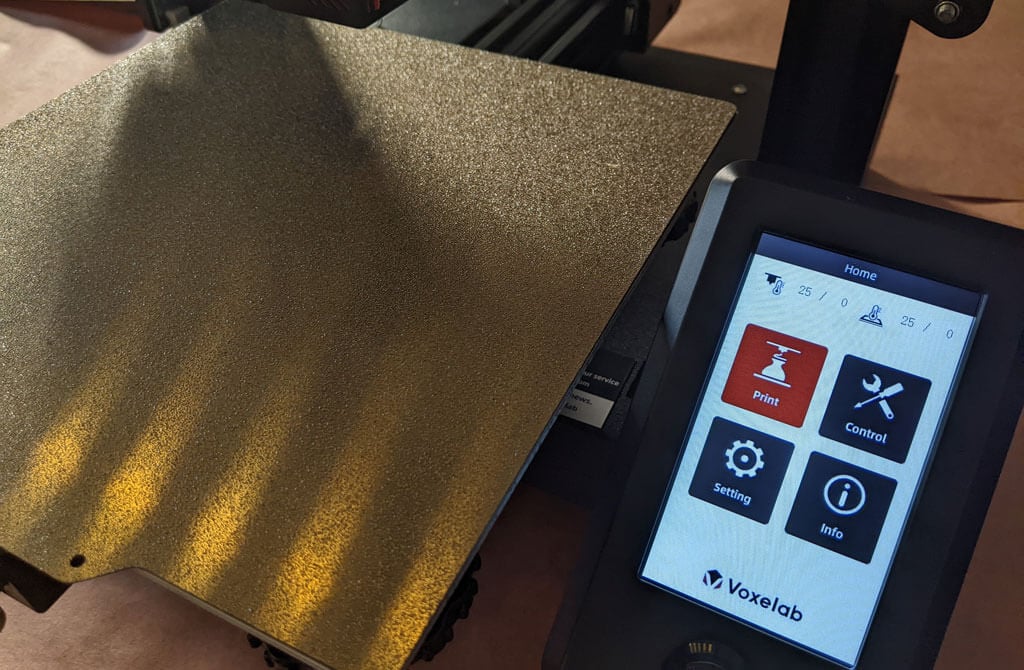
It has a fantastic LED display, quite like the display on the AnyCubic Vyper. It’s big. It’s clear and colorful. Despite the fact that it’s not a touch-screen, it’s intuitive to use. It has a rotary knob control that you push to make a selection.
A few other observations about the Aquila’s features:
- If you have frequent power outages in your area, you’ll be happy to know that the Aquila can resume printing after a power interruption.
- The Aquila runs a fork of Marlin, probably the most popular open-source 3D printing firmware available.
- You can load files to print via the MicroSD card reader or you can use a serial interface like Pronterface.
- Since most models of the Aquila include the N32 chip, that means you could run OctoPrint and all of the great OctoPrint plug-ins on this printer.
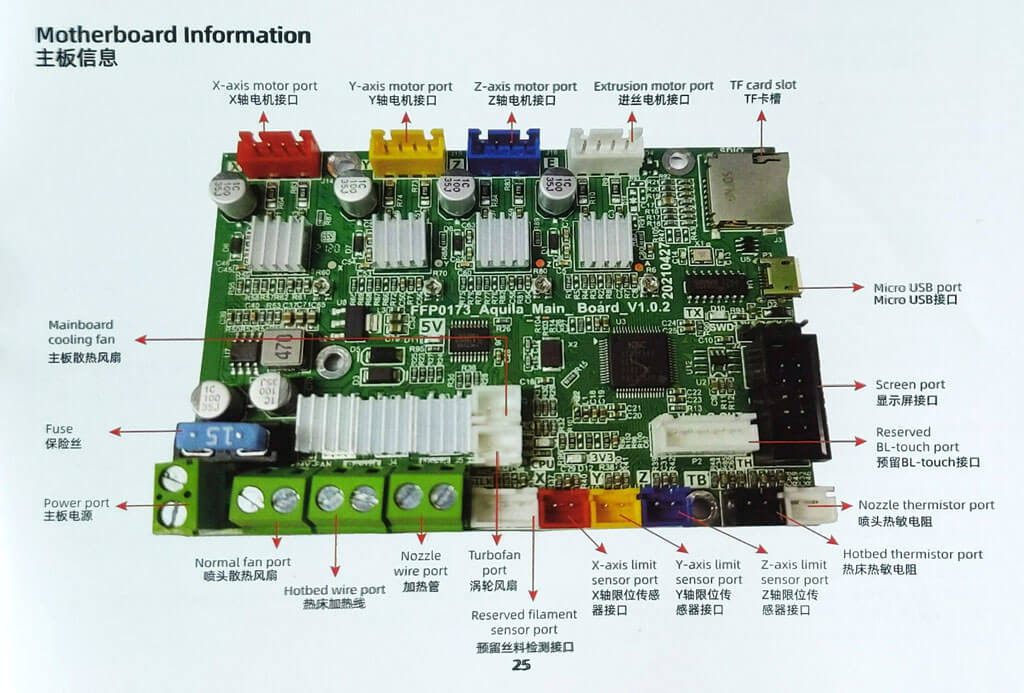
The user manual includes a full schematic of the motherboard, which will come in handy when you inevitably mod your printer.
Assembling the Voxelab Aquila S2 3D Printer
If you have any experience with 3D printing, you know to expect a certain amount of frustration when assembling your new printer.
There are a lot of typos and confusing language in the manual. We muddled through, and everything turned out fine.
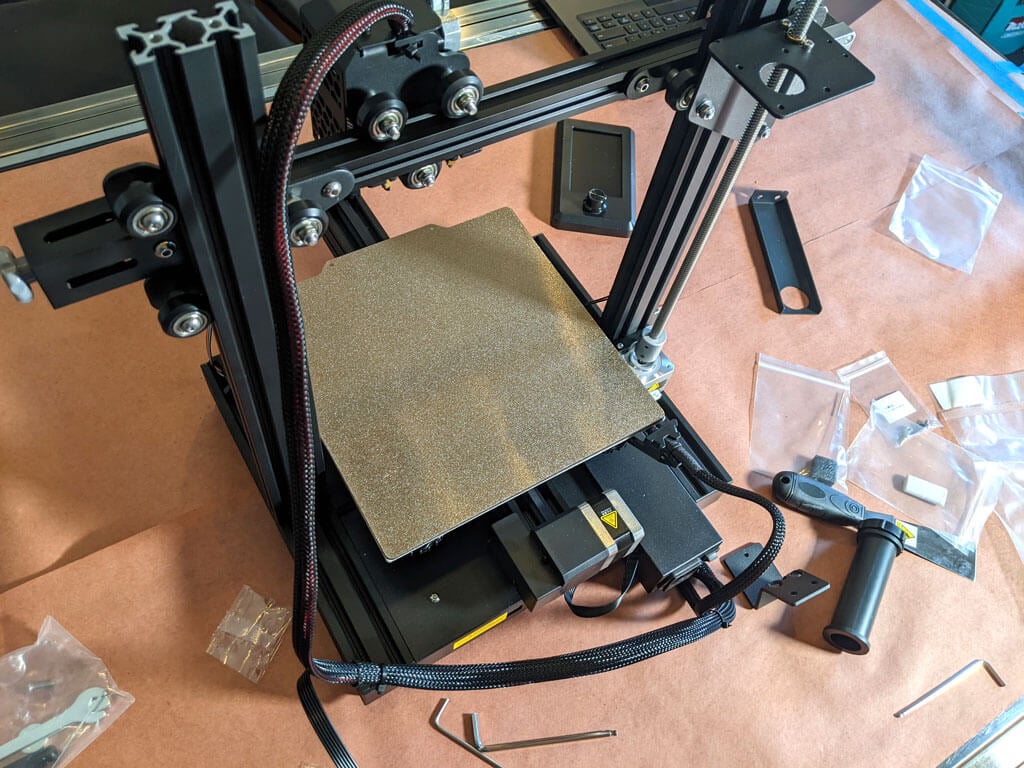
Beginners will find this printer is easier to build with two people. Also, 3D printers need maintenance. Putting it together yourself will give you the confidence you need to do that maintenance. The included tools are all good quality. You’ll want to keep the particularly good Allen wrenches.
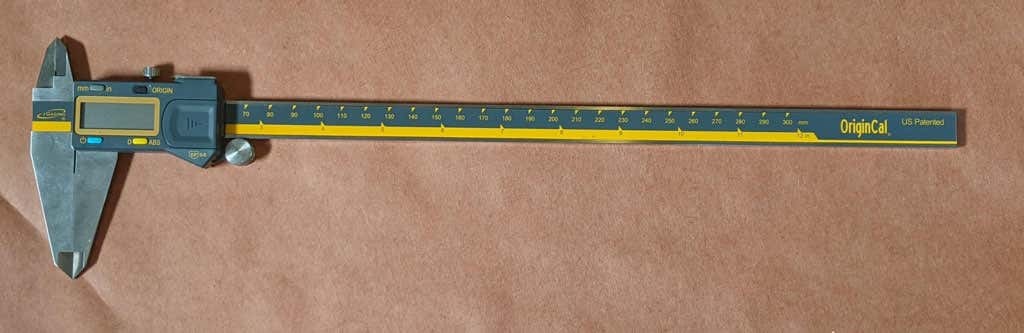
The bolts weren’t labeled, so you might want to use a pair of calipers to figure out which ones are which. It’s not difficult to figure that out, but it would have been nice if they had been labeled.
A beginner might get stuck trying to put this printer together using only the included user manual. It took about an hour to build the printer. They do have a YouTube video that will straighten out any confusion.
Build Quality of the Voxelab Aquila S2
This is a very well put together entry-level printer. It has a direct-drive extruder. It has aluminum extrusions for the x, y, and z axes. The only thing that makes this an entry-level printer vs. a high-end printer is the lack of auto-bed-leveling and the fact that it only has one z-axis screw.
The removable, magnetic PEI bed is something we’d never go without. It’ll save you a lot of grief, time, and scratches.
The belt-tensioners are a great feature that are often lacking in other printers—even some much more expensive printers. Belts need occasional tightening, and it’s nice to be able to do that without disassembling your printer.
The Aquila comes with a spool holder, but that’s the first thing you’ll want to replace and move. You’ll want to take the weight off the top of the printer. It’s a right of passage to print your own spool holder, and one is even included in the sample files that come on the SD card.
Calibration
All printers with manual bed-leveling have a learning curve because the threads are upside-down, so it’s easy to get confused. You could add your own auto-bed-leveling kit to it. That would be a nice project once you get the basics of 3D printing down. To be fair, leveling the bed manually only took about five minutes. If this is your first 3D printer, it might take you a little longer.
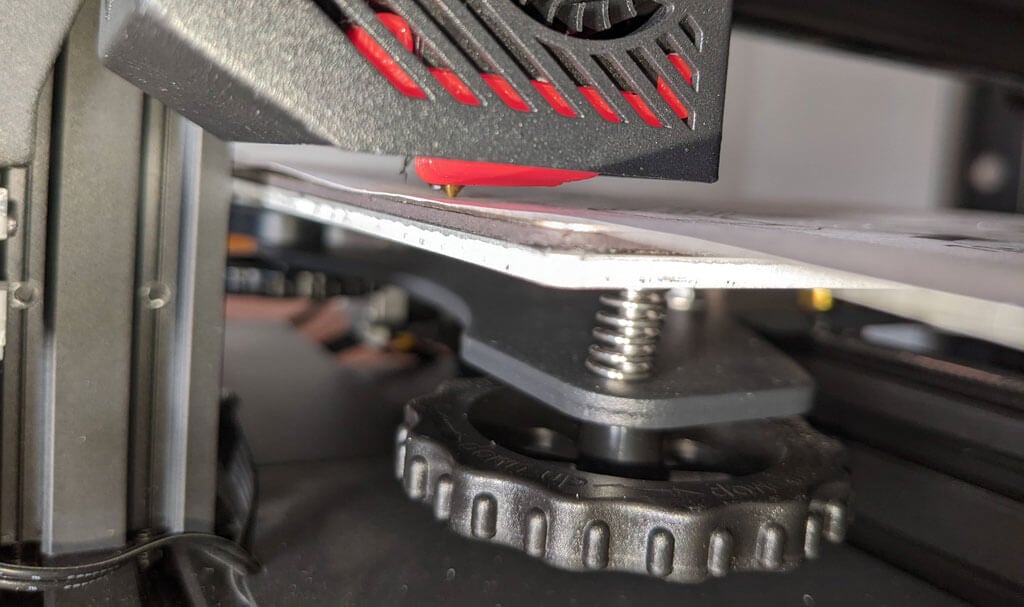
Once your bed is level, and you’ve successfully printed the test print, you’ll want to print your own models. Voxelab has a profile you can import into Cura, a free, open-source slicer that can convert STL 3D model files and other formats into instructions your printer understands (gcode). You can use any slicer you want; however, VoxelMaker slicing software is included on the SD card that comes with the printer.
First Print
We recommend starting with the included test model because it’s already calibrated for the printer. It’s on the MicroSD card, and you can access it via the LCD panel. There were no adhesion problems while it was printing, and the print popped off the build plate on its own as it cooled—exactly what you want.
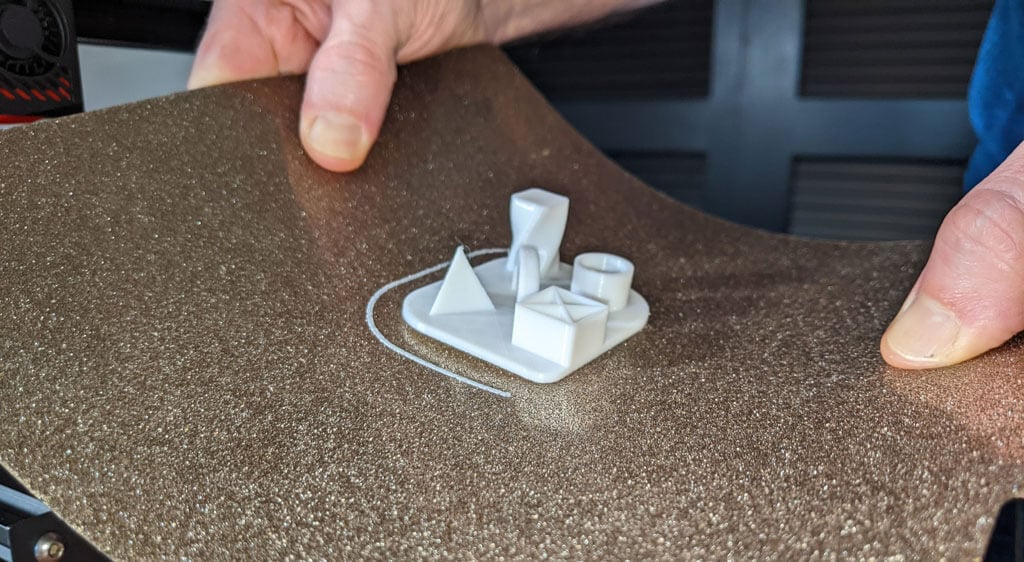
The print speed of the sample file is clearly slower than the printer is capable of, which makes sense for a test print. We did not experience any stringing, and we found the print quality to be impressive given the cost of the printer.
We started printing at a .2mm layer height. The minimum layer thickness is .1mm. If you want higher resolution than that, you may want to consider a resin printer.
Cut to the Chase
This printer is very similar to the Ender 3, and:
- It’s cheaper.
- It has a removable magnetic bed.
- The LCD screen is better.
We recommend the Voxelab Aquila S2 for users who want to save some money and still get some of the features of pricier, high-end printers. We wish it had auto-bed-leveling, but at this price point, we have to say the Aquila S2 exceeded our expectations.
*Special thanks to FormerLurker for help in reviewing the Voxelab Aquila S2 3D printer from Flashforge.
- Tribit StormBox 2: The Under $70 Portable Speaker that Stands Out
- ENGWE L20 2.0 Review: The Best Budget-Friendly Foldable E-Bike?
- TopDon TC004 – a Thermal Imaging Camera That Will Give You Predator Vision
- Newyes Portable Wireless Thermal A4 Printer Review
- Eskute Star Folding Fat Tire Electric Bike Review
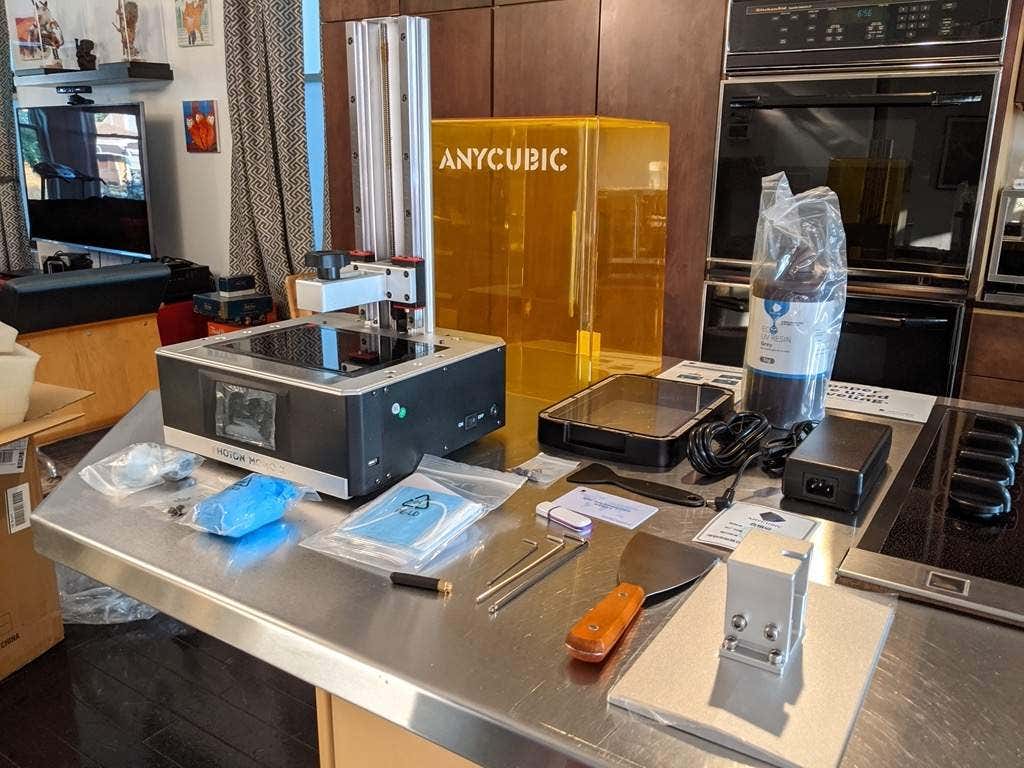
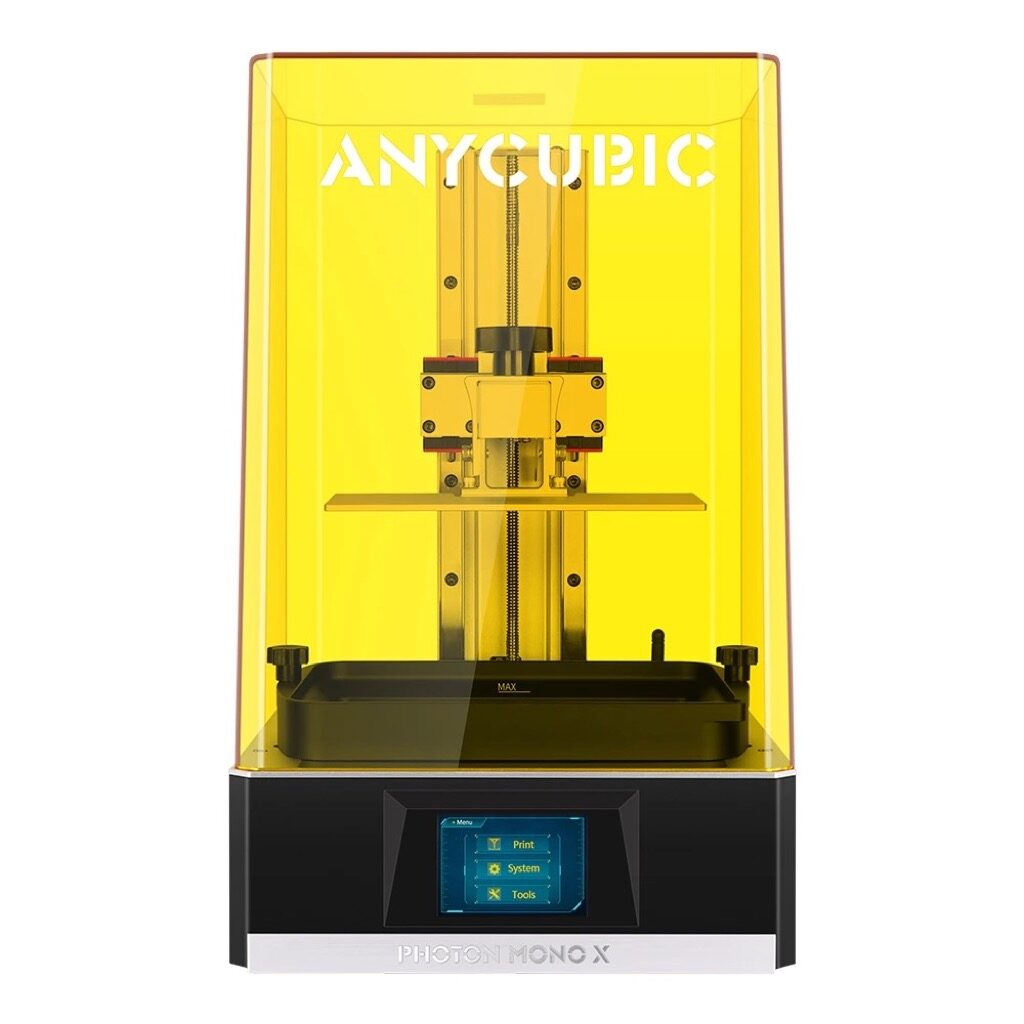
AnyCubic recently sent us their gorgeous Photon Mono X 3D printer and Wash and Cure station to try out. This was our first, ahem, exposure to 3D printing with resin, although we* have plenty of experience with filament/FDM 3D printers. Rest assured, this review is independent and was not shared with AnyCubic in advance of publication.
We spent a few weeks using AnyCubic’s Photon Mono X, and, overall, we found it to be an excellent product with a few notable downsides, mostly related to the challenges inherent to printing with resin and not the printer itself.
The Upshot: This Printer Is Amazing
It’s big. It’s beautiful. It’s an MSLA printer. What does that mean? MSLA stands for masked stereolithography. As we noted in our article about how 3D printing works, “MSLA printers use lasers to cure a liquid resin into a solid plastic material. Usually, the object is ‘pulled’ from a vat of resin, forming layer by layer as it rises from the material.”
In other words, it’s magic.
The Caveat: You’ve Got Some Learning (and Cleaning) to Do
It’s going to take some time to get to the point where you’re proficient with the Photon Mono X or any resin printer. Once you know what you’re doing, using this printer is straightforward, but getting there can be frustrating.
We’ve been assured by experts that this experience is universal. It is a rite of passage, similar to getting the first layer to come out right on an FDM printer. The only difference is that if your first layer fails to adhere to the build plate on a resin printer, there’s a lot of messy clean-up involved.
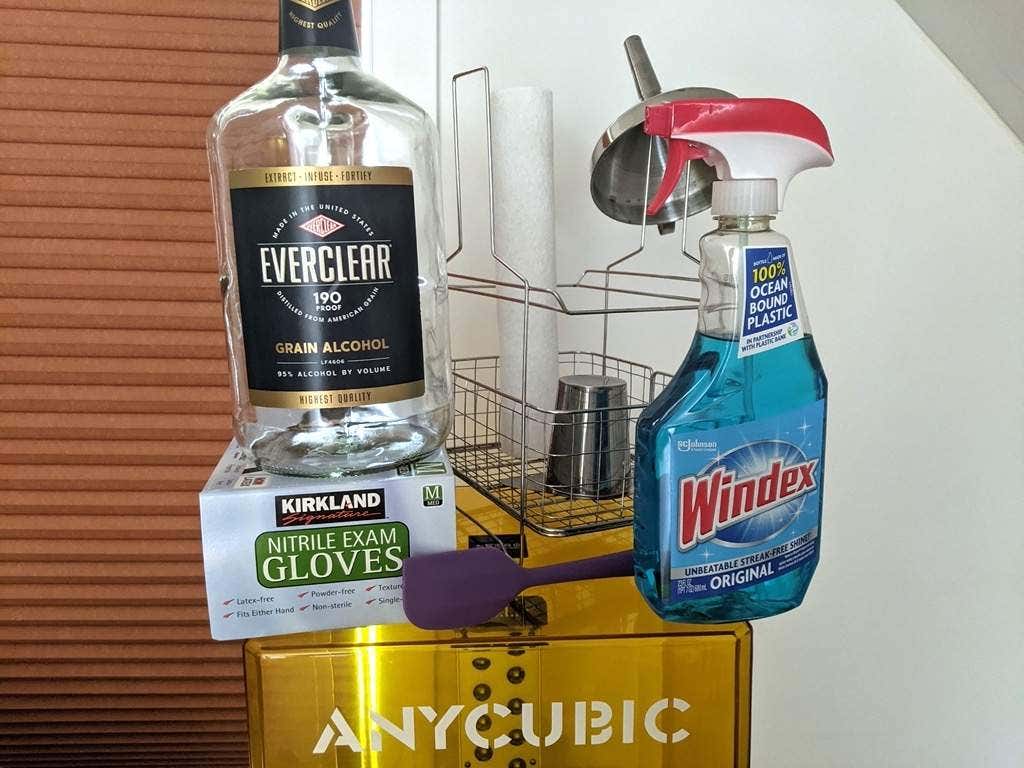
That’s because any time a print fails on a resin printer, you have to clean everything . Since the resin is a toxic material, that means you’ll go through a lot of gloves, masks, paper towels, Windex, and alcohol. (Note: We used Everclear since it’s cheaper than isopropyl, although we’re not sure the cashier at the liquor store believed us.) However, as you improve, there’s less and less clean-up involved.
Resin vs. Filament: What’s the Difference?
A resin printer allows you to print objects with incredibly fine details. If you’re coming from the filament world, the resolution will amaze you. However good you think it will be, it’ll probably be better.
Build Volume & Printing Speed
The Photon Mono X has a larger build volume than virtually any other consumer-level MSLA printer on the market today. Moreover, printing time is entirely dependent on the exposure time and the number of layers, not on how much material is cured per layer.
You can cram as much as you want onto the build plate, and it won’t affect your print time.
Product Quality & Safety
The Z-axis rails on the Photon Mono X are no joke. They’re superior to the linear rails on any printer we’ve seen. Linear rails keep your print from wiggling while printing, and there’s no noticeable play on the Photon Mono X. The Z screw is beefy with no visible wobble.
Additionally, the touchscreen is responsive and easy to read, and the menus are intuitive. The overall look is clean and sleek.
The optional safety features are more than adequate to protect your eyes from UV light and protect the resin from sunlight. In fact, we left the resin in the printer for three days next to a window, and none of the resin cured from the sunlight.
Washing & Curing Your Print
AnyCubic’s wash and cure station perfectly complement the resin printer. They look great together. The wash station has a built-in magnetic stirrer that agitates the cleaning solution, allowing you to clean your print in less than five minutes. It’s almost effortless.
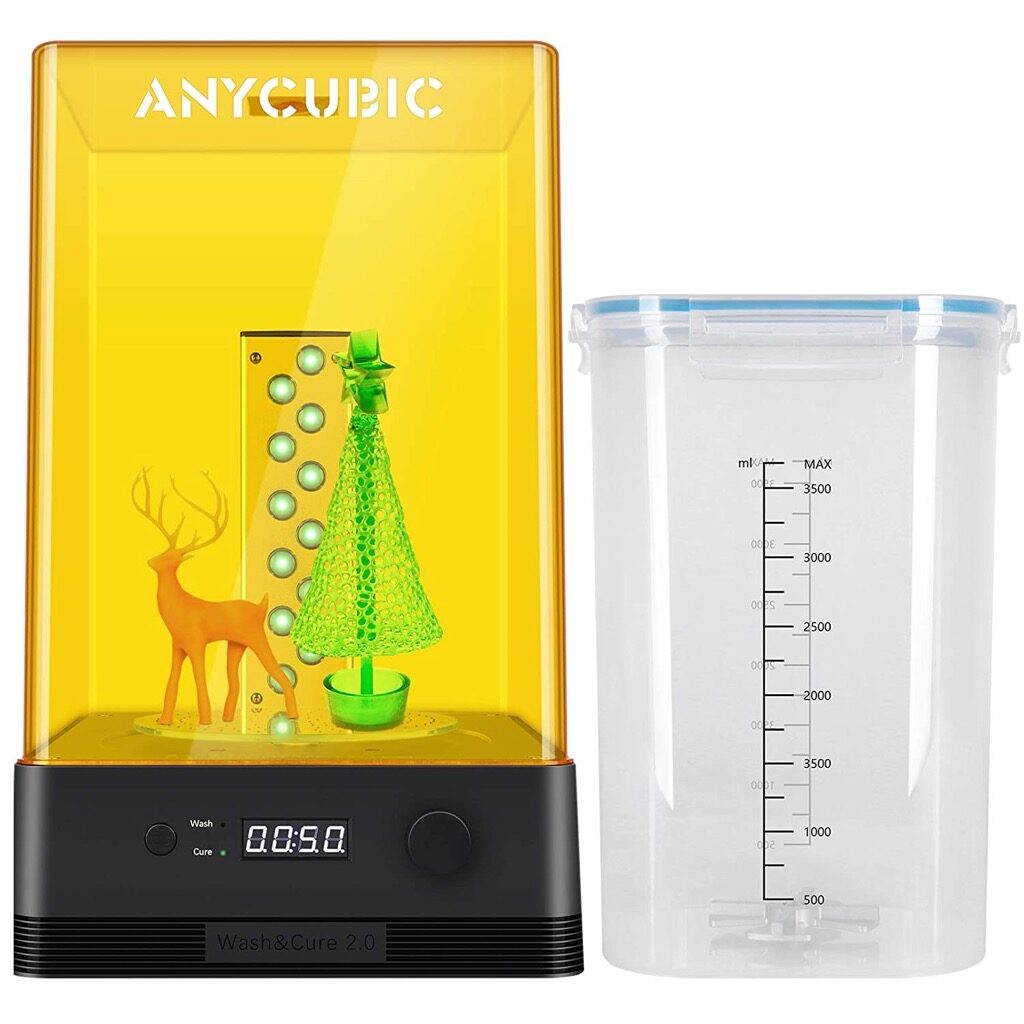
After printing, you can remove the print from the bed or you can put the bed itself into the wash station, alleviating some of the need for cleaning we mentioned above.
Note : You do need a LOT of cleaning fluid, whether that’s alcohol or the cleaning solution of your choice. The cleaning solution goes into a large plastic container with a snap-on top.
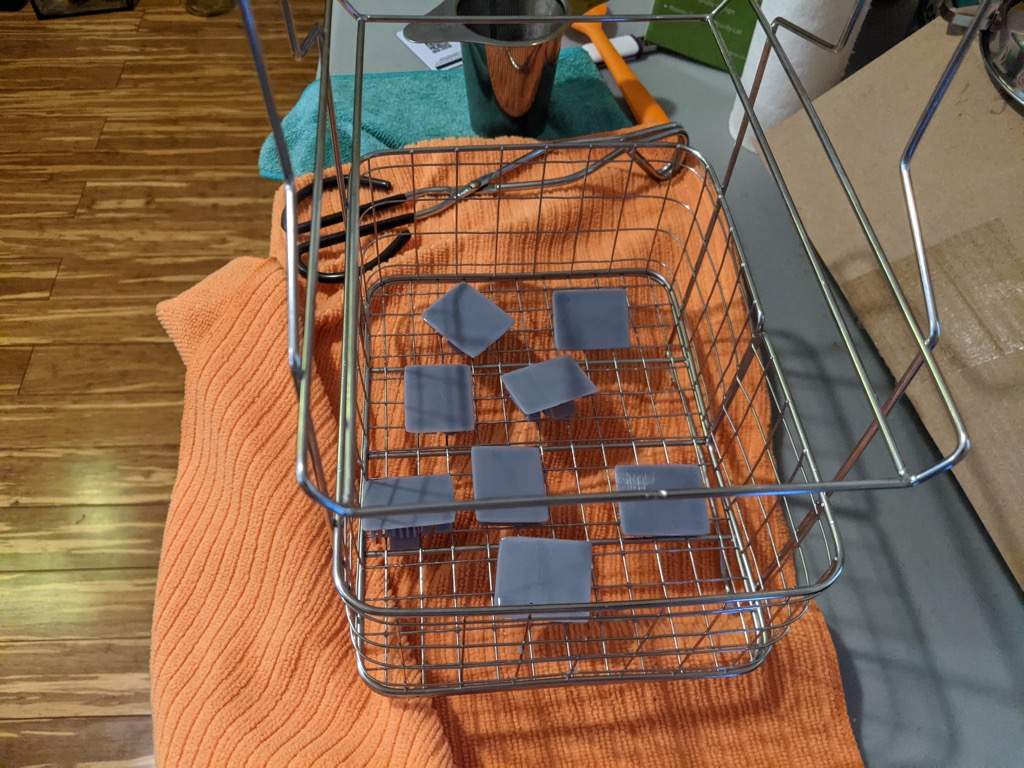
To wash, you set the wash timer, hit Go, and you’re done. Be careful handling the uncured print. It will be soft and not fully cured, so it’s easy to deform the print if you’re not careful.
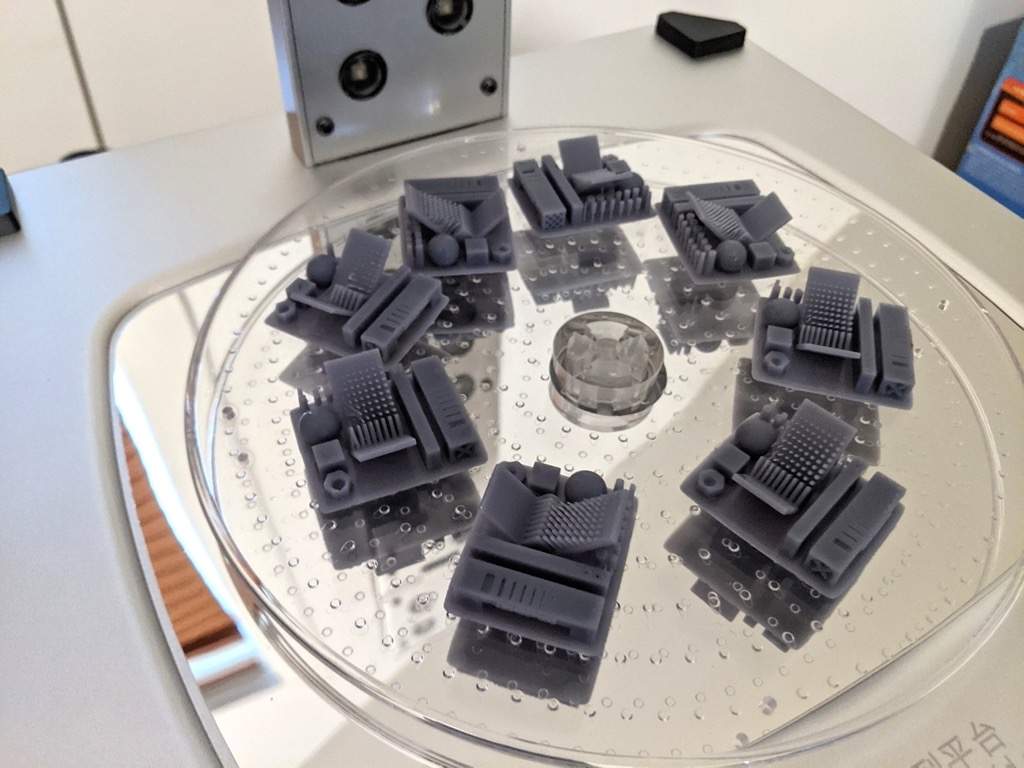
To cure the print, you place it on a carousel that comes with the Wash & Cure station. Optionally, you can adjust the angle of the topmost LEDs to direct light towards the print.
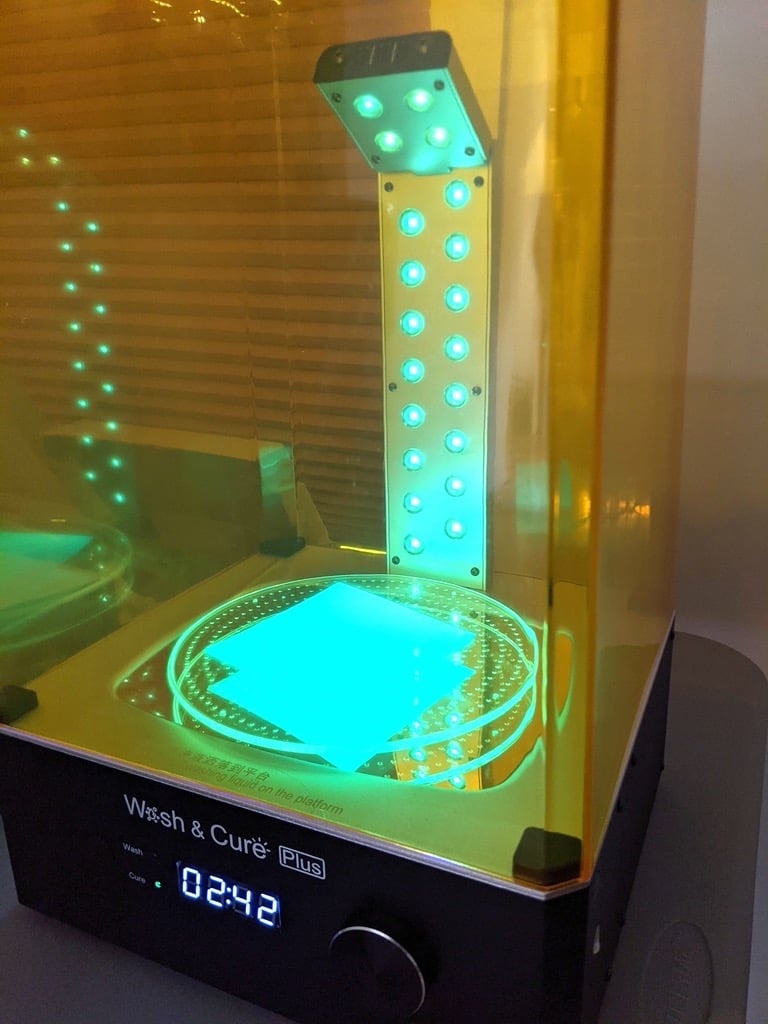
It’s just as easy to cure as it is to wash. Set the timer, press the Start button, and a few minutes later, your print is cured. Enjoy the weird, eerie glow of the print as it’s curing.
AnyCubic’s PhotonWorkshop
AnyCubic’s slicing software doesn’t feel as polished as Cura or Slic3r, but it does have lots of interesting functionality that, admittedly, we haven’t fully explored. You can add manual or automatic supports, rafts, and drainage holes.
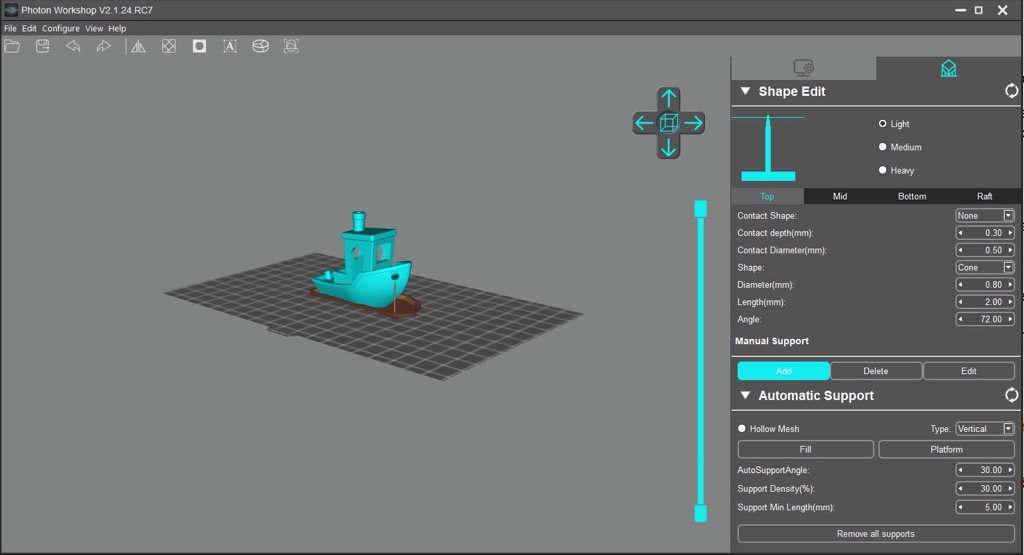
PhotonWorkshop is a little clumsy to navigate and learning how to place supports correctly takes some trial and error. If you don’t adequately support your print, it will fail and then you’ll have to clean the resin vat before your next attempt, so it’s crucial that you learn how supports work.
Transferring files to the Mono X is a snap. Upload a file to a USB drive, and stick it in the printer. Bam. As it prints, you’ll see images on the LCD screen of each layer as it’s being exposed. It’s pretty fun to watch. And, AnyCubic has a phone app you can use to monitor your prints and start them remotely.
Maintaining the Photon Mono X
Regarding maintenance, we wish the resin vat’s pour spout were better designed. Resin doesn’t pour out cleanly, making clean-up more difficult. Moreover, when printing, the resin covers the top of the build plate, not just the bottom, so when it’s time to clean up, you have to clean the resin off of both sides. That’s unfortunate, but we’re uncertain how it could be avoided.
Another complaint: it’s hard to remove the build plate without dripping resin on the machine. You have to do a dance when you remove the build plate. It’s difficult to keep it over the vat so the resin doesn’t drip everywhere. Once you’re consistently getting good prints, this won’t be as much of an issue.
At some point you’ll have to pour the resin back into the container it came in, and you’ll have to clean off the build plate. That process is not as convenient as it could be. Ideally, you’d only have to clean off the bottom and the sides of the build plate. As it is, there are a lot of nooks and crannies that fill with resin, and they all need to be cleaned. It’s kind of like drying tupperware off when it comes out of the dishwasher.
We suspect this is a design tradeoff to maximize the print area while allowing for enough resin for a large print. Furthermore, the printer doesn’t include any funnels or filters, both of which you’ll want to have.
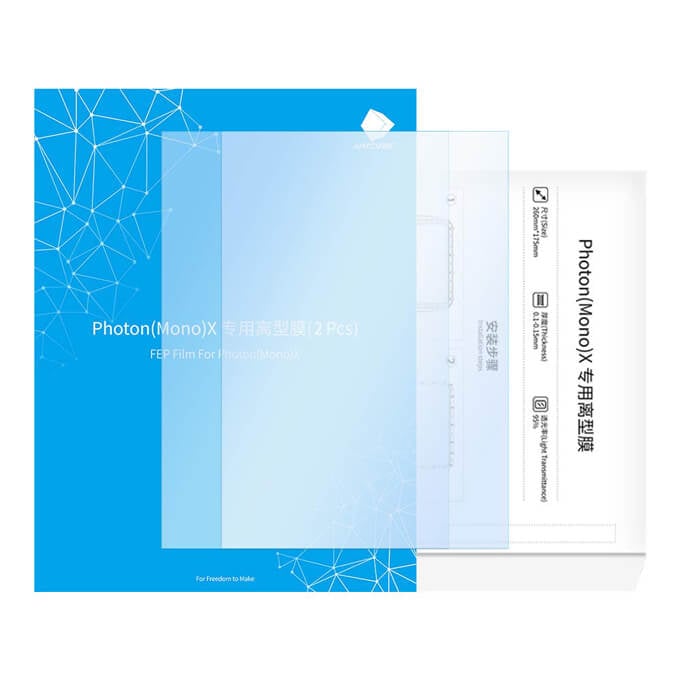
We also tried changing the FEP sheet. The FEP sheet is the film at the bottom of the resin vat. If it gets dirty, scratched, or punctured, it needs to be replaced. As complete beginners to resin printing, we found installing a new FEP sheet to be pretty straightforward. There are a ton of screws to tighten, but following the directions was simple. It was like changing and tuning a snare drum head, and the sound was similar, too!
Final Recommendation
If you’re someone who wants things to just work out of the box with little effort, then perhaps resin printing isn’t for you. That’s not a criticism of the Photon Mono X.
If, on the other hand, you’re someone who will put in the required time to really learn the ins and outs of new technology, then, yes, we absolutely recommend AnyCubic’s Photon Mono X 3D printer. You’re going to love it (eventually). It can print things that would be impossible to print on a filament printer. Plus, it just looks amazing.
- Special thanks to FormerLurker for help in reviewing AnyCubic’s Photon Mono X 3D printer.
- Tribit StormBox 2: The Under $70 Portable Speaker that Stands Out
- ENGWE L20 2.0 Review: The Best Budget-Friendly Foldable E-Bike?
- TopDon TC004 – a Thermal Imaging Camera That Will Give You Predator Vision
- Newyes Portable Wireless Thermal A4 Printer Review
- Eskute Star Folding Fat Tire Electric Bike Review
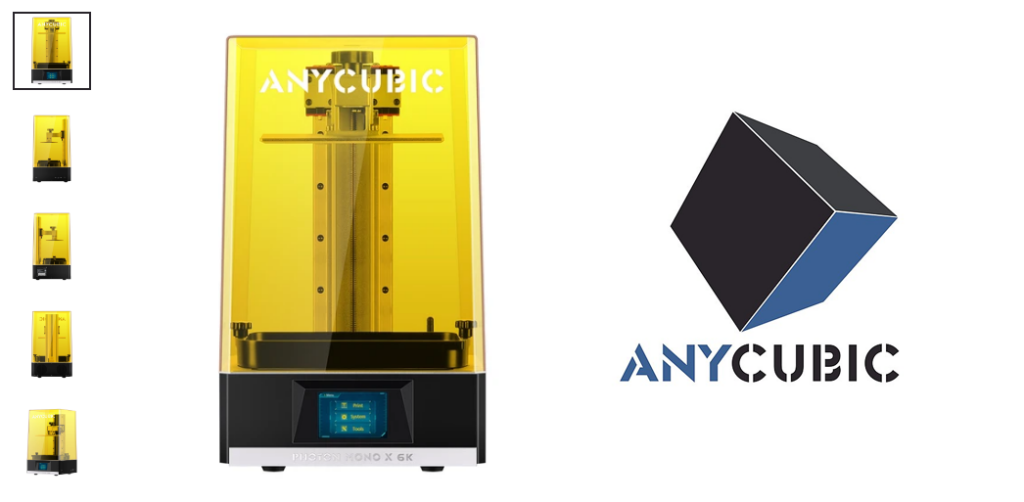
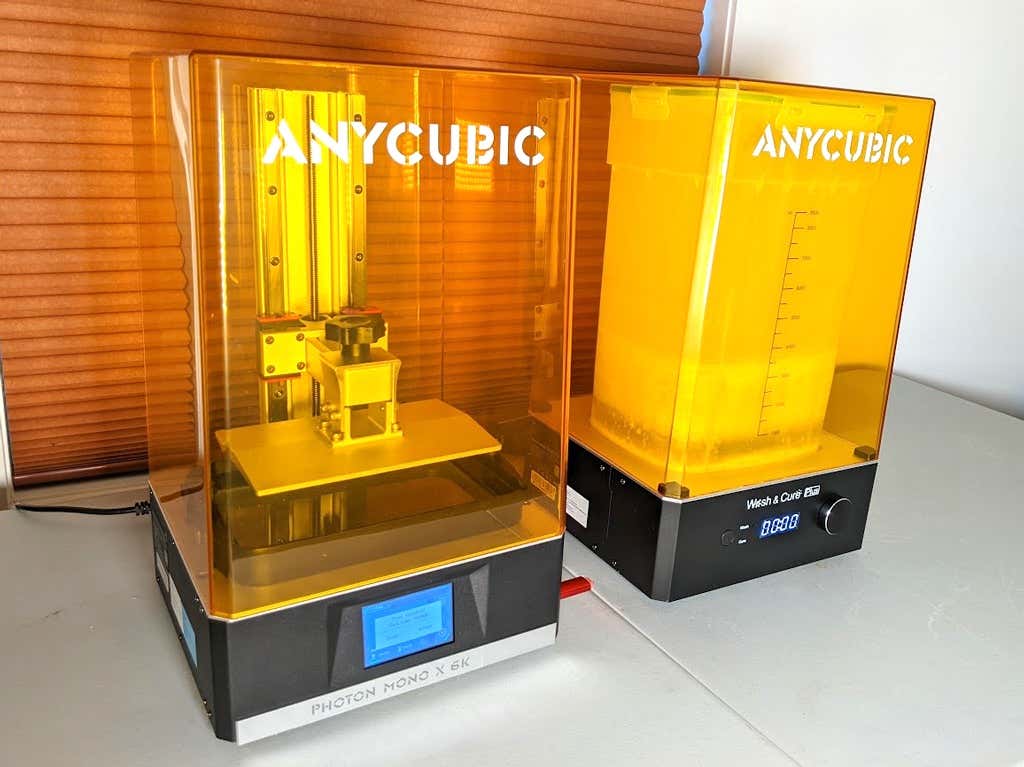
We’ve been fans of AnyCubic’s 3D printers since we tried the AnyCubic Photon Mono X and one of their filament/FDM printers, the AnyCubic Vyper. Since then, we’ve had a chance to preview the AnyCubic Photon Mono X 6K .
The Photon Mono X 6K is AnyCubic’s highest-resolution version of the Mono X, a resin printer that uses masked stereolithography to cure a liquid resin into a solid plastic material. We were excited to see the extent to which this new high-res printer could produce highly detailed prints.
We previously covered the perils of resin printing in our review of the AnyCubic Photon Mono X , so we’ll assume you understand the learning curve and clean-up you can expect when printing with masked stereolithography and skip straight to the features of this magical beast.
What’s in the Box
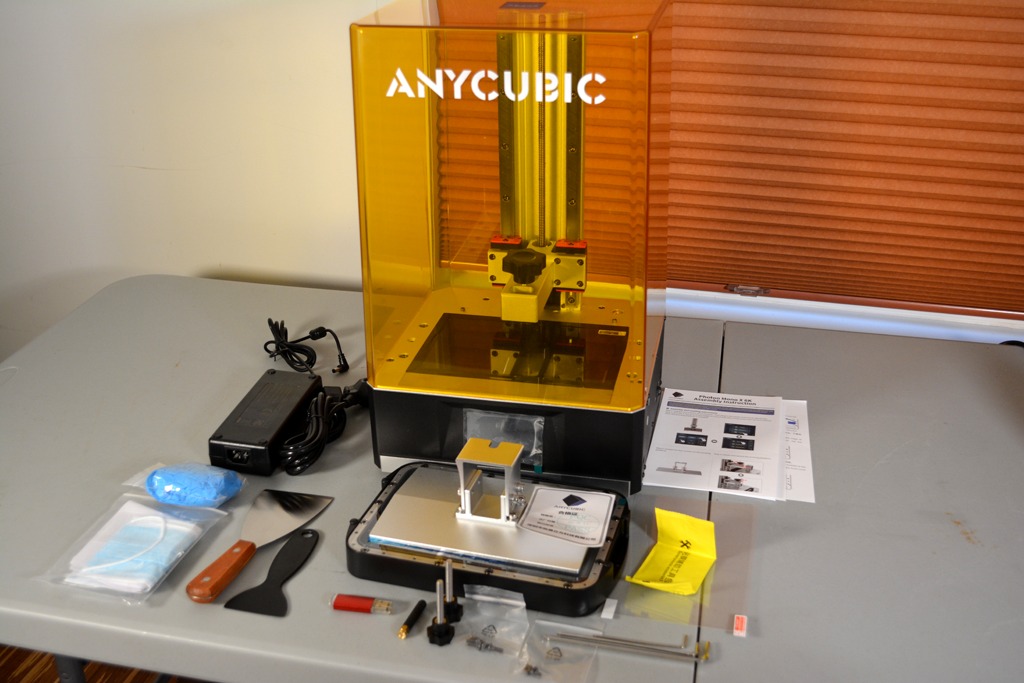
As with the Mono X, you get a bunch of accessories with the Mono X 6K, including metal and plastic spatulas/scrapers, a mask, gloves, and all the parts you need to get the printer up and running.
Assembly and Leveling
After unpacking all the accessories, we assembled and leveled the printer. Assembly took about five minutes, with another five minutes to put on the included screen protector. The pre-fit screen protector is a really nice upgrade because it means you won’t accidentally scratch, and thus ruin, the screen. We recommend you watch a video about how to install the screen protector because it can be a little tricky, and you only get one shot at it. The process is similar to installing a protective film on a smartphone screen .
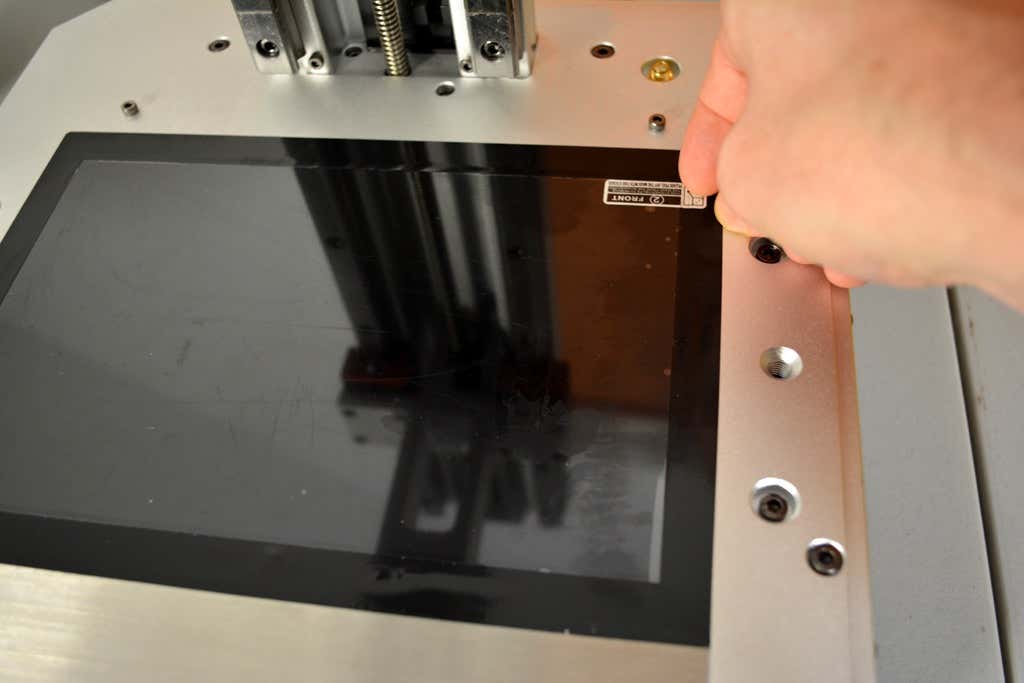
We noticed that the build instructions didn’t say when to install the screen protector. You should either install it before you level your bed or re-level your bed after putting the protector on the printer. If not, the Z position will be a bit too low.
Leveling the bed was straightforward—just follow the instructions. As with the Mono X, the touch screen walks you through everything you need to level the bed quickly. Here are the steps:
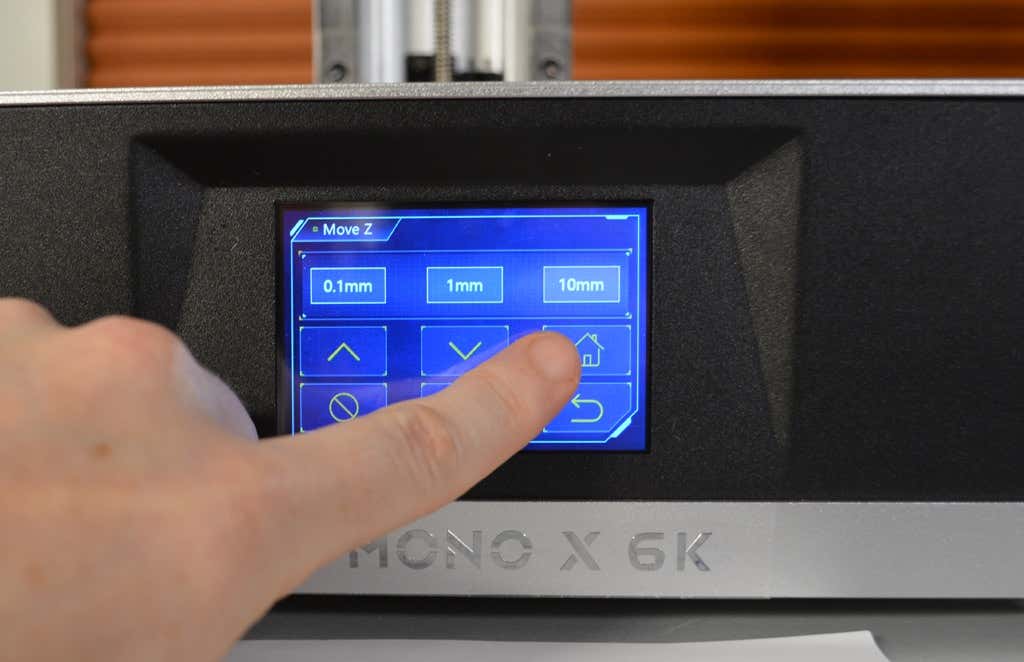
- Using the touch display, tap Tools and then Move .

- Using the touch display, raise the build plate about five or six inches above the screen by tapping the up arrow . This will go faster if you select the 10mm option first.
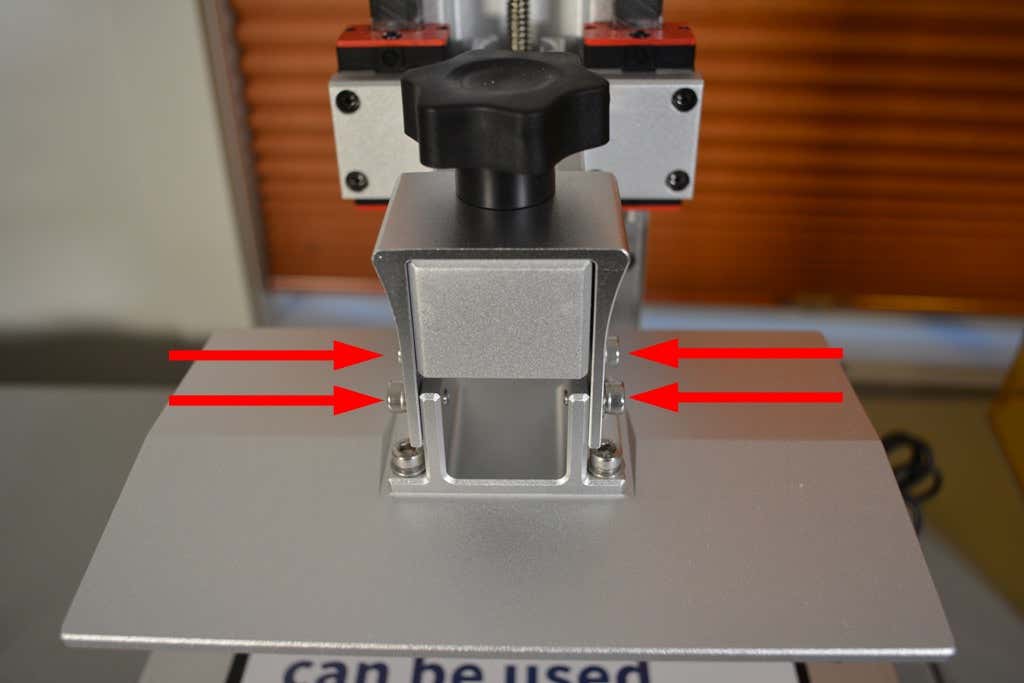
- Loosen the four screws on the build plate and secure it to the printer.
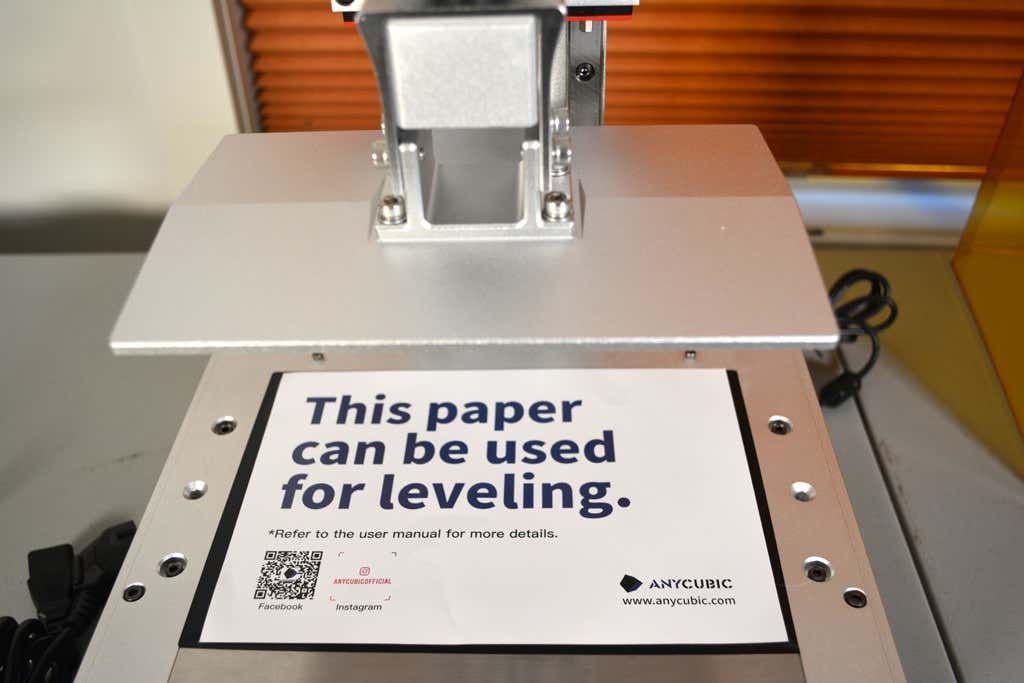
- Place the leveling paper over the curing screen and press the Home button.
- Click the Home icon on the touch screen and wait for the printer to stop moving.
- Use one hand to press down gently on the build plate. The build plate shouldn’t move at all . Use your other hand to slowly tighten the four screws.
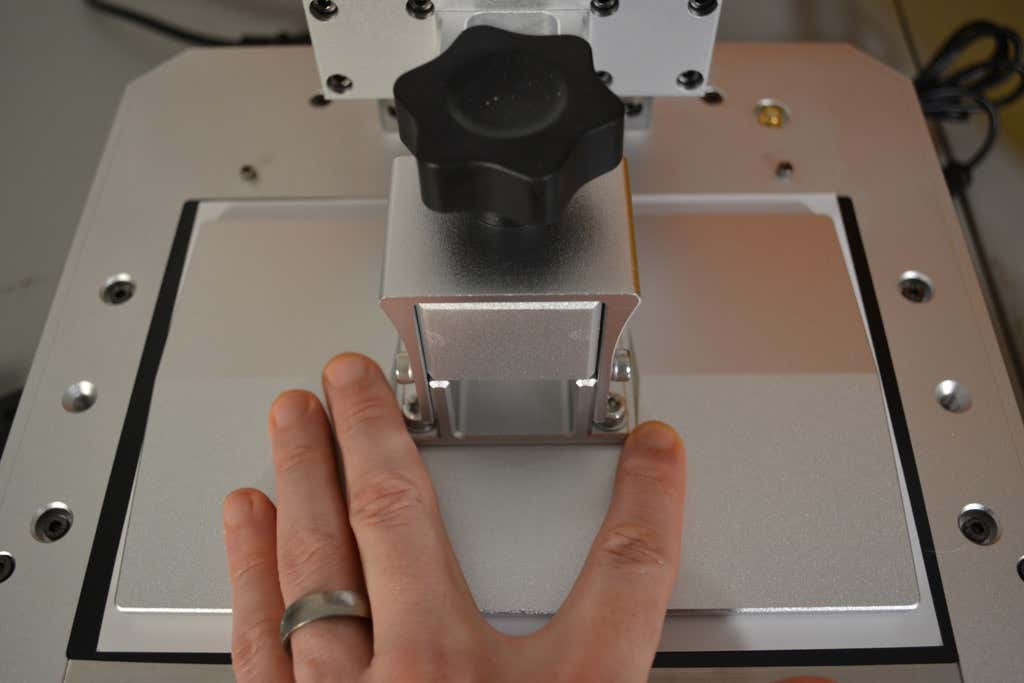
- Now tap the z=0 button, and then select Enter to confirm. The bed will now raise up a bit to give you access to the resin vat.
That’s all there is to it—the printer bed is now level.
Build Volume & Printing Speed
The build volume of the Photon Mono X 6K is virtually identical to that of the Photon Mono X. According to AnyCubic’s online tech specs, the build volume on the 6K version is ever-so-slightly larger.
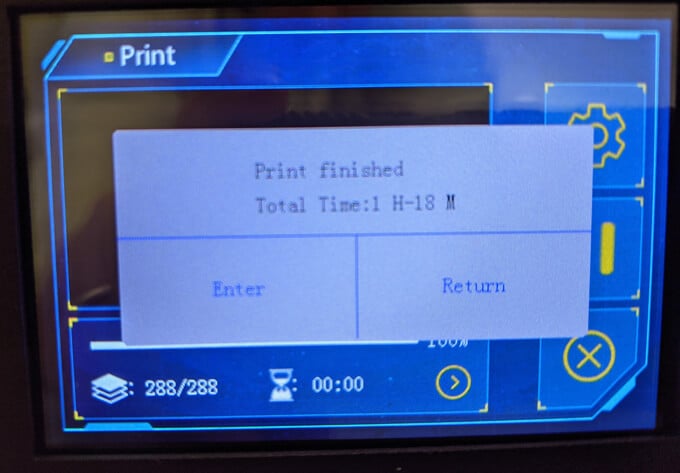
The maximum print speed of the 6K is 33% faster than that of the Mono X, up to a maximum of eight centimeters an hour. Remember, for resin printers, the time it takes your object to print depends entirely on the exposure time and the number and height of layers, not on how much material is cured per layer.
The New Textured Bed Is Awesome
The Photon Mono X 6K comes with a textured bed that’s a clear upgrade from the bed that came with the Photon Mono X. The textured bed really grips. As a result, it seems far less likely that your print will have adhesion problems.
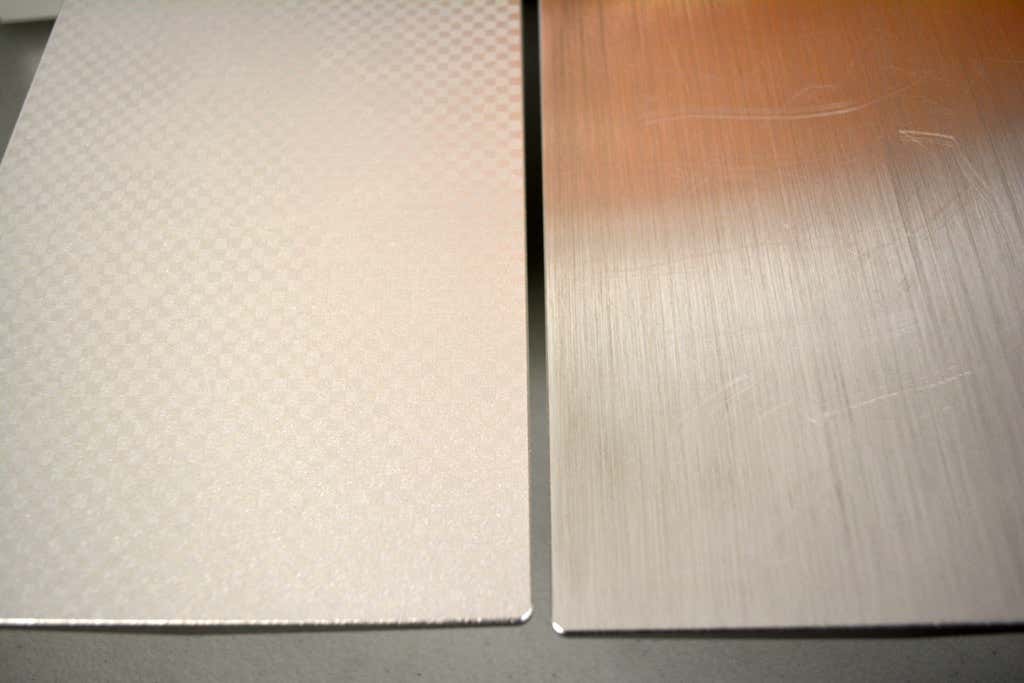
You can see the difference between the bed textures on the Photon Mono X 6K (left) and the Photon Mono X (right) in the image above.
Print Accuracy and Resolution

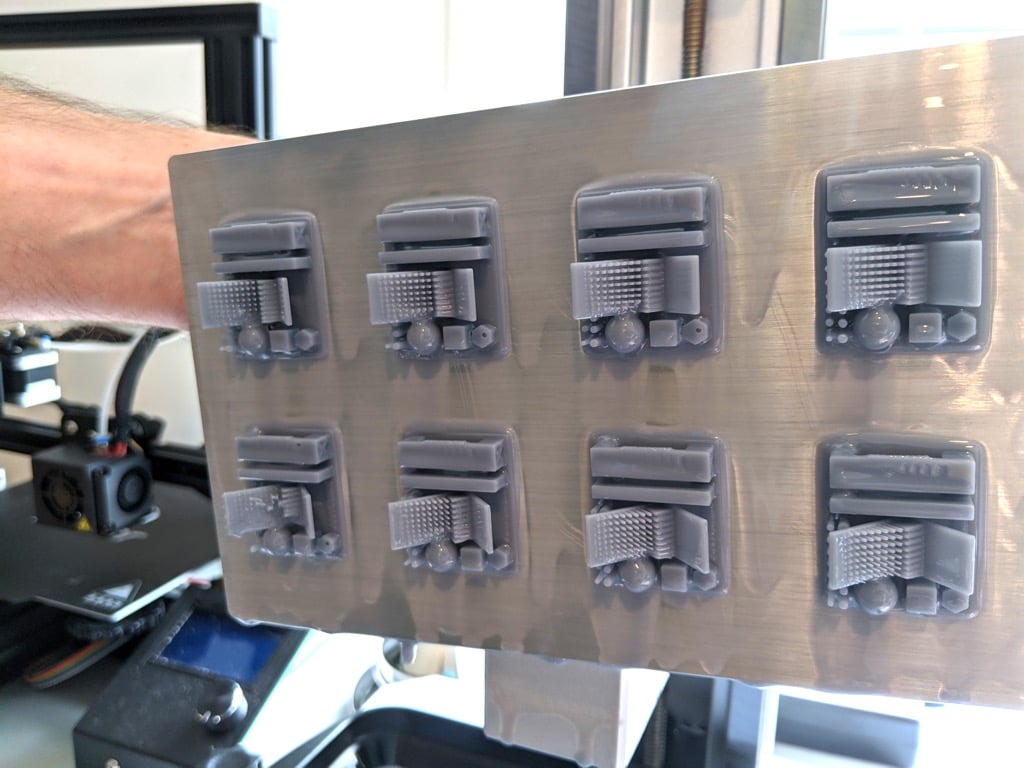
Aside from the textured bed, the main difference between the Mono X and the 6K version is the resolution at which the printers print. While the Mono X has a resolution of 3840 x 2400 pixels, the Photon Mono X 6K has a resolution of 5760 x 3600 pixels. That means the AnyCubic Photon Mono X 6K has 125% more resolution than the Mono X printer.
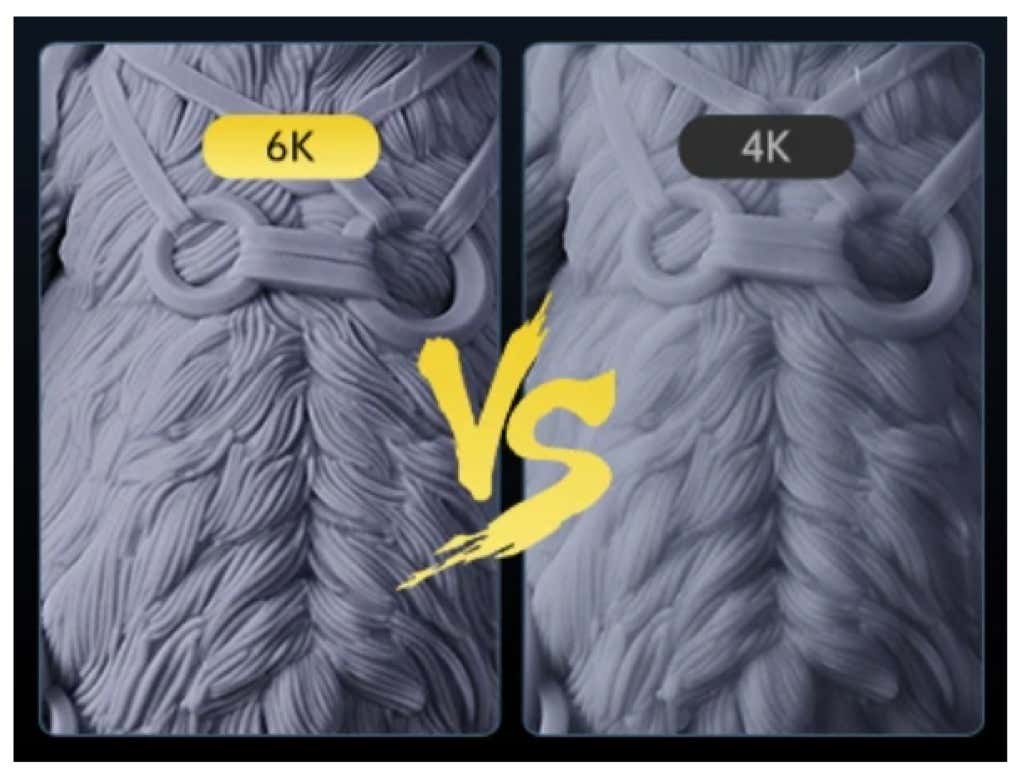
Put another way, for every pixel in the Mono X, the Mono X 6K has 2.5 pixels. That’s a substantial increase. For example, see AnyCubic’s comparison of a print from the Mono X 6K versus a print from a competitor’s 4K printer above.
Product Quality
The quality of the printer is what you’d expect from AnyCubic’s Photon lineup. If you look at the Mono X and Mono X 6K side by side, it’s hard to tell which is which. Same placement of buttons, same cover, same amazing dual linear rail system. The nuts and bolts of the machine haven’t changed that much.
It’s the addition of the super high resolution (6K) LCD screen and the faster print speed that makes this printer stand out from its predecessors.
Washing & Curing Your Print

The process for washing and curing your print is the same across all AnyCubic’s Photon printers. You can use water or alcohol to wash the print, and curing is as mesmerizing as ever. While the Wash and Cure Machine Plus makes these processes simple and satisfying, you could wash and cure without the machine. Contrary to popular belief, resin prints will cure outside or in the window on cloudy days.
Final Recommendation
If you’re looking for a resin printer that’s easy to use, fast to assemble, and unparalleled in print quality, look no further. We loved the original Mono X, but if we were deciding which one to purchase today, the extra resolution, textured bed, and faster print speed would make the decision easy.
The Photon Mono X 6K is available for pre-order at a steal for $599.00. That’s a mere $100 more than the regular Mono X, which is currently on sale for $499, down from $759.
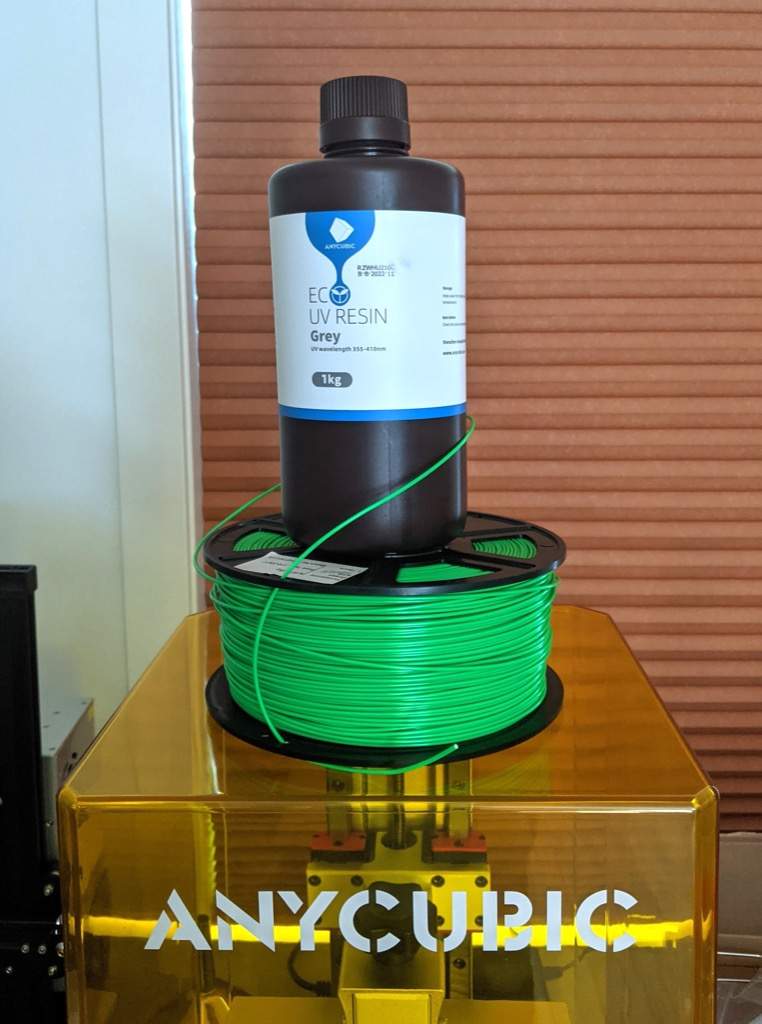
Optionally, you can add 1KG of resin and the Wash and Cure Machine Plus, which brings the total to $838. We absolutely love the Wash and Cure Machine Plus, making the whole process much faster, easier, and more enjoyable.
We’re not sure what the price will be after the pre-order period is over, but we expect it to climb substantially. However, for those of you who are cautious about pre-ordering, we’ll say that this machine is definitely production-ready. Moreover, once you make the purchase, you’ll have fun discovering all the things you can print with your new 3D printer.
*Special thanks to FormerLurker for help in reviewing AnyCubic’s Photon Mono X 6K 3D printer.
- Tribit StormBox 2: The Under $70 Portable Speaker that Stands Out
- ENGWE L20 2.0 Review: The Best Budget-Friendly Foldable E-Bike?
- TopDon TC004 – a Thermal Imaging Camera That Will Give You Predator Vision
- Newyes Portable Wireless Thermal A4 Printer Review
- Eskute Star Folding Fat Tire Electric Bike Review
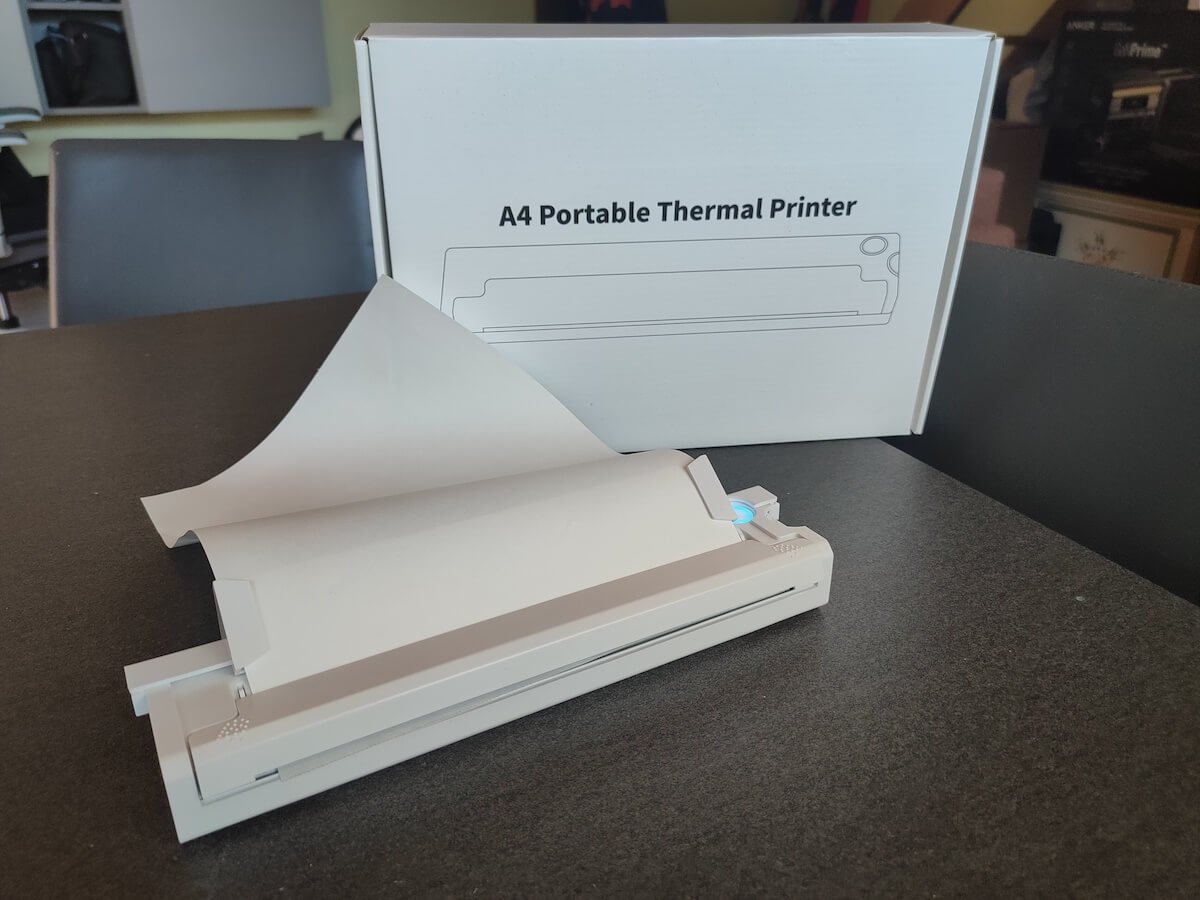
If you don’t have a full-sized printing machine at home and often need to print a document on the go, check out the Newyes portable printer . This wireless printer is lightweight and small enough to fit in your bag. Not to mention it’s environmentally friendly, since it uses thermal paper instead of ink.
Follow our review of the Newyes portable wireless thermal printer to see if it suits your printing needs.
Newyes Portable Wireless Thermal A4 Printer: First Impressions & Specs
When I was a student, I remember my university always required hard copies of documents. Luckily, there was a print shop on campus where I could always pop in to print something.
Then I became a professional, and to my surprise many life spheres still required me to have printed versions of documents with me. Of course you can get your own full-sized machine to print things at home, but if like me you live in a small apartment, you value every extra bit of space and don’t want a massive printer to take it up.
One day, when I was looking for a neighbor with a printer to help me with my event tickets, they introduced me to the concept of a portable printer. Seeing how easy it is to use, I immediately wanted to get my hands on one of those. So here I am, reviewing one of the most useful gadgets I received recently – the Newyes portable thermal printer.
Before we continue with this review, here is the full list of specs of this printer.
- Model: Newyes LD0801
- Dimensions: 10.4 x 1.2 x 2.28 in (265 x 58 x 30.5 mm)
- Weight: 16.8oz (475g)
- Paper format: A4
- Paper width: 210mm or 218mm
- Printing Type: thermal paper
- Resolution: 203DPI
- Connectivity: Bluetooth
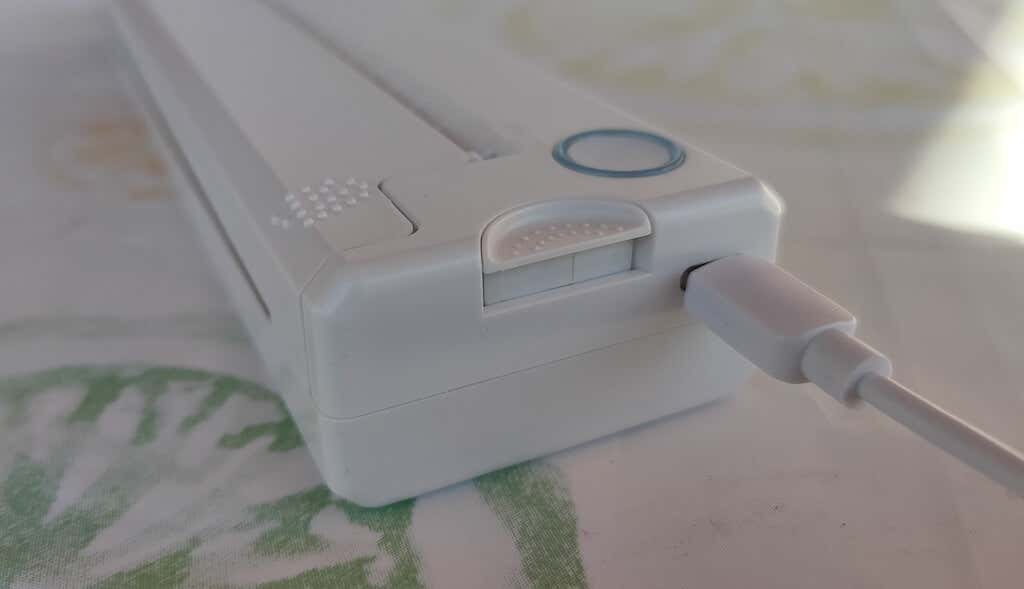
- Charging port: USB type-C port
- Input Voltage: DC 5V / 2A
- Battery: 1200mAh lithium battery
- Charging time: 75 min
- Automatic shut down: after 30 minutes
- Stand-by: about 30 days
- Extra features: LED light, reset, on / off switch button
- Color: white, black
- Warranty: limited one year warranty
- Price: $199 on the Newyes website
If you find yourself in need of hard copies of important documents while on the move, the Newyes portable wireless thermal printer will become your go-to gadget. Newyes calls it “the world’s smallest printer”, and with the weight of under 500g this seems plausible. This mini printer offers a handy solution for those moments when you need to quickly print an important document but don’t have access to an office setup.

Operating this printer is a breeze – a simple Bluetooth connection is all that’s required. Once connected, just fire up the app, choose the file you want to print, and send it over. Efficiency is at the forefront, and you can easily print multiple sheets by inserting new pages back to back.
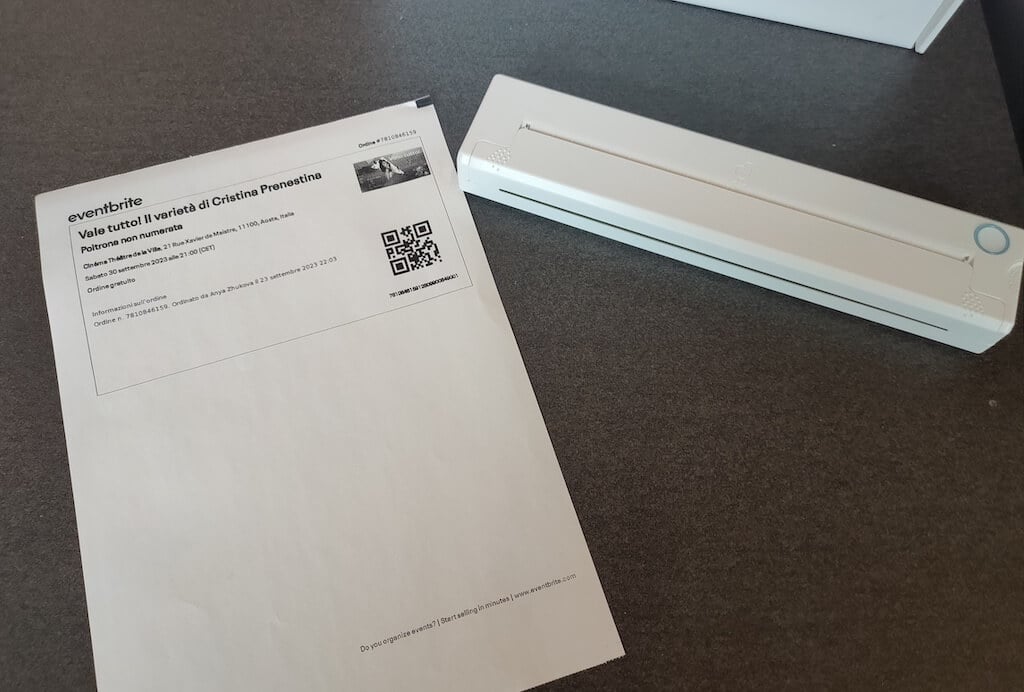
The only limitation this printer has is that it can only print in black. So even if your original file is in color, the printed document will still come out in black and white. Other than that – you can print a variety of file types including Excel, Word, PDF, JPG, PNG, and web pages – and it only takes seconds.
The Newyes portable wireless printer combines convenience, portability, and efficiency – all the things I appreciate in a modern gadget.
Design and Unpacking
Let’s have a closer look at the design and build of this smart printer, as well as what you get included in the package when you purchase it.
What’s in the Box
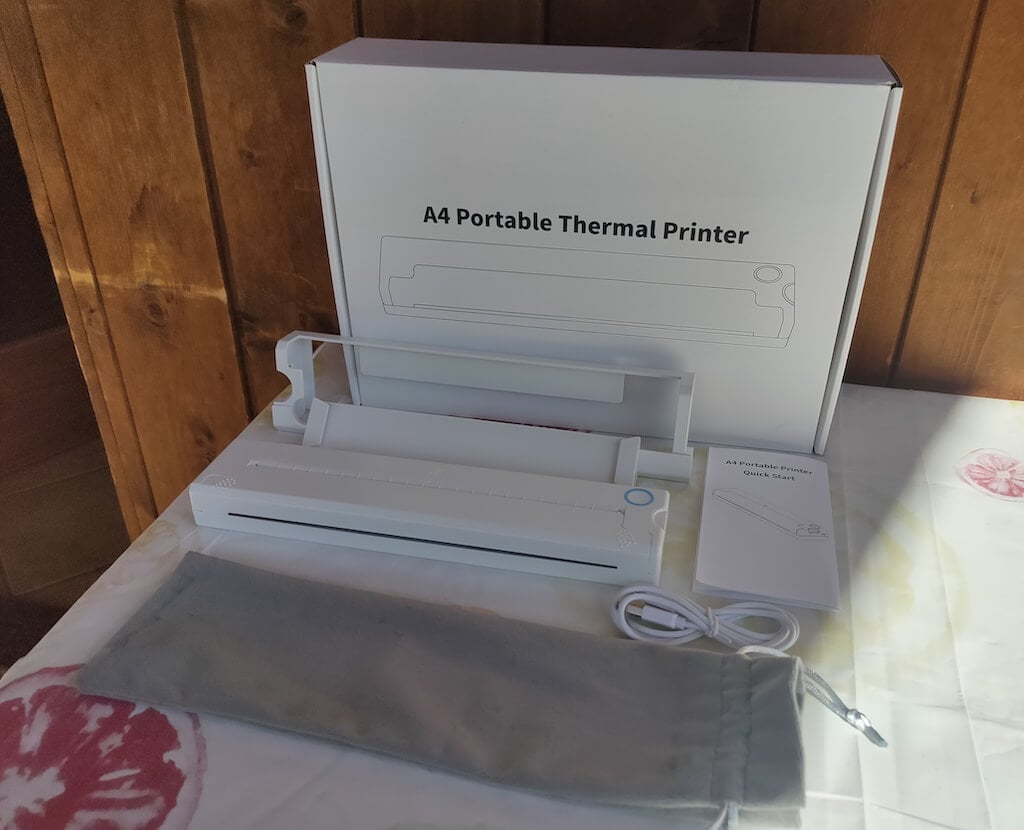
Here’s everything you’ll find when unpacking your Newyes portable thermal printer:
- The Newyes portable wireless thermal printer
- Bracket
- USB type-C cable
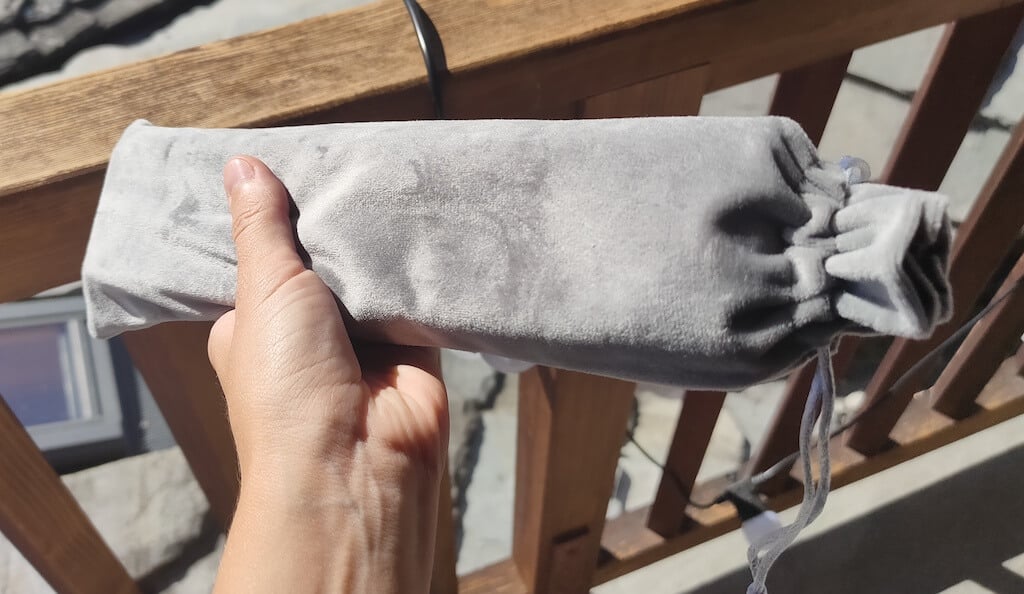
- Storage/carrying pouch
- 100pcs thermal printing paper
- User manual
You can use the Newyes portable printer right out of the box, as you’re all set with essential accessories. Aside from the printer itself, the package includes a bracket which will make printing more than one page smoother, a convenient storage bag for carrying your printer with you, a USB-C cable for charging, and a supply of 100 pieces of thermal paper to get you started.
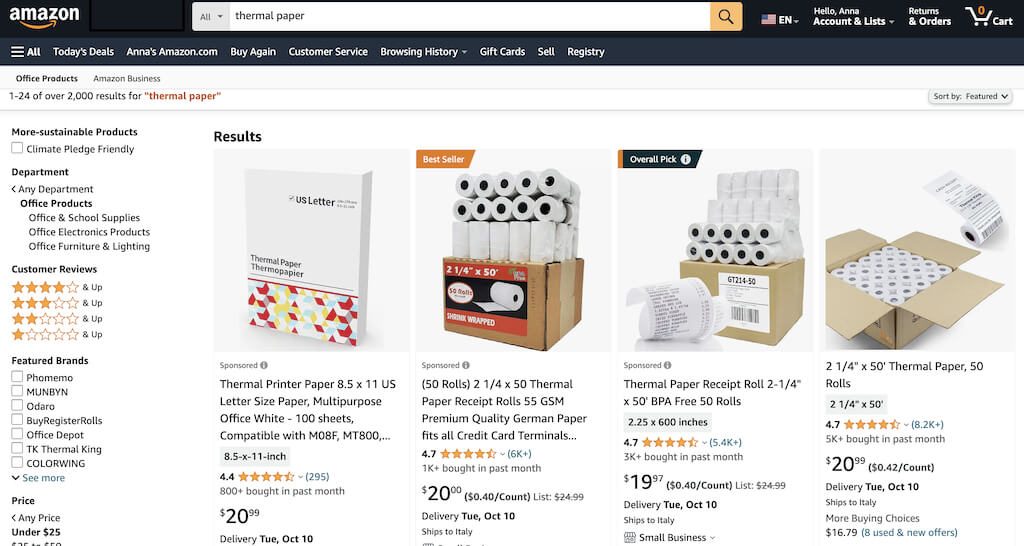
One important thing to remember is that this printer only works with thermal paper. While thermal paper is significantly more expensive than normal paper, this printer also uses inkless printing and works without a ribbon and toner. Since you don’t have to spend money on ink, carbon ribbons or toner cartridges, you ultimately end up saving money with thermal paper.
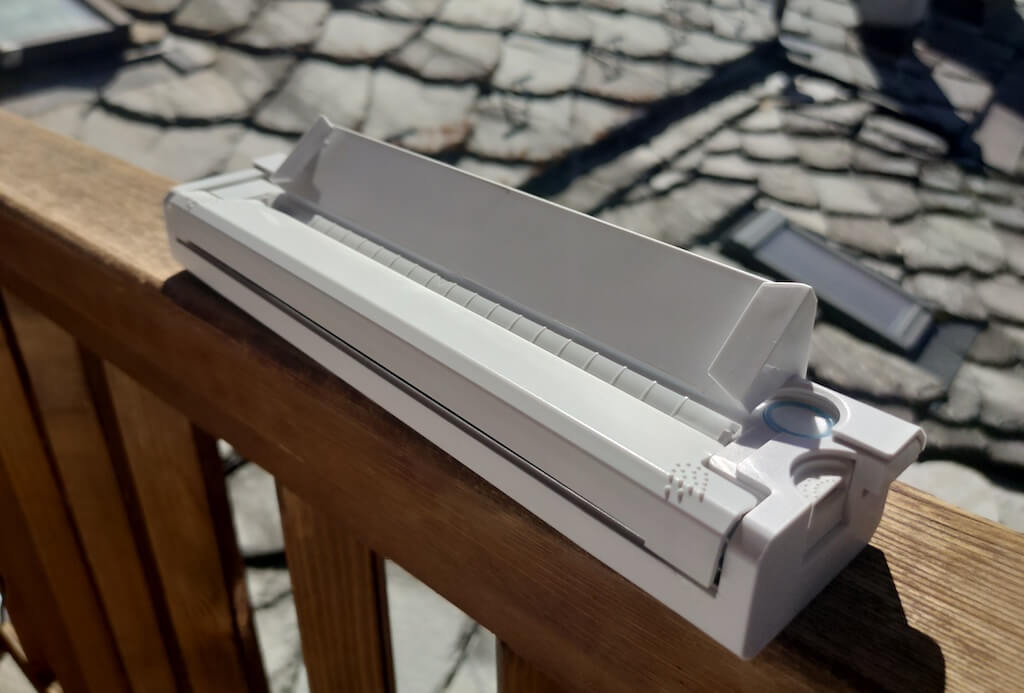
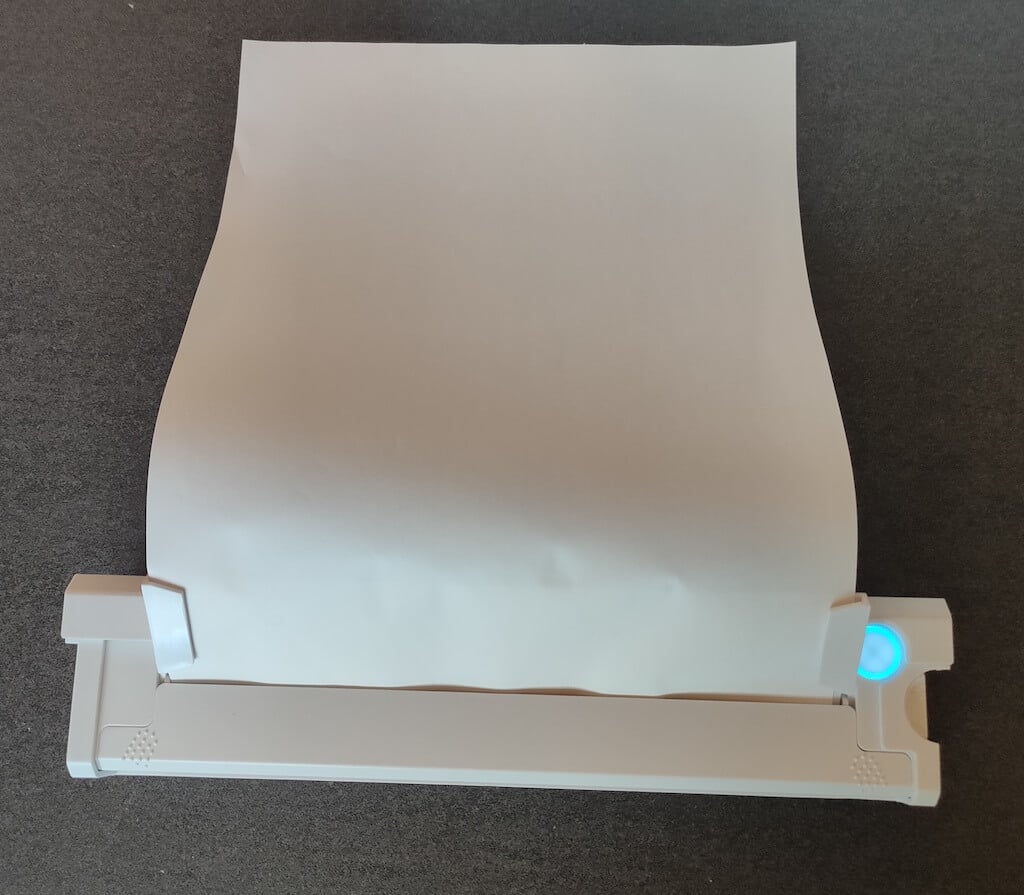
The Newyes LD0801 is a pocket-sized printer that features straightforward design. For the purpose of this review, I had a printer in white color. The printer looks like a small white brick with just two pressable buttons on top – one for switching it on and off, and another for opening the printer’s cover. You’ll also see the paper entry slot on top of the printer.
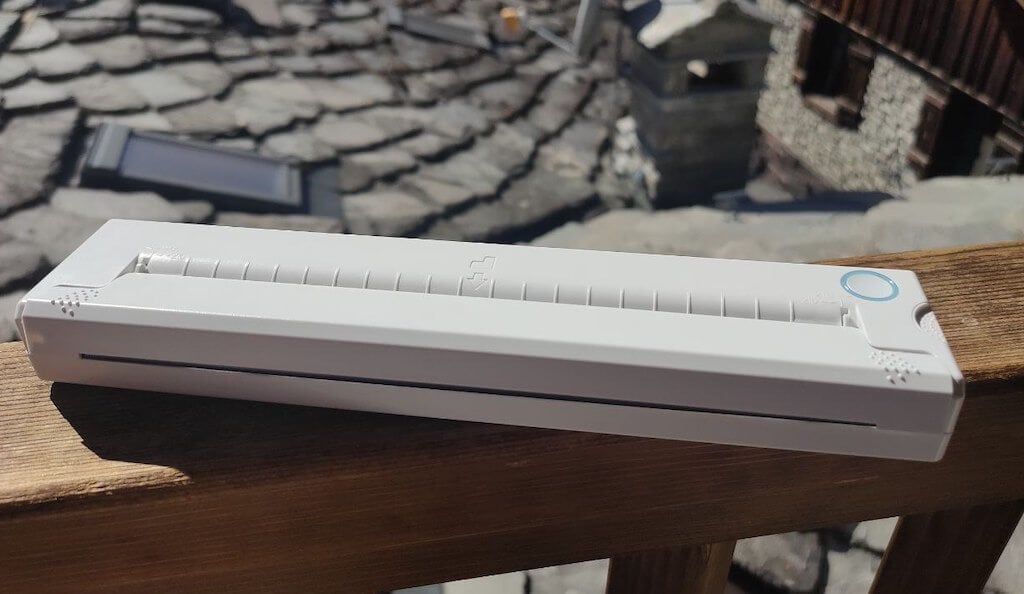
On the side of the printer, you’ll find a single charging port.
The printer is made of plastic, but the build feels sturdy. I never have to worry about throwing it into my bag or damaging it when traveling. Besides, you can use a nice carrying pouch included in the package for protection.
Performance & Features
According to Newyes, the portable printer has a “handheld size and two times the weight of an iPhone”. This can give you an idea of how portable and convenient this little gadget is. In a month of testing, I used it at home, in a store, and even in a car while on the road.
Using the printer is unbelievably easy. Connect it to your mobile phone via Bluetooth, press the button to turn the printer on and put a sheet of thermal paper into the paper entry slot. Make sure to use thermal paper and not standard paper, and put it with the black marks facing down. Bear in mind that the thermal printer can only print in black and white and only on one (marked) side of the thermal paper sheet.
Then open the iPrint app on your smartphone. If you’re printing an A4 document, you can select one of two options – Photo Printing and Document Printing . Then choose the document from your phone’s files and print it.
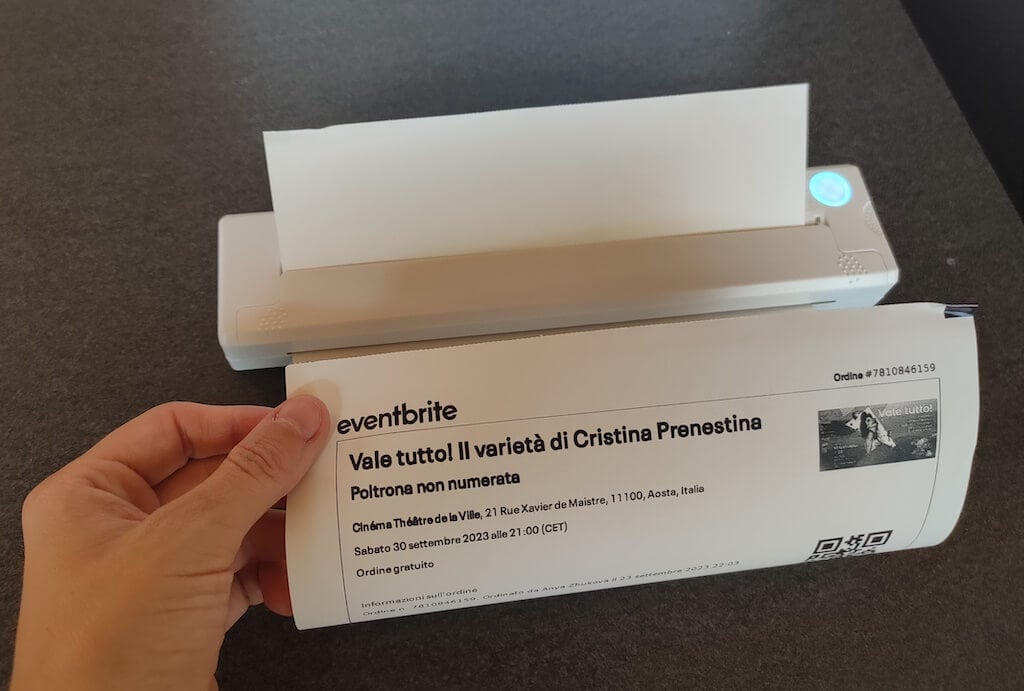
The printer is reliable and in the time that I used it the Newyes LD0801 never let me down. The printing quality will surprise you, as it’s sometimes better than what you get from a full-sized printer. The printer supports printing in various formats, and you can use it to print documents from your smartphone (Android and iPhone), iPad, and Android tablet.
When fully charged, the printer can support up to 90 pieces of paper continuously, which is very impressive for a gadget of such a small size.
Software
The Newyes portable printer requires an iPrint app to operate. The app is available for free on iOS and Android. You’ll need to download the app on your device from the App Store or Google Play before you begin printing your documents.
The app has a simple and user-friendly design. You’ll need to pair your device with the printer on the first use via Bluetooth.
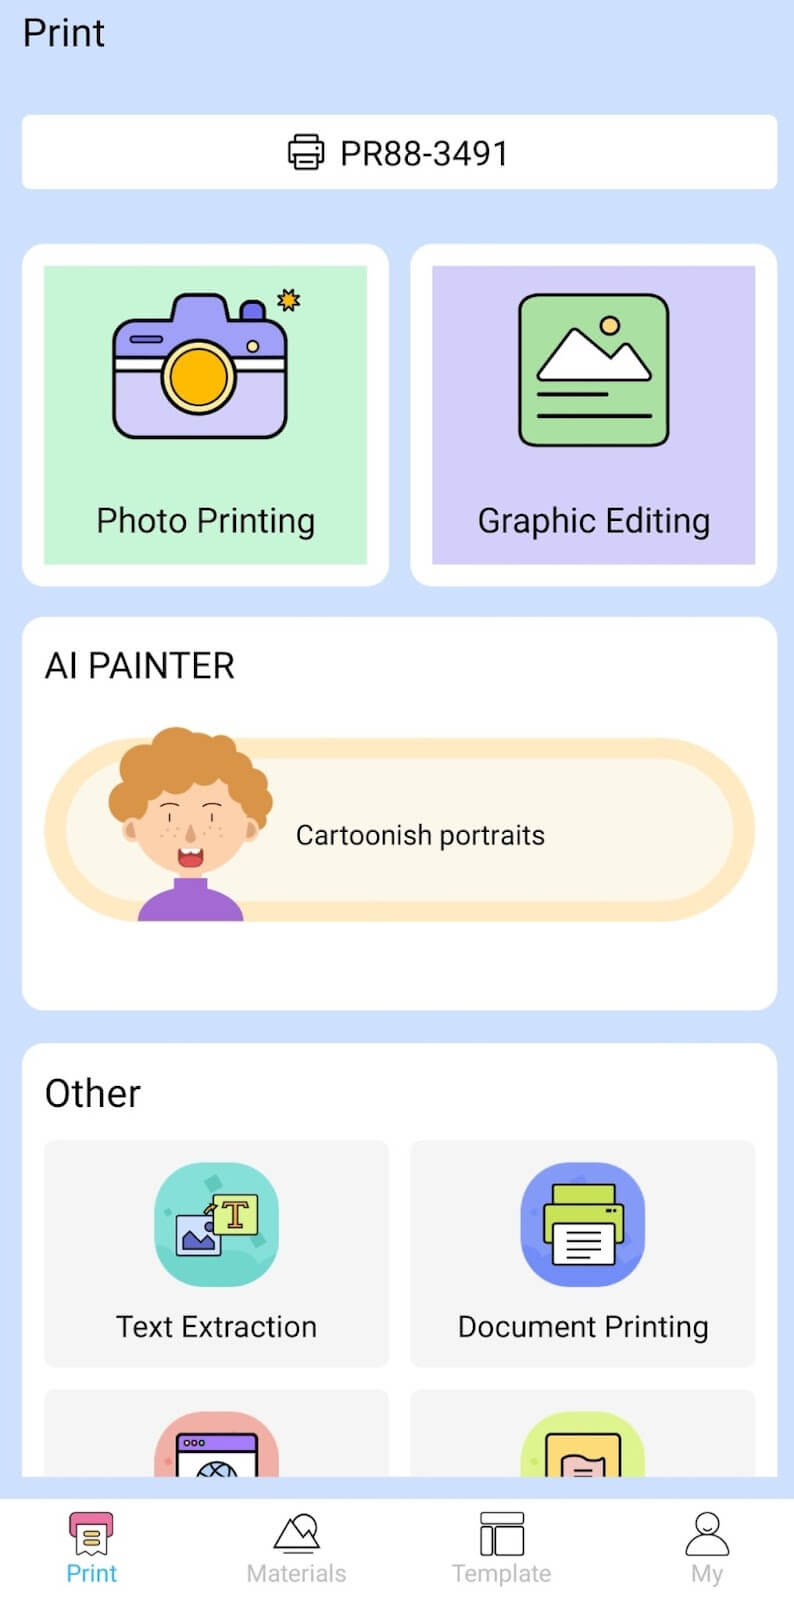
Depending on the type of document you want to print, you can choose different options from the app. There’s photo printing, document printing, web printing, and banner printing.
The app also has Materials and Template sections, where you can find various pictures and templates for printing to-do lists, post-its and holiday cards. You can also use the Newyes LD0801 as a label printer using these templates.
Battery Life
The Newyes portable wireless thermal printer is equipped with a decent 1200mAh lithium battery. This high-capacity battery allows you to print on the go without constantly worrying about running out of charge. When I received the printer, I charged it fully once, and it still hasn’t run out of battery after one month of use (I use it to print something almost every other day).
Charging this printer is quick and takes just over an hour to charge the printer from zero to full. The type-C charging cable facilitates a rapid charging experience. And if you run out of battery while on the go, you can quickly charge the printer from a portable power station or a power bank to continue printing.
The printer doesn’t support wireless charging, so I’d recommend always bringing the usb-c cable with you just in case.
Should You Buy the Newyes Portable Wireless Thermal Printer?
The Newyes portable thermal printer ensures high-quality wireless printing while on the go and easy operation. It’s not the most budget-friendly option, but this purchase will save you money and nerves in the long run thanks to its versatility and portable nature.
Personally, I can say that this printer made my life easier. So much that it’s probably my favorite smart gadget of the year. If you’re looking for a portable printer that won’t take any space in your house, I’d certainly recommend considering the Newyes LD0801 model.
- Tribit StormBox 2: The Under $70 Portable Speaker that Stands Out
- ENGWE L20 2.0 Review: The Best Budget-Friendly Foldable E-Bike?
- TopDon TC004 – a Thermal Imaging Camera That Will Give You Predator Vision
- Eskute Star Folding Fat Tire Electric Bike Review
- The 70mai Power Station Tera 1000 Review
