If you tried working from home before, you know the importance of staying connected with your team at all times. That’s why it’s crucial to choose the best software and hardware that will help you replace face-to-face time with online communication.
The OBSBOT Tiny 4K is a new AI-powered PTZ webcam that will make sure you always look your best on camera. The AI tracking is a great feature for anyone who needs to get up and move around a lot during online meetings, and the 4K video quality is here to make sure your live streams look flawless. What else can the OBSBOT Tiny 4K do? Find out in our review of this smart webcam.
OBSBOT Tiny 4K: First Impressions & Specs
The OBSBOT Tiny 4K is a unique camera compared to other webcams on the market. OBSBOT Tiny is a PTZ 4K webcam and offers a PTZ (pan-tilt-zoom) gimbal and AI tracking as well. This camera can auto-track you as you move around. You’ll find this kind of technology on top-tier conference cameras. You’ll also have to pay a steep price for them. The OBSBOT Tiny 4K is a more affordable alternative for anyone who needs a PTZ webcam to track their movement during the call while also delivering a stunning 4K image.
Let’s have a look at the full list of specs of the OBSBOT Tiny 4K AI-powered PTZ webcam.
- Size: 89.4mm x 58mm x 58mm (without mount), 142mm x 58mm x 58mm (with mount)
- Weight: 147g (without mount), 176g (with mount)
- Max video resolution: 4K@30fps, 1080p/60fps, MJPEG, H264
- Supported resolutions: 3840×2160, 1920×1080, 1280×720, 640×360
- Zoom: 4x digital zoom
- Focus type: AF/MF
- HDR: Yes
- Field of view: 86°
- Audio: Built-in dual omni-directional mics with noise reduction
- Gimbal: 2-Axis gimbal, max control speed: 120°/s
- Charging ports: USB-C & DC power ports
- System requirements: Windows 10 or later, Windows 8, Windows 7, macOS 10.13 or later
- Price: $269 on the official OBSBOT store , or from $228 on Amazon
Compared to its predecessor OBSBOT Tiny, the 4K version sports quite a few improvements. The max video resolution changed from 1080 to 4K resolution improving the image quality. Tiny 4K also has improved digital zoom, autofocus, and HDR.
Design & Unpacking
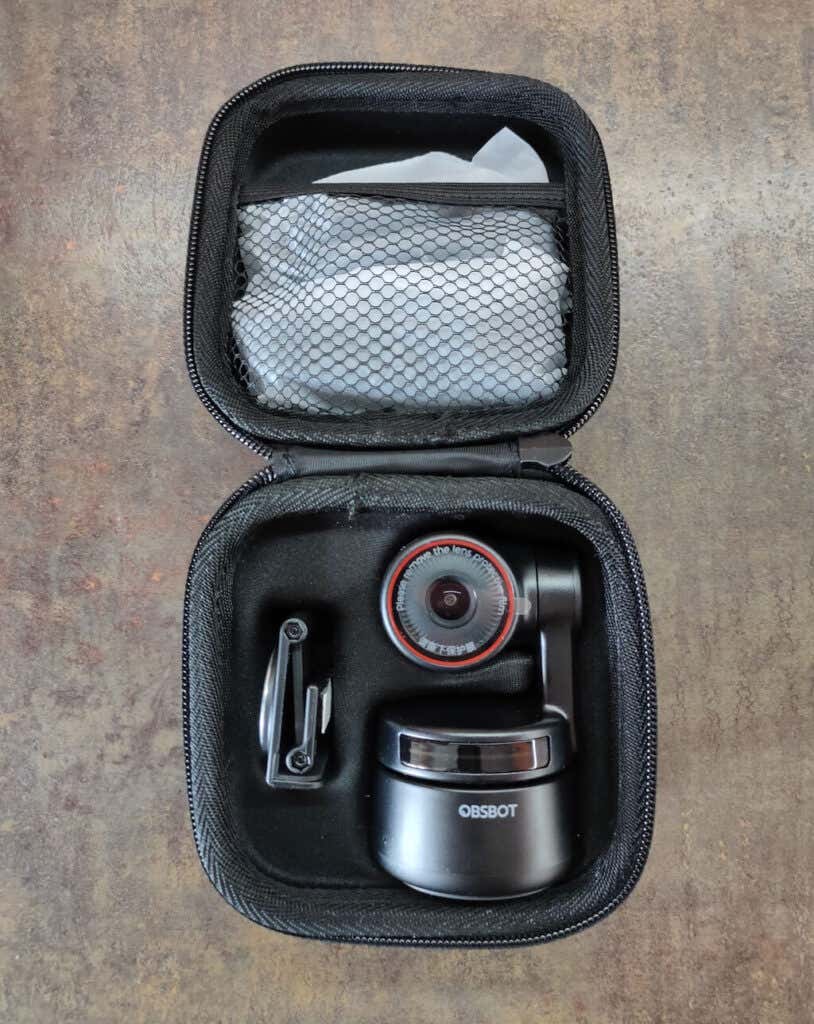
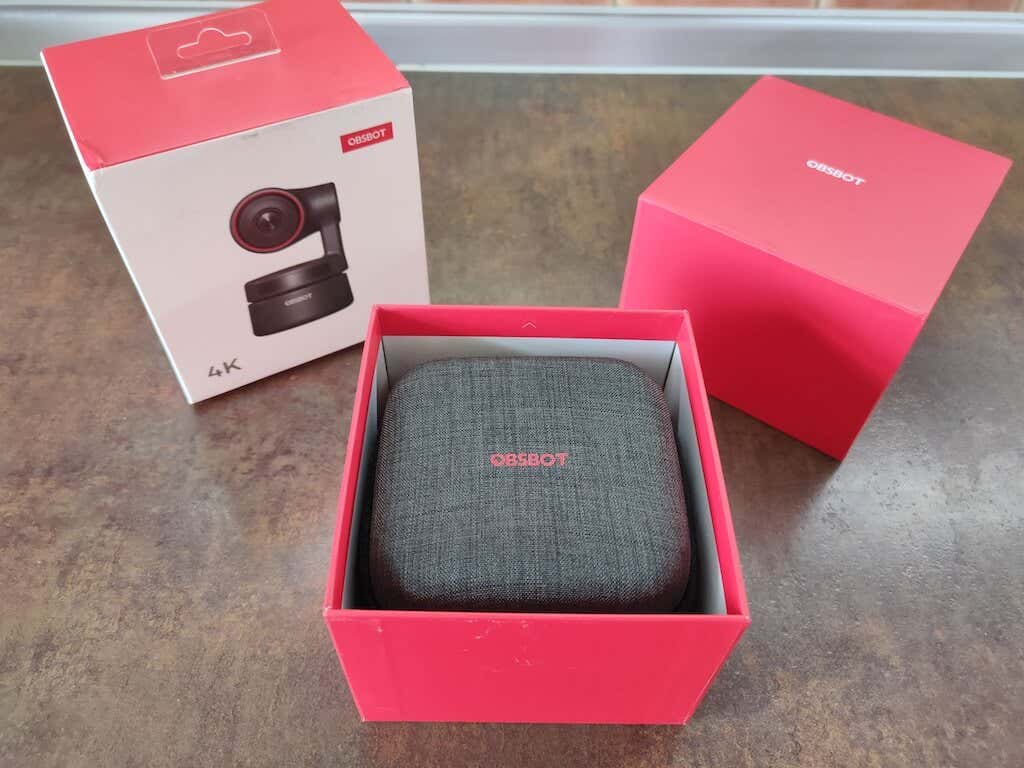
The first sign that the OBSBOT Tiny 4K is a higher-end webcam is the packaging. It comes in a stylish red and white box that in turn houses a hard carrying case. With premium packaging like that, you can be sure that your gear won’t be damaged when transported.
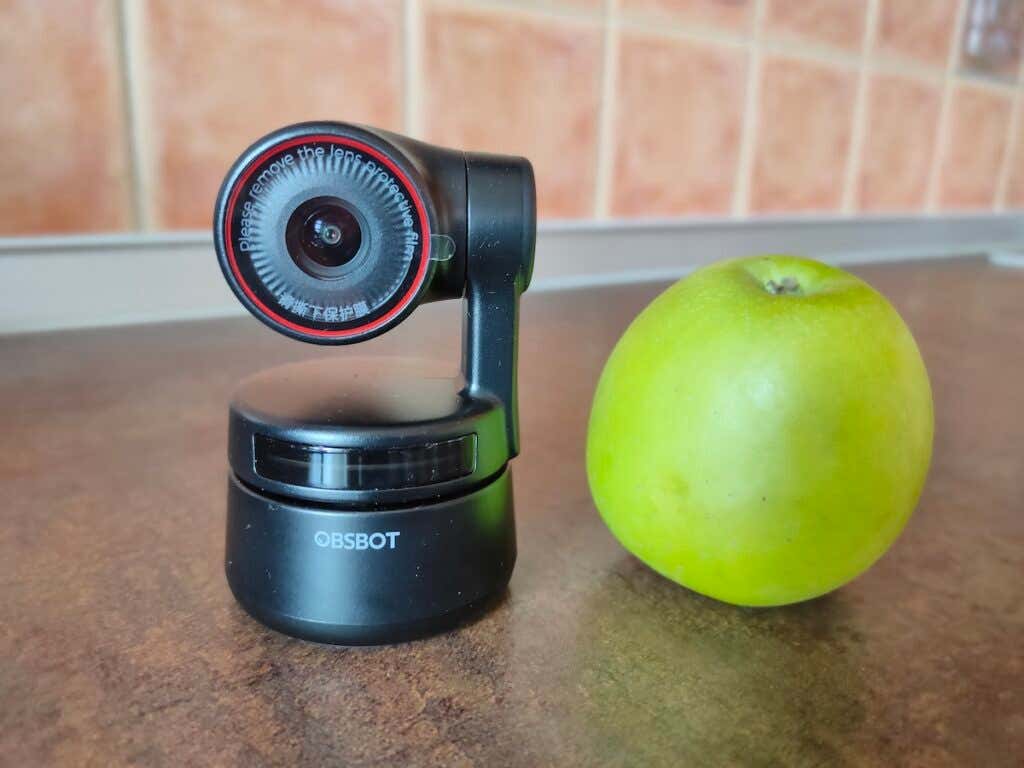
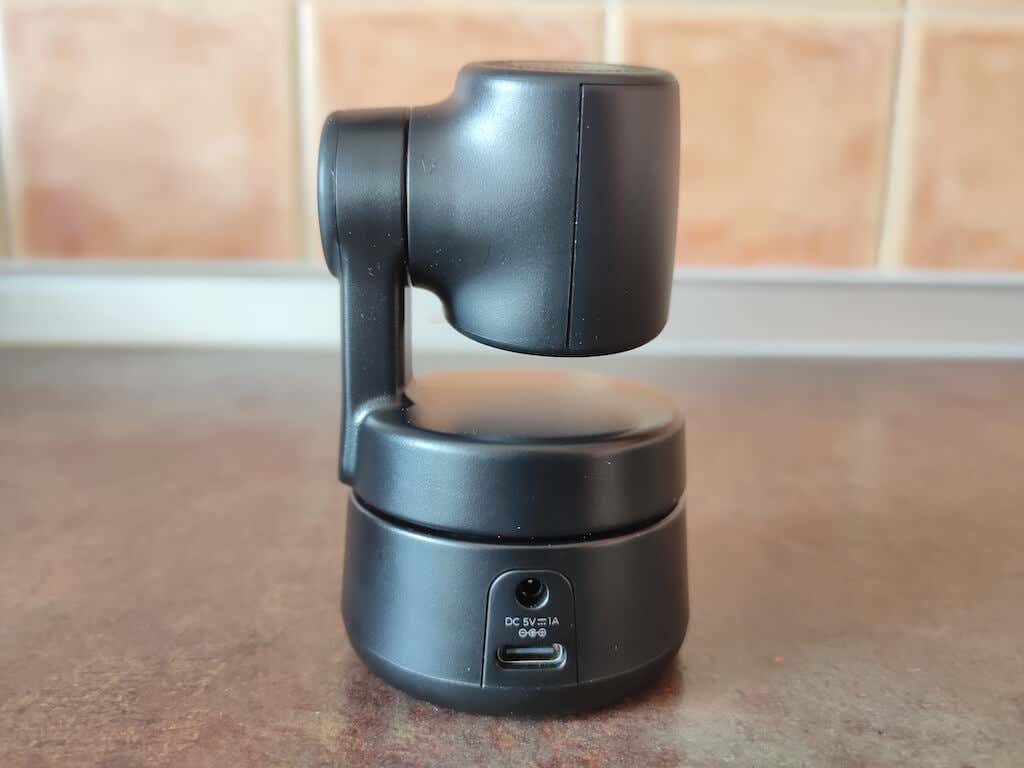
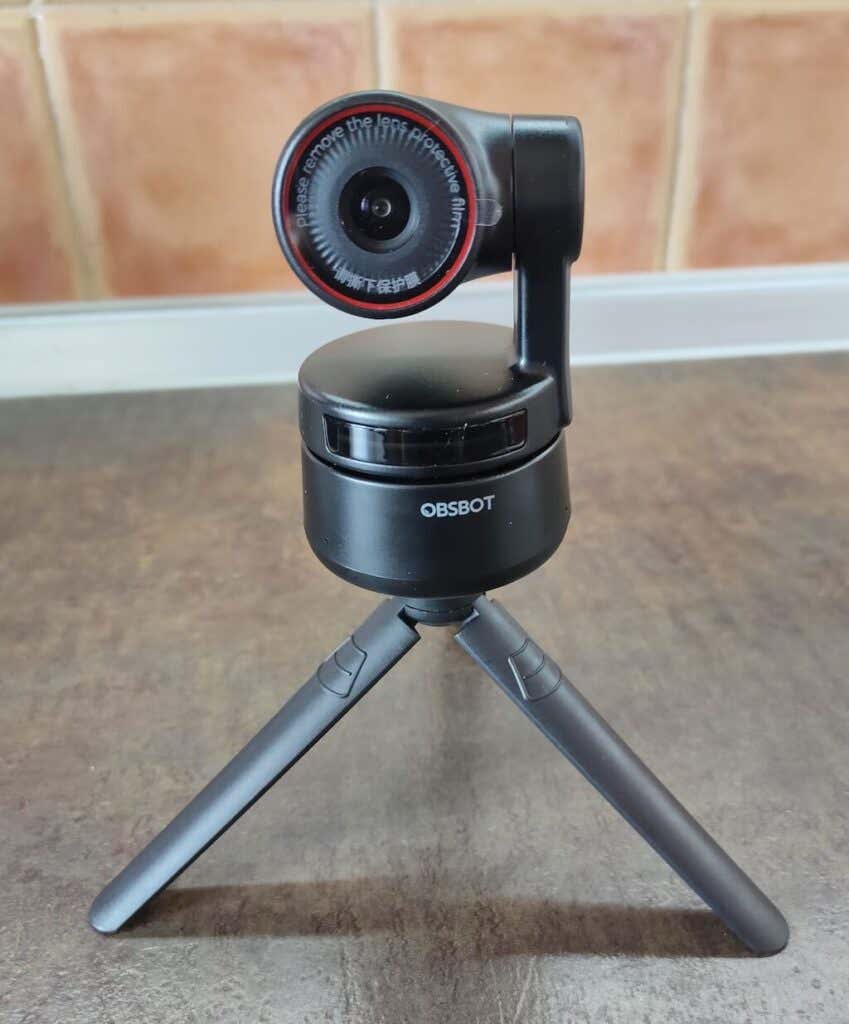
When you open the carrying case, you’ll find your Tiny 4K together with the charging cables and a mounting device. The case itself is a hard shell that can be used to store or carry the Tinky 4K with you. OBSBOT Tiny 4K is compact, light (5.18 ounces without mount) but durable. It has a matte black body with a round base. The base has a green light bar on the front that illuminates when the camera’s on. The top of the base rotates so the camera can pan left and right.
On top of the rotating base, you’ll find a gimbal with the camera attached. The gimbal can tilt the camera up and down, allowing it to track moving objects. The cylindrical head of the camera houses a lens that is surrounded by a red ring.
The branding isn’t invasive, and you’ll only find the brand name on the front of the camera. If you’re into minimalistic and clean design, you’ll appreciate this camera’s overall look.
What’s in the Box
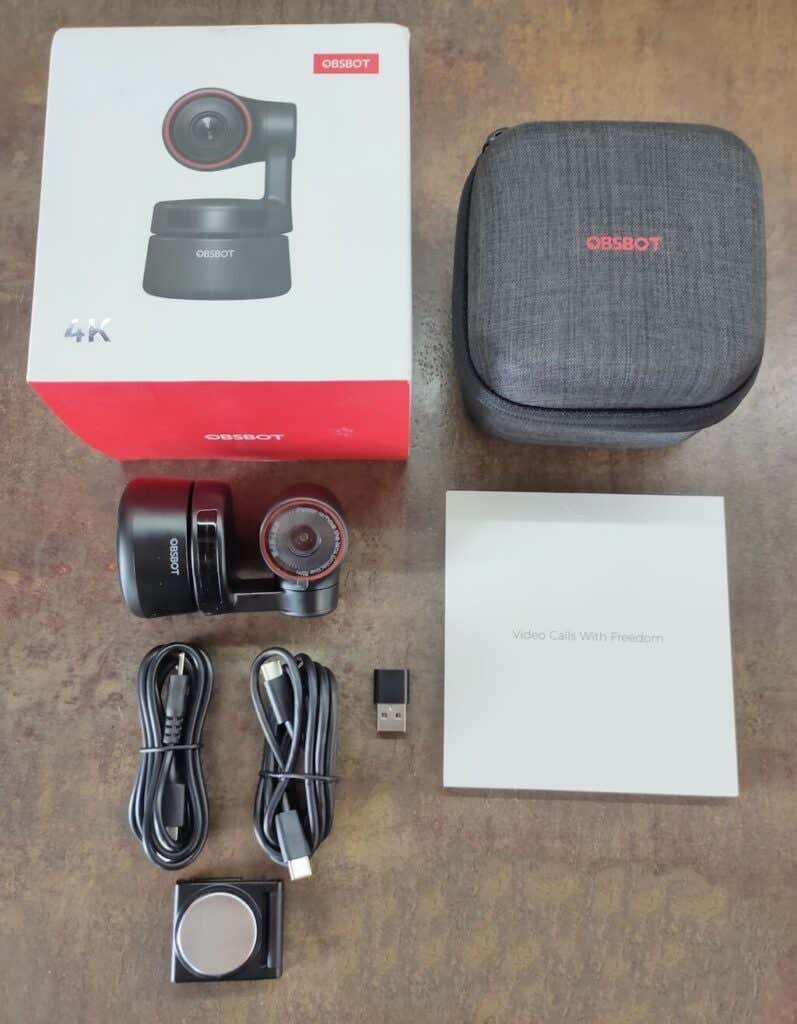
Here’s everything you’ll find inside the box when unpacking your OBSBOT Tiny 4K:
- OBSBOT Tiny 4K camera
- OBSBOT carrying case
- USB-C to USB-C Cable
- USB-C Female to USB-A Male Adapter
- USB-A to DC Power Cable
- Magnetic mount
- User manual & Warranty card
The Tiny 4K bundle we had for testing also included a few extra accessories: remote control and a small tripod. The remote control comes with a set of batteries, so you can use it right out of the box. OBSBOT offers a large selection of accessories for their cameras, which we’ll talk about a little later.
Setup & Daily Use
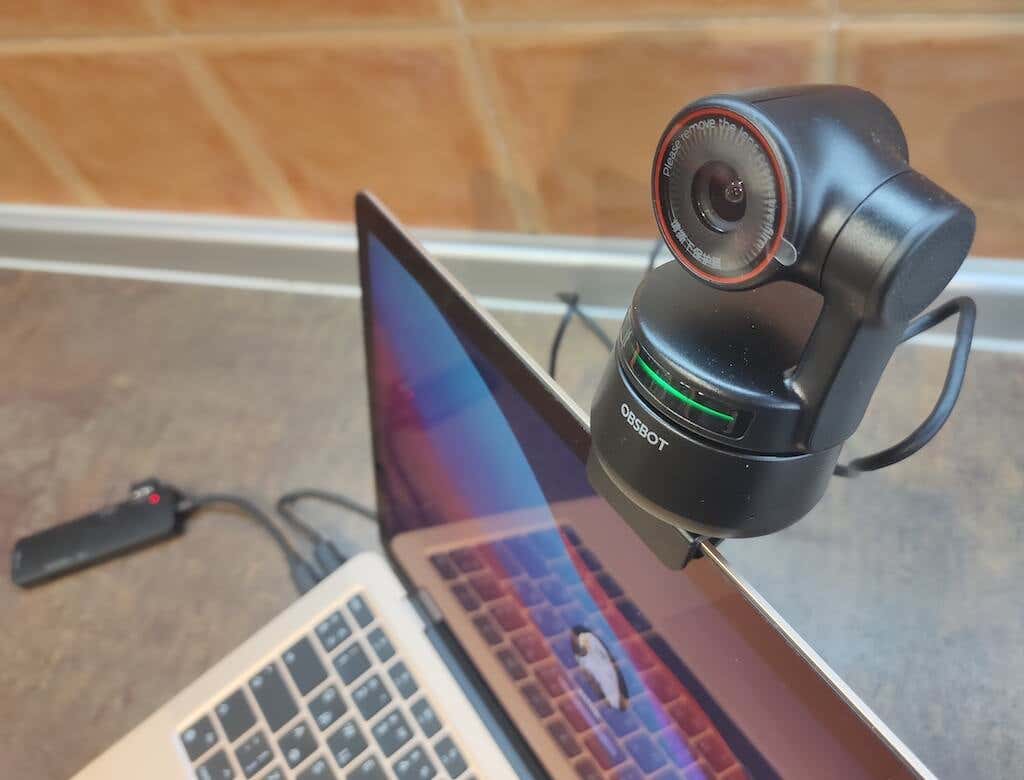
The setup process is as easy as it can be: connect the Tiny 4K with your laptop or desktop via a USB-C cable, and you can start using it.
OBSBOT Tiny 4K has a magnetic mount that you can use to fix the camera on top of your PC so that it sits at the same height as your face. The magnetic mount system works well with both laptops and desktops, though you might find that on thinner computers like MacBook Air it looks a little chunky. Nevertheless, the mount will keep your camera fixed on top of your PC, and even has a self-adhesive strip for a more permanent setup.
If you prefer keeping the webcam separately from your monitor, you can use a tripod to mount it on your desk or somewhere else. You can use one of the OBSBOT tripods made specifically for the Tiny 4K, or any other standard tripod that you have at home.
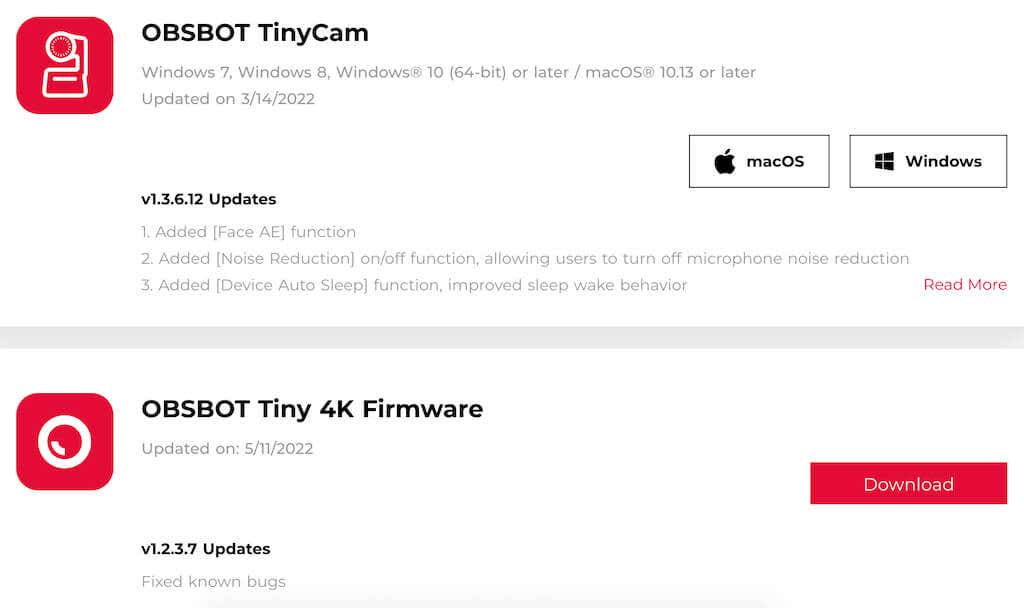
Once connected to your computer, the OBSBOT Tiny 4K powers by itself via USB-C. The next thing you need to do is download the OBSBOT TinyCam software to control OBSBOT Tiny and get access to its full functionality. You can also download an electronic version of the user manual, and the latest firmware from the official OBSBOT site to ensure the software is up to date.
Video & Audio Quality
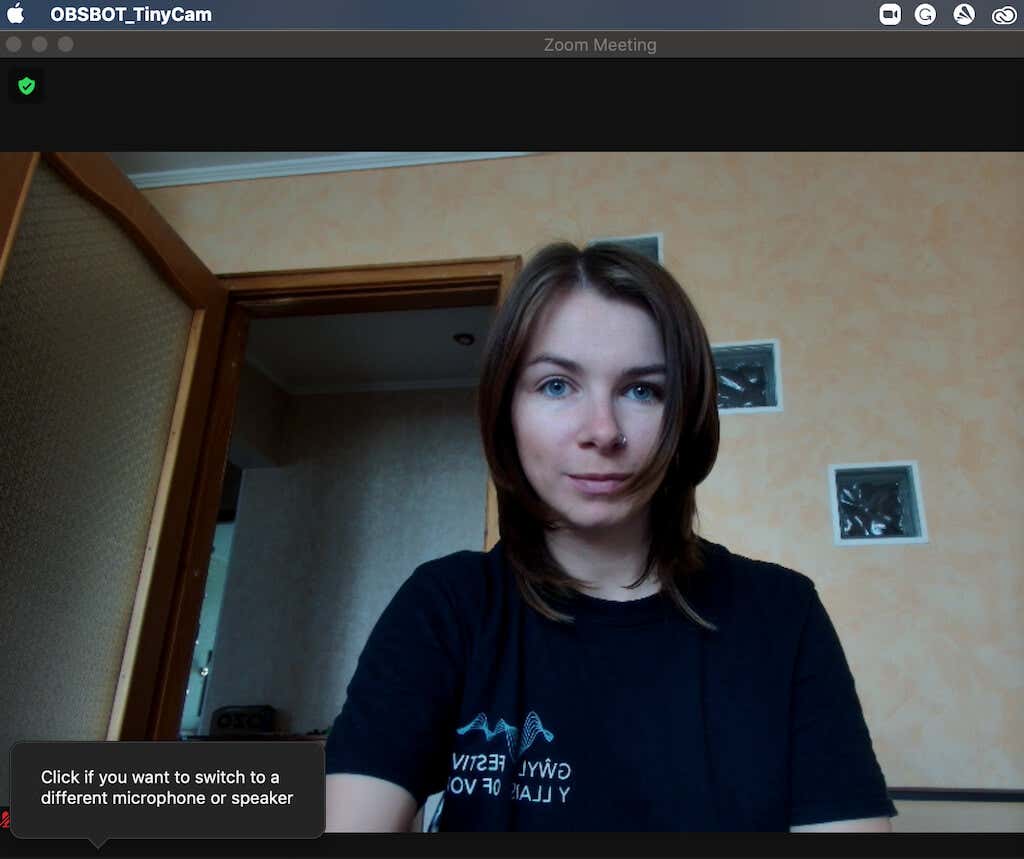
As you can tell from the name of the camera, the OBSBOT Tiny 4K can record video in 4K resolution. This gives you four times the pixel density of 1080p and allows you to zoom in without the video quality dropping significantly. The 4x digital zoom will still get you a 1080p video, which is useful when you’re doing a presentation using a physical chalkboard that you need to film from across the room.
The default setting on the OBSBOT Tiny is capturing video in full 4K at 30 fps. If you’re using Tiny 4K for live streaming or simple video calls, this is the recommended setting. The 4K Ultra HD (UHD) lens will help you to have crystal-clear video quality.
When you need to record video in a dim-lit environment, you can use the HDR feature to get a better light-dark balance and enhance the colors. The HDR setting is disabled by default. You can switch it on using the TinyCam software. Tiny 4K also comes with features like auto-exposure and smart white balance that help you make the subject of the video look great in any lighting conditions.
AI-Powered Features
There are a few more automated features that you should be aware of while using the OBSBOT Tiny 4K. One of them is auto-framing. This feature uses AI to identify the most important object in the camera’s field of view and automatically focus on it. This can be useful when there’s more than one subject in your video (like when you’re showing different objects to your audience), and you want the camera to switch between them. If you want the OBSBOT Tiny to only focus on your face, you can use the TinyCam app to switch to face mode.
Another AI-powered feature is auto-tracking. OBSBOT Tiny 4K uses a next-gen AI tracking algorithm that enables it to lock on a target (you), and automatically follow them around the room. If you suddenly need to change your position during a stream, you don’t have to worry about staying in the shot. The Tiny 4K will keep the focus on you. The movement of the camera is surprisingly smooth, even when you’re moving at a fast pace, like when you’re dancing or doing sports.
Speaking of fast movements, if you’re filming a dance class or delivering a presentation with a lot of movement, we recommend switching to a higher frame rate – 1080p at 60 fps. This setting will bring down the resolution but it’ll also reduce motion blur.
Gesture Controls
In addition to the AI tracking, you can use gestures to set a tracking target and zoom in and out. While Tiny 4K uses simple gestures as controls, getting them to work is still a bit of a learning curve. There are two gestures that you can use: a handwave for the camera to set your face as a target for tracking, and an L sign to zoom in and out.

The trick here is to make sure the camera can see and recognize your gestures. When the Tiny 4K is in operation, the light strip on the front is green. Once you show the gesture, wait till the light strip color changes to blue – that indicates your gesture is acknowledged.
Audio Quality
OBSBOT Tiny 4K comes with built-in dual omni-directional mics with noise reduction. The audio quality is solid, though it won’t beat the top gaming headsets on the market. If you’re used to the best sound quality, you can just use a separate microphone for streaming or gaming. However, if you don’t have an external option, you can use the OBSBOT Tiny 4K’s built-in mic and your colleagues on the other end of the Zoom or Skype calls won’t complain.
App & Connectivity
OBSBOt Tiny 4K has its own software and specific firmware that you can download from the company’s official site. The OBSBOT TinyCam app unlocks a number of features that otherwise you wouldn’t be able to use. TinyCam is compatible with Windows and Apple computers.
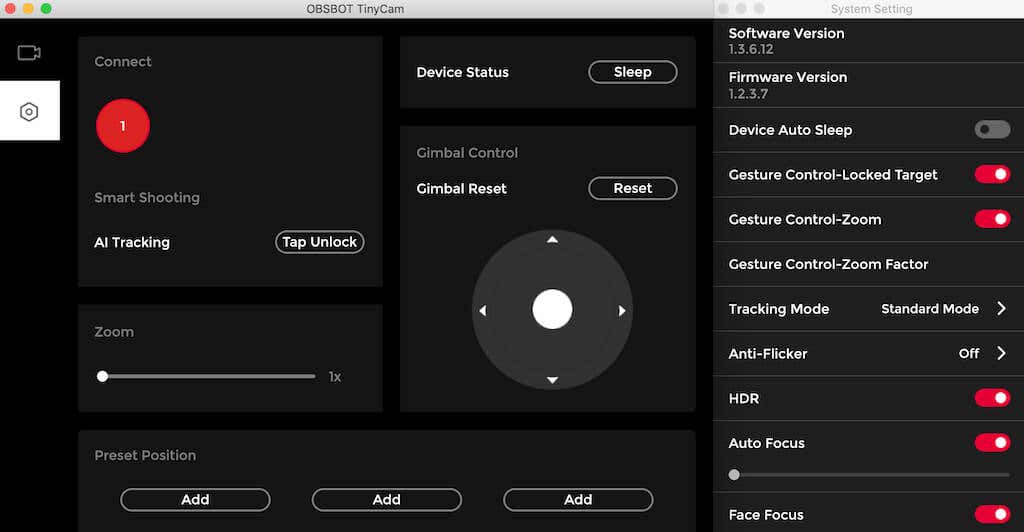
Here’s a full list of camera functions that you can enable in the OBSBOT TinyCam:
- Select target for shooting or unlock target
- Zoom in and out
- Set preset positions for the camera
- Control the gimbal with an on-screen joystick to manually move the camera around
- Reset the gimbal to the initial position
- Put your device to sleep or switch it back on
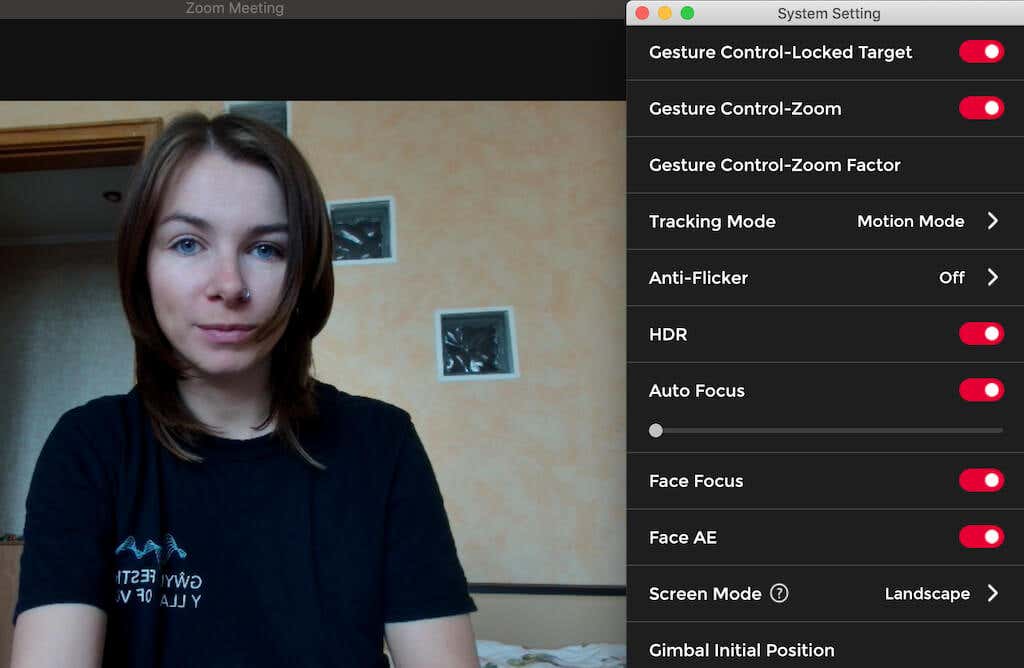
Using the app’s System Settings , you can also enable the following features:
- Put the camera to sleep automatically after a certain time period of no use
- Enable the gesture control for remote control of the camera
- Change the tracking mode. TinyCam offers 3 different modes: Headroom Mode , where the camera automatically leaves more space above your head for close-range video calls, Standard Mode with standard tracking speed and auto-frame, and Motion Mode which adjusts auto-frame to capture your whole body and enables the AI tracking (recommended mode for filming sports or other activities with a lot of movement)
- Change the camera’s tracking mode
- Switch anti-flicker on & off. This feature reduces flicker – useful when you need to shoot a TV screen in the background
- Enable or disable HDR
- Control the auto-focus setting: switch it on and off if you need to use manual focus
- Enable or disable noise reduction
While TinyCam has a lot of functions and features, it also has a user-friendly interface and is easy to use once you get a hang of it. Once you install the latest firmware, you get full control over your OBSBOT Tiny 4K and can really take advantage of all of the extra features like its AI tracking and gesture control.
Accessories
If you want to improve your user experience with OBSBOT even further, have a look at the camera accessories that OBSBOT offers. Some of them are just spare parts to replace anything that you might lose or break from the original package. However, some of the accessories are really useful and can unlock even more functionality of your Tiny 4K.
One example of that is an OBSBOT tripod . OBSBOT has 3 tripods suitable for different needs: the small OBSBOT Tiny Webcam tripod perfect for desk use, a Portable Tripod with non-slip feet for a more stable setup, and a bigger Extendable Tripod with adjustable height.
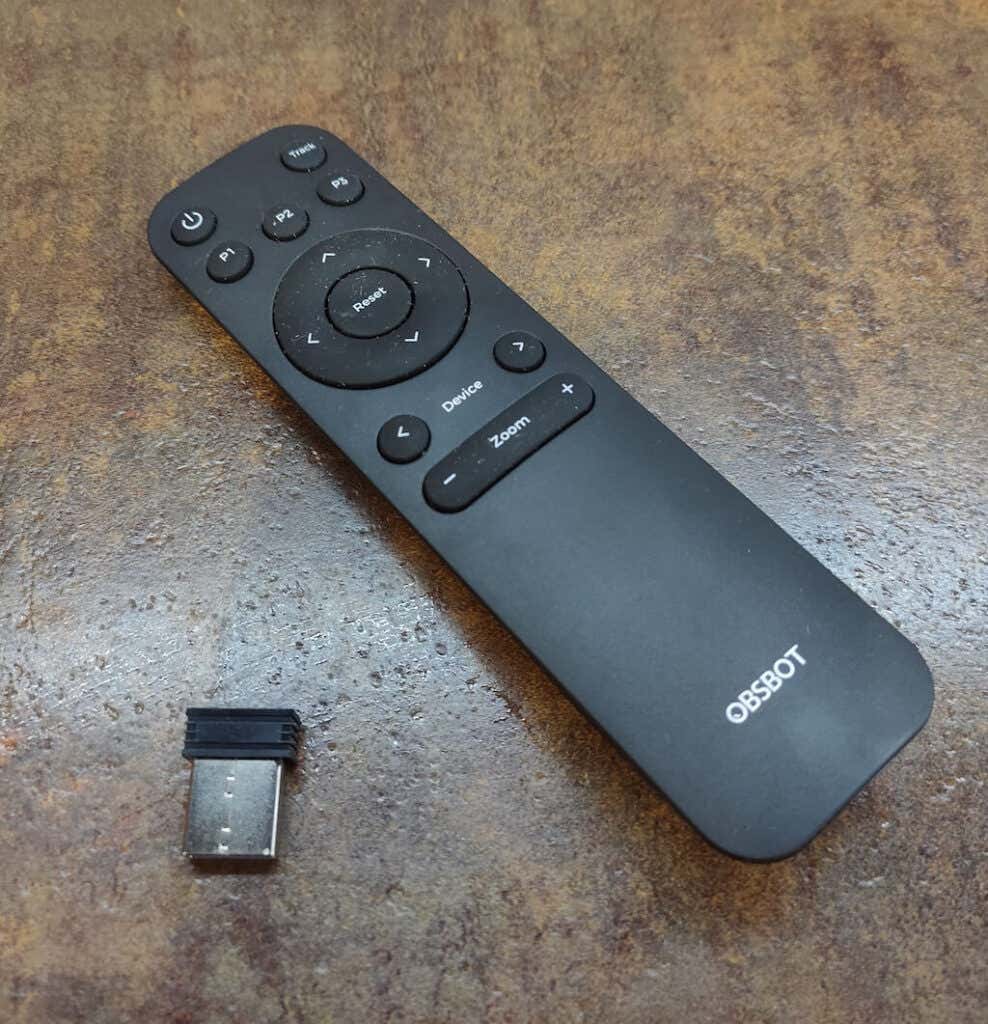
OBSBOT Tiny Remote Control (compatible with Windows and macOS) is also a useful gadget that allows you to press the key and control Tiny remotely. Among the functions, the remote control supports are zoom, PTZ, and tracking.
Should You Buy the OBSBOT Tiny 4K?
OBSBOT Tiny 4K is an example of a great camera that can do more than your average webcam while also being reasonably priced (compared to other 4K options on the market). If you’re looking for a smart camera with impressive tracking abilities and PTZ features that can follow you while you’re moving or giving a presentation, the OBSBOT Tiny 4K is a great pick. However, if you just need a decent full HD webcam for video calls with your colleagues , you can save some money by picking something less advanced like a Logitech C922.
- WhatGeek x 3inuS Kebohub EE01 Mechanical Keyboard Review
- Mobile Pixels Duex Max Portable Monitor Review
- Trifo Lucy: The AI Robot Vacuum and Mop
- Review of Anycubic Kobra Max 3D Printer
- Review of Anycubic’s Kobra 3D Printer
Anya is a freelance technology writer. Originally from Russia, she is currently a full-time Remote Worker and Digital Nomad. With a background in Journalism, Language Studies, and Technical Translation, Anya couldn’t imagine her life and work without using modern technology on a daily basis. Always looking out for new ways to make her life and location-independent lifestyle easier, she hopes to share her experiences as a tech- and internet-addict through her writing. Read Anya’s Full Bio
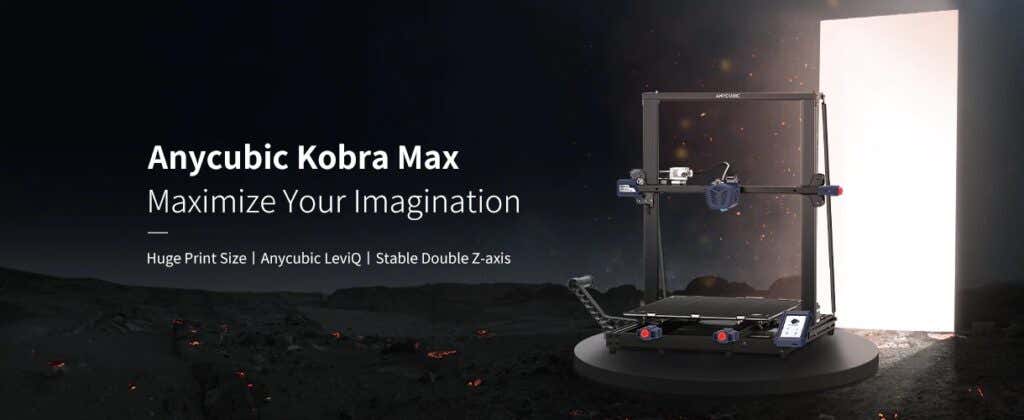
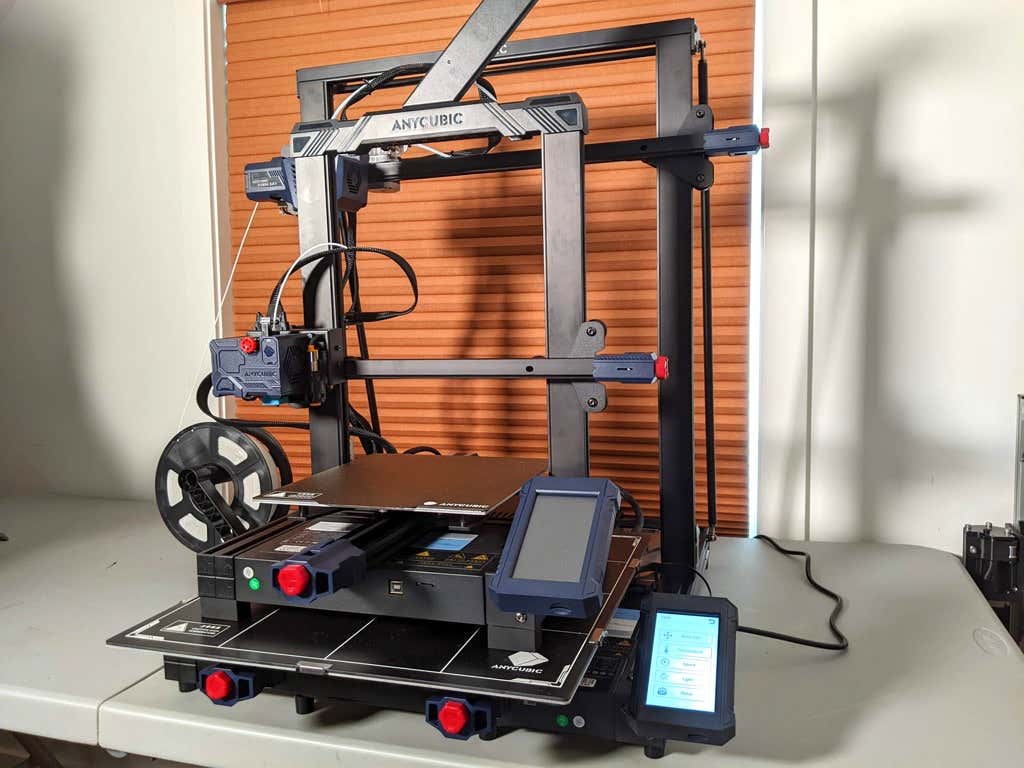
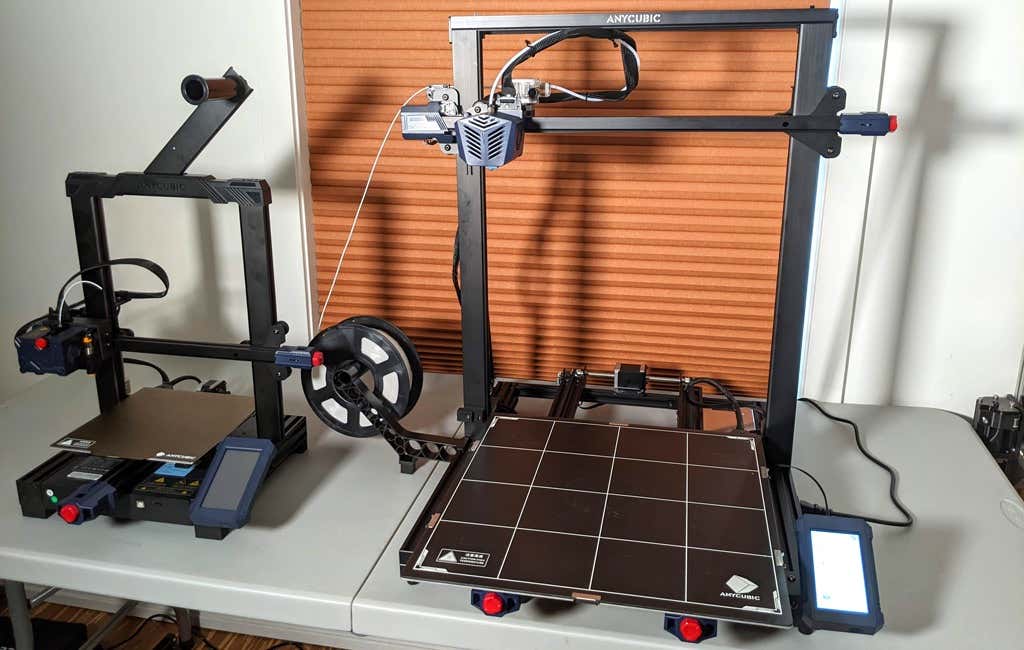
3D printer manufacturer, Anycubic, recently released two new printers—the Anycubic Kobra and its bigger, badder uncle, the Anycubic Kobra Max. We were interested in testing both products in our hunt for the best entry-level 3D printers. We’re looking for ease-of-use and affordability, as well as build and print quality.
We’ve published a number of 3D printer reviews from Anycubic—for both FDM printers like the Anycubic Vyper that print with spools of filament and SLA resin 3D printers like the Anycubic Photon Mono X 6K that use a liquid resin as its raw material—and we can say that the Kobra Max has quickly become one of our favorites.
Features of the Anycubic Kobra Max 3D Printer
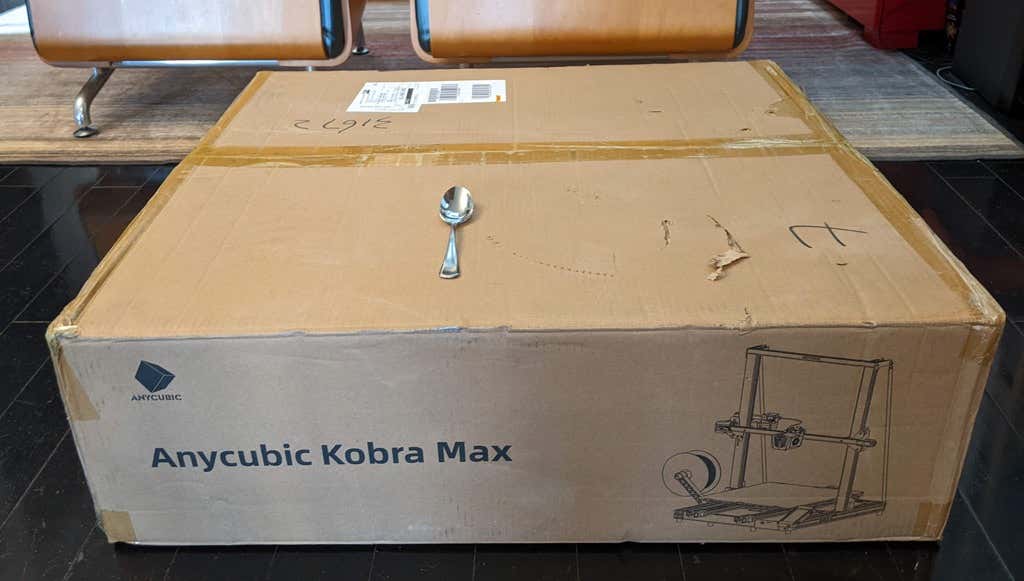
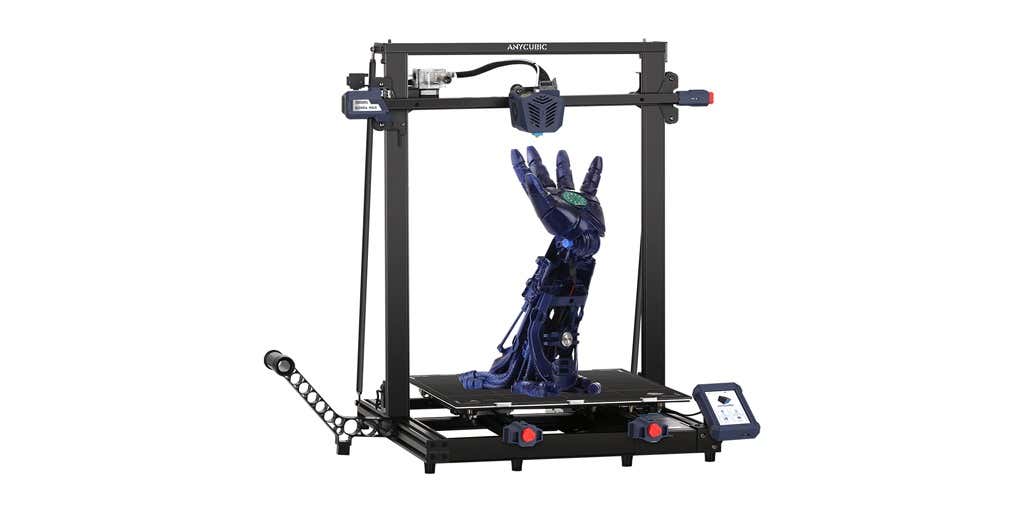
The most obvious feature of this printer is its size. It is absolutely massive. That means you can print huge items in a single piece. Think of a full helmet or an entire ukulele—these are things you couldn’t print in one piece on a normal-sized 3D printer. Truly, the word “Max” doesn’t sufficiently capture just how big this printer is. Good luck fitting the packaging into your trash or recycling bins!
We were skeptical that a Cartesian printer of this size (which relies on a moveable print bed) would perform well since it has a lot of weight to move around. Admittedly, it’s not the speediest printer out there because of those design tradeoffs, but it works great.
The Kobra Max has an impressive list of technical specifications:
- Leveling: Automatic, 25 points leveling using the Anycubic Leviq technology
- Panel area: 7.95 in² / 51.3 cm²
- Filament run-out detection: support
- Printing material: PLA / ABS / PETG & TPU
- Nozzle size: ø 0.4 mm (replaceable)
- Nozzle temperature: ≤ 500 °F / 260 °C
- Hot bed temperature: ≤ 194 °F / 90 °C
- Average speed: 3.1 – 3.9 in./s (80mm/s – 100m/s)
- Control panel: 4.3 inch LCD touch screen
- Z-axis: double threaded rod
- Print size: 17.7 x 15.7 x 15.7 in. / 45 x 40 x 40 cm (HWD)
- Build volume: 19.02 gal. / 72.0 L
- Machine dimensions: 72 x 71.5 x 66.5cm
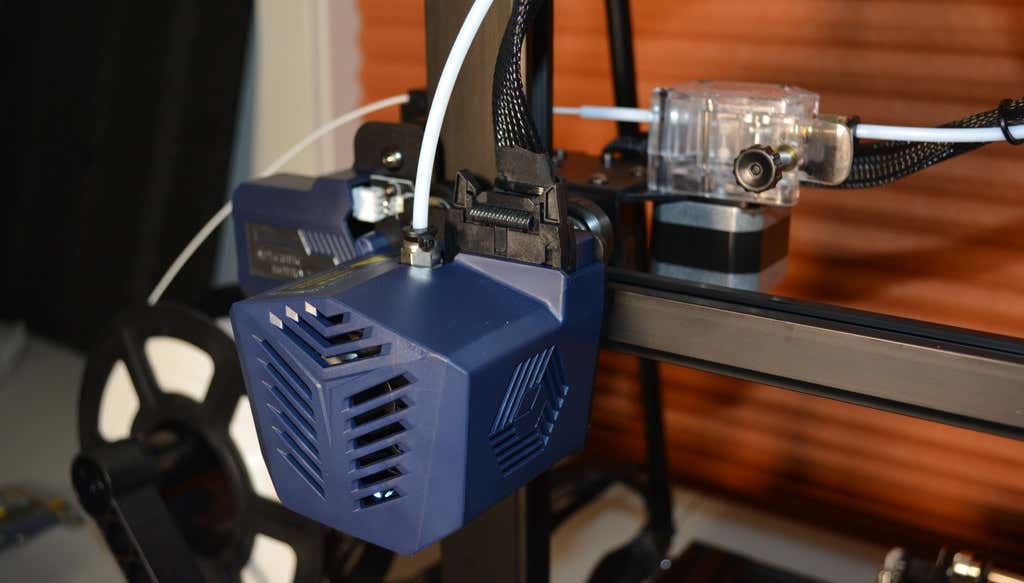
As far as we can tell, the extruder is identical to the extruder and print head on the Anycubic Vyper. Furthermore, the Kobra Max has the same automatic bed-leveling system as the Vyper. The system uses a pressure sensor instead of an inductive sensor.
The bed-leveling sensor is right on the nozzle itself, ensuring that it can probe every printable part of the bed. And since the sensor is pressure-based, you could replace the glass bed with any other material and the bed-leveling system will still work. (Inductive sensors require metal to work, so you won’t find them on printers with glass beds.)
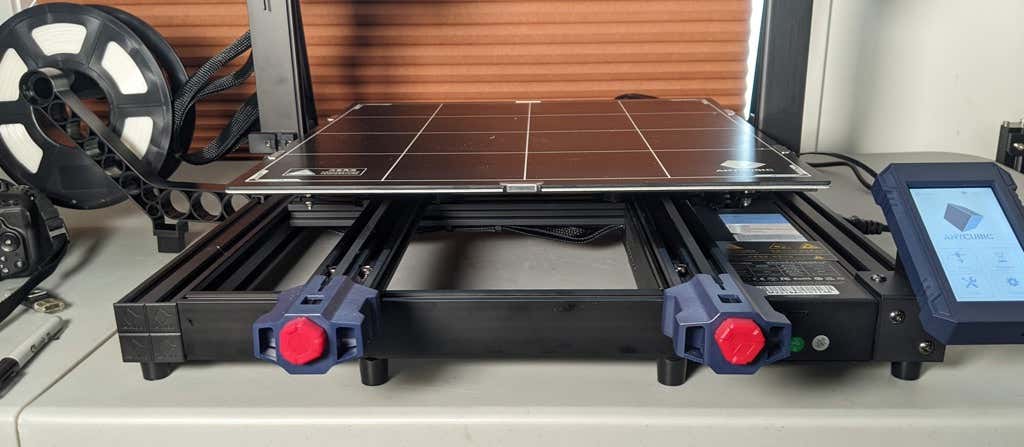
Since the Kobra Max’s printing platform is a rigid glass sheet, you can’t remove and flex it to pop your prints off. We prefer removable spring steel build plates, but glass is still a nice printing surface. If your printer doesn’t have a removable bed, glass is ideal because you can use metal scrapers to remove your prints without worrying about scratching the surface.
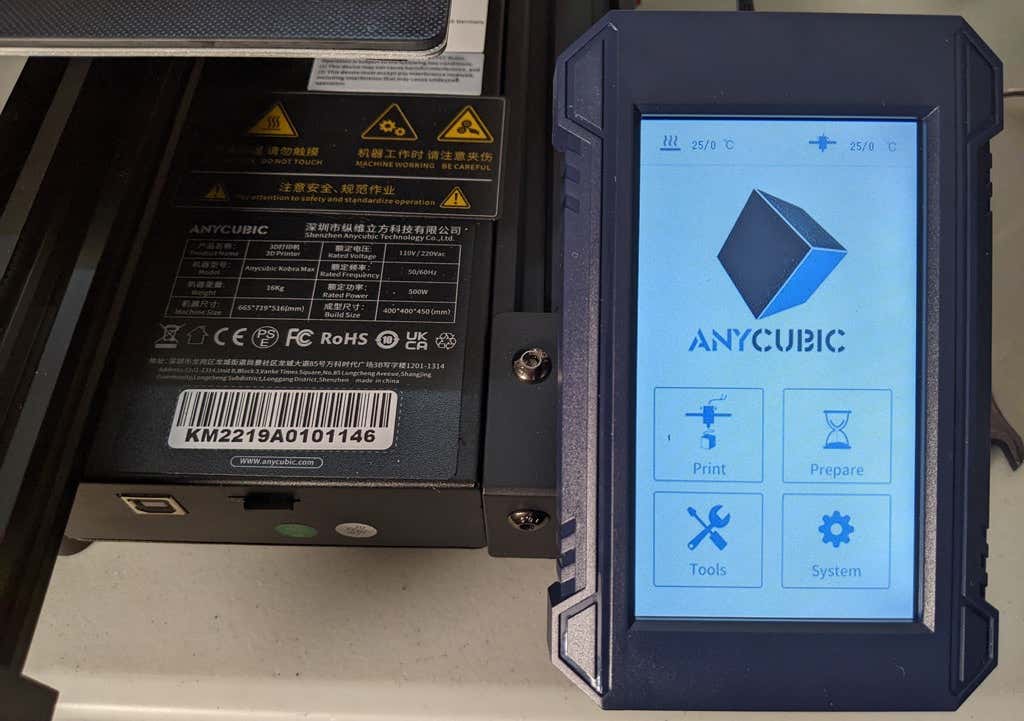
The LCD touchscreen is identical to the screens used on many other Anycubic printers. As usual, it’s responsive and easy to use.
A note about filament types: the Kobra Max will print with PLA, PETG, TPU, and ABS. However, if you really want to print with ABS and get the best possible results, the printer should be inside an enclosure. Given its size, it may be challenging to build a suitable enclosure for the Kobra Max.
Assembling the Kobra Max 3D Printer
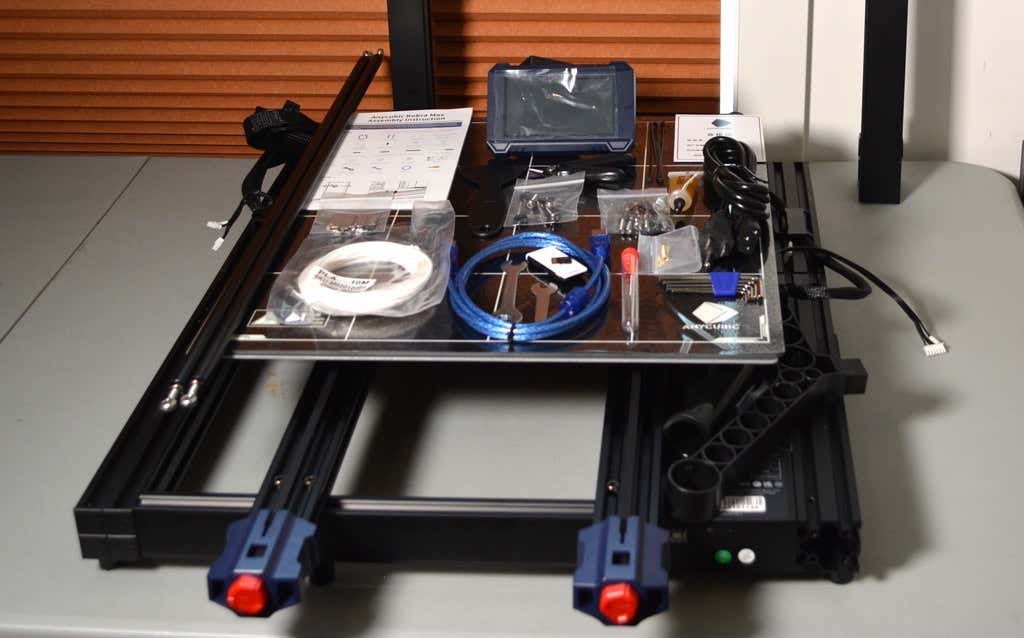
When assembling the new Kobra Max, make sure you have sufficient working space. Since the bed moves forward and backward, you need more space than you’d think. We put it on a 30” folding table, and when it’s printing, it needs about 36 inches, front to back.
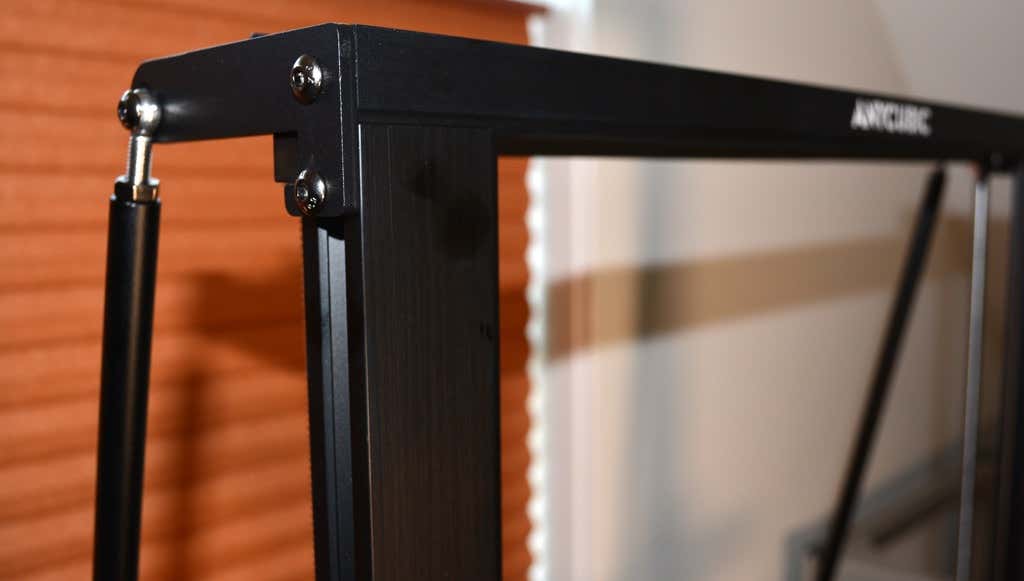
Assembly of the Kobra Max is no more difficult than assembling the Kobra or Vyper. The only additional items are the diagonal braces which add stiffness to the frame, reducing mechanical vibration.
It took two people about 15 minutes to assemble. Double-check that you’ve cut all the zip ties used to stabilize the printer during shipping. There are a lot of them.
Calibration
The auto-bed-leveling system is easy to use. Anycubic recommends that you check the x- and the y-axes to make sure they don’t wobble. If they do, you can adjust the eccentric nuts until the wobbling stops. There was no wobble on our printer, so we didn’t have to do anything.
Additionally, the x- and y-axes have belt tensioners. We needed to slightly tighten the x-axis on ours. The tensioners are easy to use and are features a lot of other printers lack. Who wants to take apart the extruder assembly just to tighten the belts? Not us, and probably not you.
Build Quality of the Kobra Max
Due to the addition of the diagonal braces, the frame is really stiff. The dual z-axis screws are an improvement over the smaller Kobra. They virtually eliminated sagging of the x-axis assembly.
The spool holder sits on the base of the printer, reducing wobbling when printing tall items. It’s better than having the spool on the top like on the Kobra.
This printer is built with aluminum extrusions with aesthetically-pleasing plastic covers for the hotend and the tenionsers. It’s got an optical z endstop. The x and y endstops are mechanical. The whole thing feels solid.
First Print
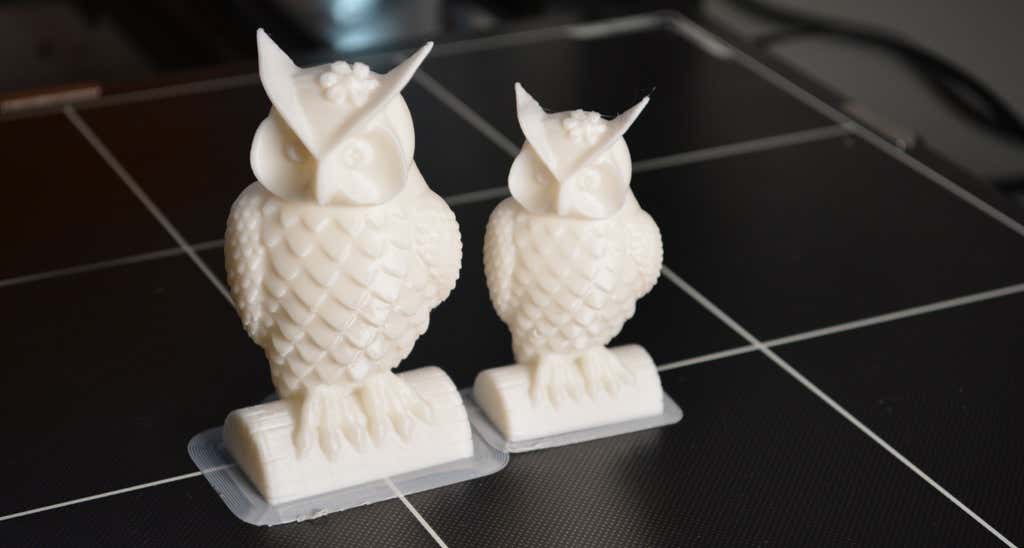
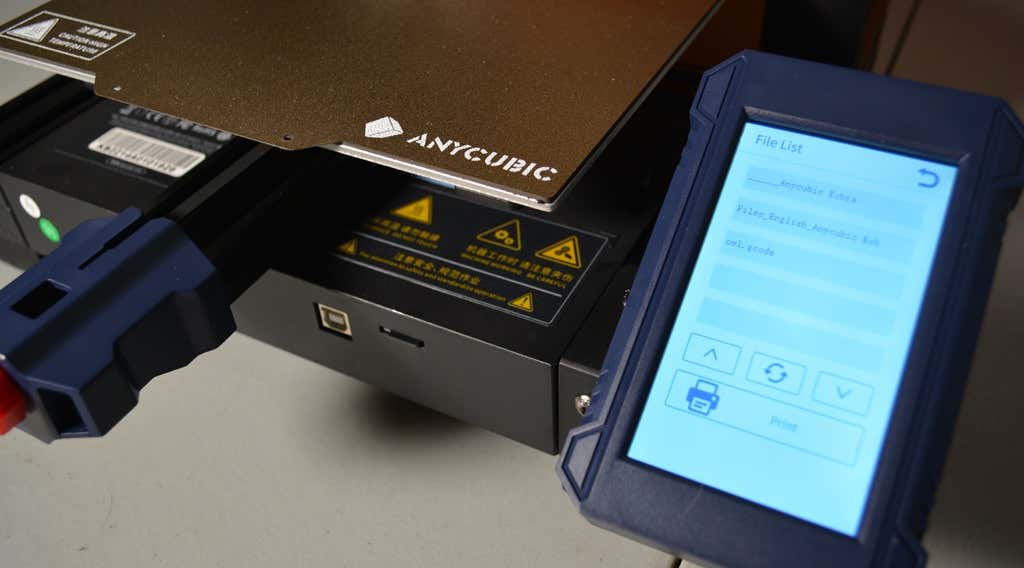
For the first print, we used the test file provided by Anycubic. Appropriately, the owl is about twice the print volume of the owl test print that comes with the smaller Kobra. Given the bowden setup (which makes sense for a printer this size), we were surprised that the ears on the owl turned out so well.
The ears look better than they did on the owl printed on the Kobra which has a direct drive extruder system. We suspect that’s due to the slower print speed. Many times, retractions on bowden extruders will create artifacts, but we didn’t notice any blobs or stringing. It approaches the quality you’d expect from a direct-drive.
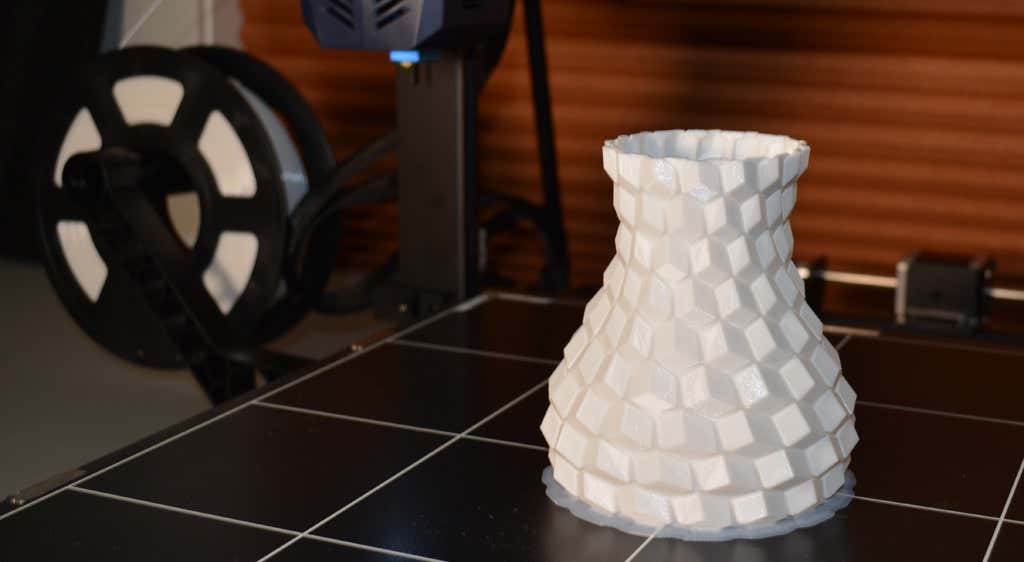
Next, we printed a vase with a large, flat base with a 0.2mm layer height. Removing prints from the glass bed is certainly not as easy as removing prints from smaller, flexible beds, but it’s not a deal-breaker either. We didn’t have any adhesion problems. The prints didn’t release when the glass bed cooled, which is what we expected and hoped for.
Curious what the power requirements would be for a printer this size, we were worried we wouldn’t be able to run multiple printers on the same circuit. We measured the power usage while the Kobra Max was printing, and, as expected, power usage is highest while the printer is warming up. Ours topped out at 473 watts. While printing, it was a more manageable 200-300 watts. We thought it would be more than that. You could probably run three of these printers on a 20 amp circuit.
Cut to the Chase
To drive home just how big the Kobra Max is, we put the Kobra on the bed of the Kobra Max. Insane. (We do not recommend you try this.)
A small printer is limiting, so if you find yourself printing large objects in small pieces and assembling them, consider buying a Kobra Max. If you’re new to 3D printing, keep in mind that it takes a long time to print big objects—potentially days and days. Typically, we’d recommend a smaller printer to beginners, but at the price point of $569.00 if you purchase on the Anycubic site, it’s worth considering as an entry-level printer.
One downside is that smaller prints will take a little longer than they would on a smaller, faster printer. That’s just physics. Bigger printers have more inertia to overcome and take longer to move. For example, the print time for our vase was thirteen hours. On our Prusa MK 2.5 with similar settings, it would have taken about twelve hours—not a huge difference.
*Special thanks to FormerLurker for help in reviewing AnyCubic’s Kobra Max 3D printer.
- WhatGeek x 3inuS Kebohub EE01 Mechanical Keyboard Review
- Mobile Pixels Duex Max Portable Monitor Review
- Trifo Lucy: The AI Robot Vacuum and Mop
- The OBSBOT Tiny 4K: an Impressive Webcam for PC & Mac
- Review of Anycubic’s Kobra 3D Printer
Maggie Marystone is a freelance technology writer, human rights worker, and storyteller based in Chicago. Read Maggie’s Full Bio
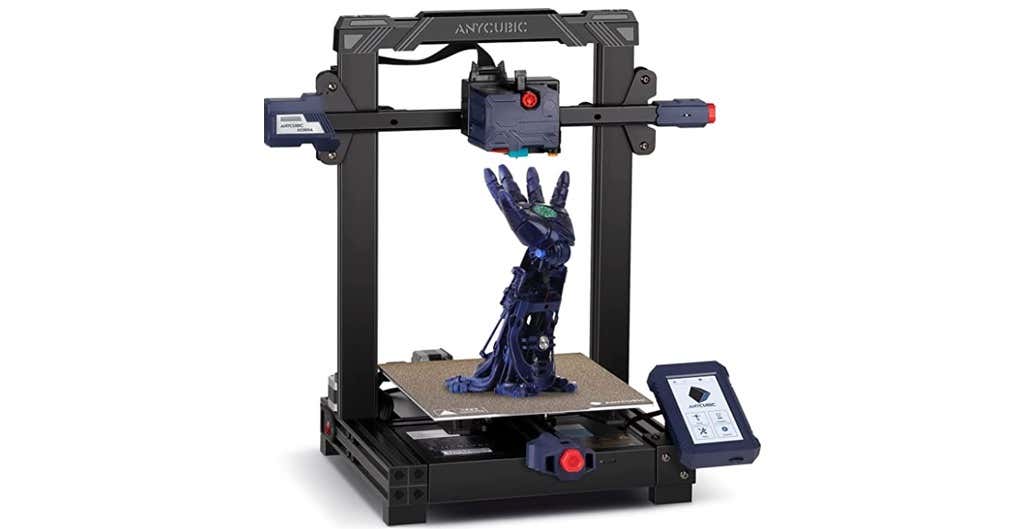
In this 3D printer review, we’ll let you know what you get when you buy an Anycubic Kobra, what it’s like to build it, and our first impressions about its quality and usability.
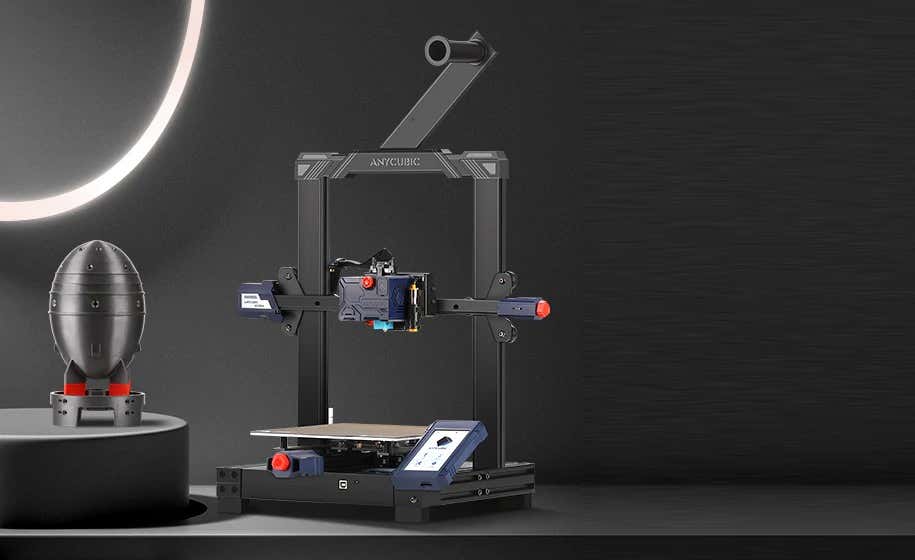
Features of the Kobra by Anycubic
The Kobra by Anycubic is an FDM 3D printer. FDM stands for fused deposition modeling . The print material for FDM printers is plastic filament. If you’re considering buying your first 3D printer, you could also consider a resin printer like the Anycubic Photon Mono X , the larger Photon Mono X 6K , or the Photon M3.
The Kobra’s features include:
- Build volume of 9.8 x 8.7 x 8.7 in. (250 x 220 x 220 mm)
- Machine dimensions of 19.1 x 19.1 x 16.9 in. (486 x 486 x 430 mm)
- Uses 1.75mm PLA, ABS / PETG & TPU filaments
- Ø 0.4 mm replaceable nozzle
- A heated, textured, removable, and flexible build platform made of PEI spring steel
- Ports for USB and microSD card
- 4.3″ color touchscreen LCD
- 25-point auto bed leveling with an inductive sensor using Anycubic’s LeviQ technology
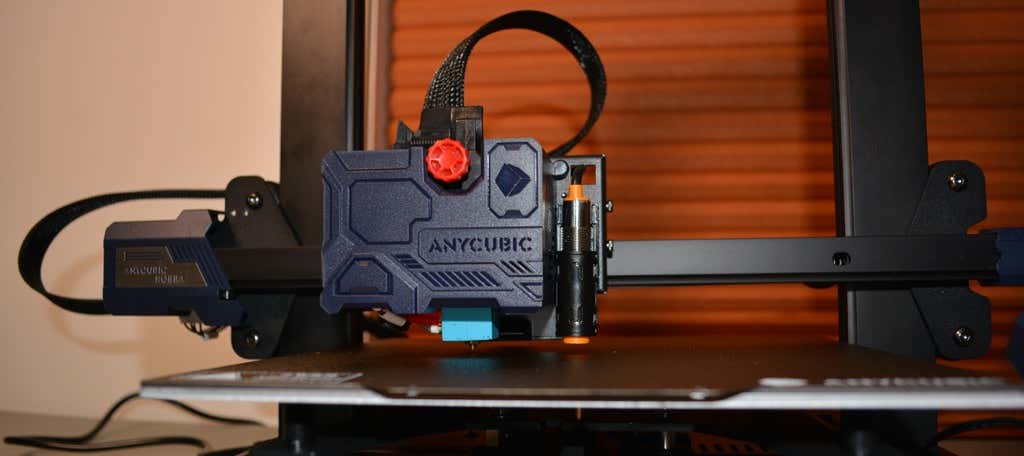
The Kobra has a direct-drive extruder, which is relatively uncommon among printers at this price point. In general, filament printers have either a direct-drive extruder or a bowden extruder. Bowden extruders push the filament into the nozzle from a distance, guided through a teflon tube, whereas direct drive extruders are mounted right above the hot end, greatly reducing the slack inside the tube because it’s so much closer to the nozzle.
The Kobra has an inductive probing sensor for automatic bed leveling. It’s a proximity sensor that can detect nearby metals. It’s not quite as accurate as something like the BL Touch but it’s dramatically cheaper and can give you excellent results. Prusa uses these on printers that are twice as expensive, like the Prusa MK3.
The heated bed has a spring steel sheet that attaches to a magnetic top on the bed, making it incredibly easy to remove your prints. Just remove the spring steel sheet and crack it like an ice tray. In our test print, the print even released itself from the bed as it cooled. Moreover, the bed leaves a nice texture on the underside of the print.
The LCD touchscreen is quite similar to the screens on some of Anycubic’s other printers, like the Anycubic Vyper . It’s intuitive, responsive, and easy to read.
The print volume is quite similar to the Vyper’s, as well, and the print beds are identical. Lastly, the Kobra has optional filament run-out detection. You can turn that feature on or off via the touchscreen panel.
Assembling the Anycubic Kobra 3D Printer
The Kobra comes partially assembled—another reason it’s a good option for beginners to 3D printing. You’ll learn how the printer’s mechanics work as you assemble it, and it won’t take very long since many of the parts are already put together for you.
It took us about fifteen minutes to assemble the Kobra. The instructions were fairly clear, although the photos in the assembly manual could have been larger. There’s not a whole lot to mess up. The cable management is where you want to be the most careful.
The stepper motors are already mounted. They just needed to be plugged in using the provided wiring.
Calibration
Anycubic recommends checking the tension of the belts and ensuring the build plate and x-axis don’t wobble. We didn’t need to make any adjustments to the eccentric nuts which control how tightly the rollers grip on the aluminum extrusions. You don’t want them too tight, and you definitely don’t want them too loose. If you do need to adjust them, it’s fairly simple. You just turn the eccentric nut until the wobbling stops—and no tighter.
If you do need to adjust the belt tension, it’s straightforward. There’s a screw tensioner for each belt. A couple turns of those screws, and you’re done.
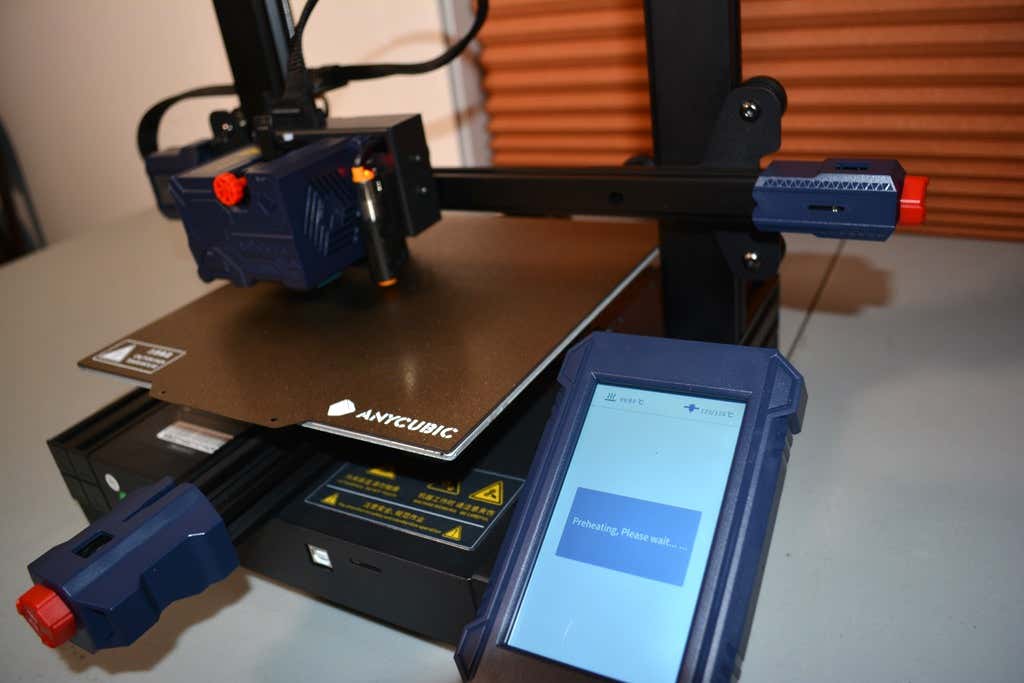
After performing the automatic bed-leveling, we calibrated the z offset. To do that, you put a piece of paper under the nozzle and adjust the offset until it ever-so-slightly grips the paper. You’ll need to fine-tune this as the first layer is being printed. We had to raise the z offset 0.1mm. Your results will vary.
Build Quality of the Anycubic Kobra
The only thing we didn’t like about the build quality is that the z-axis only has one lead screw. Despite that, the x-axis seemed pretty stable. We didn’t notice any sagging.
The cooling fan is a bit noisy, but we probably wouldn’t have noticed if the printer weren’t so quiet.
The filament spool is positioned at the top of the printer. We would have preferred it at the bottom since any extra weight at the top of the direct-drive extruder could make the printer shake. On the other hand, there was no evidence of that happening during our prints.
First Print
For our first test print, we used the test file included on the SD card and printed with Anycubic PLA filament. We didn’t try printing with ABS filament because, in our experience, that requires an enclosure to have any hope of getting the quality you expect from PLA.
We had no problems with bed adhesion on our first print. The print partially released when the bed cooled, which was nice.
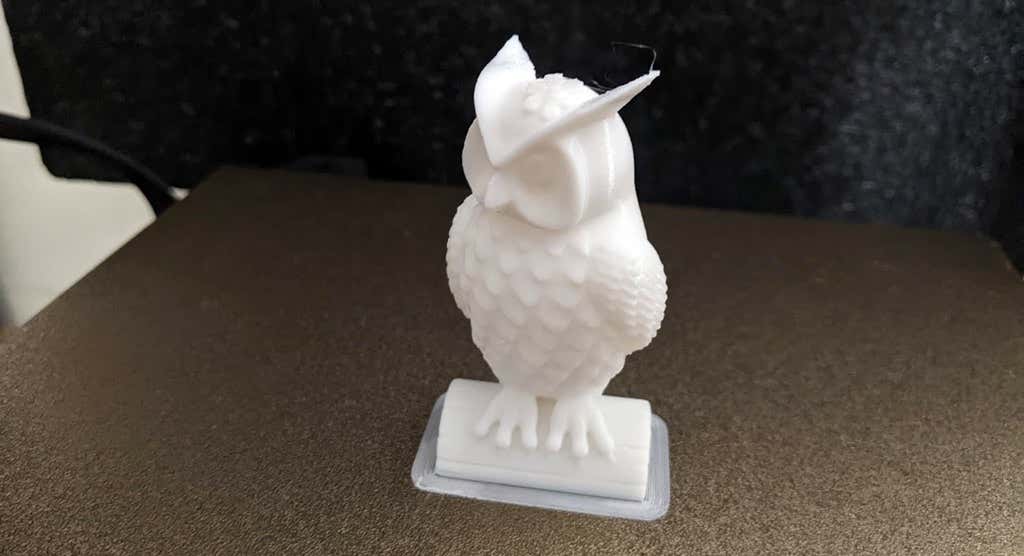
As you can see, we got a good print on our first attempt. There was minimal stringing (really, almost none at all). The only large defect was caused by a piece of plastic we failed to remove from the nozzle. We were particularly impressed by the print quality of the ears at the top of the owl—printers often struggle with thin parts that are at a steep angle and are separated, requiring the nozzle to lift and move.
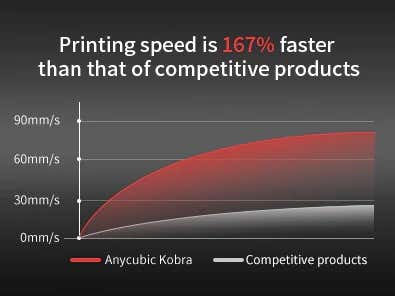
Anycubic says the Kobra’s printing speed is 167% faster than competitors. While the print speed isn’t the fastest we’ve ever seen, we expected that. It’s a trade-off for having a direct-drive extruder instead of a bowden. In our opinion, the responsiveness of a direct-drive extruder is an acceptable tradeoff for the slightly slower print speeds.
Cut to the Chase
Virtually every entry-level 3D printer gets compared to the Ender 3. In this case, the Kobra out-performs the Ender 3 in these areas:
- Less stringing because of the direct-drive extruder
- Comes with a magnetic bed for easy print removal
- No x-axis sagging
- Vastly superior touchscreen
With the Kobra, you’ll get high-quality prints for under $300. If you’re interested in a similar printer with a much larger build volume, keep an eye out for our upcoming review of the Anycubic Kobra Max, a monster FDM 3D printer we simply loved.
*Special thanks to FormerLurker for help in reviewing Anycubic’s Kobra 3D printer.
- WhatGeek x 3inuS Kebohub EE01 Mechanical Keyboard Review
- Mobile Pixels Duex Max Portable Monitor Review
- Trifo Lucy: The AI Robot Vacuum and Mop
- Review of Anycubic Kobra Max 3D Printer
- The OBSBOT Tiny 4K: an Impressive Webcam for PC & Mac
Maggie Marystone is a freelance technology writer, human rights worker, and storyteller based in Chicago. Read Maggie’s Full Bio
